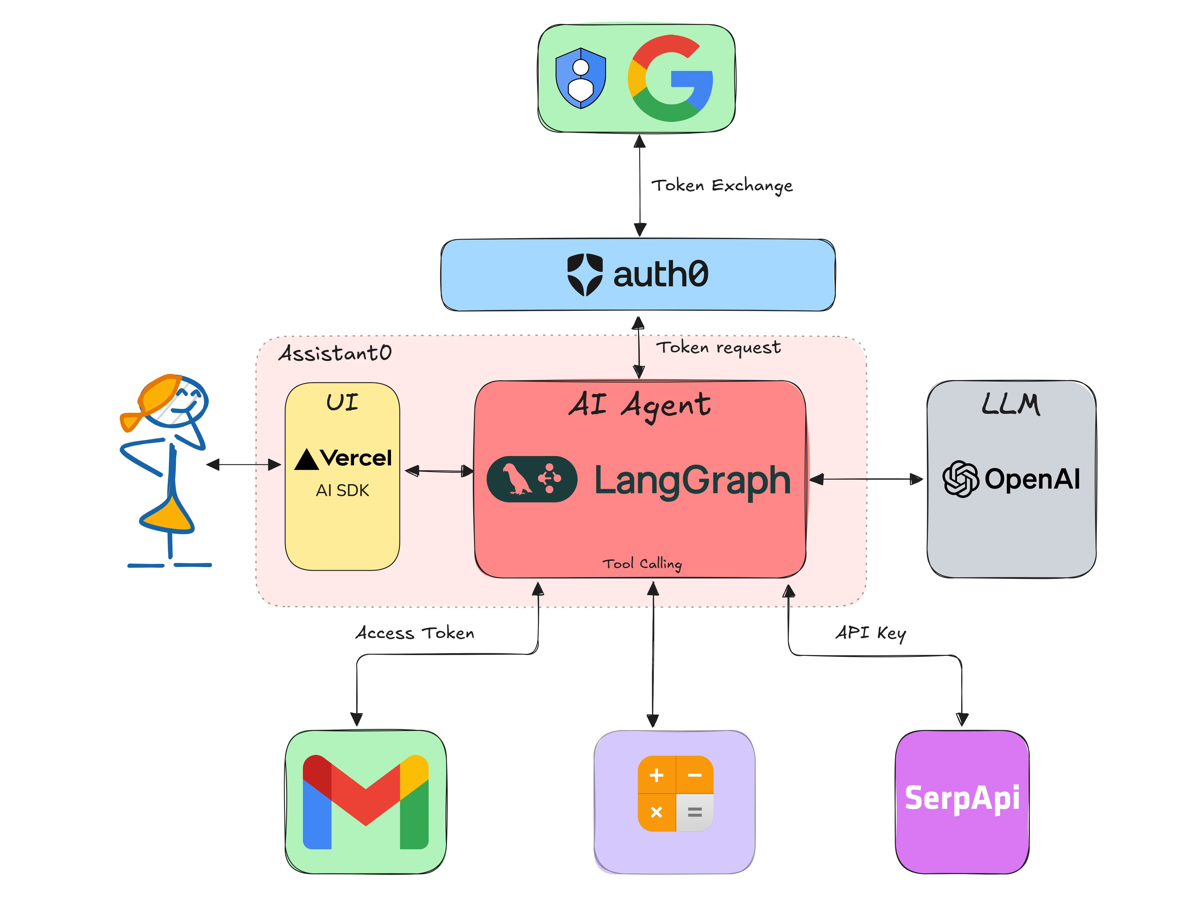
TL;DR: Build a personal assistant that can search the web, search your emails, and draft emails. It uses LangGraph.js, Vercel's AI SDK, Auth0 Next.js SDK, and the Auth0 AI SDK.
AI agents and Operators are the next big things in software development. In a previous post, we discussed how AI agents are taking center stage by seamlessly integrating with multiple digital tools to be more efficient. In this post, we will build a personal assistant that can use different types of tools. Both simple unauthenticated tools and more complex authenticated tools like Gmail, Calendar, and Google Drive.
If you haven't read the previous post, I recommend you do so before continuing to better understand tool calling in AI agents and how security is currently handled.
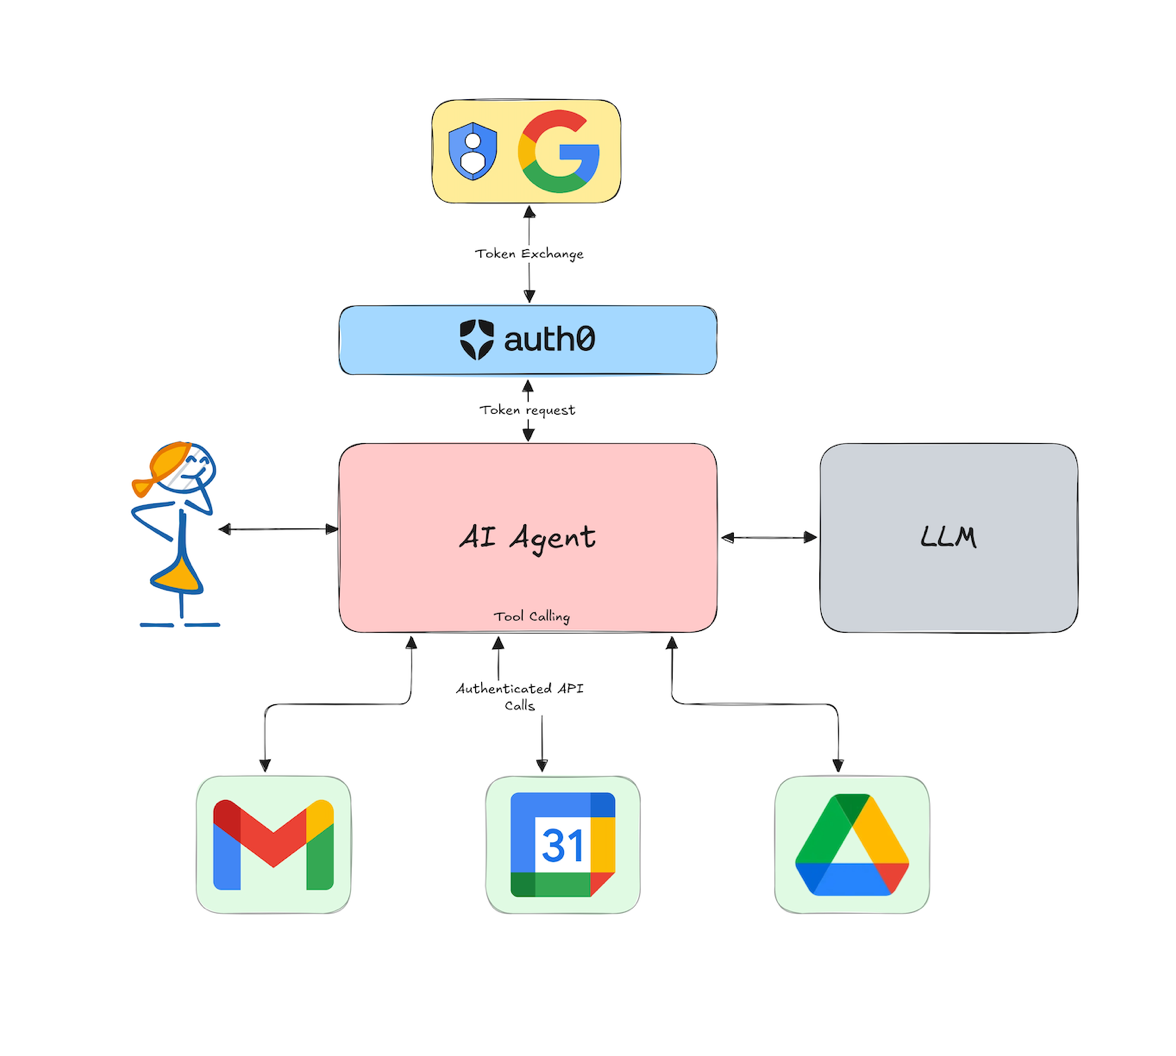
Discover how AI agents are taking center stage by seamlessly integrating with multiple digital tools to be more efficient. Learn why it is important to secure them.
To keep this post focused on tool calling, we will only focus on the AI agent part, not the UI. Each tutorial step, including building the UI, can be found as a distinct commit in the GitHub repository.
Technology Stack
We will use a Next.js application called Assistant 0 as the base. Assistant 0 is an AI personal assistant that consolidates your digital life by dynamically accessing multiple tools to help you stay organized and efficient.
Apart from Next.js, we mainly use the following technologies:
- LangGraph.js and LangChain's JavaScript framework for building agentic workflows.
- LangChain community tools.
- Vercel's AI SDK to stream response tokens to the client and display the incoming messages.
- The Auth0 AI SDK and Auth0 Next.js SDK to secure the application and call third-party APIs.
Prerequisites
You will need the following tools and services to build this application:
- Bun v1.2 or NodeJS v20
- An Auth0 for AI Agents account. Create one.
- An OpenAI account and API key. Create one or use any other LLM provider supported by LangChain.
- (Optional) A SerpAPI account and API key for web search capabilities. Create one.
- A Google account for Gmail, Calendar, and Drive. Preferably a new one for testing.
Getting Started with the Assistant0 Starter
First clone the repository and install the dependencies:
git clone https://github.com/auth0-samples/auth0-assistant0.git
cd auth0-assistant0
git switch step-1 # so that we skip building the UI and get straight to the AI agent

bun install # or npm install
Next, you'll need to set up environment variables in your repo's .env.local file. Copy the .env.example file to .env.local. To start, you'll just need to add your OpenAI API key.
Now, start the development server:
bun dev # or npm run dev
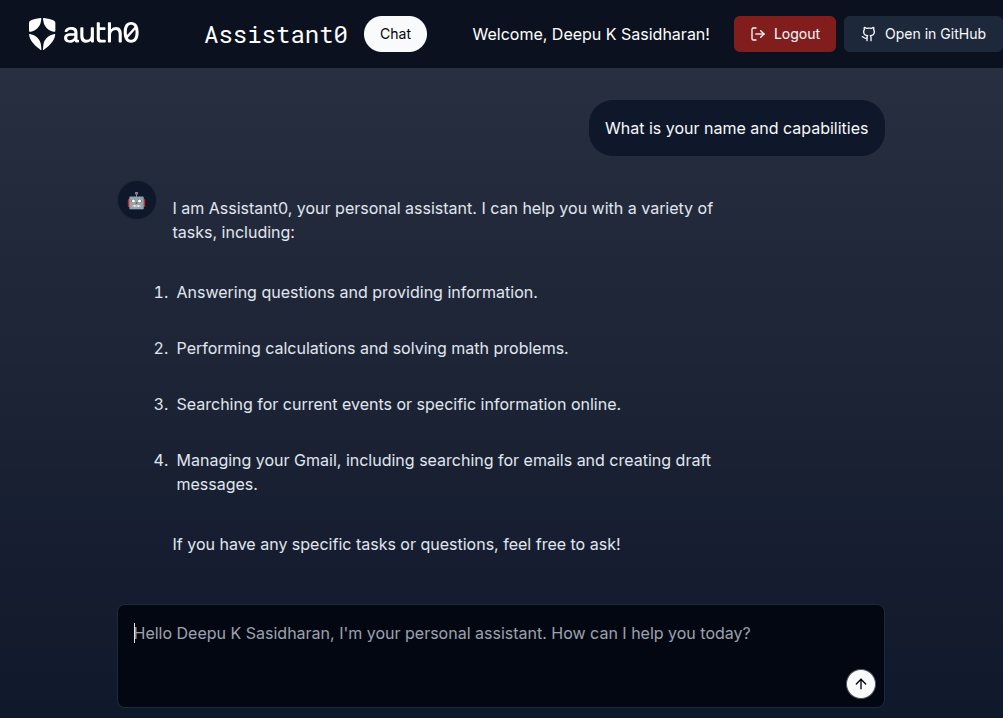
Open http://localhost:3000 with your browser to see the result! Ask the agent something, and you'll see a streamed response.
A peek into the code
The application is structured as follows:
src/app: Contains the Next.js application routes, layout, and pages.src/app/page.tsx: Home page with chat interface.src/app/api/chat/route.ts: API route for handling chat requests. This is where the AI agent is defined.src/components: UI components used in the application.src/lib: Services and configurations. This is where custom tools will be defined.src/utils: Utility functions
Let's take a look at the src/app/api/chat/route.ts file where the AI agent is defined.
// src/app/api/chat/route.ts
// ...
const AGENT_SYSTEM_TEMPLATE = `You are a personal assistant named Assistant0.
You are a helpful assistant that can answer questions and help with tasks.
You have access to a set of tools, use the tools as needed to answer the user's question.`;

export async function POST(req: NextRequest) {
  // ... Process the request and get messages
  // Create a new OpenAI chat model
  const llm = new ChatOpenAI({ model: "gpt-4", temperature: 0 });
  const tools = [];
  // Use a prebuilt LangGraph agent.
  const agent = createReactAgent({
    llm,
    tools,
    messageModifier: new SystemMessage(AGENT_SYSTEM_TEMPLATE),
  });
  // Stream back all generated tokens and steps from their runs.
  const eventStream = agent.streamEvents({ messages }, { version: "v2" });
  // Log tool calling data. Only in development mode
  const transformedStream = logToolCallsInDevelopment(eventStream);
  // Adapt the LangChain stream to Vercel AI SDK Stream
  return LangChainAdapter.toDataStreamResponse(transformedStream);
}
The route uses a prebuilt LangGraph agent and OpenAI chat model. No tools are defined yet; we will add them in the next section.
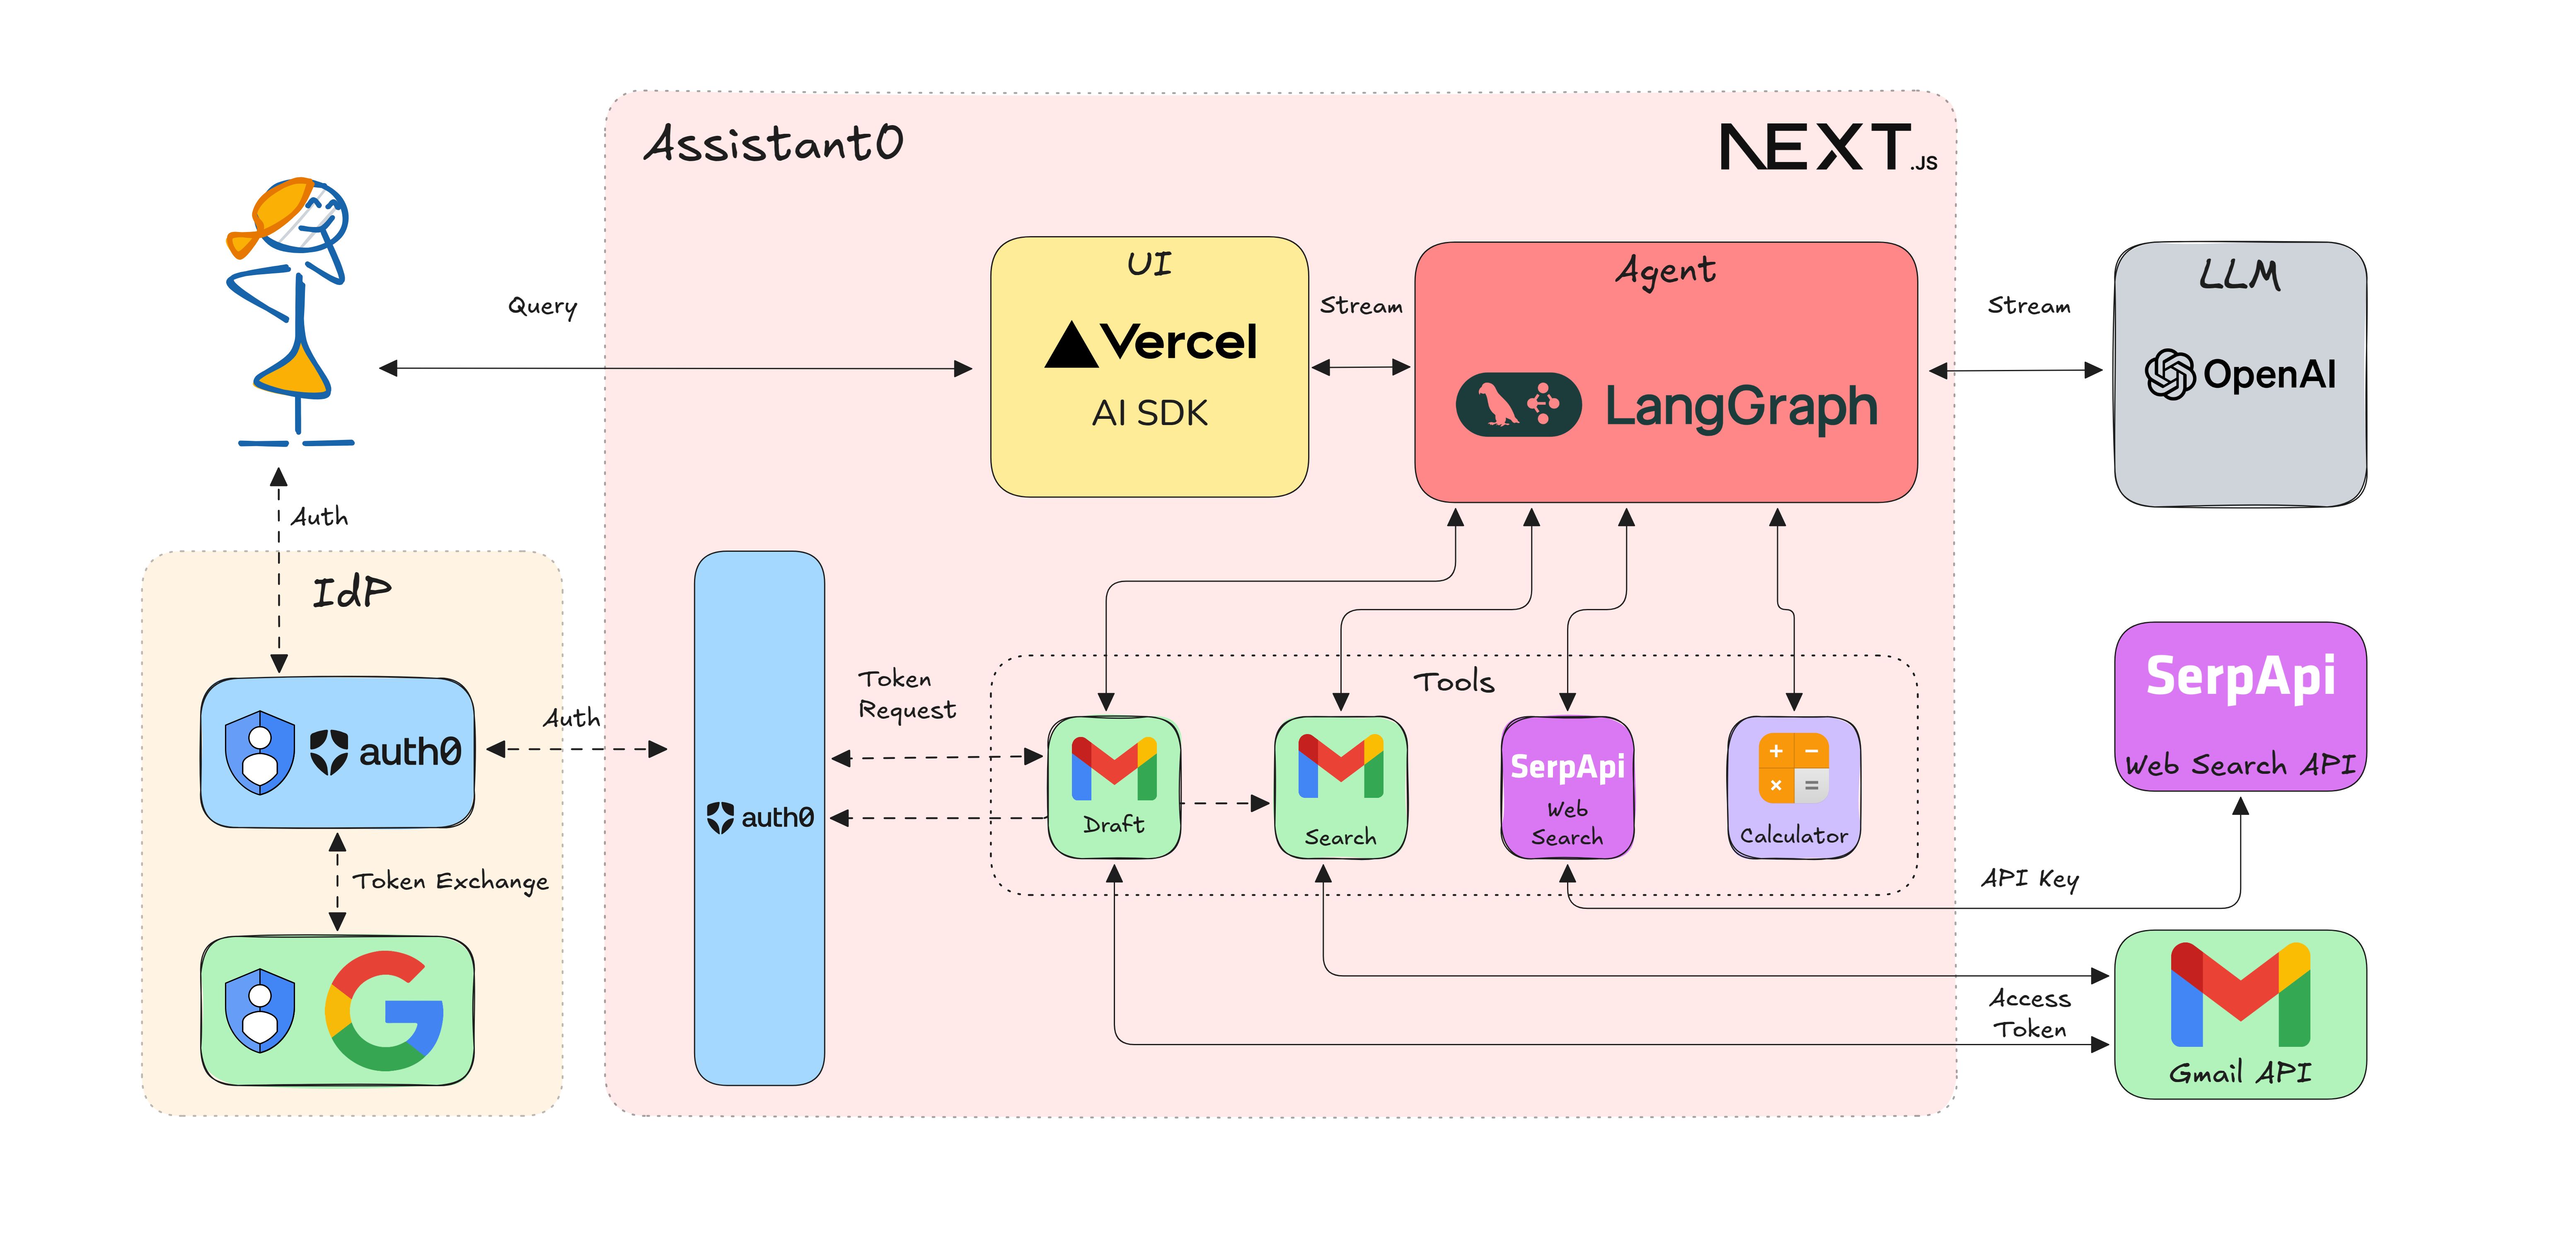
Here is a high-level architecture of the application with the tools we will be adding in this post.
Now that the base application is running, let's start building our personal assistant with tool-calling capabilities.
Adding Tools to the AI Assistant
If you recall the previous post, we discussed authenticated and unauthenticated tools. Let's start with an unauthenticated tool and then proceed to add more complex tools like Gmail, Calendar, and Google Drive.
Adding an Unauthenticated Calculator Tool
We will start with a simple calculator tool from the LangChain community tools to perform basic arithmetic operations.
Install the @langchain/community package.
bun add @langchain/community # or npm i @langchain/community
Update the src/app/api/chat/route.ts file with the following code.
// src/app/api/chat/route.ts
import { Calculator } from "@langchain/community/tools/calculator";
// ...
export async function POST(req: NextRequest) {
  // ...
  const tools = [new Calculator()];
  // ...
}
It's that simple! Now, try asking the assistant to perform some calculations. For example, what is (2+56) x 200. You should see the answer in the UI. If you check the console where Next.js dev server (bun dev) is running, you should see the tool calling data like below.
Tool calls state: {
 "call_E3Za9klJcJ5TADWiMj8XfjdB": {
   "name": "calculator",
   "args": "{\n  "input": "(2+56) * 200"\n}"
 }
}
POST /api/chat 200 in 8382ms
Adding an Authenticated Web Search Tool
Now let's add a web search tool to search the web for information. Let's use SerpAPI for this. It's an authenticated tool, but since this is going to be API usage (not user impersonation), we can simply use an API key.
Note: SerpAPI is optional for this tutorial. If you skip it, the agent will still work with the calculator and Gmail tools.
First, get an API key from SerpAPI and add that to your .env.local file.
SERPAPI_API_KEY=your-api-key
Now, update the src/app/api/chat/route.ts file with the following code.
// src/app/api/chat/route.ts
import { SerpAPI } from "@langchain/community/tools/serpapi";
// ...
export async function POST(req: NextRequest) {
  // ...
  const tools = [new Calculator(), new SerpAPI()];
  // ...
}
Again, quite simple! Now try asking the assistant to search the web for information. For example, What is the top 10 news today?. You will see the response in the UI.
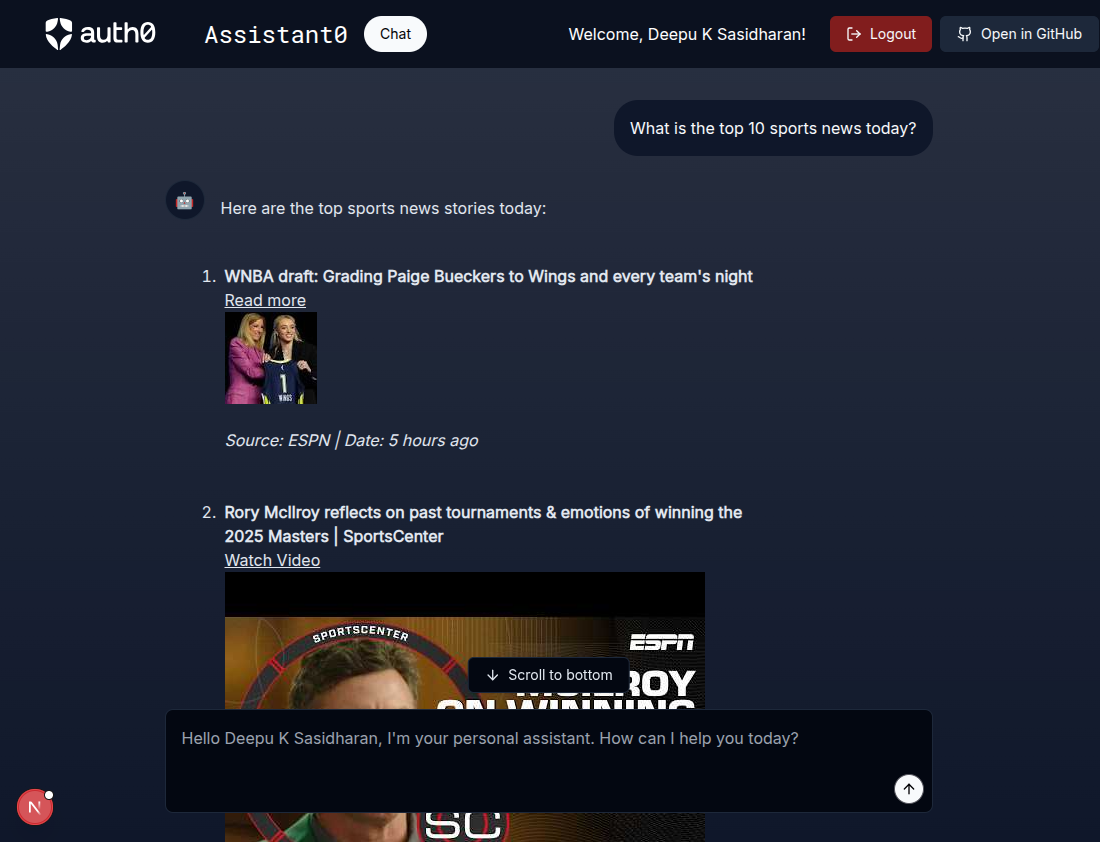
If you check the console, you should see the tool calling data like the one below.
Tool calls state: {
 "call_e8vqAPW45vMsUbFiIF9SW5Yn": {
   "name": "search",
   "args": "{\n  "input": "top 10 news today"\n}"
 }
}
POST /api/chat 200 in 15443ms
This corresponds to the step-2 branch in case you want to double-check your code.
git switch step-2
Adding Gmail as a Secured Tool
Now, let's get into business. I know you are here for this part, not to learn about adding calculators and web search tools. But before we can add a Gmail tool, we need to add Auth0 authentication to the application since we will be using Auth0's Token Vault feature to get access tokens to call the Gmail API via a tool.
Important: The following sections require proper Auth0 configuration. Make sure to follow each step carefully, as skipping any part will cause authentication to fail.
Adding Auth0 Authentication to the Assistant
First, let's add Auth0 as the authentication provider to the application.
Follow the prerequisites in the Auth0 Next.js quickstart guide to set up the application.
If you want to create the Auth0 application manually, create a new application (Type: Regular Web App, Callback URL:
http://localhost:3000/auth/callback) and get the client ID and client secret.
Enabling the Token Vault Grant
Enable the Token Vault grant for your Auth0 application. Go to Applications > [Your Application] > Settings > Advanced Settings > Grant Types and enable the Token Vault grant type.
Update the .env.local file with credentials, and create the src/lib/auth0.ts and src/middleware.ts files as described in the Auth0 Next.js quickstart guide.
At this point, your .env.local file should contain at least:
# OpenAI
OPENAI_API_KEY=your_openai_key

# SerpAPI (optional)
SERPAPI_API_KEY=your_serpapi_key

# Auth0 basic configuration
APP_BASE_URL="http://localhost:3000"
AUTH0_SECRET="use [openssl rand -hex 32] to generate a 32 bytes value"
AUTH0_DOMAIN="https://{yourDomain}"
AUTH0_CLIENT_ID="{yourClientId}"
AUTH0_CLIENT_SECRET="{yourClientSecret}"
This corresponds to the step-3 branch in case you want to double-check your code.
git switch step-3
Configuring Auth0 for Gmail Access
To use Gmail API with Auth0 via a Google Social Connection, you need to do the following:
- Configure My Account API in Auth0
- Create Google OAuth 2.0 credentials
- Enable Gmail API for the credentials
- Configure Gmail social connection in Auth0
You can follow steps 3 to 7 from the prerequisites in the Call Others' APIs on Users' Behalf with LangGraph guide from Auth0 to configure this.
Configuring the Auth0 AI SDK
git switch step-4
First, install the @auth0/ai-langchain package from Auth0 AI SDK.
bun add @auth0/ai-langchain # or npm i @auth0/ai-langchain
In the step-4 branch, the agent logic has been refactored into a separate src/lib/agent.ts file to better organize the code. This makes it easier to manage tools and agent configuration separately from the API route handler.
Update src/lib/auth0.ts with the following code.
// src/lib/auth0.ts
import { Auth0Client } from '@auth0/nextjs-auth0/server';

export const auth0 = new Auth0Client({
  authorizationParameters: {
    // In v4, the AUTH0_SCOPE and AUTH0_AUDIENCE environment variables are no longer automatically picked up by the SDK.
    // Instead, we need to provide the values explicitly.
    scope: process.env.AUTH0_SCOPE,
    audience: process.env.AUTH0_AUDIENCE,
  },
  // required for Token Vault
  enableConnectAccountEndpoint: true,
});

// Get the Access token from Auth0 session
export const getAccessToken = async () => {
  const tokenResult = await auth0.getAccessToken();

  if (!tokenResult || !tokenResult.token) {
    throw new Error('No access token found in Auth0 session');
  }

  return tokenResult.token;
};
Create a new src/lib/auth0-ai.ts file with the following code.
// src/lib/auth0-ai.ts
import { Auth0AI, getAccessTokenFromTokenVault } from '@auth0/ai-langchain';
import { SUBJECT_TOKEN_TYPES } from '@auth0/ai';

// Get the access token for a connection via Auth0
export const getAccessToken = async () => getAccessTokenFromTokenVault();

// Note: we use the Custom API Client when using Token Vault connections that access third party services
const auth0AICustomAPI = new Auth0AI({
  auth0: {
    domain: process.env.AUTH0_DOMAIN!,
    // For token exchange with Token Vault, we want to provide the Custom API Client credentials
    clientId: process.env.AUTH0_CUSTOM_API_CLIENT_ID!, // Custom API Client ID for token exchange
    clientSecret: process.env.AUTH0_CUSTOM_API_CLIENT_SECRET!, // Custom API Client secret
  },
});

// Connection for services
export const withConnection = (connection: string, scopes: string[]) =>
  auth0AICustomAPI.withTokenVault({
    connection,
    scopes,
    accessToken: async (_, config) => {
      return config.configurable?.langgraph_auth_user?.getRawAccessToken();
    },
    subjectTokenType: SUBJECT_TOKEN_TYPES.SUBJECT_TYPE_ACCESS_TOKEN,
  });
Adding a Gmail Search Tool
We can add Gmail tools now that we have Auth0 authentication in place. Let's start with a Gmail search tool. This tool will allow the assistant to search for emails in the user's Gmail account.
First, we need to get an access token for the Gmail API. We can get this using the Auth0 Token Vault feature.
Update src/lib/auth0-ai.ts with the required scopes.
// src/lib/auth0-ai.ts
// ...
export const withGmailRead = withConnection('google-oauth2', [
  'openid',
  'https://www.googleapis.com/auth/gmail.readonly',
]);
Install the googleapis package.
bun add googleapis # or npm i googleapis
Import the GmailSearch tool from LangChain community tools and update the src/lib/agent.ts file with the following code.
// src/lib/agent.ts
import { GmailSearch } from '@langchain/community/tools/gmail';
import { getAccessToken, withGmailRead } from './auth0-ai';

// ...
// Provide the access token to the Gmail tools
const gmailParams = {
  credentials: {
    accessToken: getAccessToken,
  },
};

const tools = [
  // ... existing tools
  withGmailRead(new GmailSearch(gmailParams)),
];
// ...
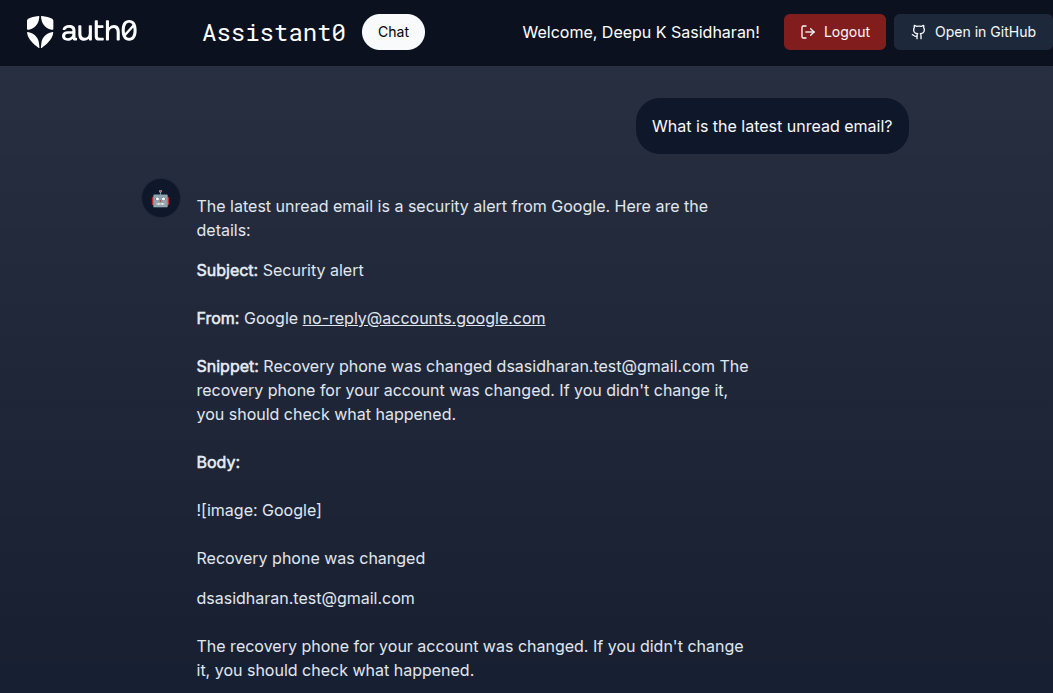
We are all set! Now, try asking the assistant to search for emails. For example, What is the latest unread email?. You should see the response in the UI.
Adding a Gmail Draft Tool
We will add a Gmail draft tool next. This tool will allow the assistant to draft emails on behalf of the user.
Update src/lib/auth0-ai.ts with the required scopes.
// src/lib/auth0-ai.ts
// ...
export const withGmailWrite = withConnection('google-oauth2', [
  'openid',
  'https://www.googleapis.com/auth/gmail.compose',
]);
Update the src/lib/agent.ts file with the following code.
// src/lib/agent.ts
import { GmailCreateDraft } from '@langchain/community/tools/gmail';
import { withGmailWrite } from './auth0-ai';
// ...
const tools = [
  // ... existing tools
  withGmailWrite(new GmailCreateDraft(gmailParams)),
];
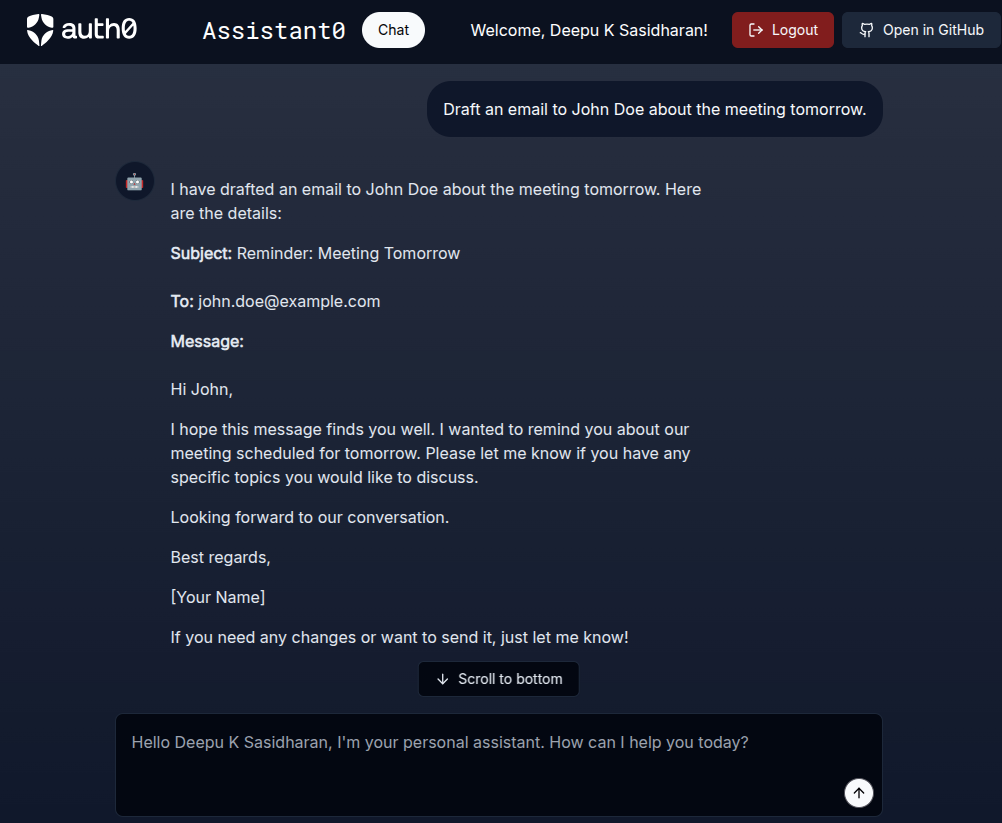
Now, ask the assistant to draft an email. For example, Draft an email to John Doe about the meeting tomorrow. You should see the response in the UI.
Next Steps: AI Agents and Auth0 for AI Agents
You have successfully built an AI personal assistant that can search the web, search your emails, and draft emails. In the next chapter, we will switch to a more production-ready architecture and add more tools like User Info, Google Calendar, Google Drive, and Slack to the assistant.
This tutorial is part of a series on tool-calling agents with Auth0 for AI Agents. We learned how to add tools to an AI agent and how to secure them using Auth0 Token Vault.
Sign up for Auth0 for AI Agents.
Before you go, we're working on more content and sample apps in collaboration with amazing GenAI frameworks like LlamaIndex, LangChain, CrewAI, Vercel AI, and GenKit.
Frequently Asked Questions
About the author

Deepu K Sasidharan
Principal Developer Advocate