---
title: "What is a Yubikey and how to set it up with Auth0?"
description: "Learn what is a Yubikey and how you can set one up with your Auth0 account."
authors:
- name: "Carla Urrea Stabile"
url: "https://auth0.com/blog/authors/carla-stabile/"
date: "Jan 23, 2023"
category: "Identity & Security,Security,Yubikey"
tags: ["security-keys", "mfa", "yubikey"]
url: "https://auth0.com/blog/what-is-a-yubikey-and-how-to-set-it-up-with-auth0/"
---
# What is a Yubikey and how to set it up with Auth0?
If you are reading this blog post, you are interested in security and how to make your accounts more secure. This blog post will teach you about Yubikeys, their benefits, and how to provide two-factor authentication (2FA) in your applications with Auth0.
## What is a Yubikey?
**A Yubikey is** a hardware authentication device that makes two-factor authentication easier by plugging it into your laptop and tapping it. Yubikeys are a type of [security key](https://www.okta.com/identity-101/security-token/) manufactured by [Yubico](https://www.yubico.com/).
Usually, when logging in to any service, you must enter **something you know**, such as your login credentials, email, and password. In our case, 2FA adds another layer of security by requiring you to provide **something you have**, for example, a code from an authenticator app or SMS on your phone. Instead of using a code, you can use a device such as your Yubikey. In other words, **2FA is the process requiring a user to verify their identity in _two unique ways_** before they are granted access to a system. [It's a form of Multi-Factor Authentication.](https://www.okta.com/blog/2021/07/what-is-two-factor-authentication-2fa/)
## How Does a Yubikey Work?
Yubikeys use [U2F (Universal 2nd Factor)](https://auth0.com/blog/the-working-principles-of-2fa-2-factor-authentication-hardware/#How-The-U2F-Protocol-Was-Created), an open standard for two-factor authentication based on [public-key cryptography.](https://auth0.com/blog/how-to-explain-public-key-cryptography-digital-signatures-to-anyone/#The-Keys)
With your Yubikey, you must first register it into your account to authenticate later.
### Register your Yubikey
1. First, you must authenticate using another method, like your email and password.
2. When you plug in your Yubikey and signal that you want to register a security key, the server you want to authenticate with sends a challenge and an AppID to the Yubikey.
3. When the Yubikey receives this information, you'll be prompted by the browser to tap the Yubikey to confirm the request.
4. Your Yubikey will generate a [nonce](https://en.wikipedia.org/wiki/Cryptographic_nonce) and hash it together with the AppID and the secret key to create a private and public key.
5. The nonce and public key are sent back to the server to be stored so they can be used later when the user wants to authenticate.
### Authenticating with your Yubikey
1. The server remembers you had registered a Yubikey, so it generates a new challenge to send back along with the AppID and nonce created when you first registered your Yubikey.
2. The browser prompts you to tap the Yubikey, and the Yubikey will use the information received in step 1 to re-create the same key pair created when you registered your Yubikey.
3. If everything goes well, your Yubikey encrypts the challenge sent by the server with the private key and sends the challenge back.
4. The server decrypts the challenge using the public key it already has, and if the challenge matches the one the server sent, it means the user authentication was successful.
## Benefits of Using a Yubikey
One of the advantages of using a Yubikey is that they **protect against phishing attacks**. Registering a new key to a server sends an AppID that could be the website URL you're trying to authenticate. Therefore, **the credentials you create in a server are linked directly to a single website**.
Yubikeys provide **one-touch login** without requiring a mobile phone to complete an authentication challenge.
You can also register as many Yubikeys as you want to minimize the chances of account lockout. You should have more than one key and register them simultaneously; **that way, if you lose any, you'll always have a backup.**
As a developer, using a device like a Yubikey might make your life easier, especially if you use [**WebAuthn**](https://webauthn.me/). It's a specification for an API that enables browsers to **create and use** strong public-key credentials so you can authenticate your users on your web applications. **In the WebAuthn process, the authenticator can be a Yubikey.**
## Set Up Your Yubikey with Auth0
You can set up your Yubikey with most mainstream websites like Google, Facebook, Instagram, etc .[Yubico provides an extensive list](https://www.yubico.com/es/works-with-yubikey/catalog/?sort=popular) of all the applications that support Yubikeys.
In this case, you will set your Yubikey with your Auth0 application to allow your users to log in with a tap!
### Requirements
- A [**Yubikey**](https://www.yubico.com/products/)
- **An Auth0 account **
which you can get by signing up here
### Enable and define an MFA Factor
First, head up to the [Auth0 Dashboard](https://manage.auth0.com/dashboard). On the left-hand menu, click **Security** and under this section, **Multi-factor Auth**. You will see a list of [Factors](https://auth0.com/docs/secure/multi-factor-authentication/multi-factor-authentication-factors):
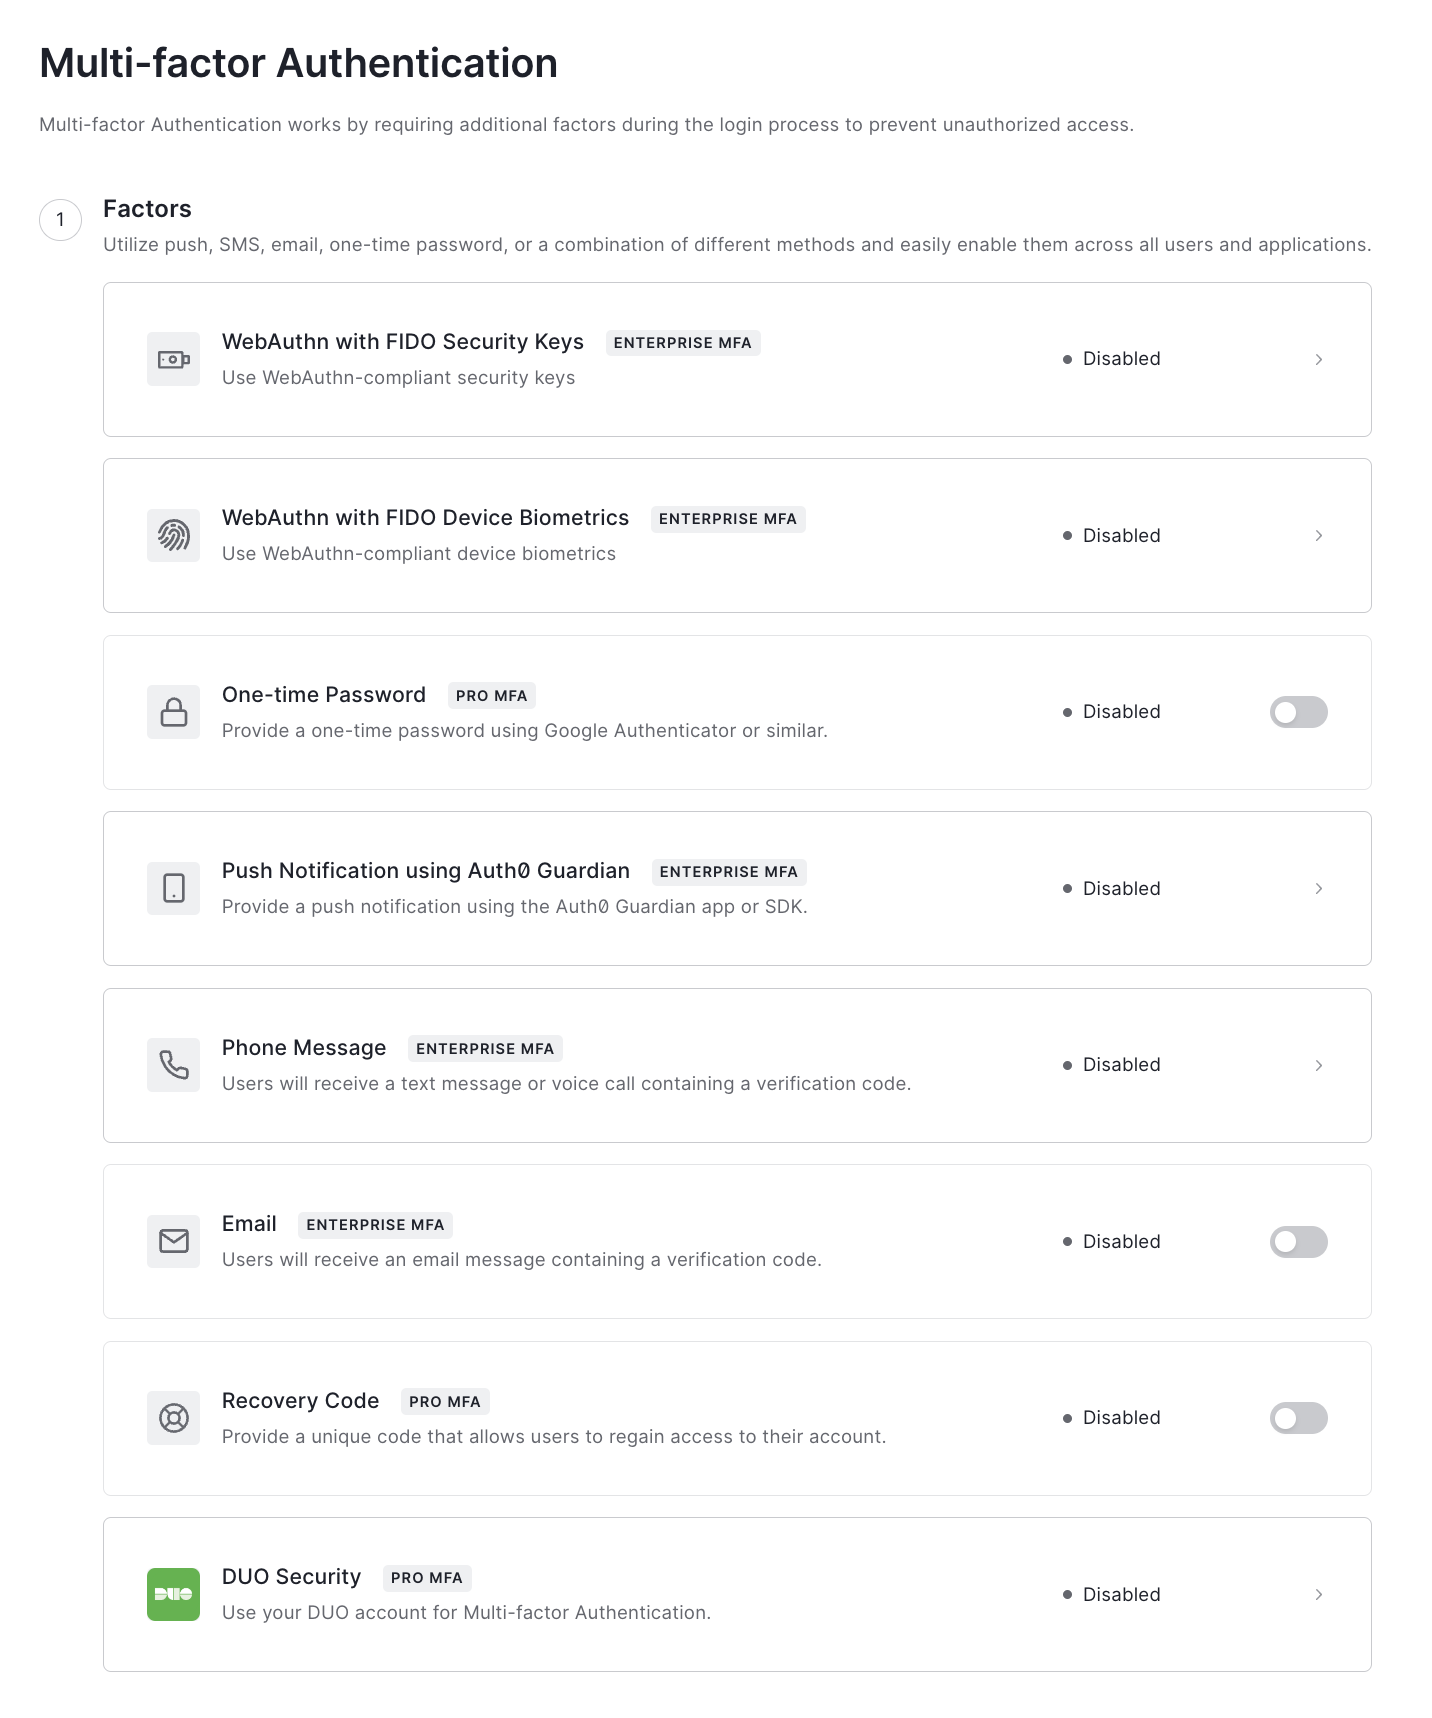
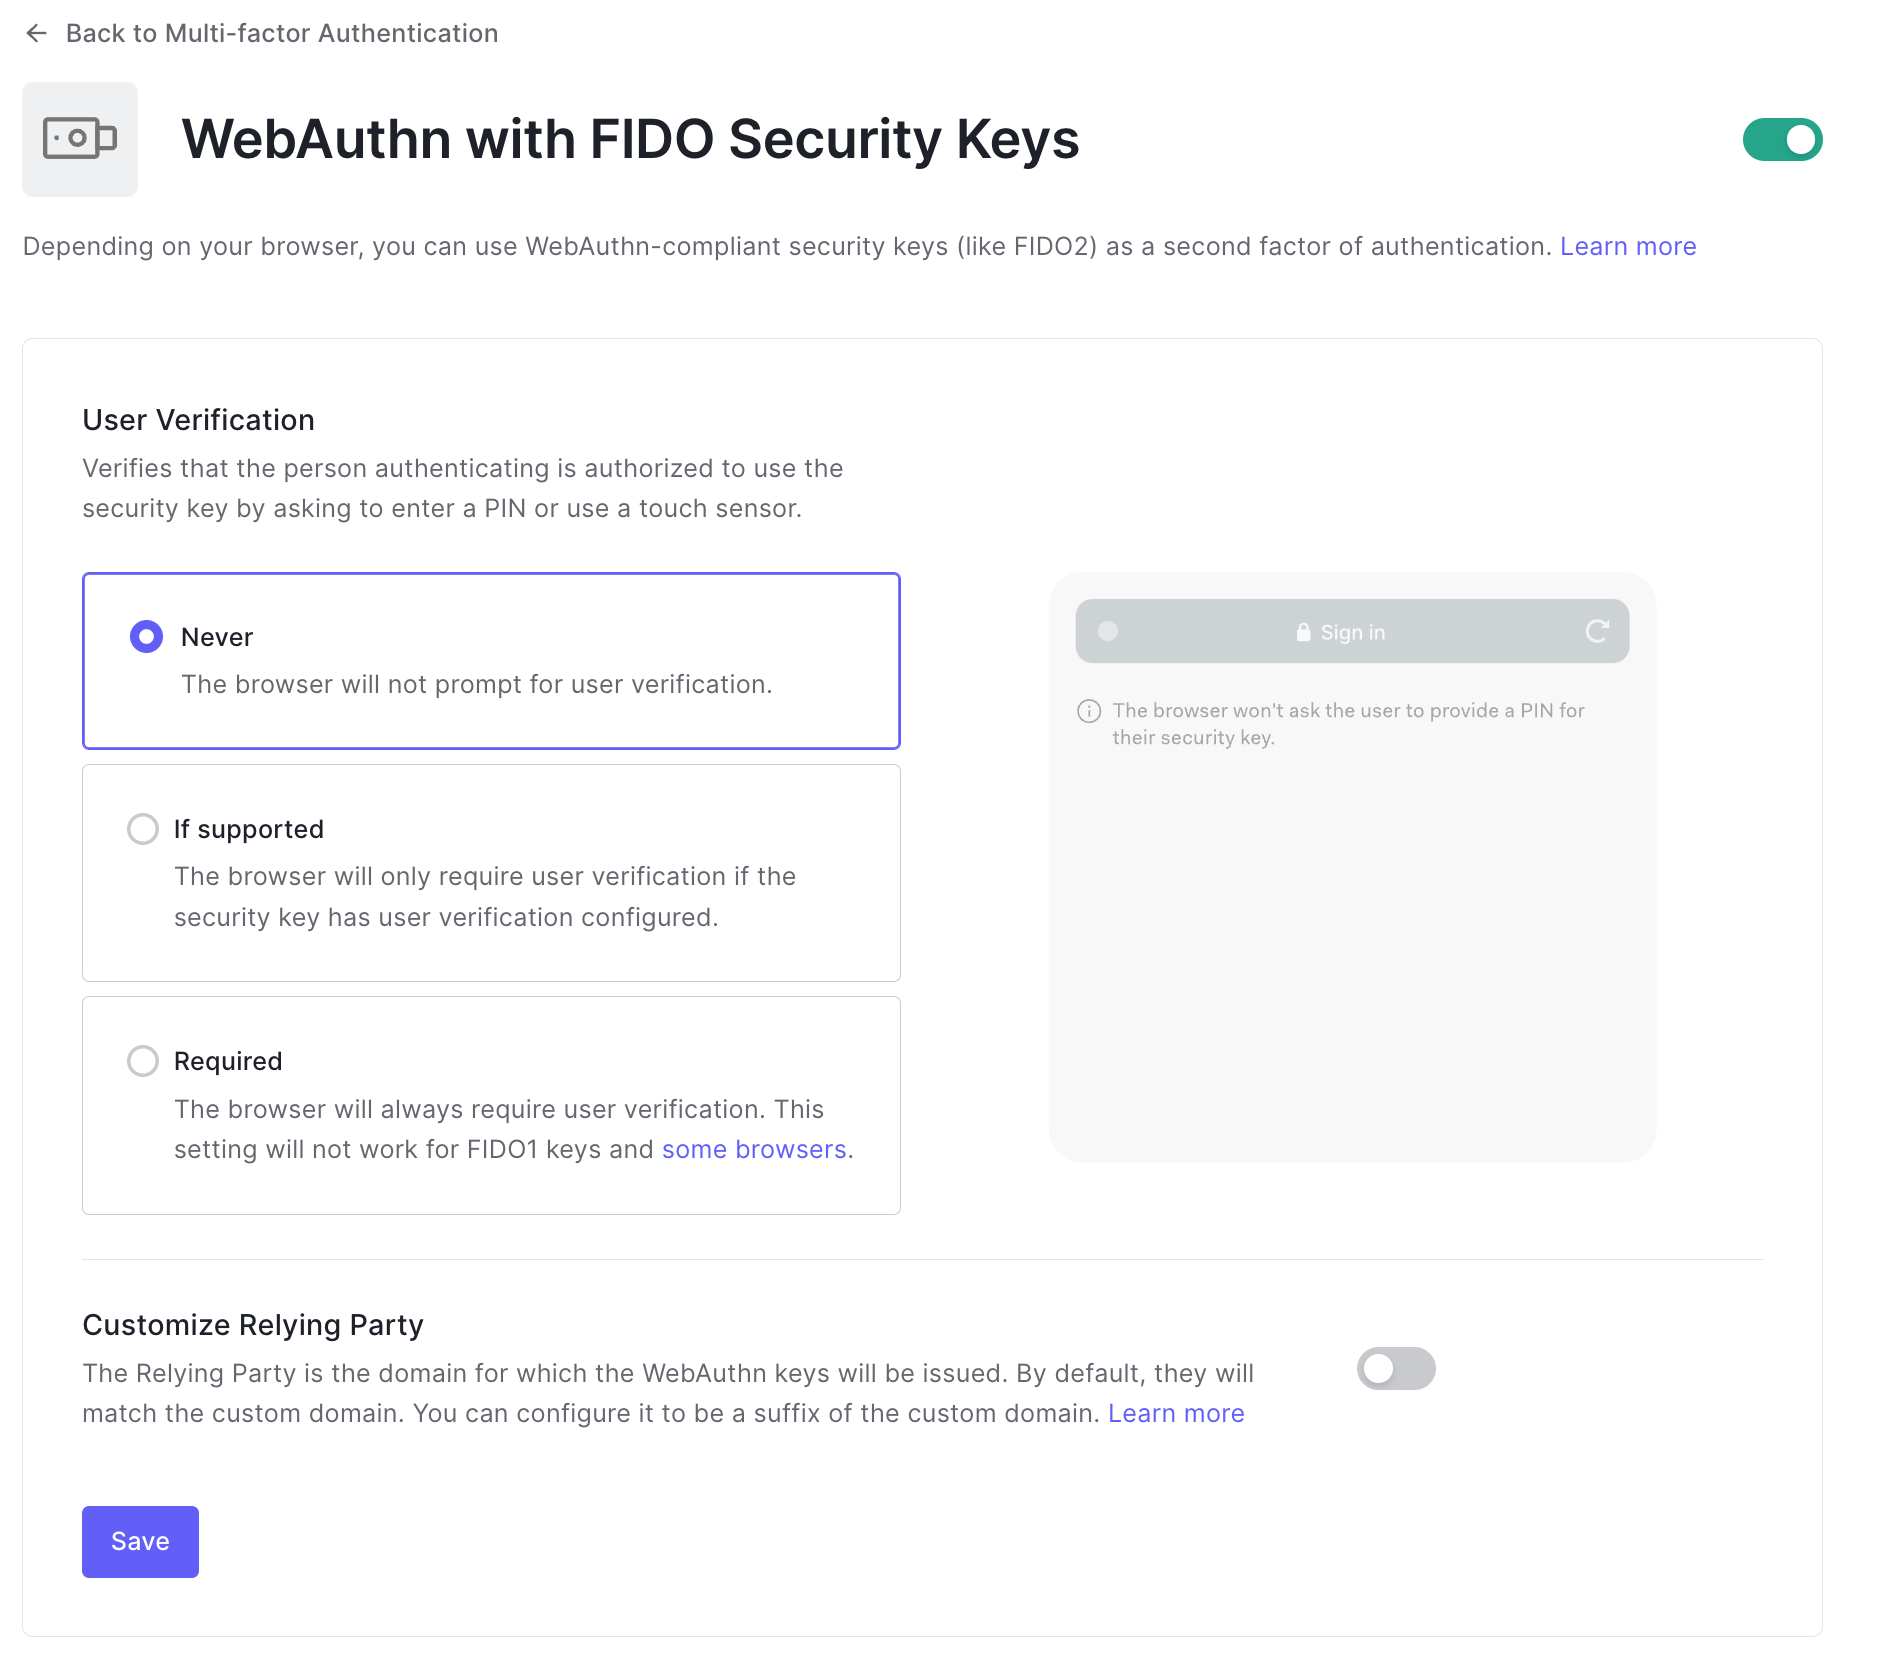
Click the factor called **"WebAuthn with FIDO Security Keys"**. It will navigate to the factor configuration page, where you can enable it by using the toggle button on the top right as follows:
### Define an MFA policy
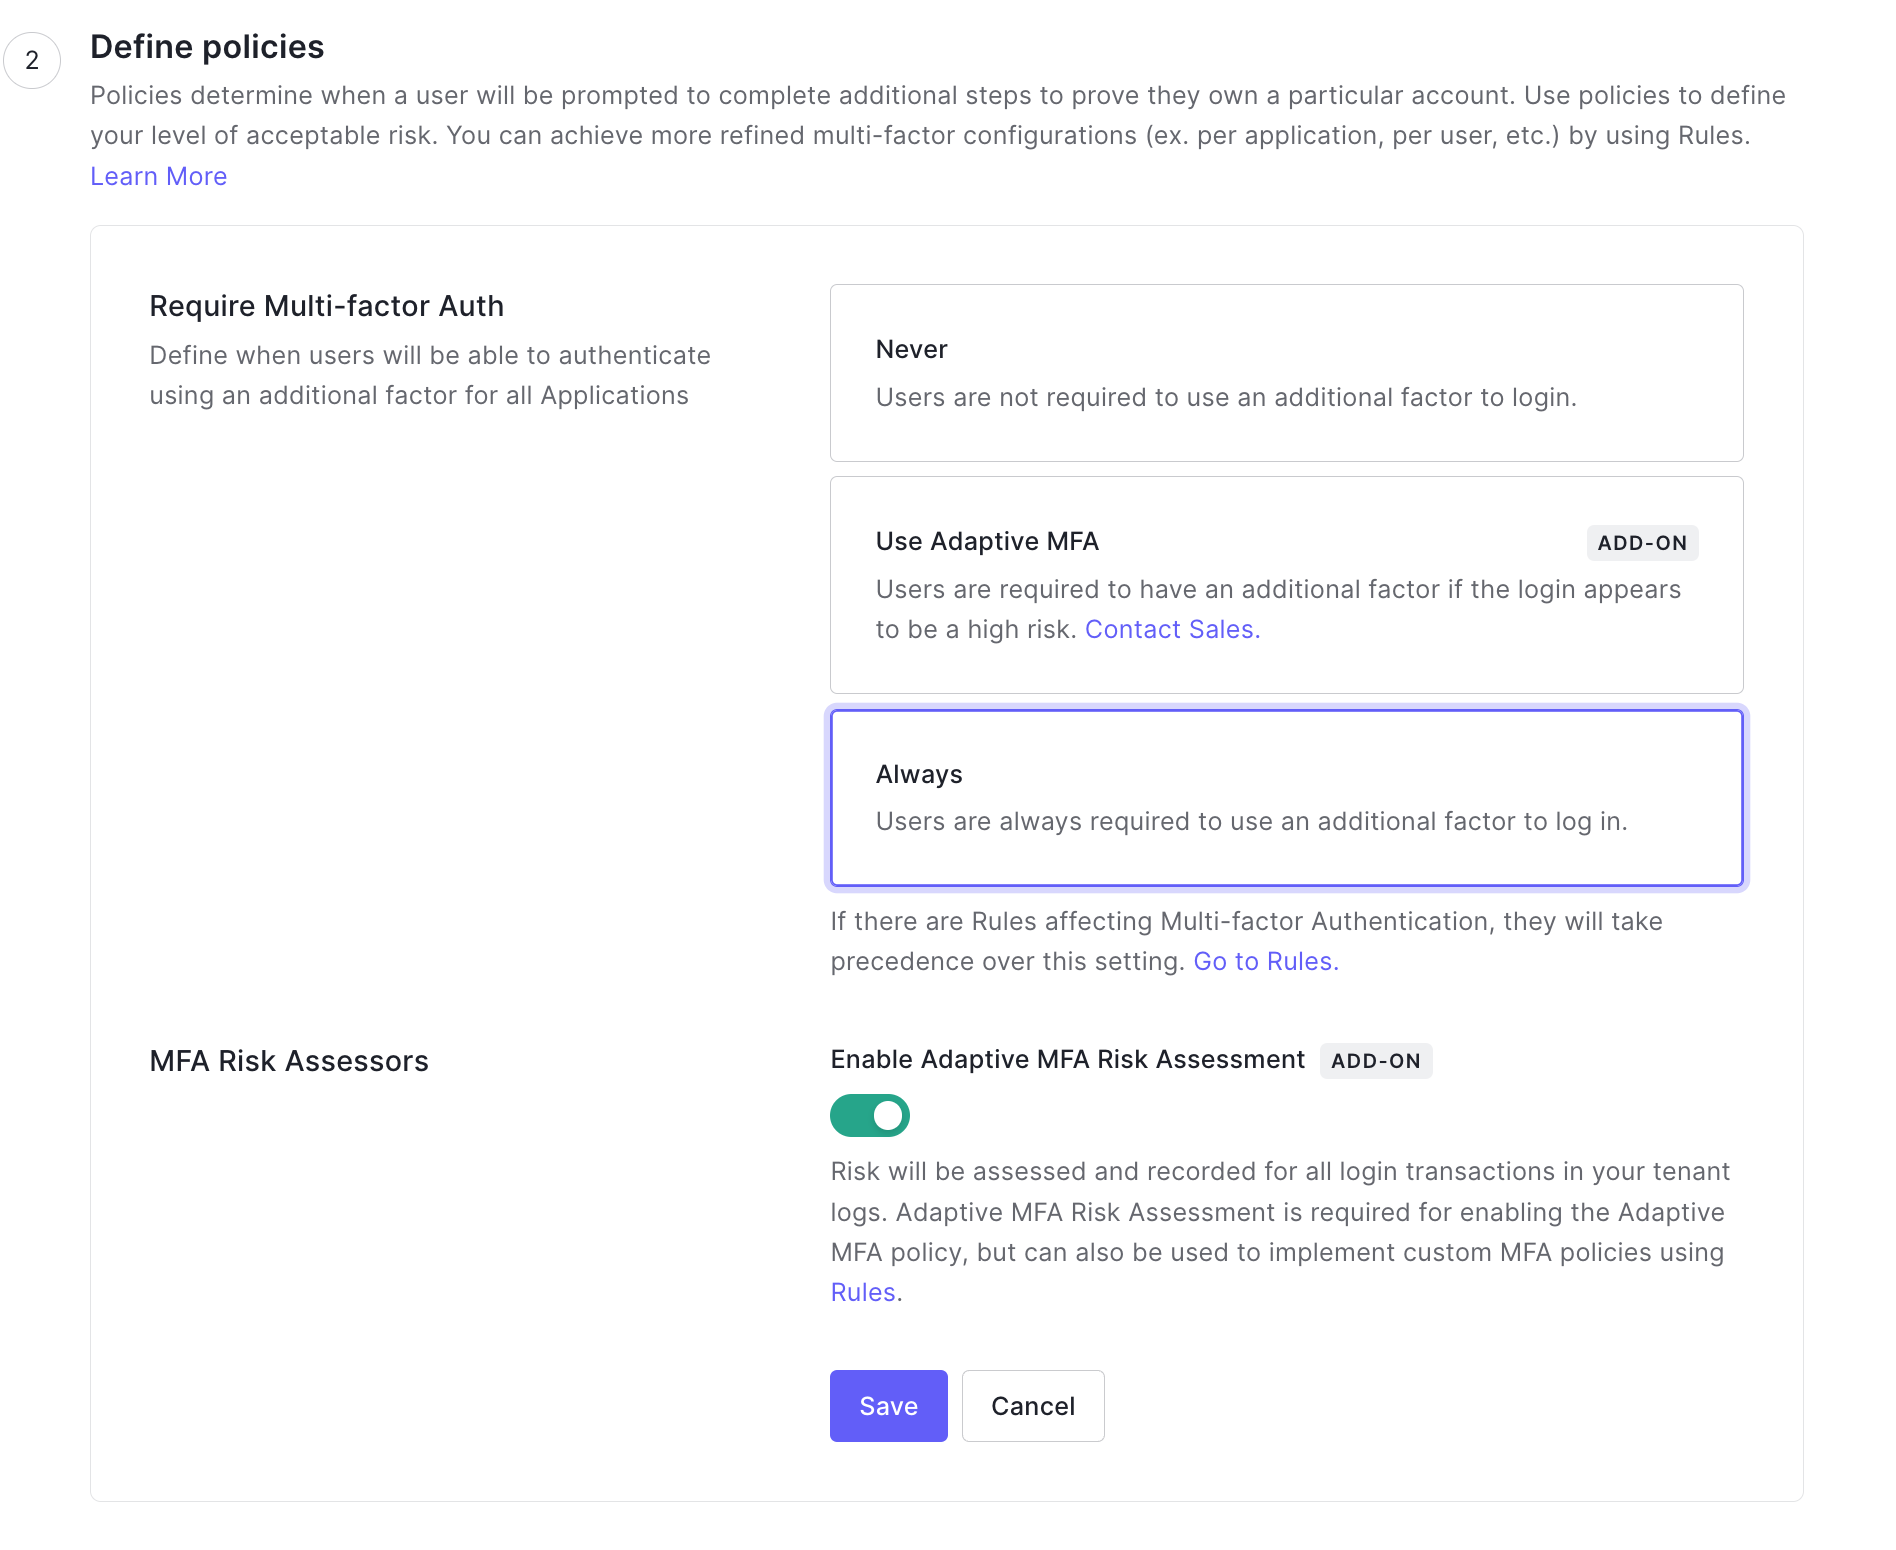
Once you have enabled your MFA Factor, click **"Back to Multi-factor Authentication"**, next, scroll down to find the **Define Policies** section.
A policy determines when to prompt users to complete to prove they own a particular account. For the sake of this tutorial, you can select **"Always"** and click **"Save"**
### Test your MFA strategy with your Yubikey
First, **plug your Yubikey into your laptop**. Make sure it lights up when you do it to make sure it's plugged in correctly.
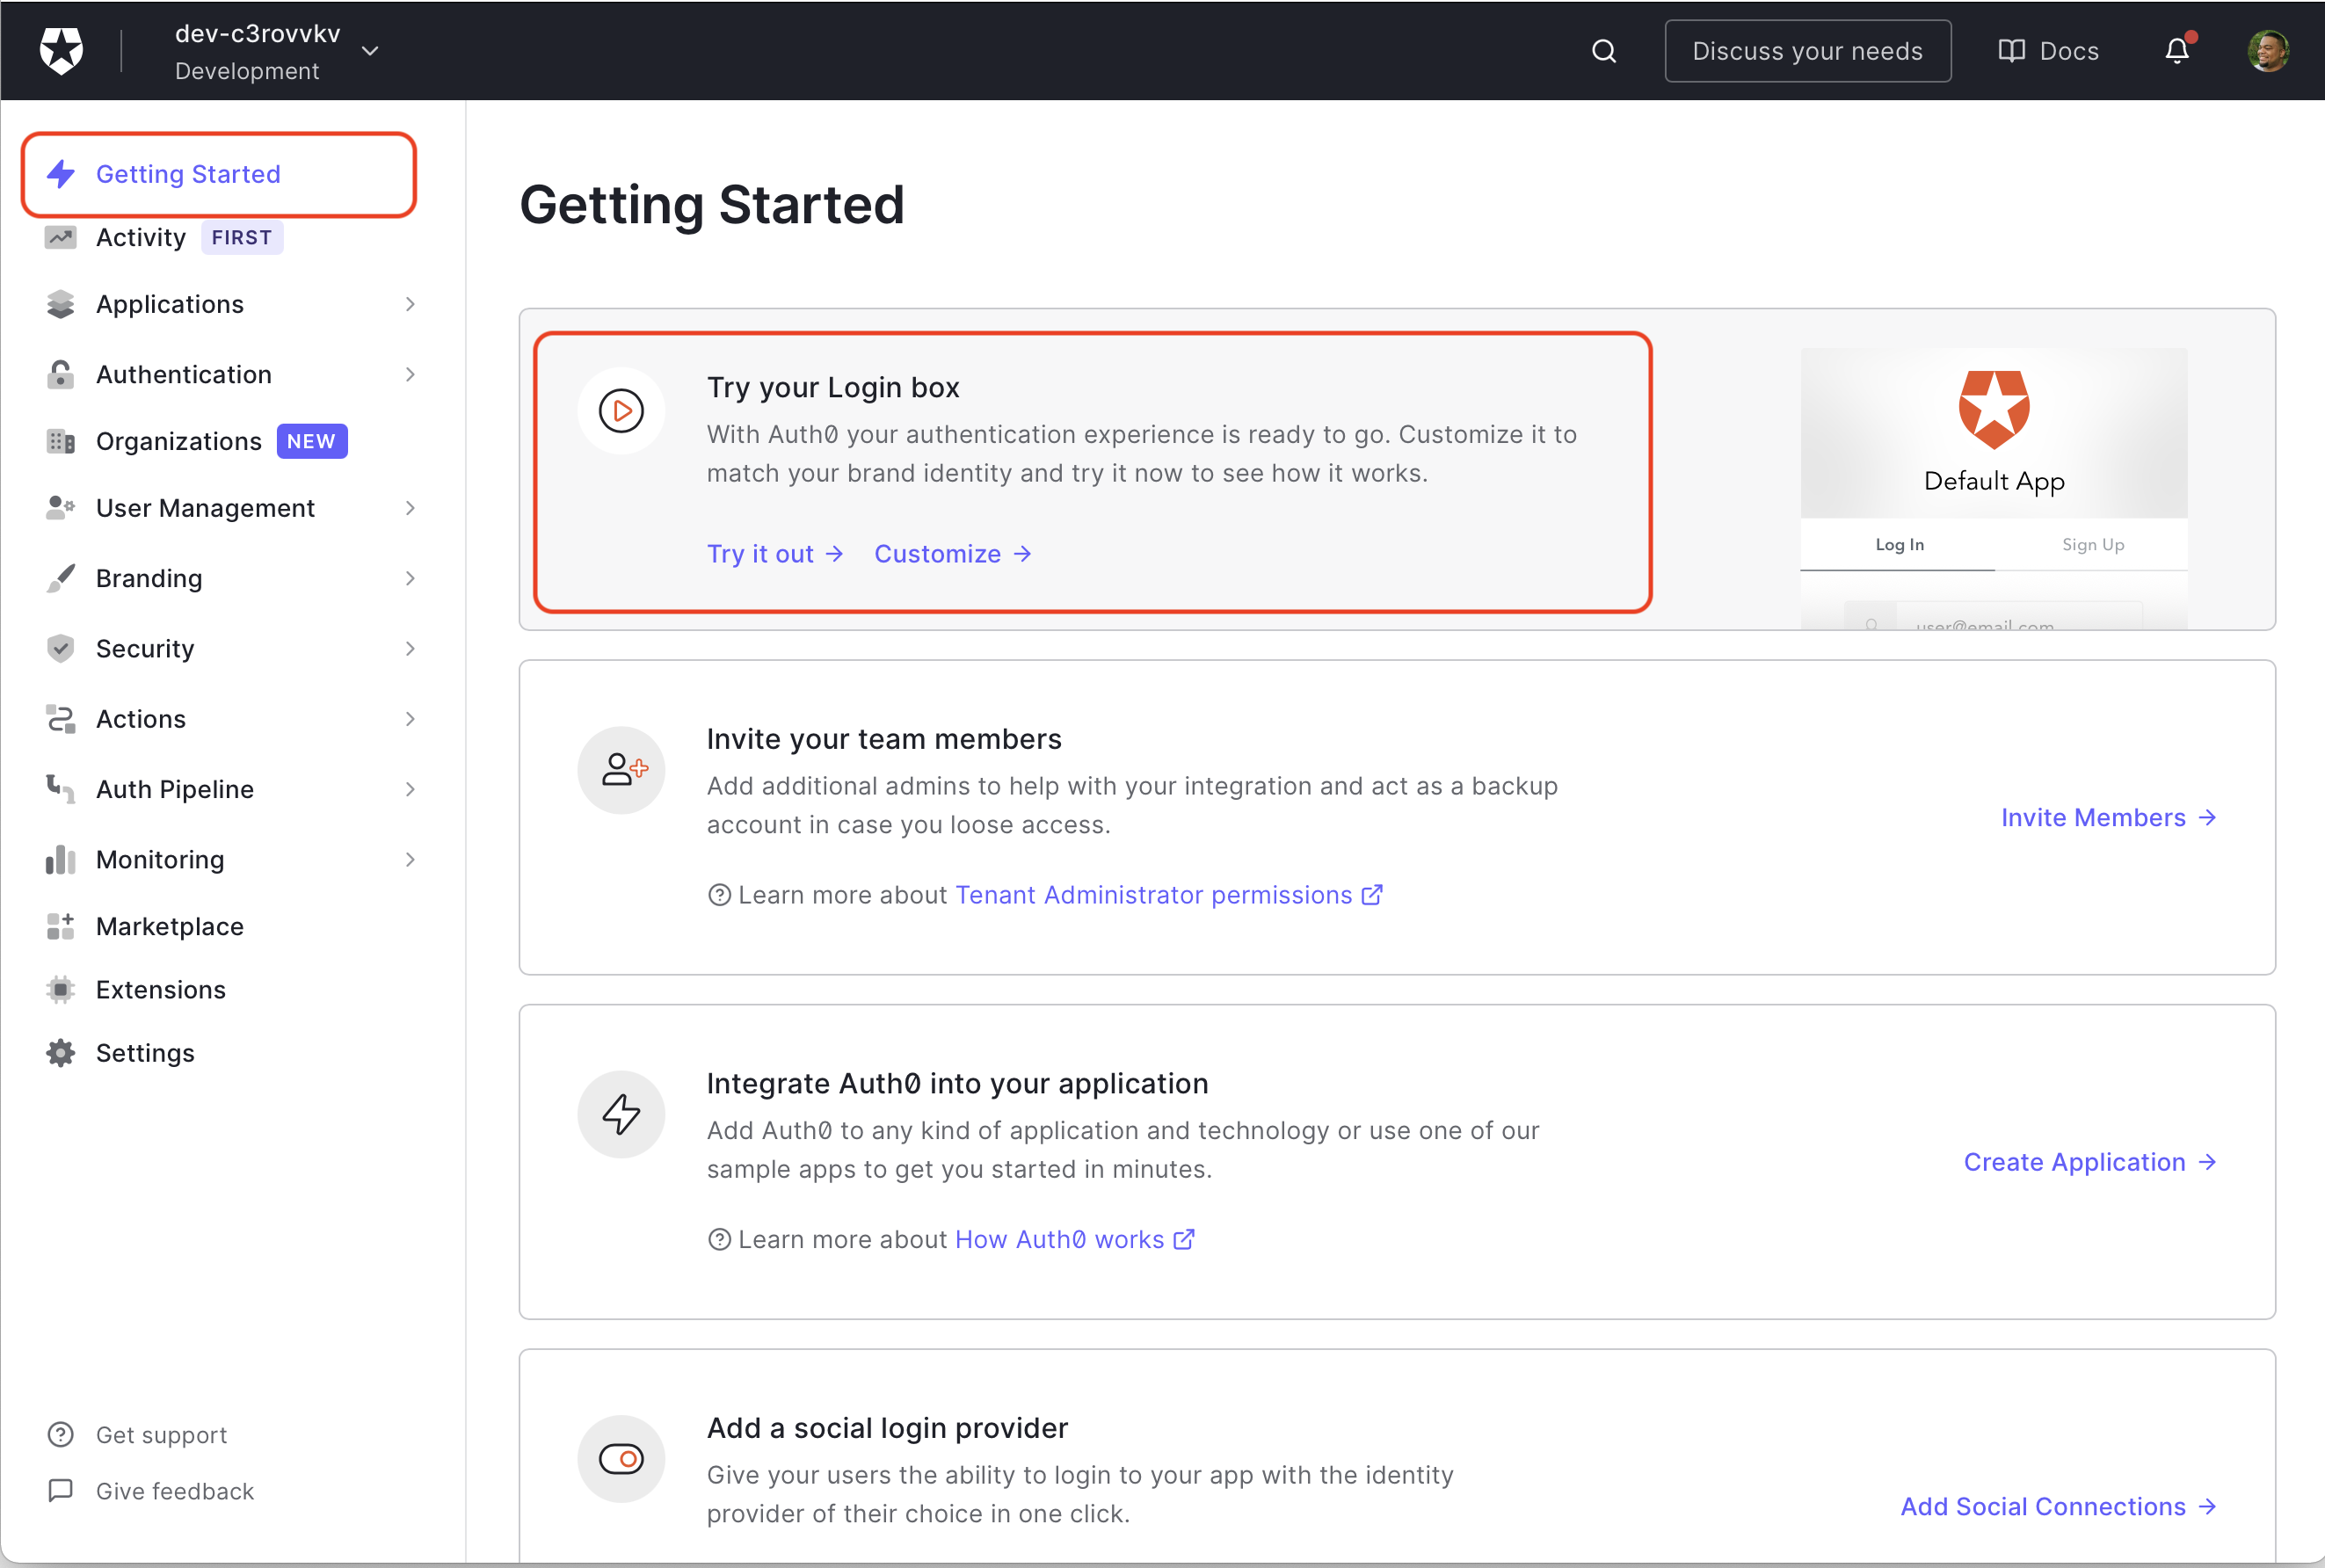
Next, head to the [Auth0 Dashboard](https://manage.auth0.com/dashboard) and find the **"Try your Login box"**, then click **"Try it out"**.
The Universal Login page should open, so **go ahead and Sign Up** with either an email and password or with Google.
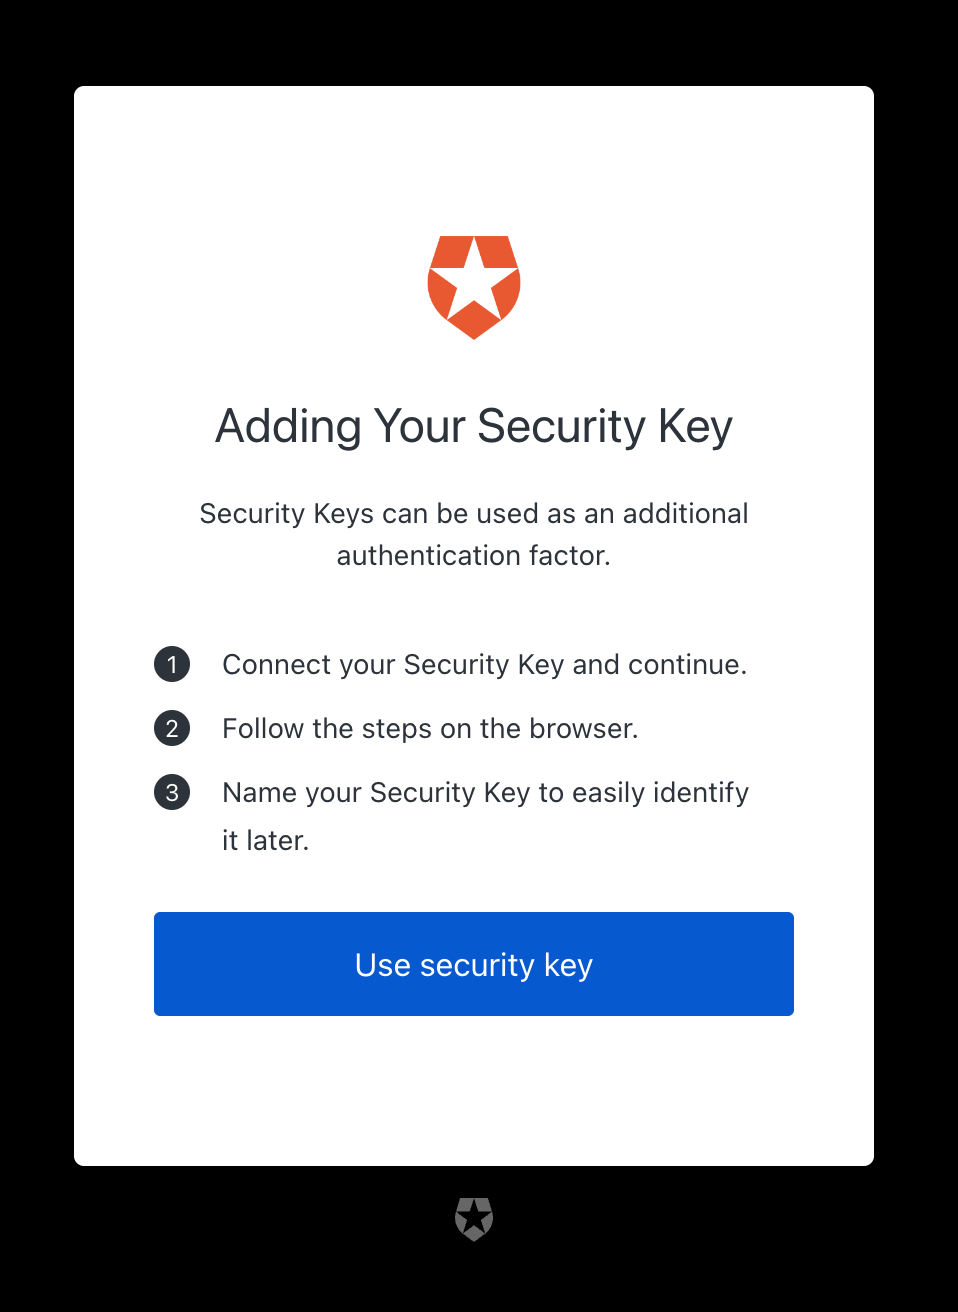
After you Sign Up, **your browser will detect that you have a Yubikey**, and it will take you to the following page so you can register your Yubikey:
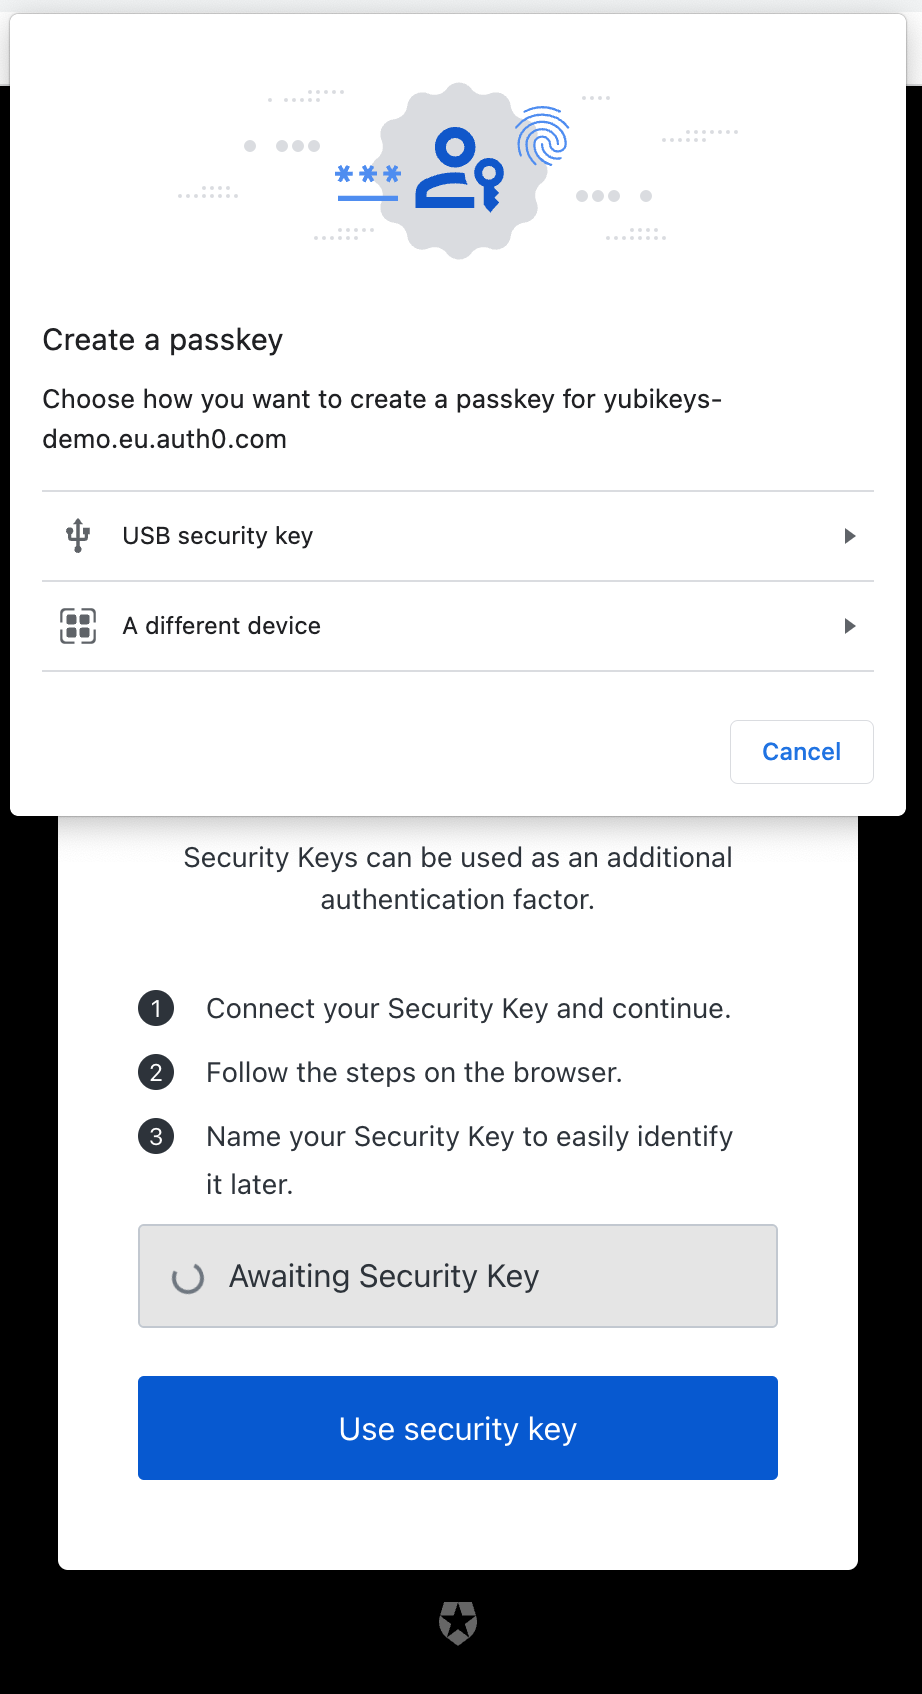
Click "Use security key". A modal will pop up; select "USB Security Key":
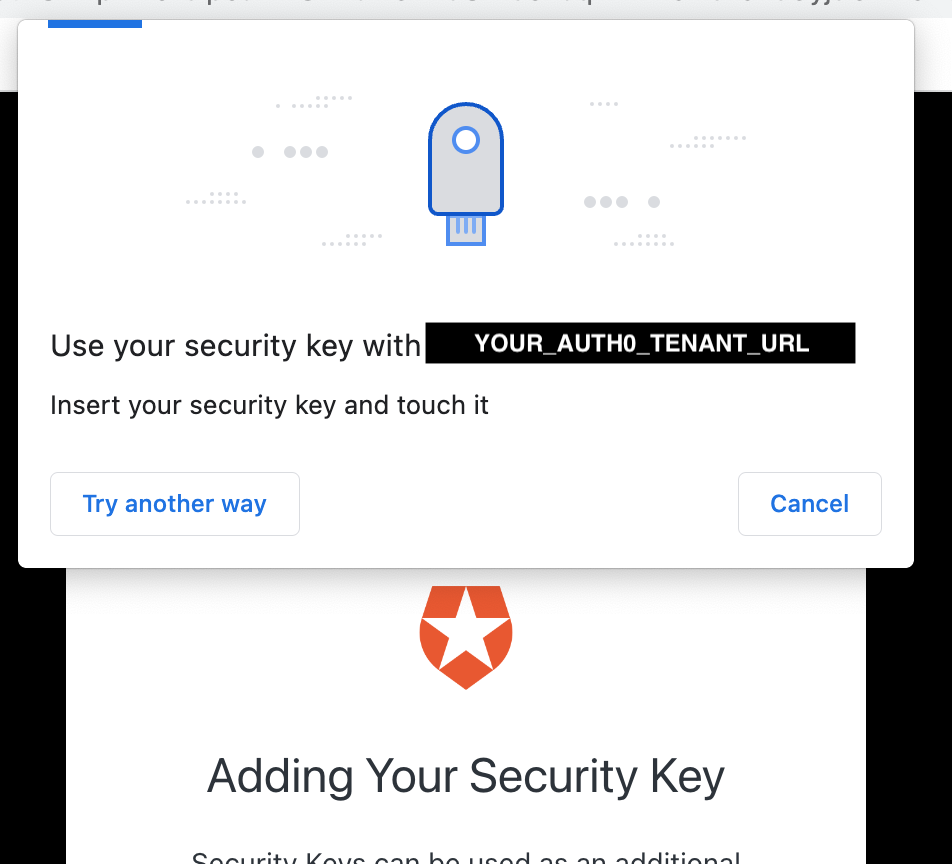
At this point, you'll be asked to **tap your Yubikey**:
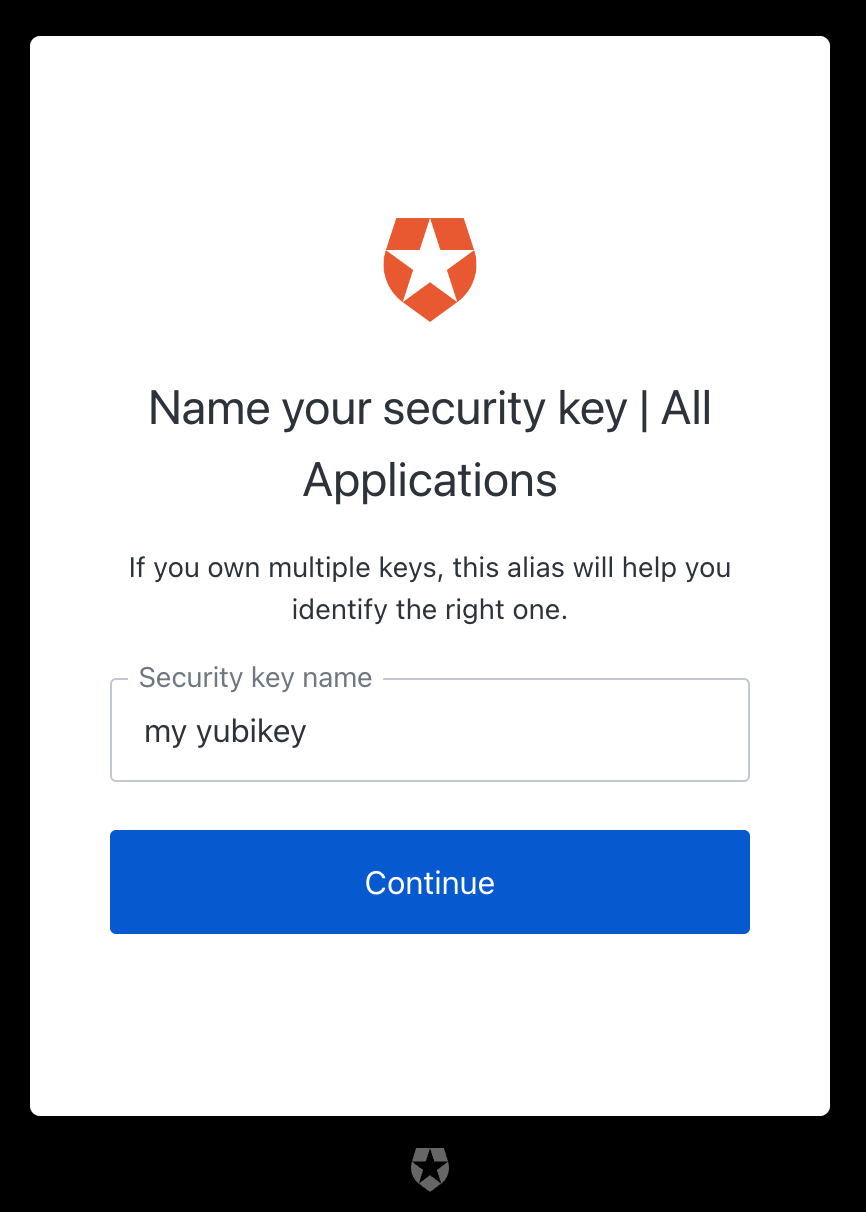
Next, you'll need to **add a name for your Yubikey**. Make sure to use a name that will help you identify which Yubikey you need to use.
And that's it! You have set up your Yubikey with Auth0! 🎉 You'll see a success message like this one:
## Summary
In this post, you learned about Yubikeys and how to set them up with Auth0.
Yubikeys are a type of security key made by Yubico that makes two-factor authentication easier. Yubikeys use U2F, which is based on public-key cryptography.
Using a Yubikey allows you to do a one-touch login and have as many Yubikeys as you want.
Setting a Yubikey with Auth0 is a relatively straightforward process; all you need is the Yubikey and an Auth0 Account.
What do you think? Will you be using a Yubikey in the future? Let me know in the comments.
Thanks for reading!
 After you Sign Up, **your browser will detect that you have a Yubikey**, and it will take you to the following page so you can register your Yubikey:
 Click "Use security key". A modal will pop up; select "USB Security Key":
 At this point, you'll be asked to **tap your Yubikey**:
 Next, you'll need to **add a name for your Yubikey**. Make sure to use a name that will help you identify which Yubikey you need to use.
 And that's it! You have set up your Yubikey with Auth0! 🎉 You'll see a success message like this one:
 ## Summary
In this post, you learned about Yubikeys and how to set them up with Auth0.
Yubikeys are a type of security key made by Yubico that makes two-factor authentication easier. Yubikeys use U2F, which is based on public-key cryptography.
Using a Yubikey allows you to do a one-touch login and have as many Yubikeys as you want.
Setting a Yubikey with Auth0 is a relatively straightforward process; all you need is the Yubikey and an Auth0 Account.
What do you think? Will you be using a Yubikey in the future? Let me know in the comments.
Thanks for reading!
## Summary
In this post, you learned about Yubikeys and how to set them up with Auth0.
Yubikeys are a type of security key made by Yubico that makes two-factor authentication easier. Yubikeys use U2F, which is based on public-key cryptography.
Using a Yubikey allows you to do a one-touch login and have as many Yubikeys as you want.
Setting a Yubikey with Auth0 is a relatively straightforward process; all you need is the Yubikey and an Auth0 Account.
What do you think? Will you be using a Yubikey in the future? Let me know in the comments.
Thanks for reading!