---
title: "The Complete Guide To Deploying JavaScript Applications - Part 1: Database, and API Deployment"
description: "Learn how to deploy JavaScript applications on different platforms."
authors:
- name: "Prosper Otemuyiwa"
url: "https://auth0.com/blog/authors/prosper-otemuyiwa/"
date: "Jan 9, 2018"
category: "Developers,Deep Dive,JavaScript"
tags: ["node", "node.js", "guide", "heroku", "deployment", "javascript"]
url: "https://auth0.com/blog/the-complete-guide-to-deploying-javascript-applications-part-1/"
---
# The Complete Guide To Deploying JavaScript Applications - Part 1: Database, and API Deployment
**TL;DR:** Atwood's law states that _Any application that can be written in JavaScript, will eventually be written in JavaScript._ In 2018, eleven years after this law was proposed, JavaScript is now the [most popular language](https://insights.stackoverflow.com/survey/2017#technology-programming-languages) in the world. In this tutorial, I'll show you how to deploy your JavaScript applications to different cloud platforms such as [Google Cloud](https://cloud.google.com), [Microsoft Azure](https://azure.microsoft.com), [Netlify](https://www.netlify.com/), and others. This article is not about performance.
---
## The Client-Server Architecture
Modern applications employ the client-server architecture. This architecture separates application software into two categories, **clients** and **servers** to better utilize available computing resources and share data processing loads. These categories are otherwise known as, **front end**, and **back end**. The client and server application can be hosted on the same machine but it's more efficient and effective when the client and server applications are hosted and executed on different machines connected via a network.
The client-server architecture aids efficiency by allowing the option of having different _clients_ consume a server resource. These _clients_ could be Single Page Applications (SPAs), mobile applications, or non-interactive clients such as CLIs or Daemons.
In recent times, most JavaScript applications are bundled and deployed as Single Page Applications running on _Vanilla JS_, _[Vue](https://vuejs.org/)_, _[React](https://reactjs.org/)_, _[Polymer](https://www.polymer-project.org/)_, _[Angular](https://angular.io/)_, consuming and pushing data to a backend application running on _[Node](https://nodejs.org/en/)_. The _front end/back end_ model of building software is common not only in the JavaScript community, but the developer community at large. And these applications are deployed to cloud servers.
## Introduction to Cloud Server
Cloud servers are basically virtual servers that run within a cloud computing environment. There are various benefits to hosting and deploying your applications on the cloud. They are:
- Economically efficient.
- You have the freedom to modify the server software to your needs.
- Cloud servers scale very well.
- Stability and security.
In fact, many companies have moved their infrastructure to the cloud in order to reduce cost and complexity. It's a great option for small, mid-sized, and enterprise scale businesses. If you write a lot of tutorials and do POCs (Proof-of-concepts) like me, it's also a great choice for you!
A generic JavaScript application involves a:
- **Front end:** _HTML_, _CSS_, and _JavaScript_. A couple of CSS frameworks that can be used on the front end are:
- **[Bootstrap](https://getbootstrap.com/):** The most popular CSS framework in the world
- **[Bulma](https://bulma.io):** A modern CSS framework based on Flexbox
- **[Tailwind](https://tailwindcss.com/):** A utility-first CSS framework for rapid UI development
A couple of JavaScript frameworks that can be used on the front end are:
- **[React](https://reactjs.org/)**
- **[Vue](https://vuejs.org/)**
- **[Angular](https://angular.io/)**
- **[Preact](https://preactjs.com/)**
- **[Polymer](https://www.polymer-project.org/)**
- **[Svelte](https://svelte.technology/)**
- **[Mithril](https://mithril.js.org/)**
- **Back end:** JavaScript running on a Node.js server. Some frameworks that can be used on the back end are:
- **[Express](https://expressjs.com/):** Fast, unopinionated, minimalist web framework for Node.js.
- **[Hapi](https://hapijs.com/):** Rich framework for building applications and services.
- **[Koa](http://koajs.com/):** Next generation web framework for Node.js.
- **[Sails](https://sailsjs.com/):** Realtime MVC framework for Node.js.
Examples of Databases that can be used are:
- **[MongoDB](https://www.mongodb.com/)**
- **[MySQL](https://www.mysql.com/)**
- **[PostgreSQL](https://www.postgresql.org/)**
## Application To Deploy
In this tutorial, we'll be deploying this sample application, **Meetups**. The Architecture is not complex. It's composed of a back end and a front end.
The back end is comprised of the following:
- **A MongoDB Database**
- **A Node.js web framework - Express**
The front end is comprised of the following:
- **Vue.js** - JavaScript front end framework.
- **Twitter Bootstrap** - CSS framework for styling our app.
### Application Key Requirements
In order to run **Meetups**, you need to have the following tools installed on your machine.
* **Node.js**: Navigate to the [Node.js website](https://nodejs.org/en/download/) and install the latest version on your machine. Ensure that `npm` works via the terminal.
* **MongoDB**: Navigate to the [MongoDB website](https://www.mongodb.com/download-center?ct=false#atlas) and install the MongoDB community server edition. If you are using a Mac, I'll recommend following this [instruction](https://treehouse.github.io/installation-guides/mac/mongo-mac.html). To avoid micromanaging from the terminal, I'll also recommend installing a MongoDB GUI, [Robo 3T](https://robomongo.org), formerly known as RoboMongo. You can then run `mongod` from the terminal to start up the MongoDB service on your machine.
> MongoDB works seamlessly with Node.js backends.
Next, let's cover how to deploy this sample JavaScript application. First, we'll hand over the database management to a cloud service. One great benefit of operating a remote database is having several apps pull data from the database service. In addition, you can optimize as much as possible because of the dedicated service your database runs on.
## Database Deployment
There are several database cloud services that can manage your database effectively. For relational databases, we have some great services such as:
- **Amazon RDS (SQL) / Amazon Aurora**
- **Microsoft Azure SQL**
- **Google Cloud SQL**
- **Elephant SQL**
For NoSQL databases such as the database _Meetups_ operates, we have some services such as:
- [mLab](https://mlab.com/)
- [MongoDB Atlas](https://www.mongodb.com/cloud/atlas)
- [Amazon DynamoDB](https://aws.amazon.com/dynamodb/)
- [Microsoft Azure CosmosDB](https://azure.microsoft.com/en-us/services/cosmos-db/)
- [Cloud Firestore](https://firebase.google.com/docs/firestore/)
### mLab
mLab is a cloud platform that provides Database-as-a-service for MongoDB. The free version provides developers with 500MB storage. Let's go ahead and create a database for our app on mLab.
Make sure you follow these steps below:
- Create an account with [mLab](https://mlab.com/signup/)
- Go to the [mLab Dashboard](https://mlab.com/home) and click the "Create new" button.
- Choose a **Cloud Provider** amongst these three providers, _Amazon Web Services_, _Google Cloud Platform_, and _Microsoft Azure_. For this tutorial, I chose _Amazon Web Services_.
- Select a **Plan type** amongst these plans: _Sandbox_, _Shared_, and _Dedicated_. For app prototyping, POCs, and demos, I recommend the _Sandbox_ option which is free and has up to 0.5GB storage.
- Choose a region for the Cloud Provider you previously selected and click on _"Continue"_. It's always recommended to choose a region closer to you or your target market.
- Choose a database name. I chose `meetup`.
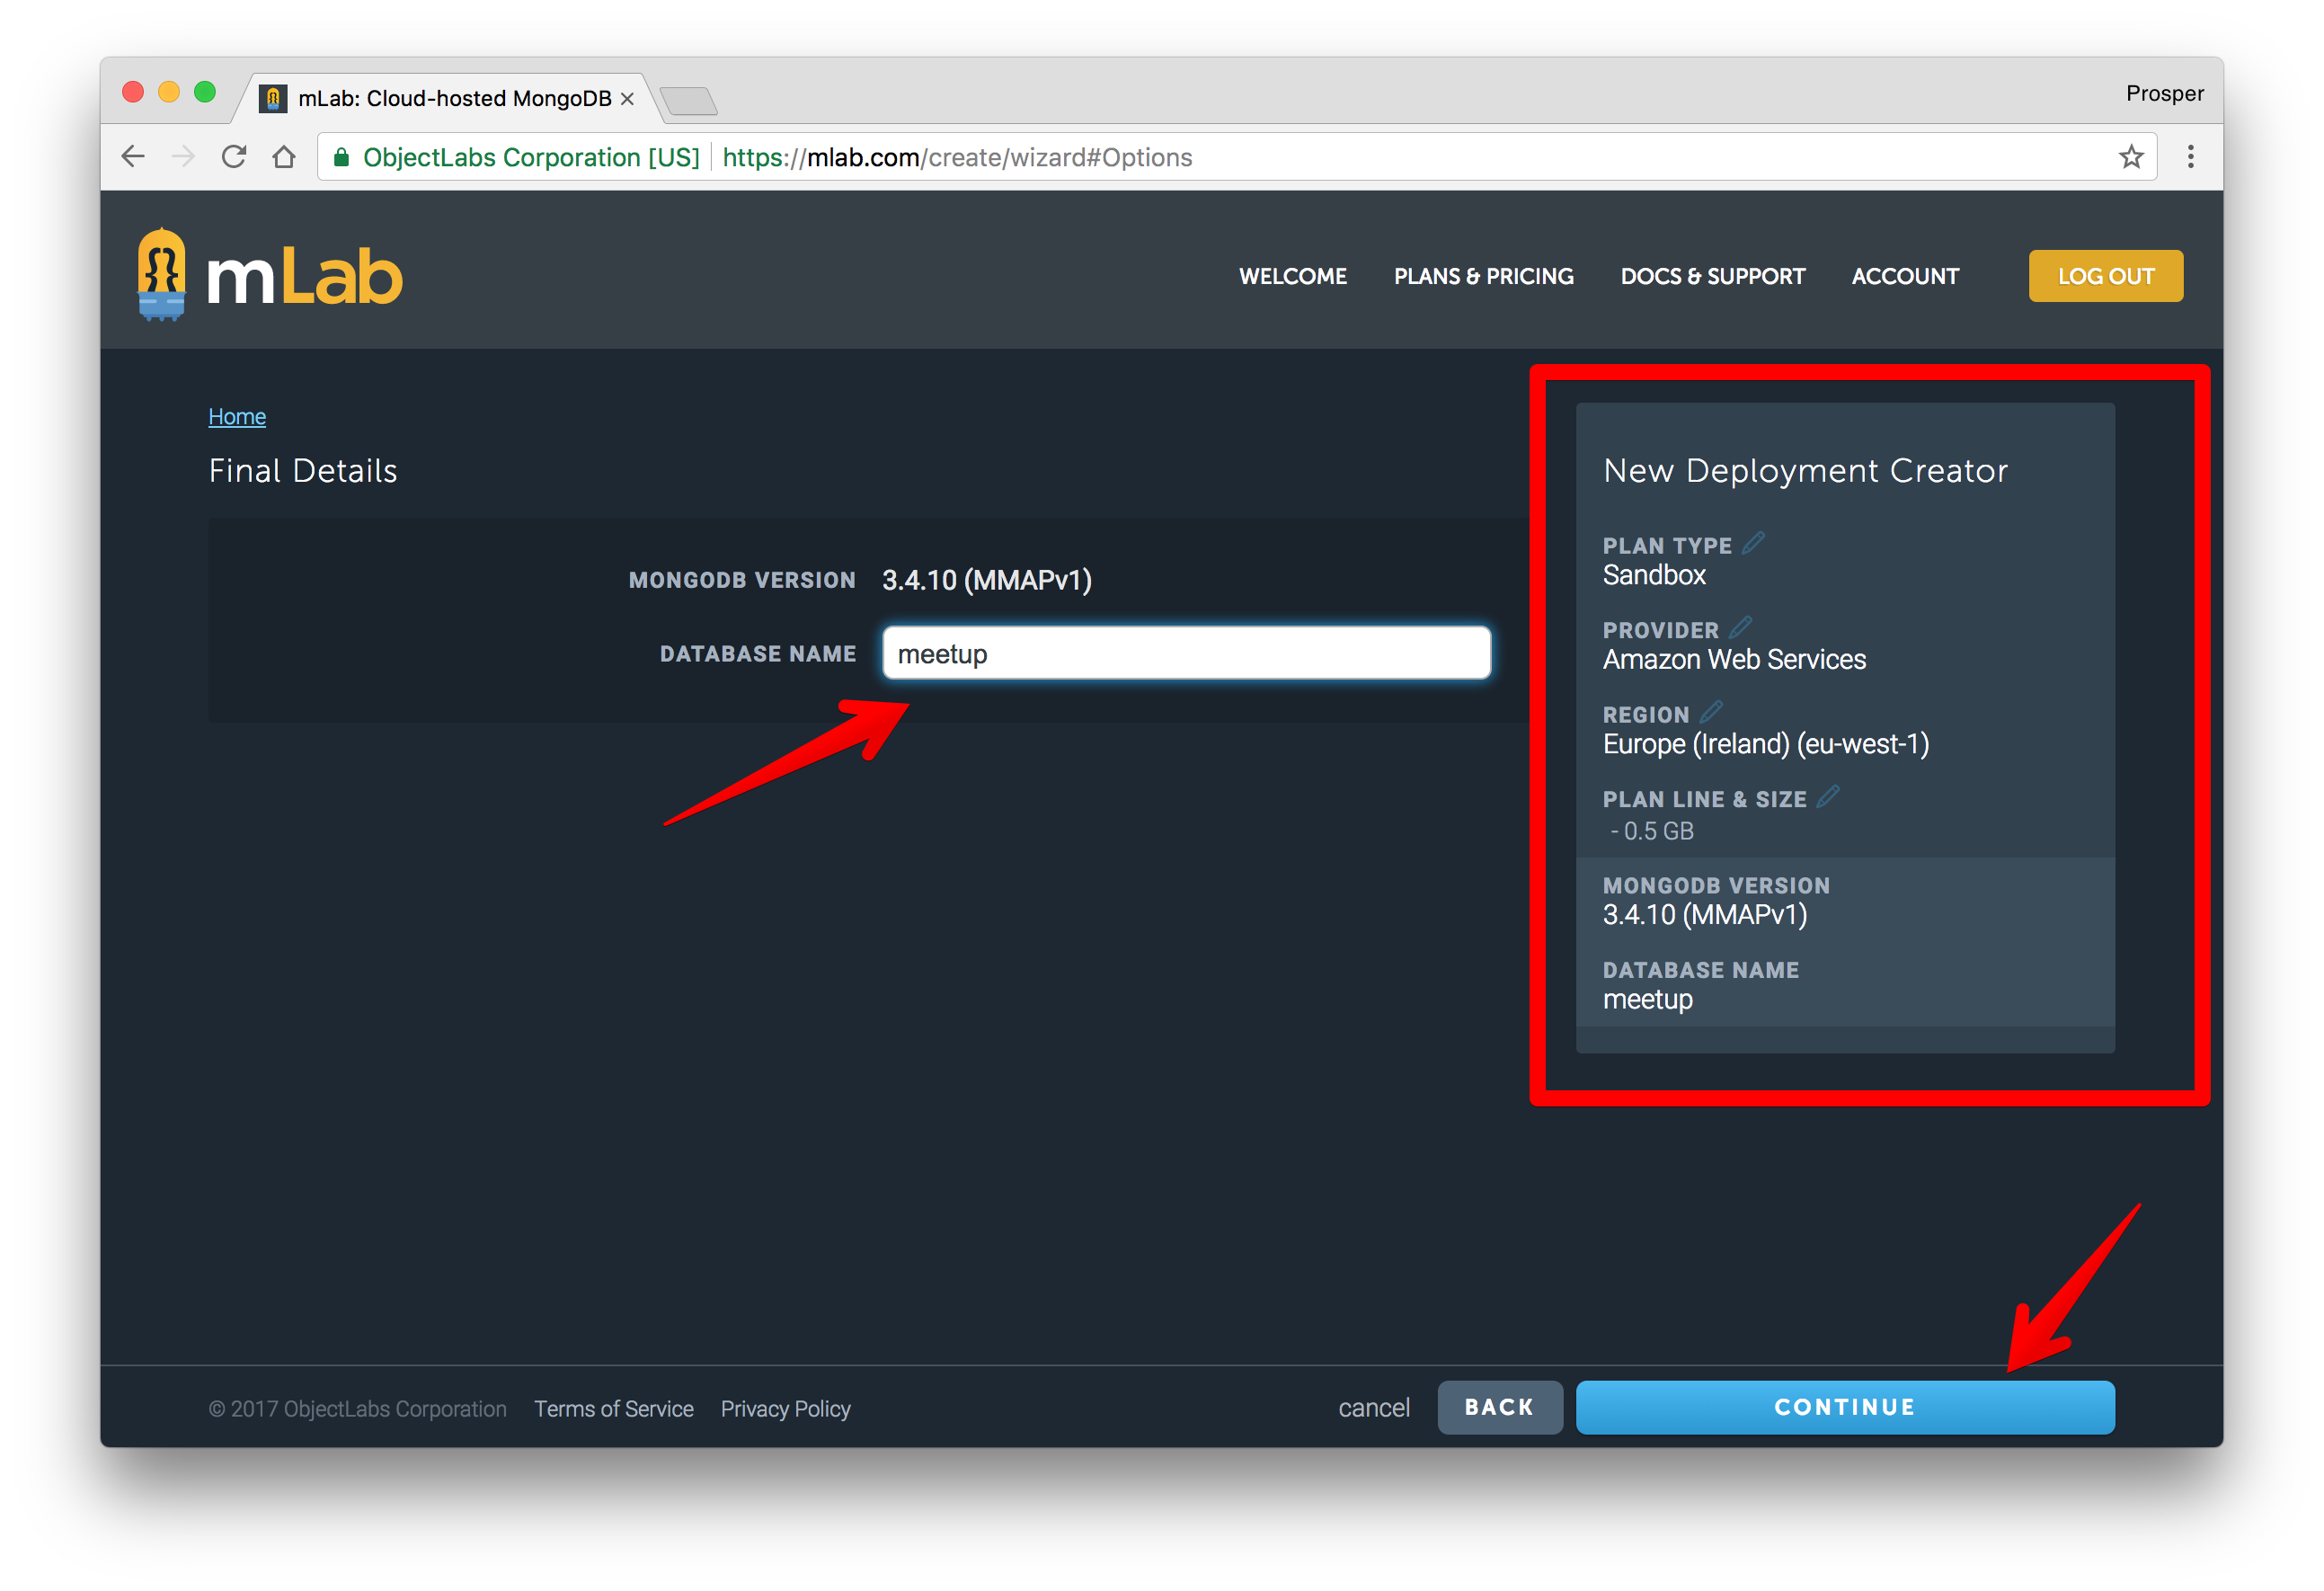
- Click "Continue". Once it has been created, you'll see the database on the dashboard like so:

- Click on the recently created database. An interface will be presented to you with a connection string like so:
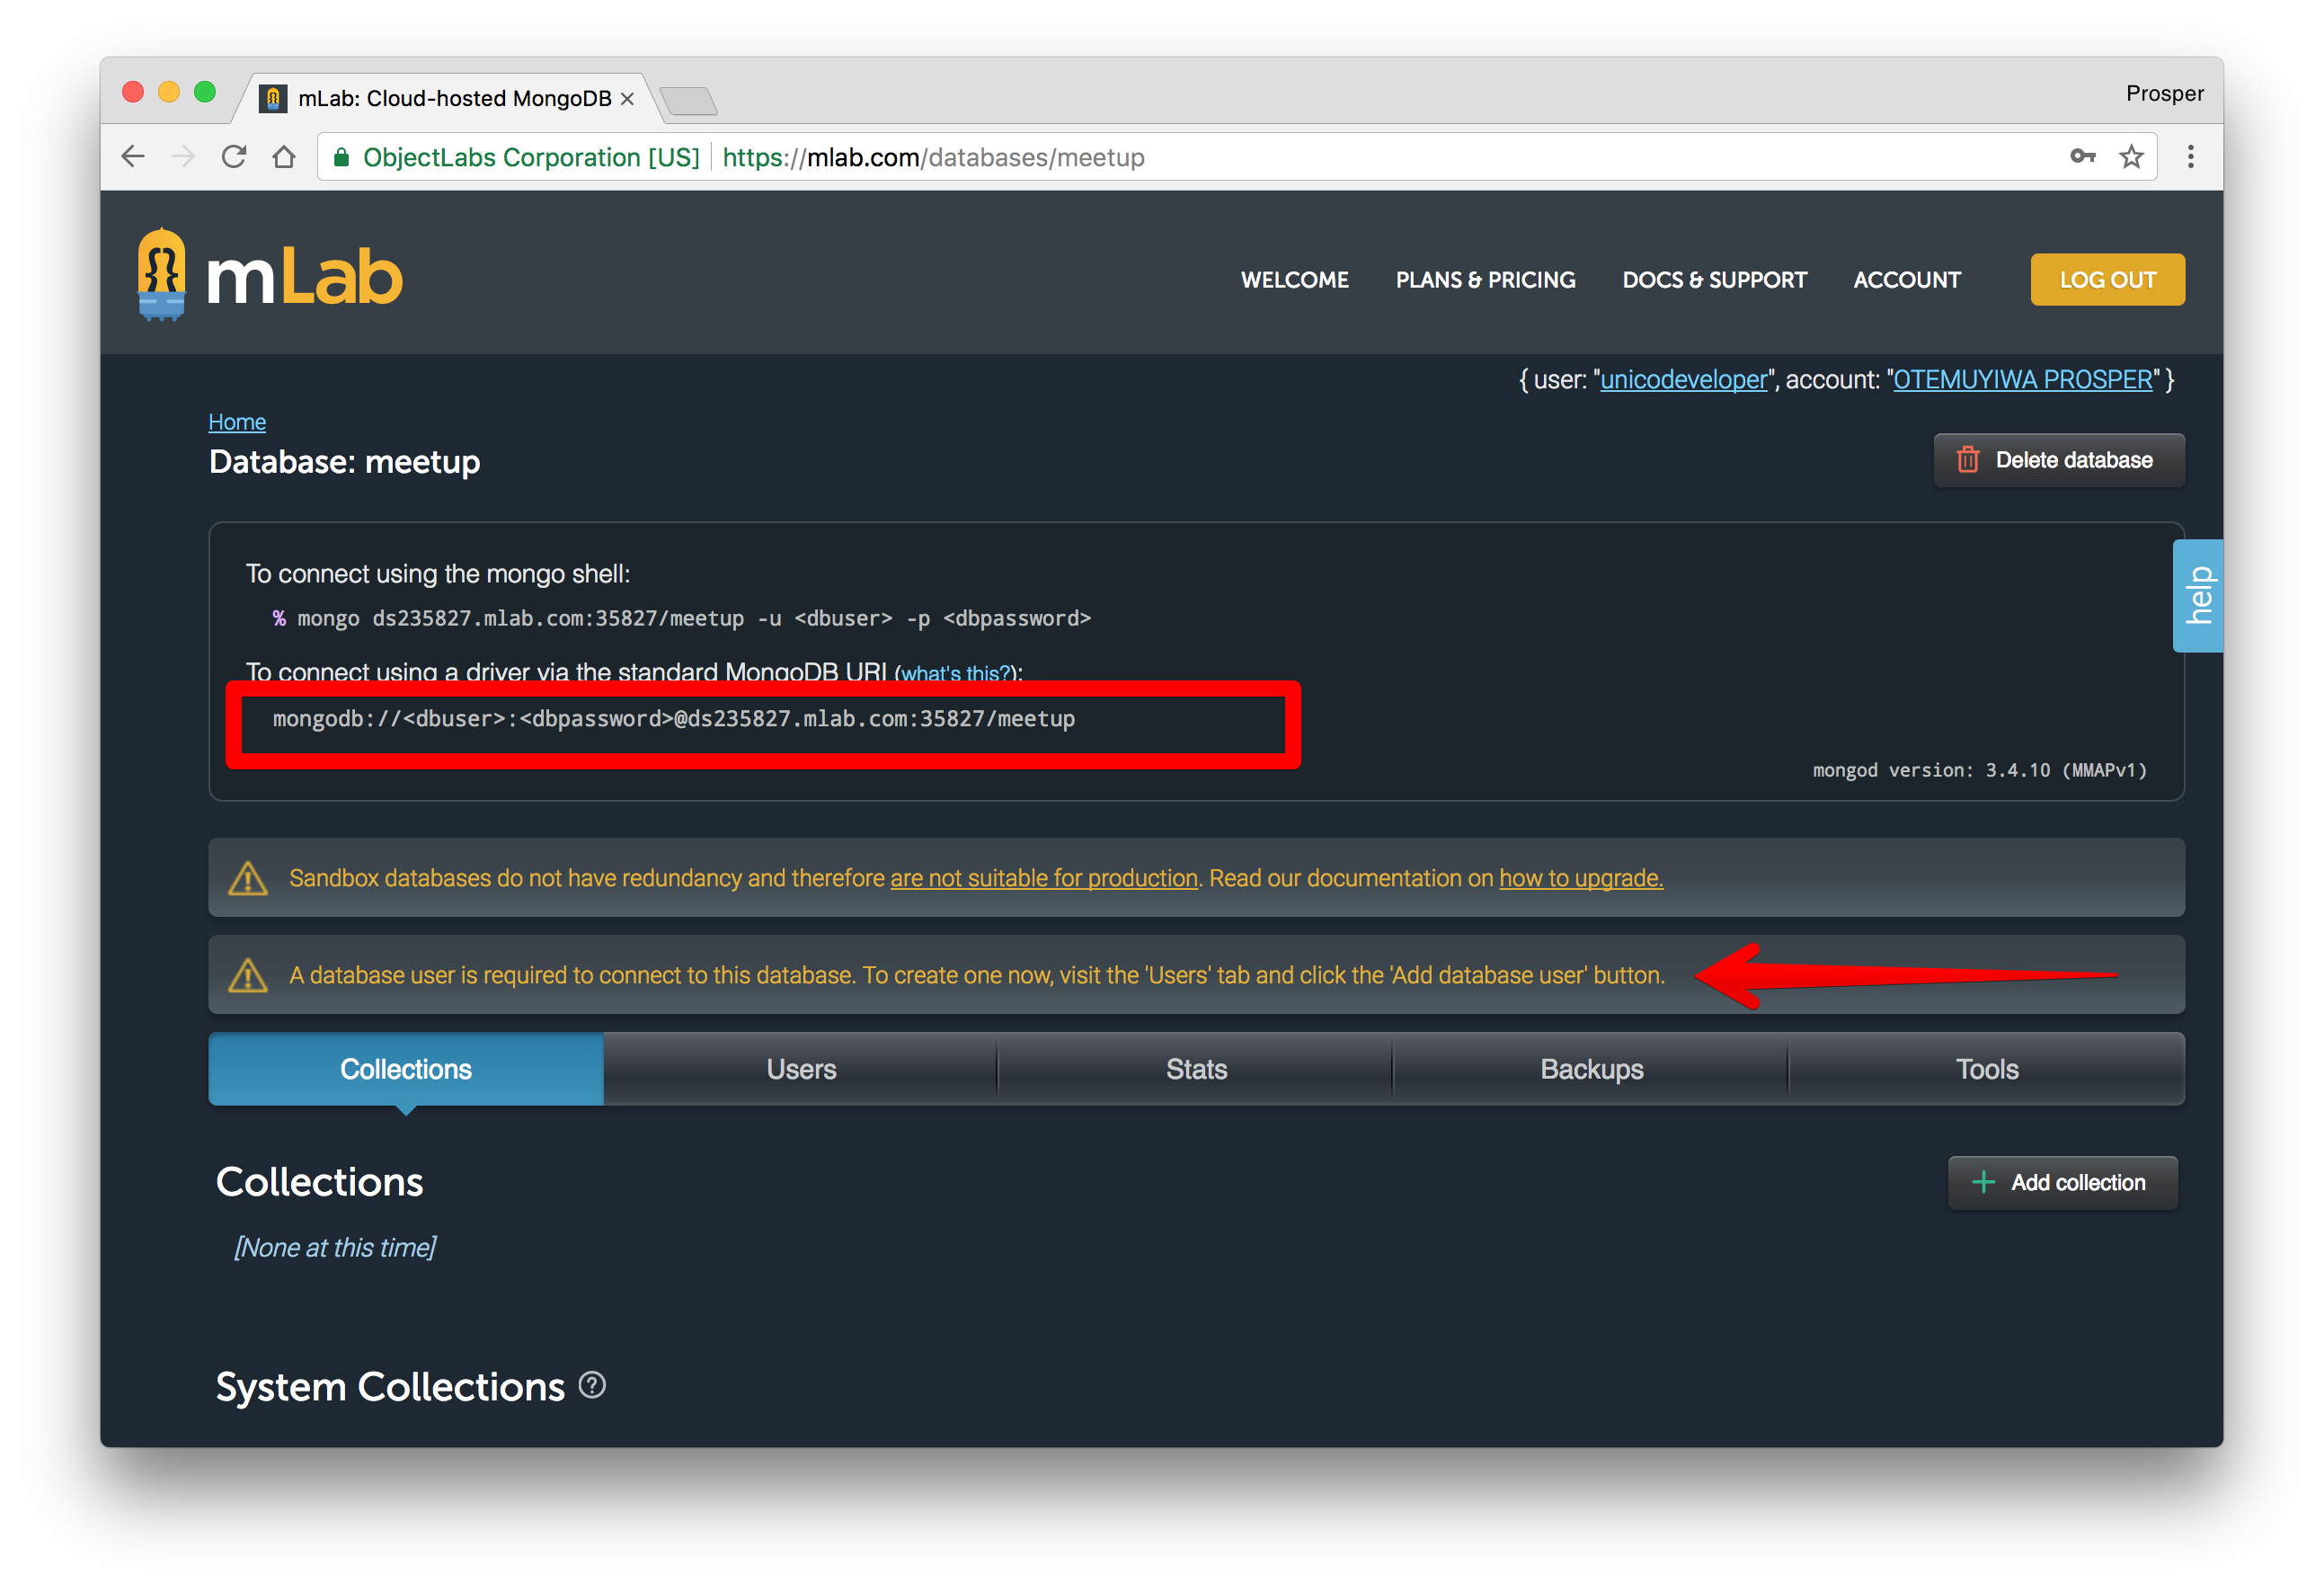
This is the connection string: `mongodb://:@ds235827.mlab.com:35827/meetup`. `` is the database user required to connect to the db. `` is the password assigned to the database user. In the diagram above, there is a notice that states that _A database user is required to connect to this database_.
All I need to do is replace my local connection string with that of mLabs.
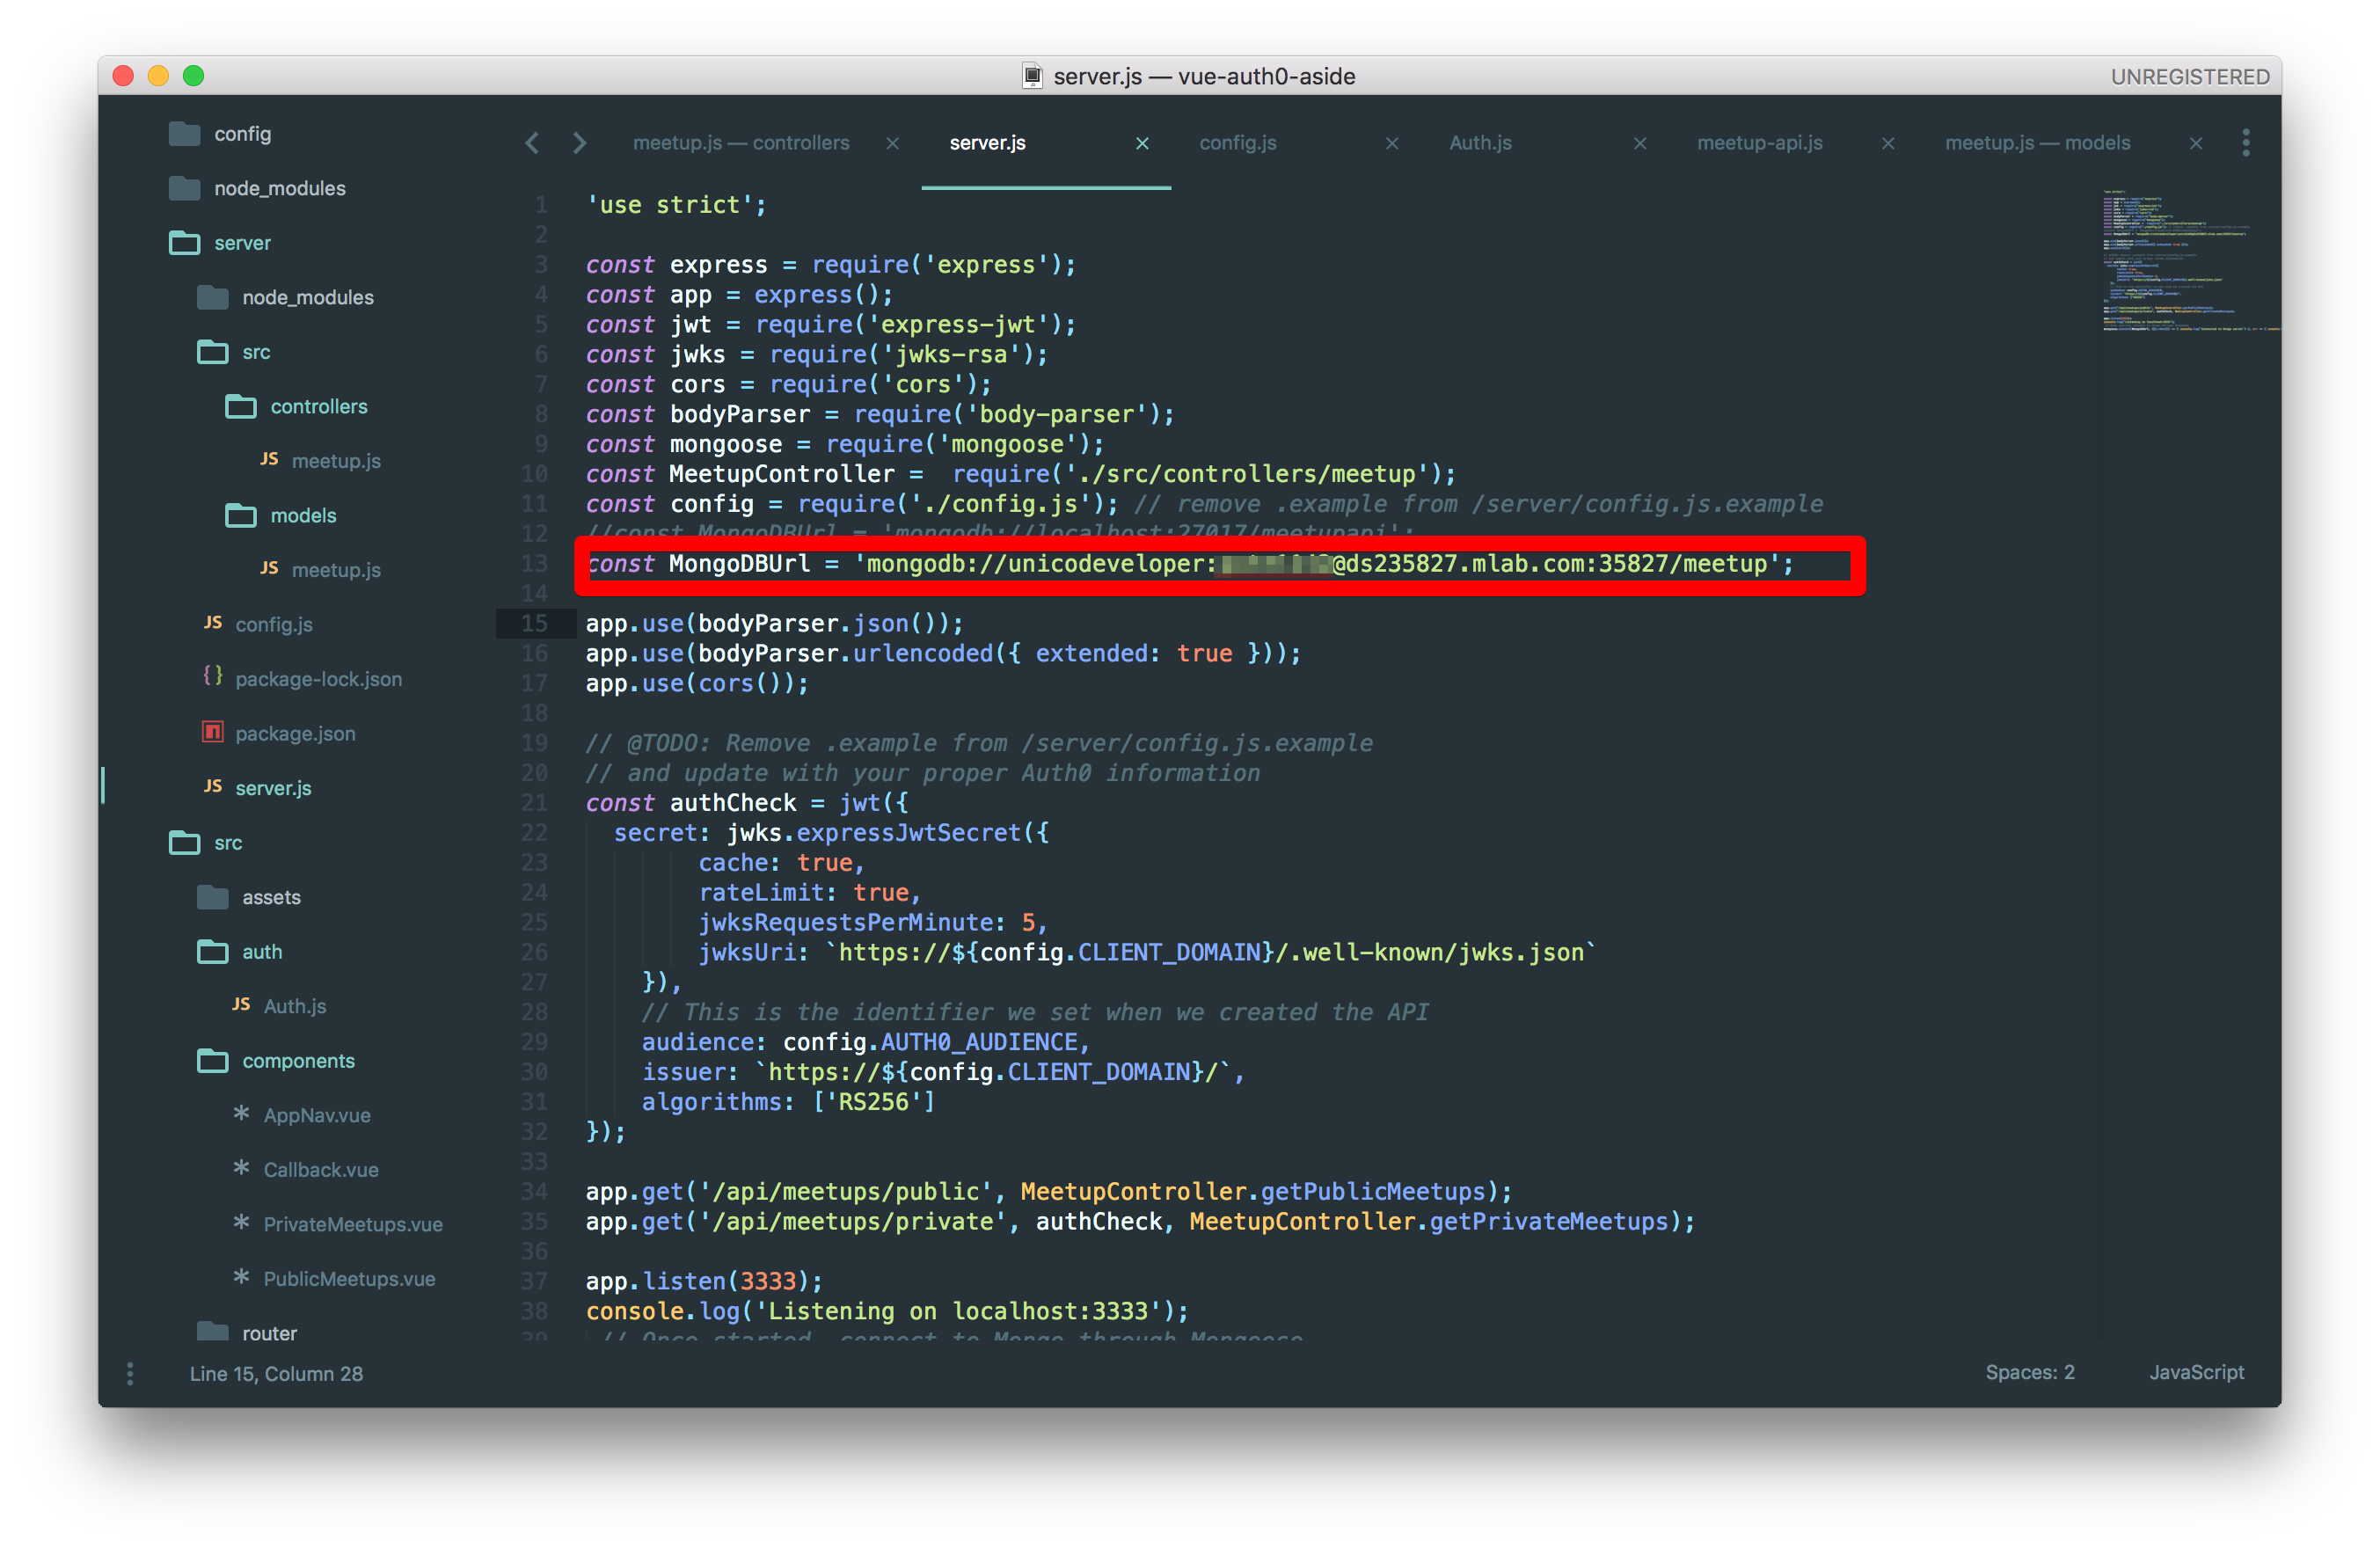
> Note: In a real-world scenario, you should have a config file with the local and production connection strings. You can use `process.env` to determine whether the app is running locally or on production and assign the appropriate database connection string based on the environment.
### MongoDB Atlas
MongoDB Atlas is a cloud platform that also provides Database-as-a-Service for MongoDB. The free version provides developers with 512MB storage. Let's go ahead and create a database for our app on MongoDB Atlas.
Make sure you follow these steps below:
- Create an account with [MongoDB Atlas](https://www.mongodb.com/cloud/atlas)
- A dialog box will be presented to you with a lot of form fields.
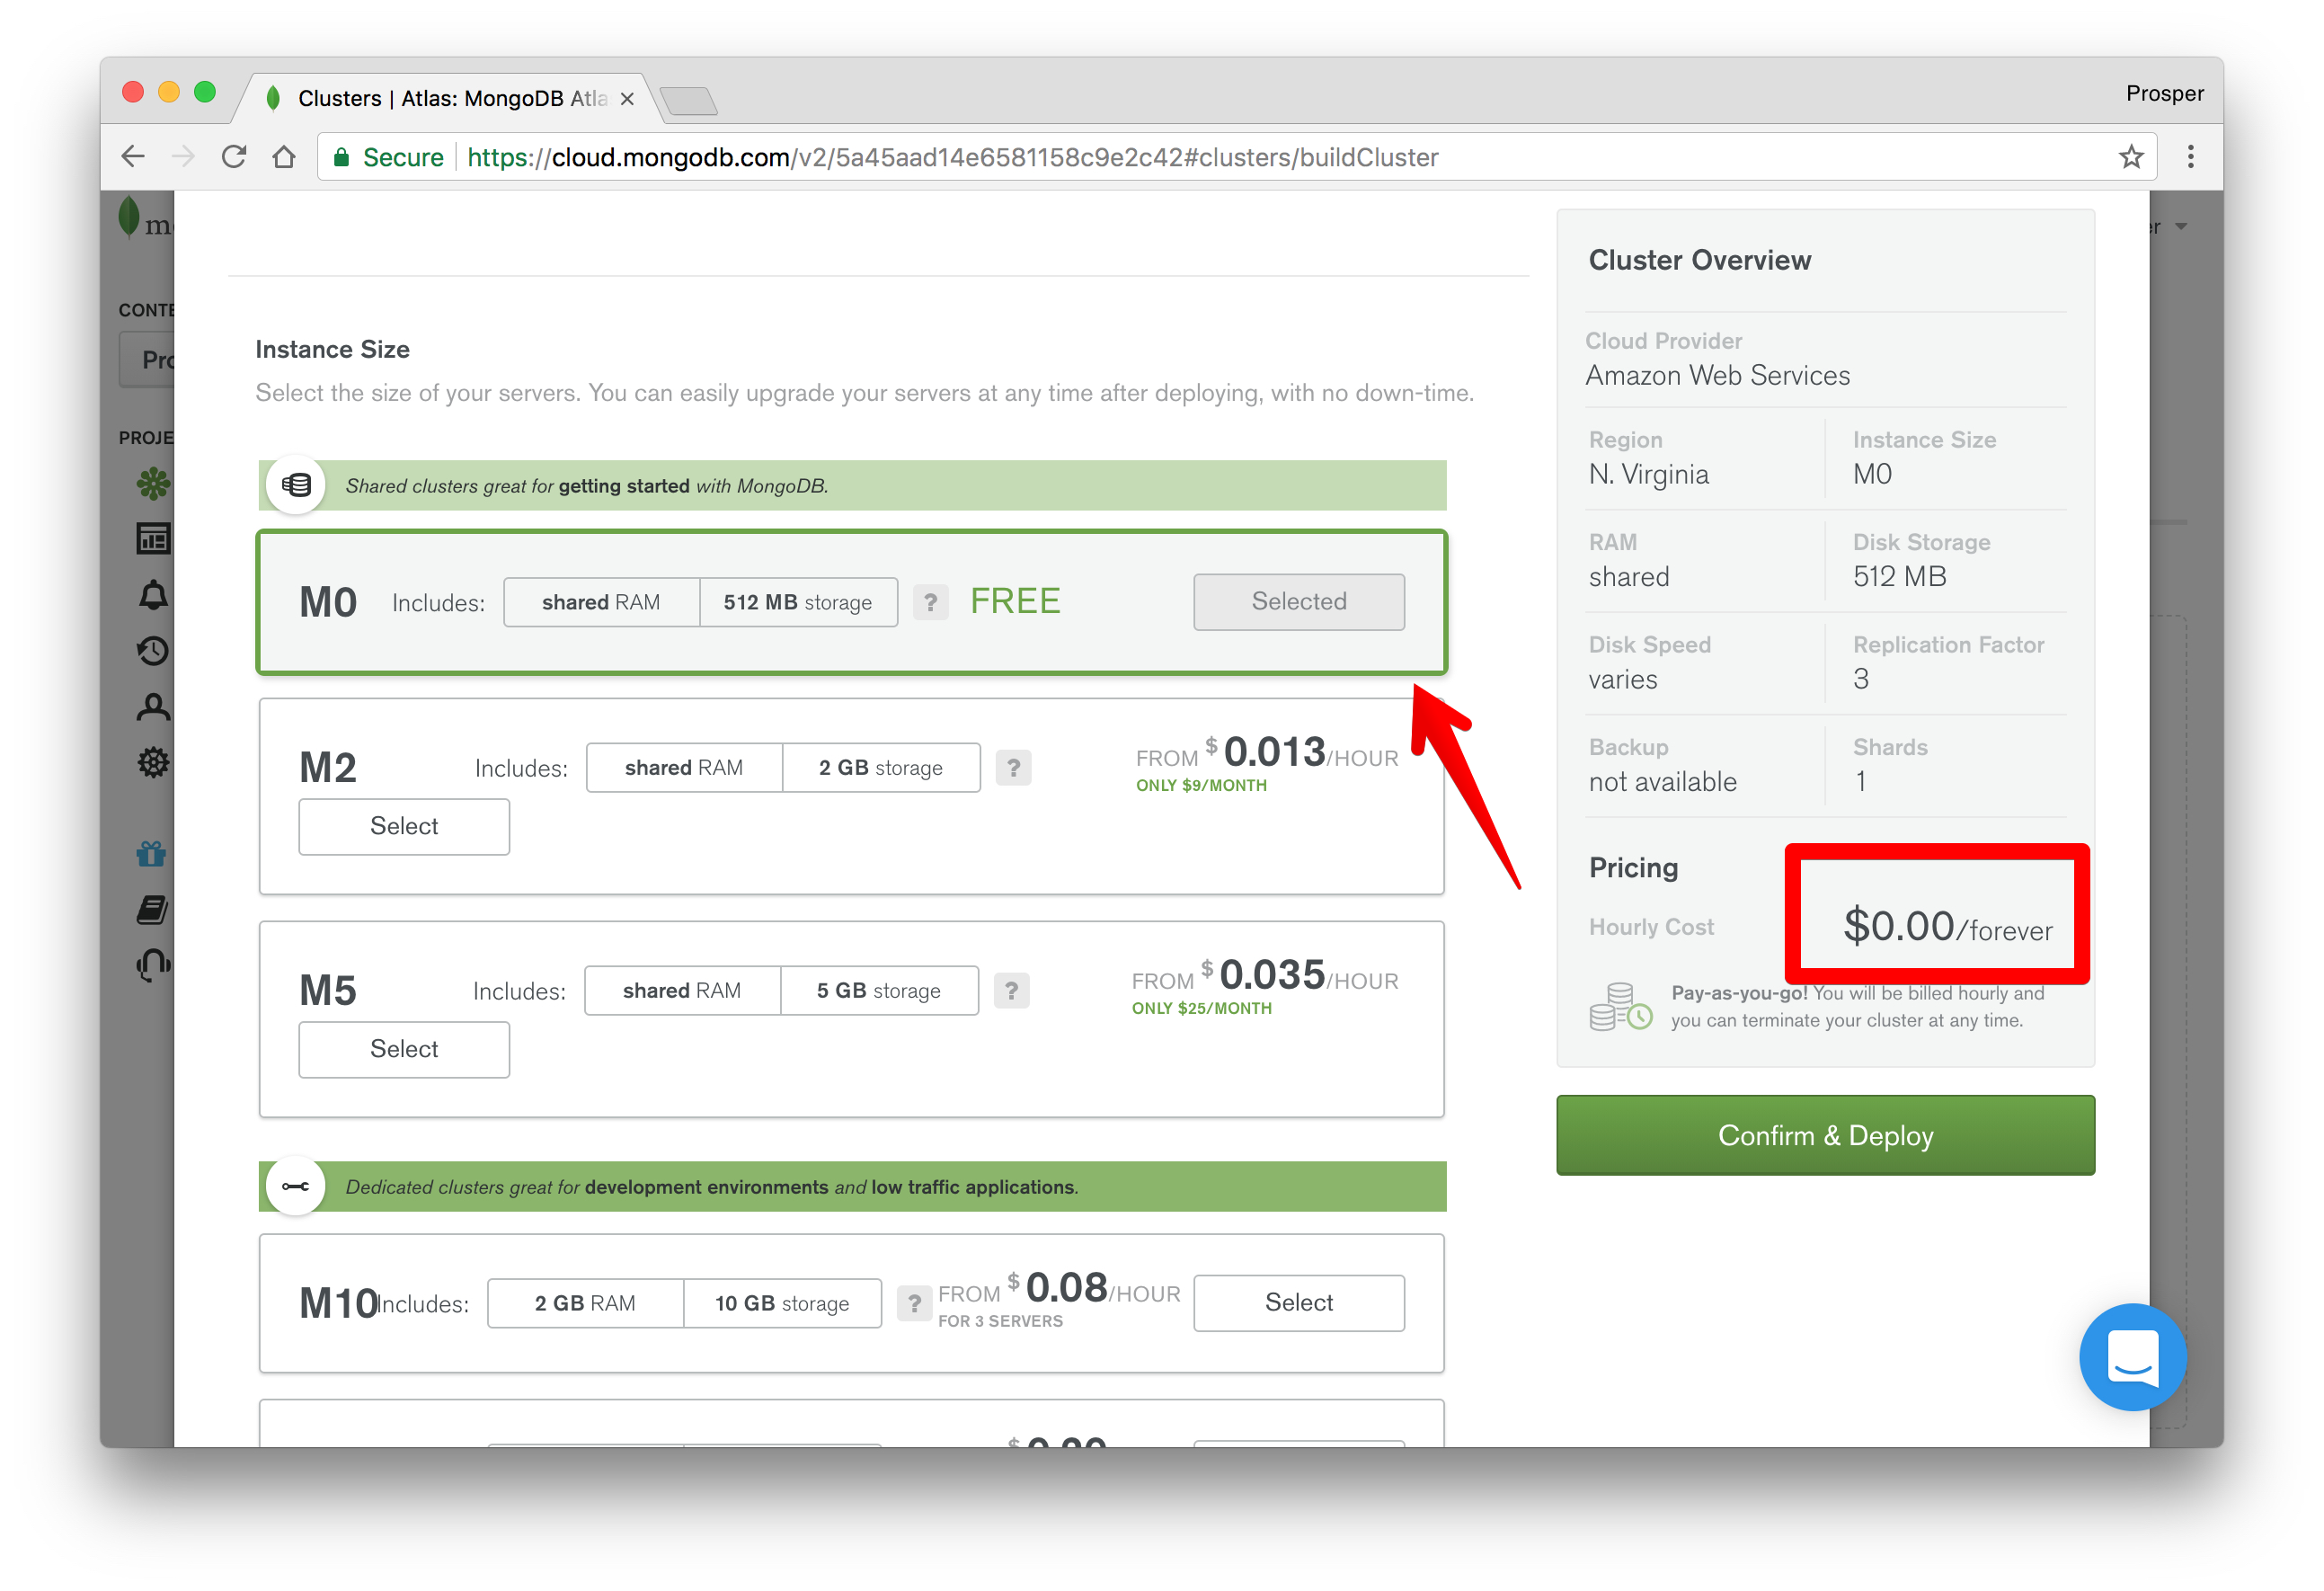
- Choose a name for your cluster, a cloud provider, and region like so:
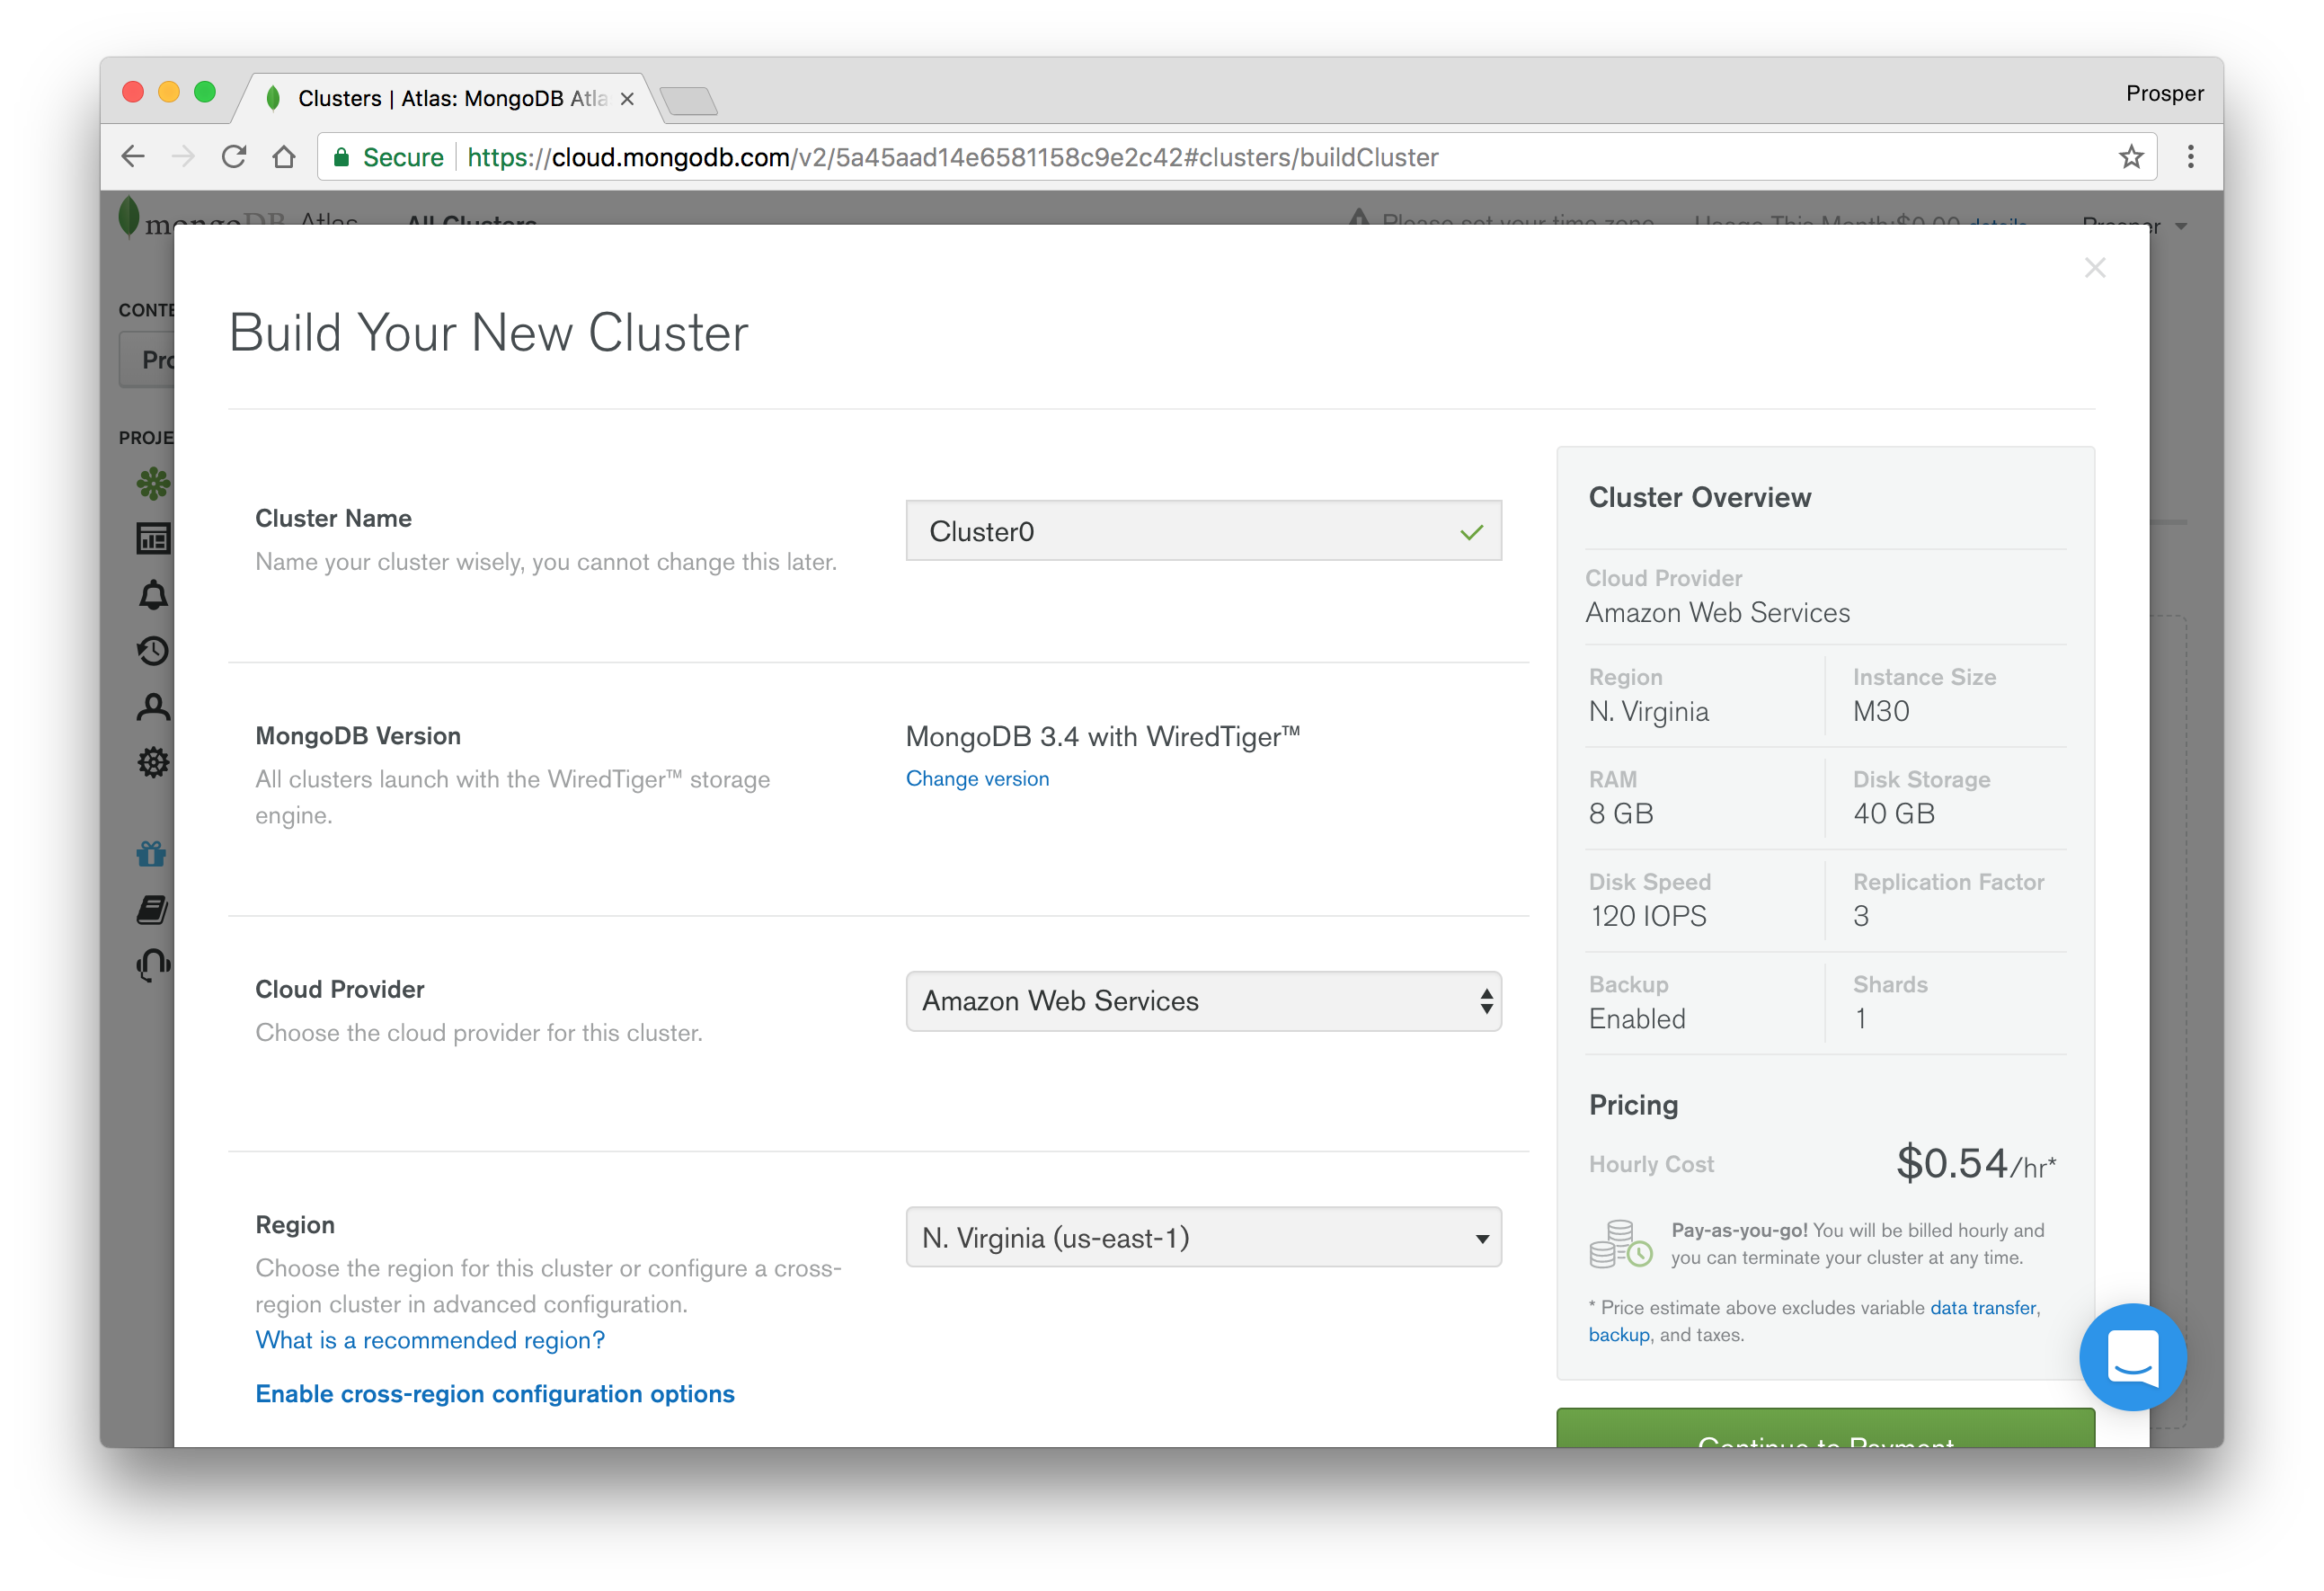
- Scroll down a bit to **Instance size**. Here you can choose a plan for your app. I chose the free version for the purpose of this tutorial. The free version is also great for prototyping, POCs, and demos.
- Scroll down and provide a username and password that your app will use to connect to your cluster.
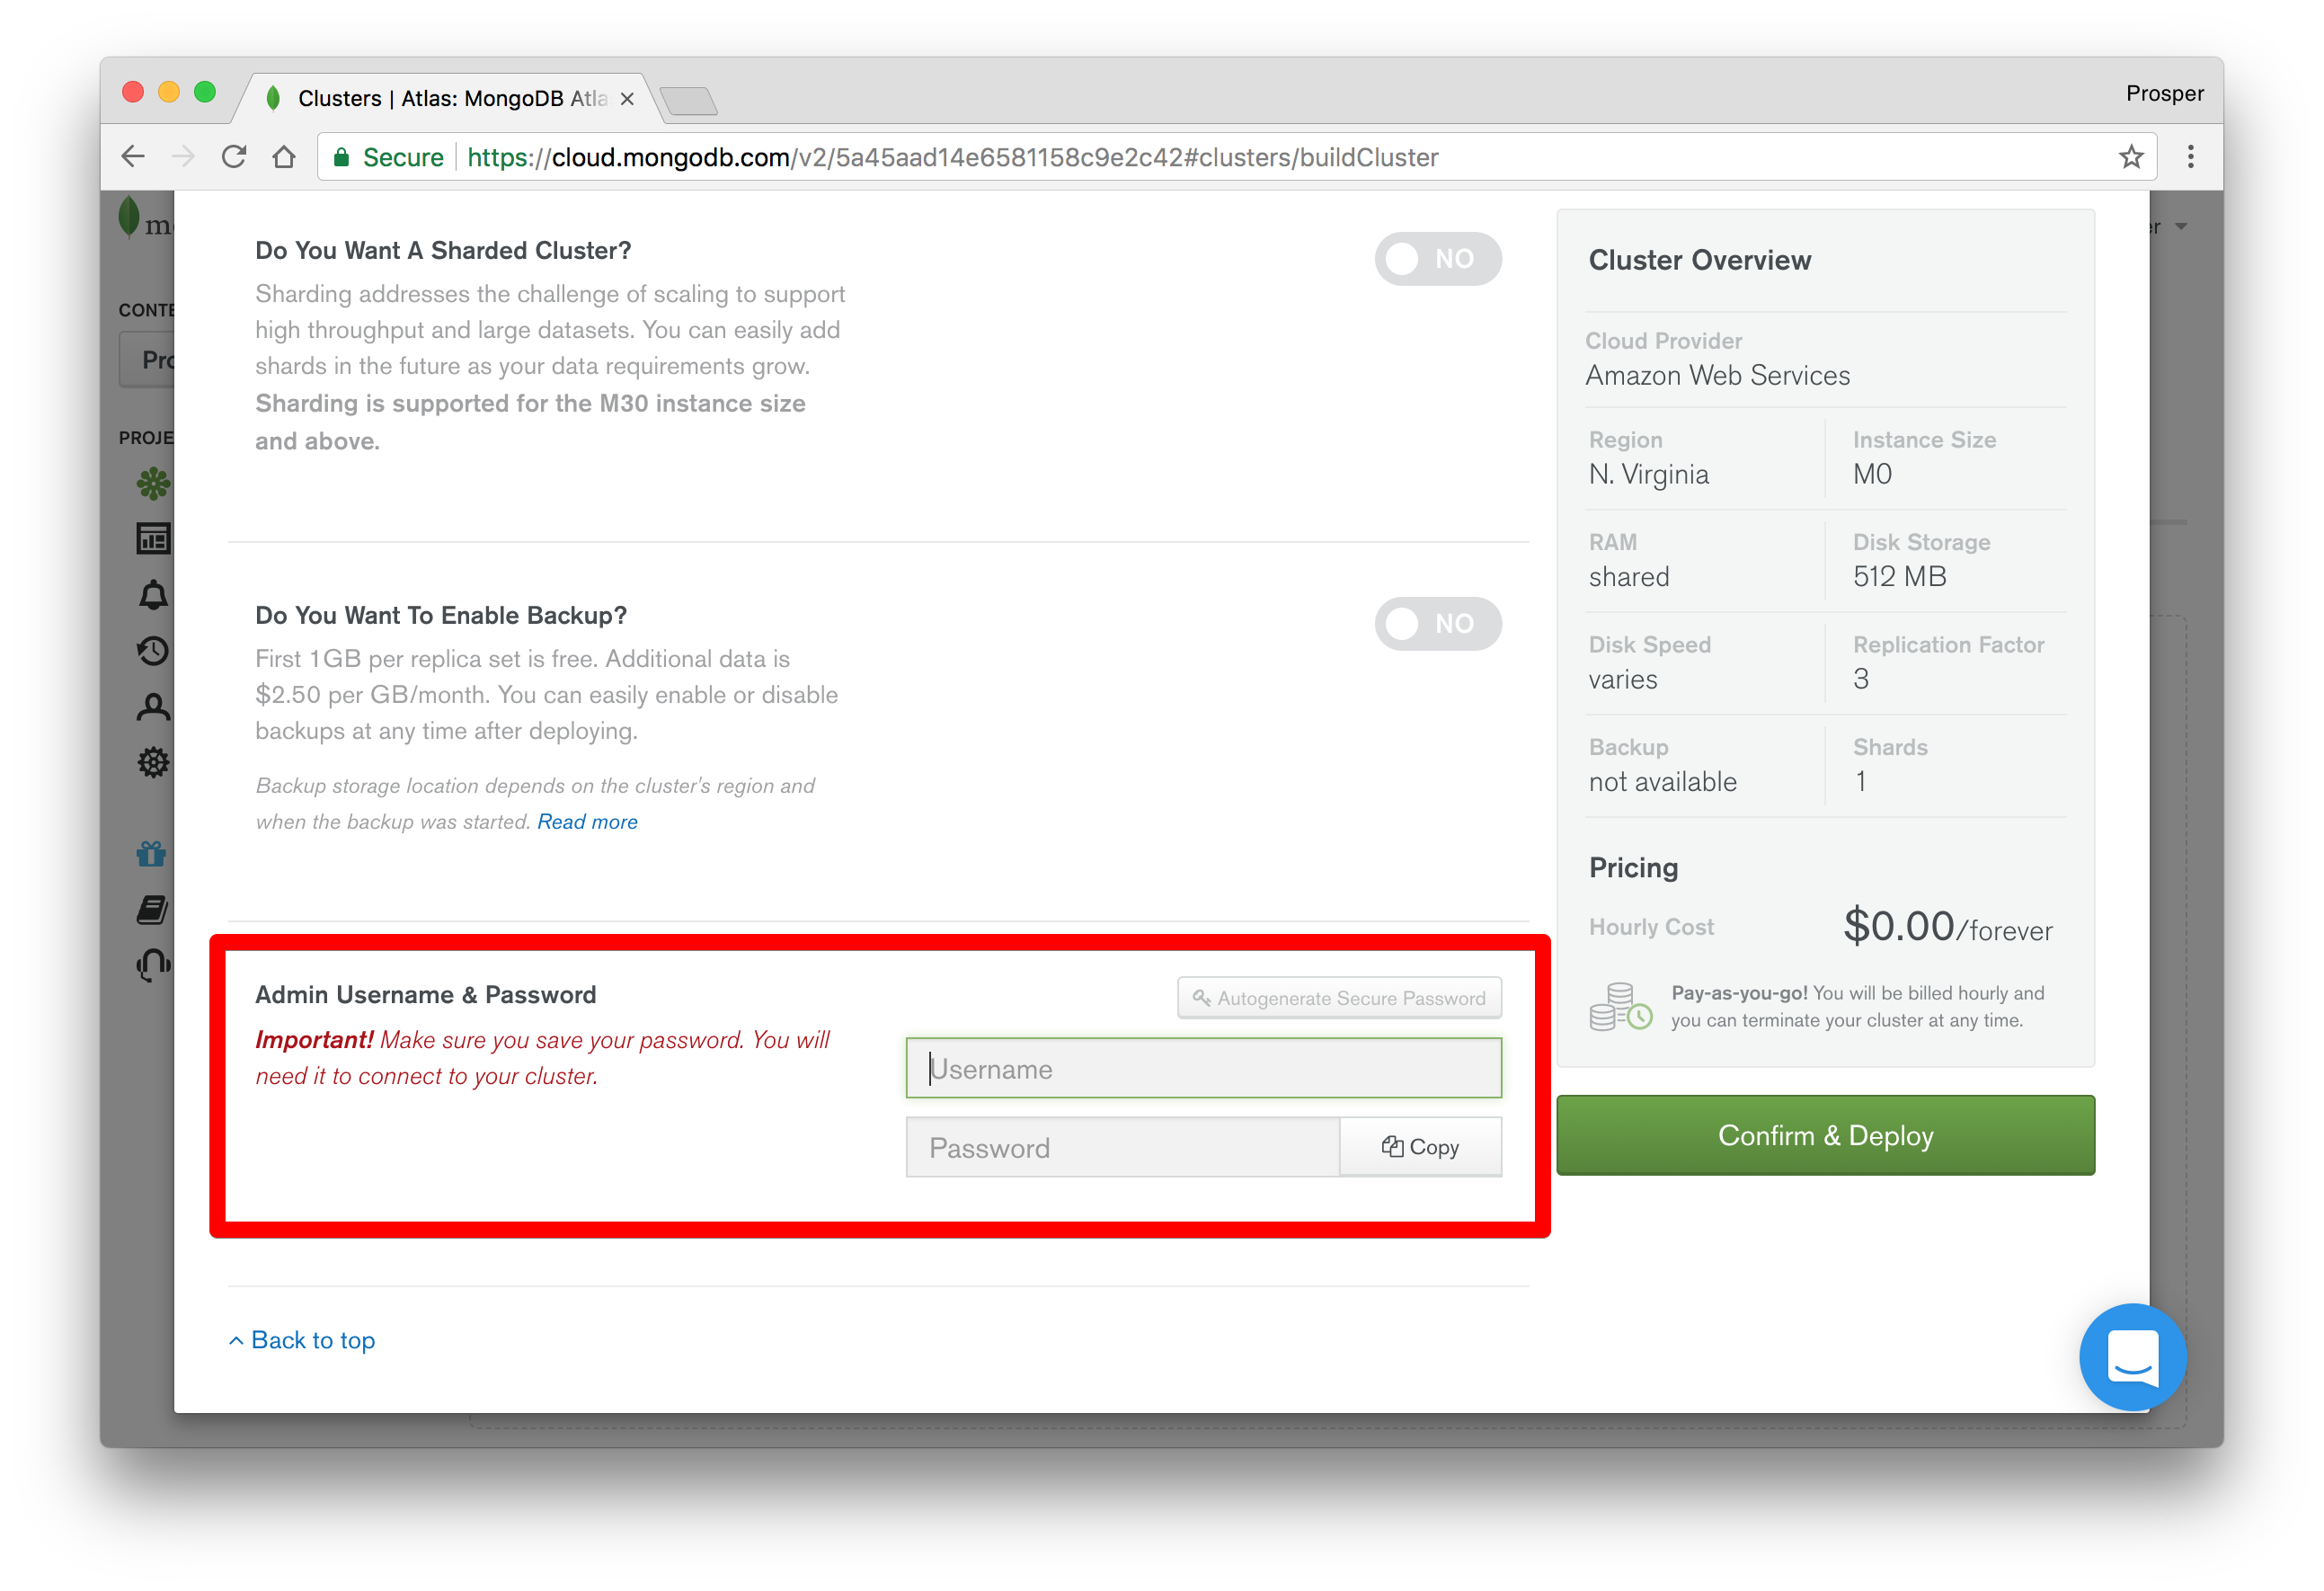
- Click on _Confirm and Deploy_. Confirm that you are not a robot and your cluster will be created within seven to ten minutes. It's noteworthy to let you know that this is the longest time I've seen a service take to provision a fresh database cluster.
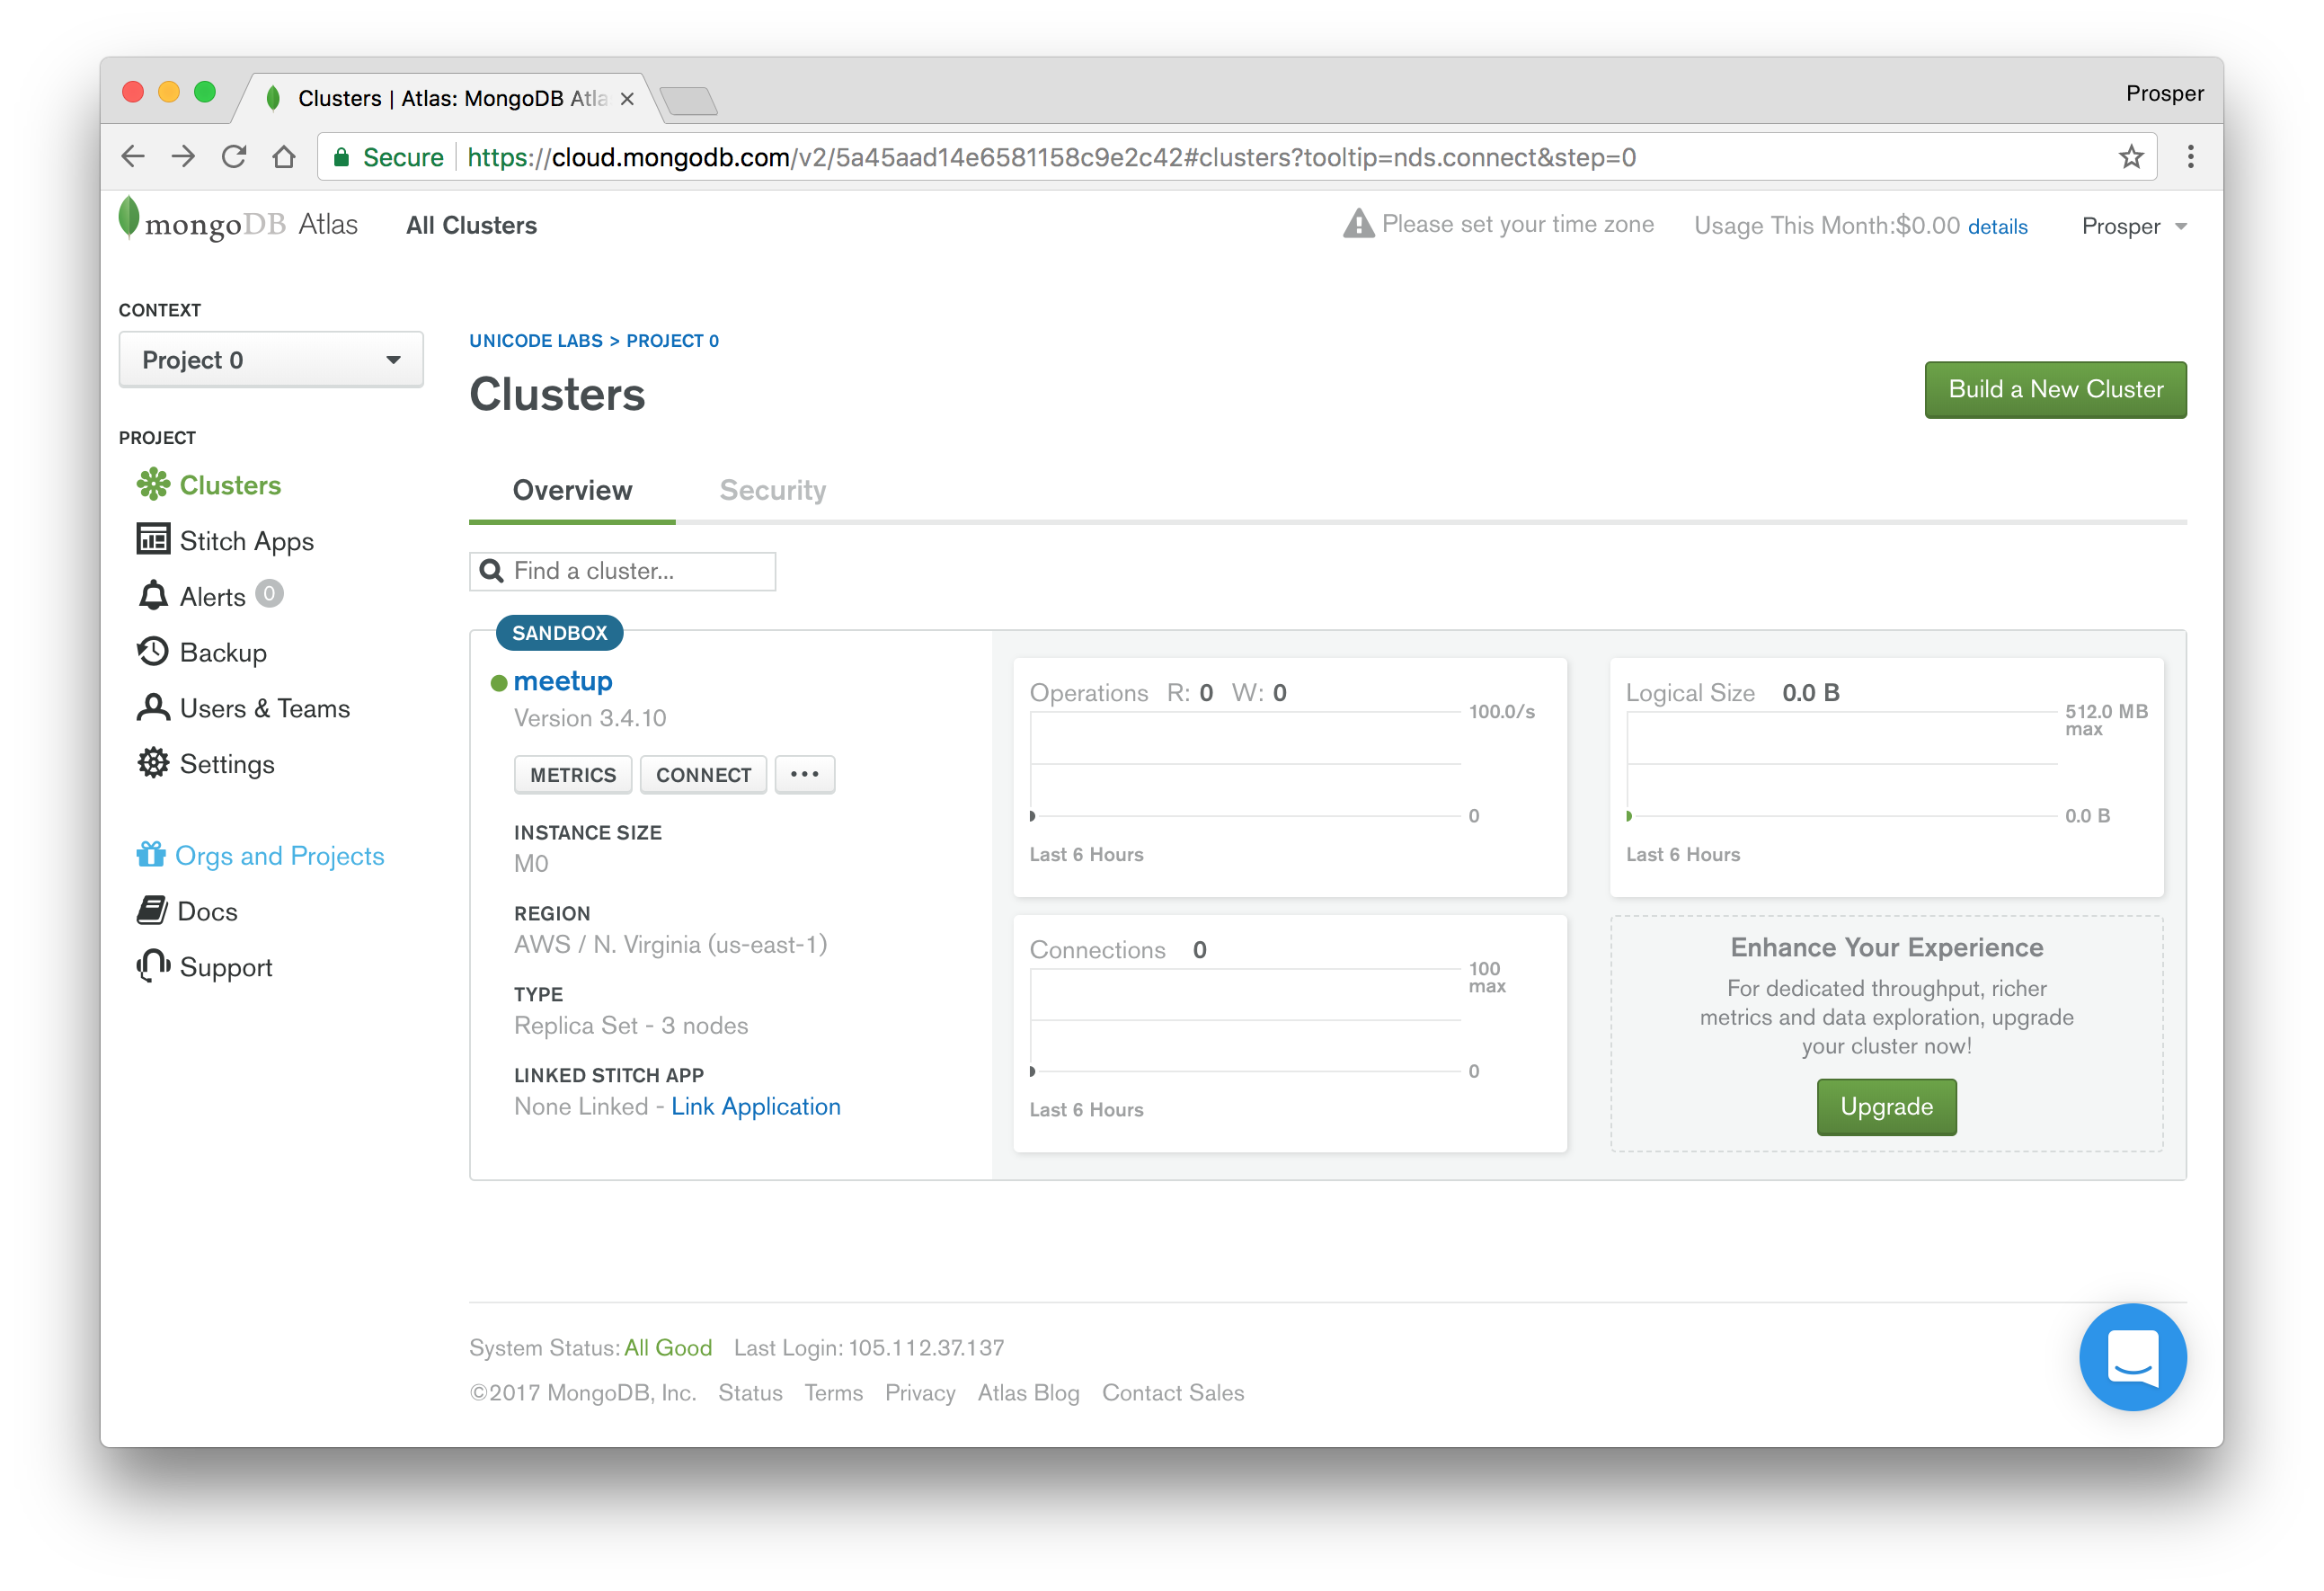
- Once it is done provisioning, your dashboard should look like so:
- The next step is to click the **Connect** button. You'll be asked to whitelist an IP address or you can simply allow access from anywhere. I particularly like this feature, for security reasons.
- Choose a connection method. I chose **Connect Your Application** because that's what is needed for our use case.
- Select the MongoDB driver appropriate for your use case and copy the respective URI connection string. Mine is `mongodb://unicodeveloper:@meetup-shard-00-00-hjyfh.mongodb.net:27017,meetup-shard-00-01-hjyfh.mongodb.net:27017,meetup-shard-00-02-hjyfh.mongodb.net:27017/test?ssl=true&replicaSet=meetup-shard-0&authSource=admin`.
> Note: Replace `test` with the name of your database, else all your data will be stored in `test` database.
### Amazon DynamoDB
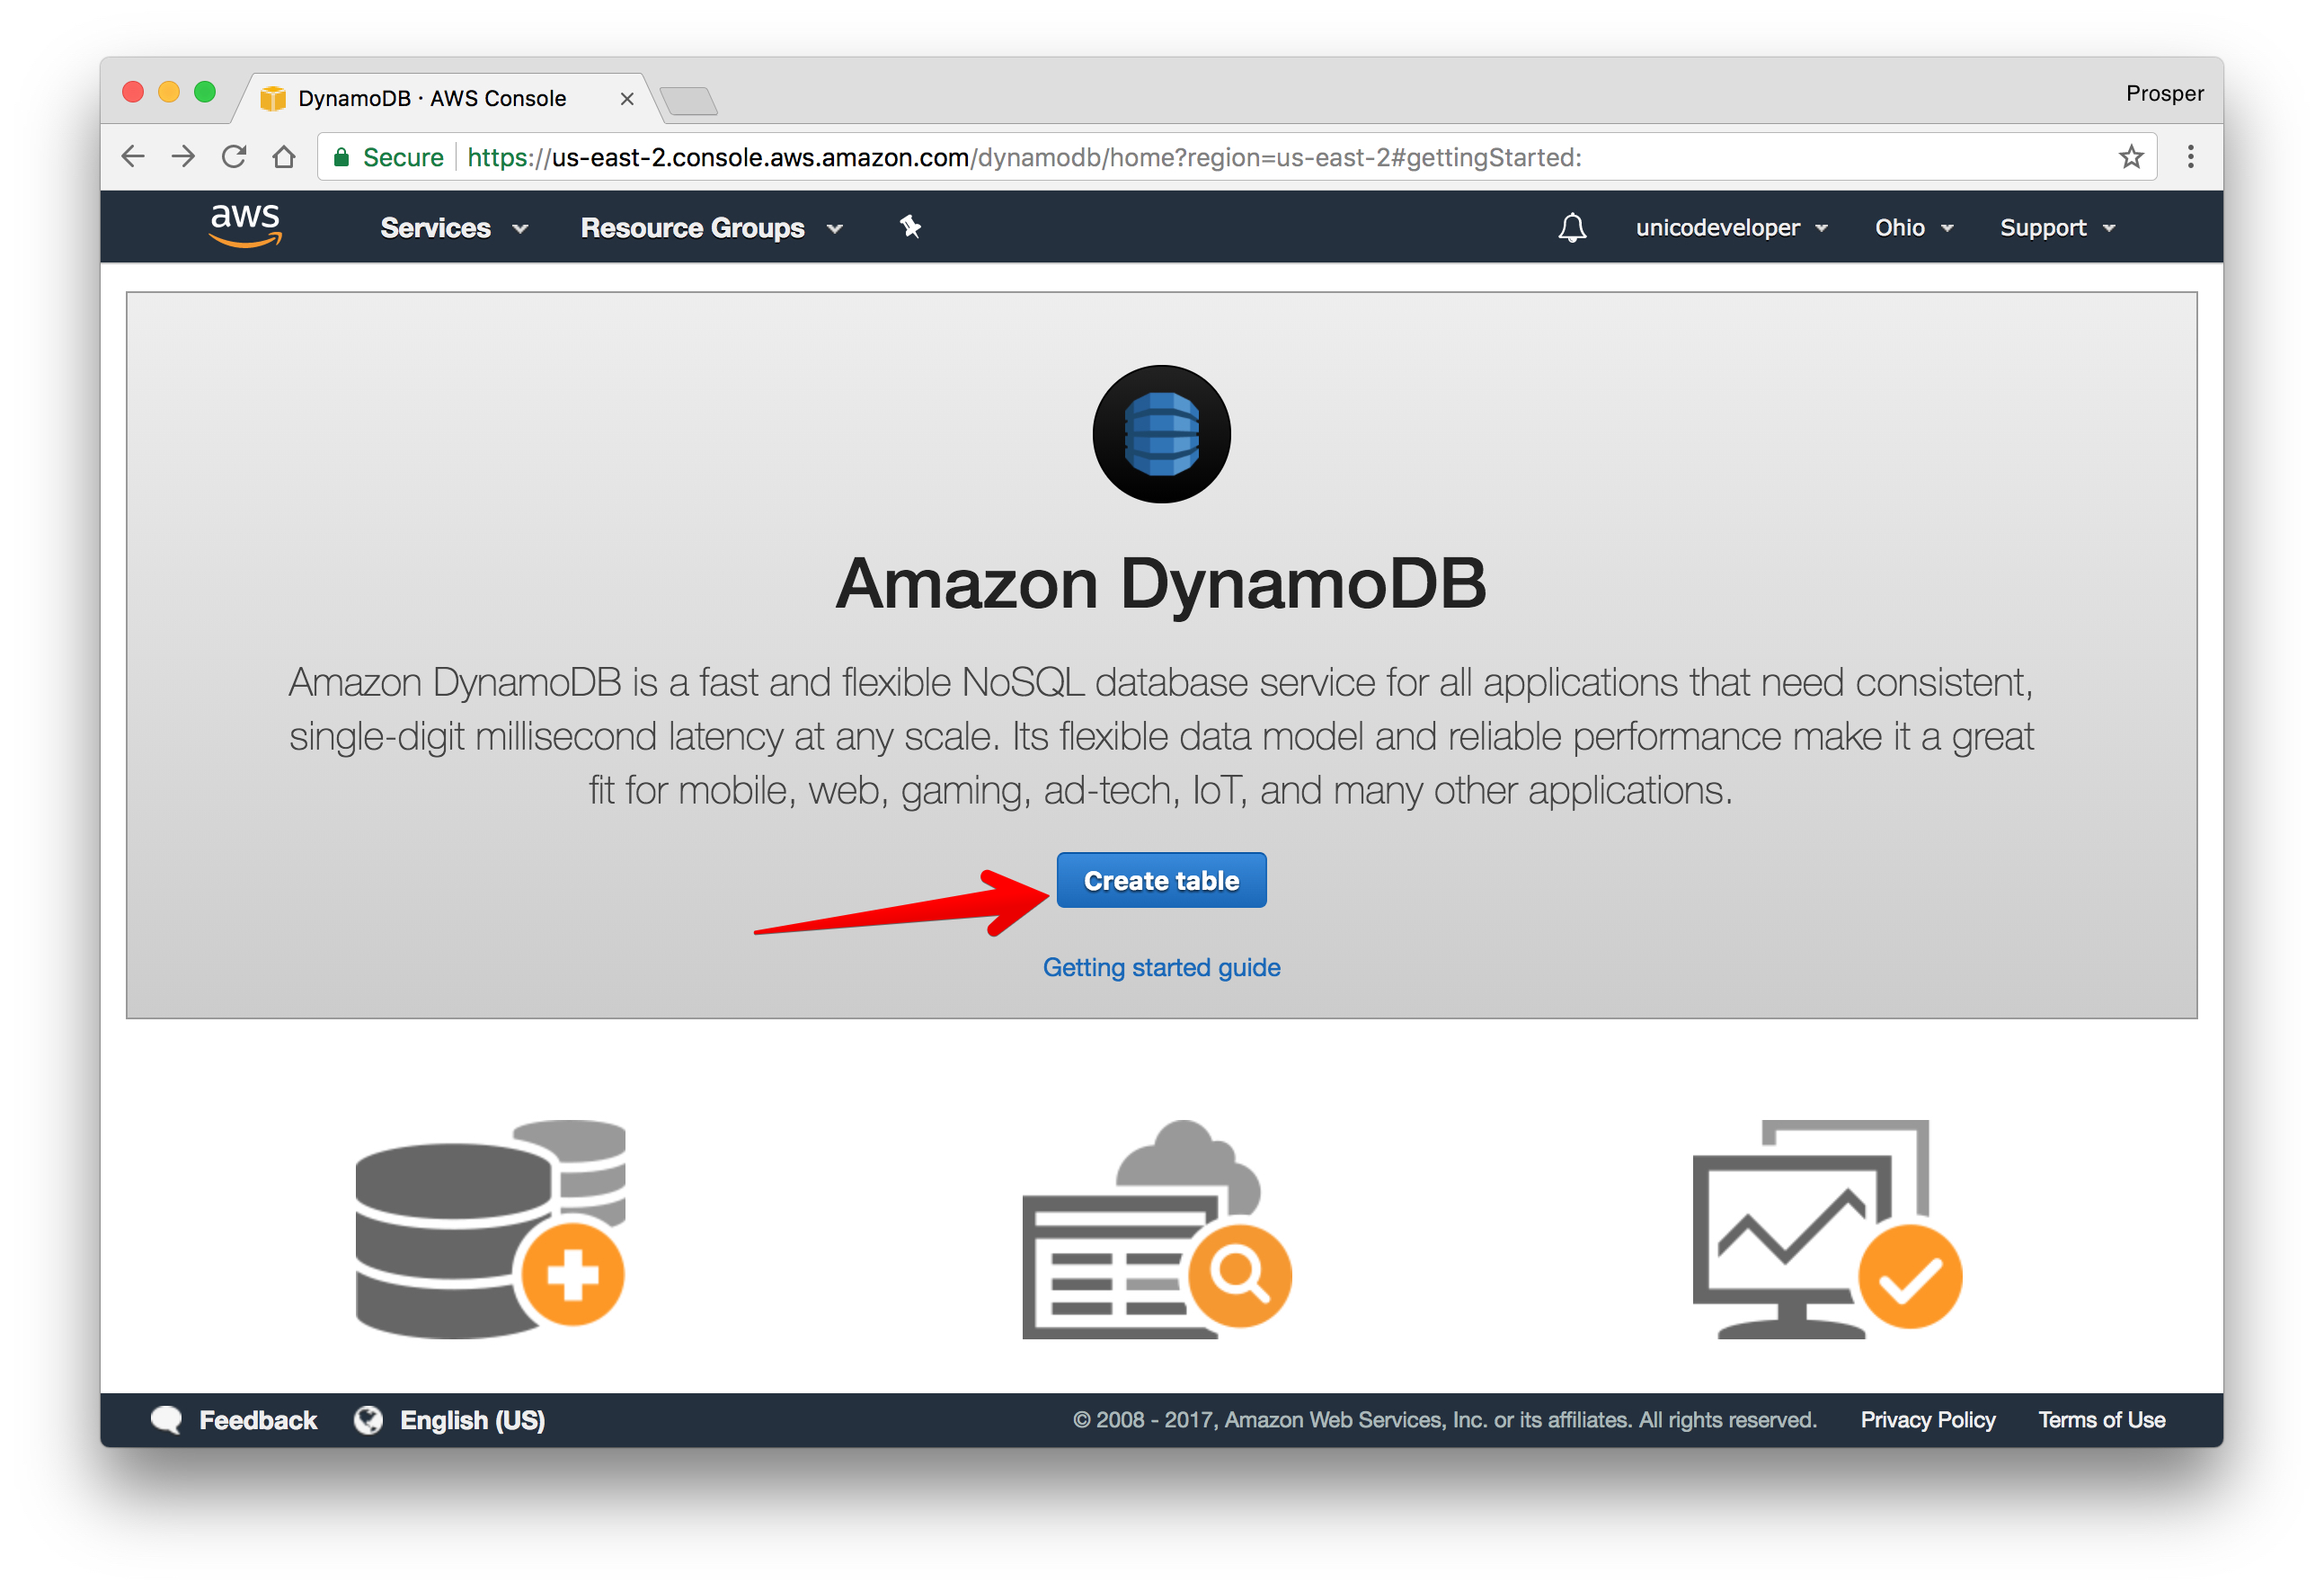
Amazon DynamoDB is a cloud platform that provides a fast and flexible NoSQL database service. Head over to [Amazon DynamoDB](https://aws.amazon.com/dynamodb/).
- If you don't have an AWS account, sign up for one.
- Head over to the database section and select _Amazon DynamoDB_.
- Create a table.
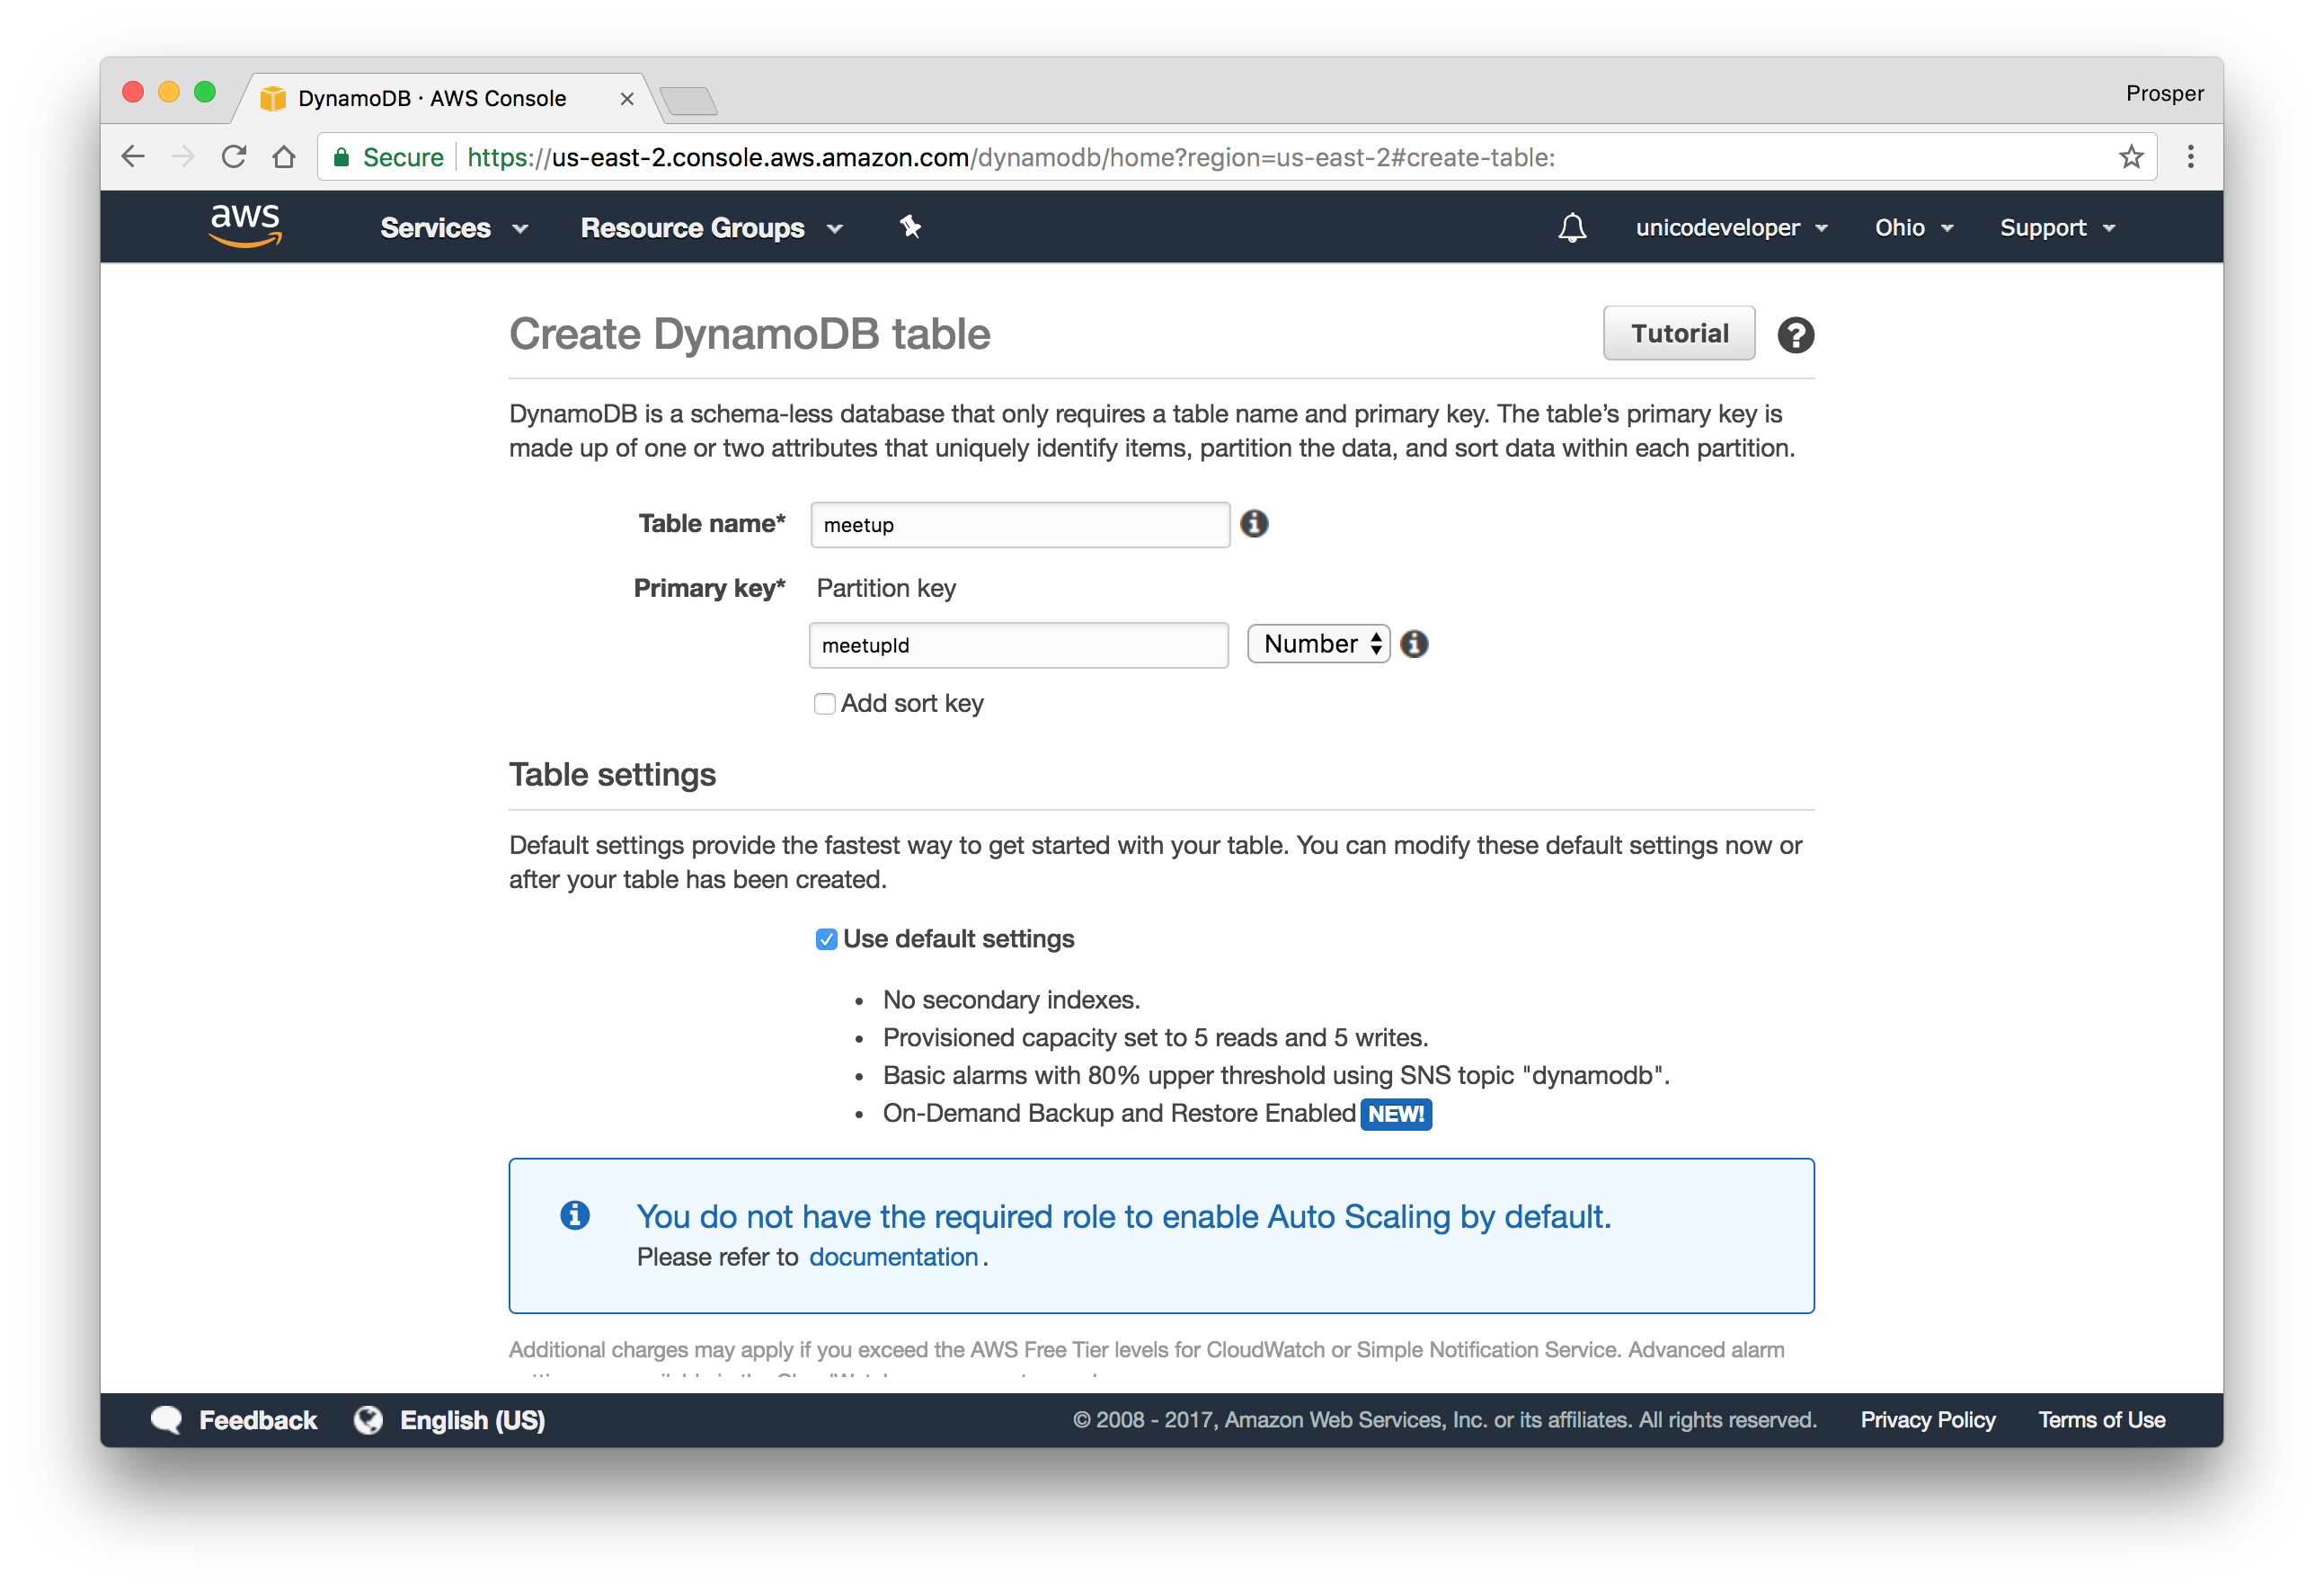
- Follow [this instruction to install the Node.js AWS SDK](http://docs.aws.amazon.com/amazondynamodb/latest/developerguide/GettingStarted.NodeJs.html), get the access key and connect to the DynamoDB table.
- You can't have more than 256 tables per account.
### Microsoft Azure CosmosDB
Microsoft Azure CosmosDB is a cloud platform that provides a globally distributed, multi-model database service. It provides native support for NoSQL choices, and offers multiple well-defined consistency models. To provision a database on Microsoft Azure platform, you need to follow these steps:
- Create a new [account](https://portal.azure.com).
- Select `Azure Cosmos DB` by the left sidebar and create database.
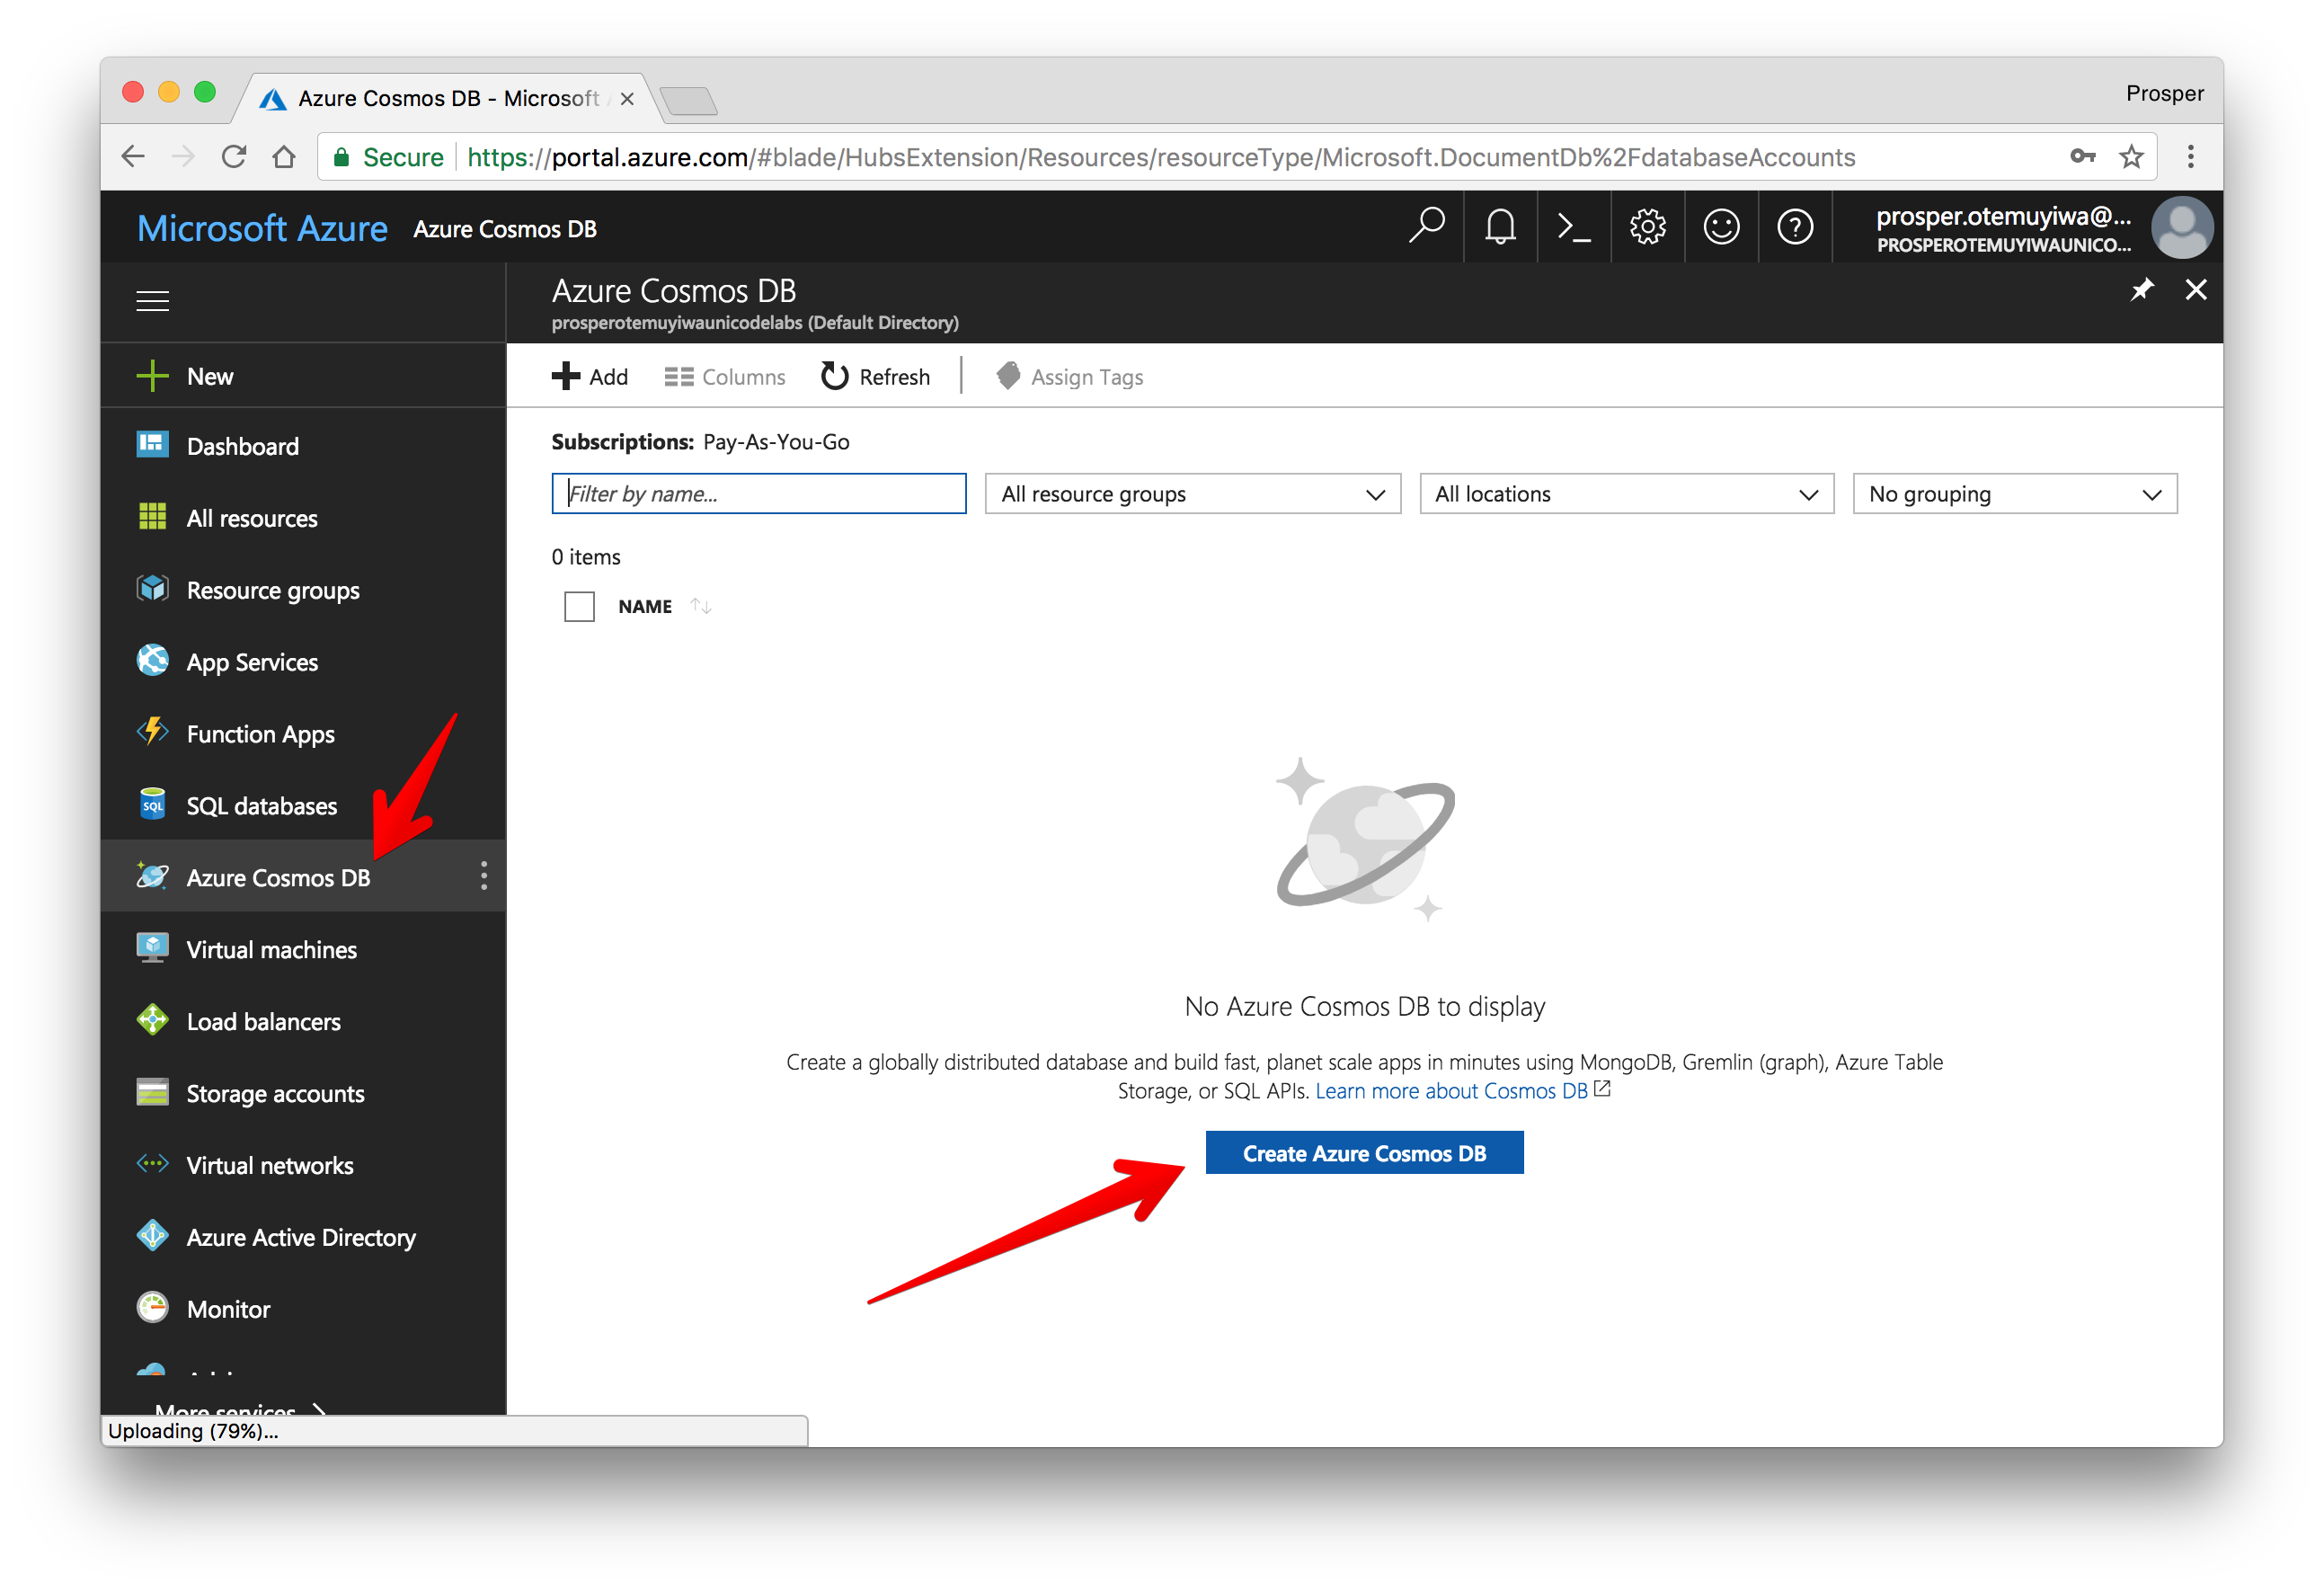
- During creation, select the type of database you want under **API**.
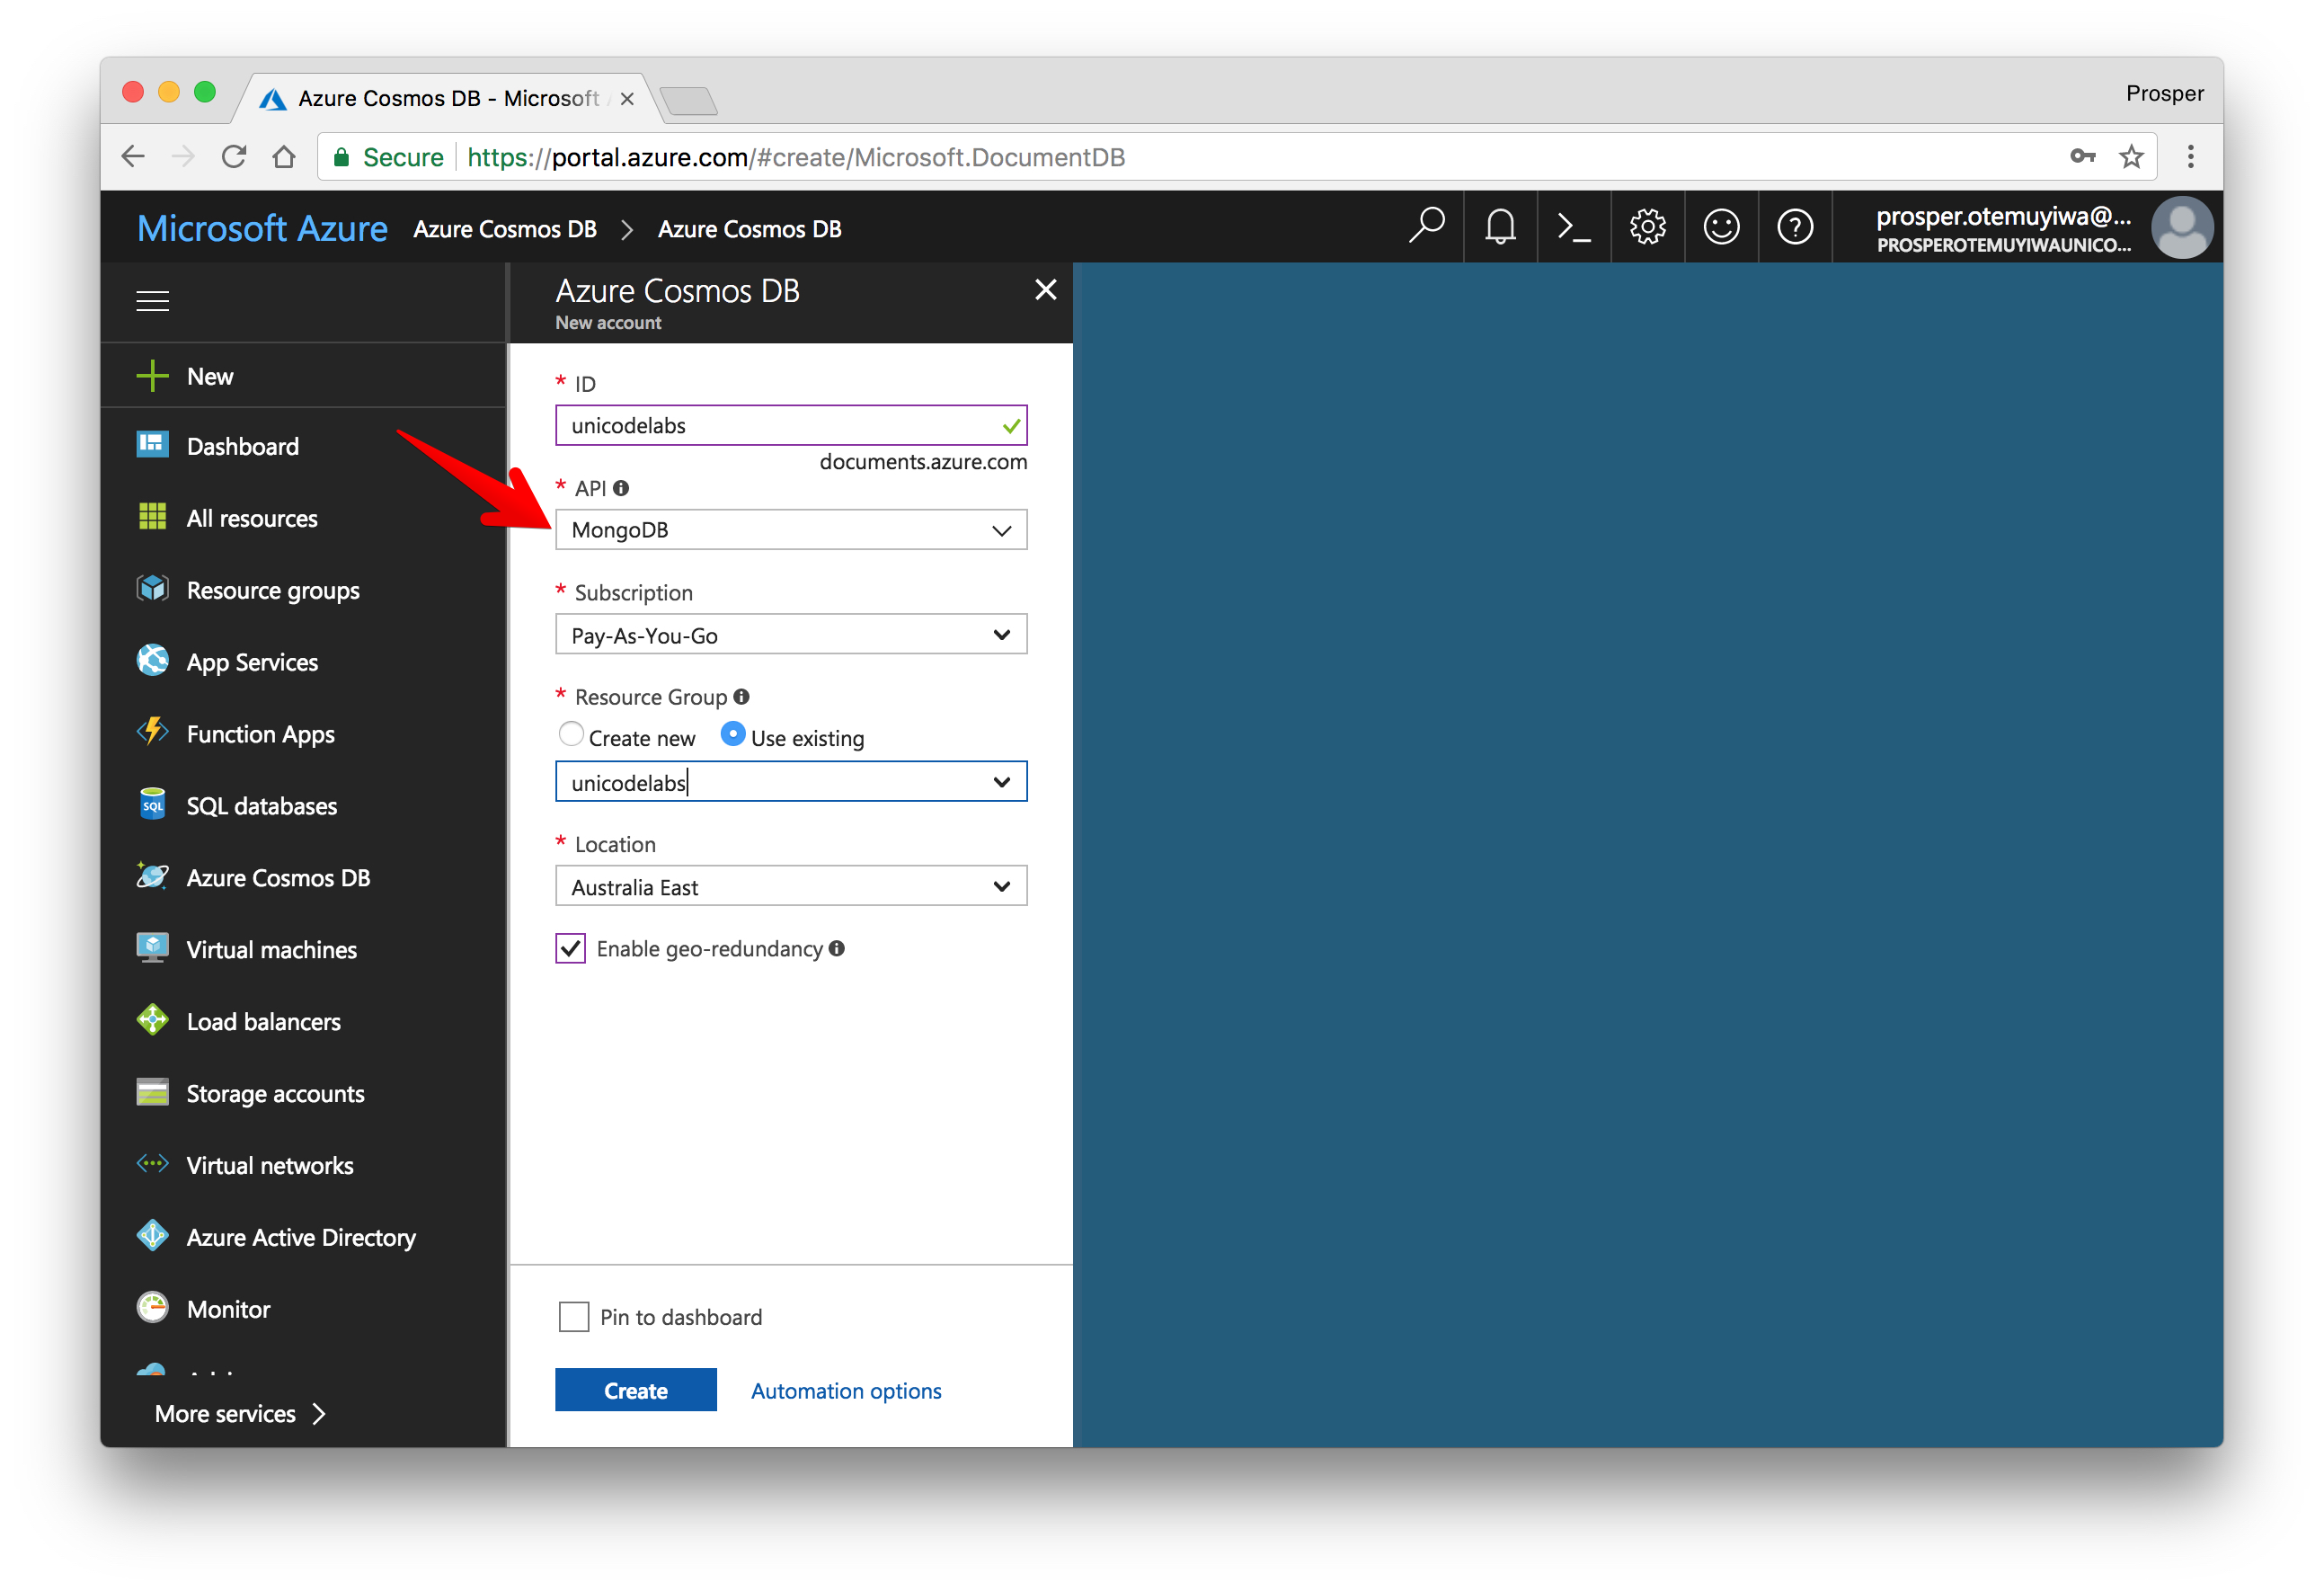
- Once you are done, create the database and click on _Show database connection strings_.
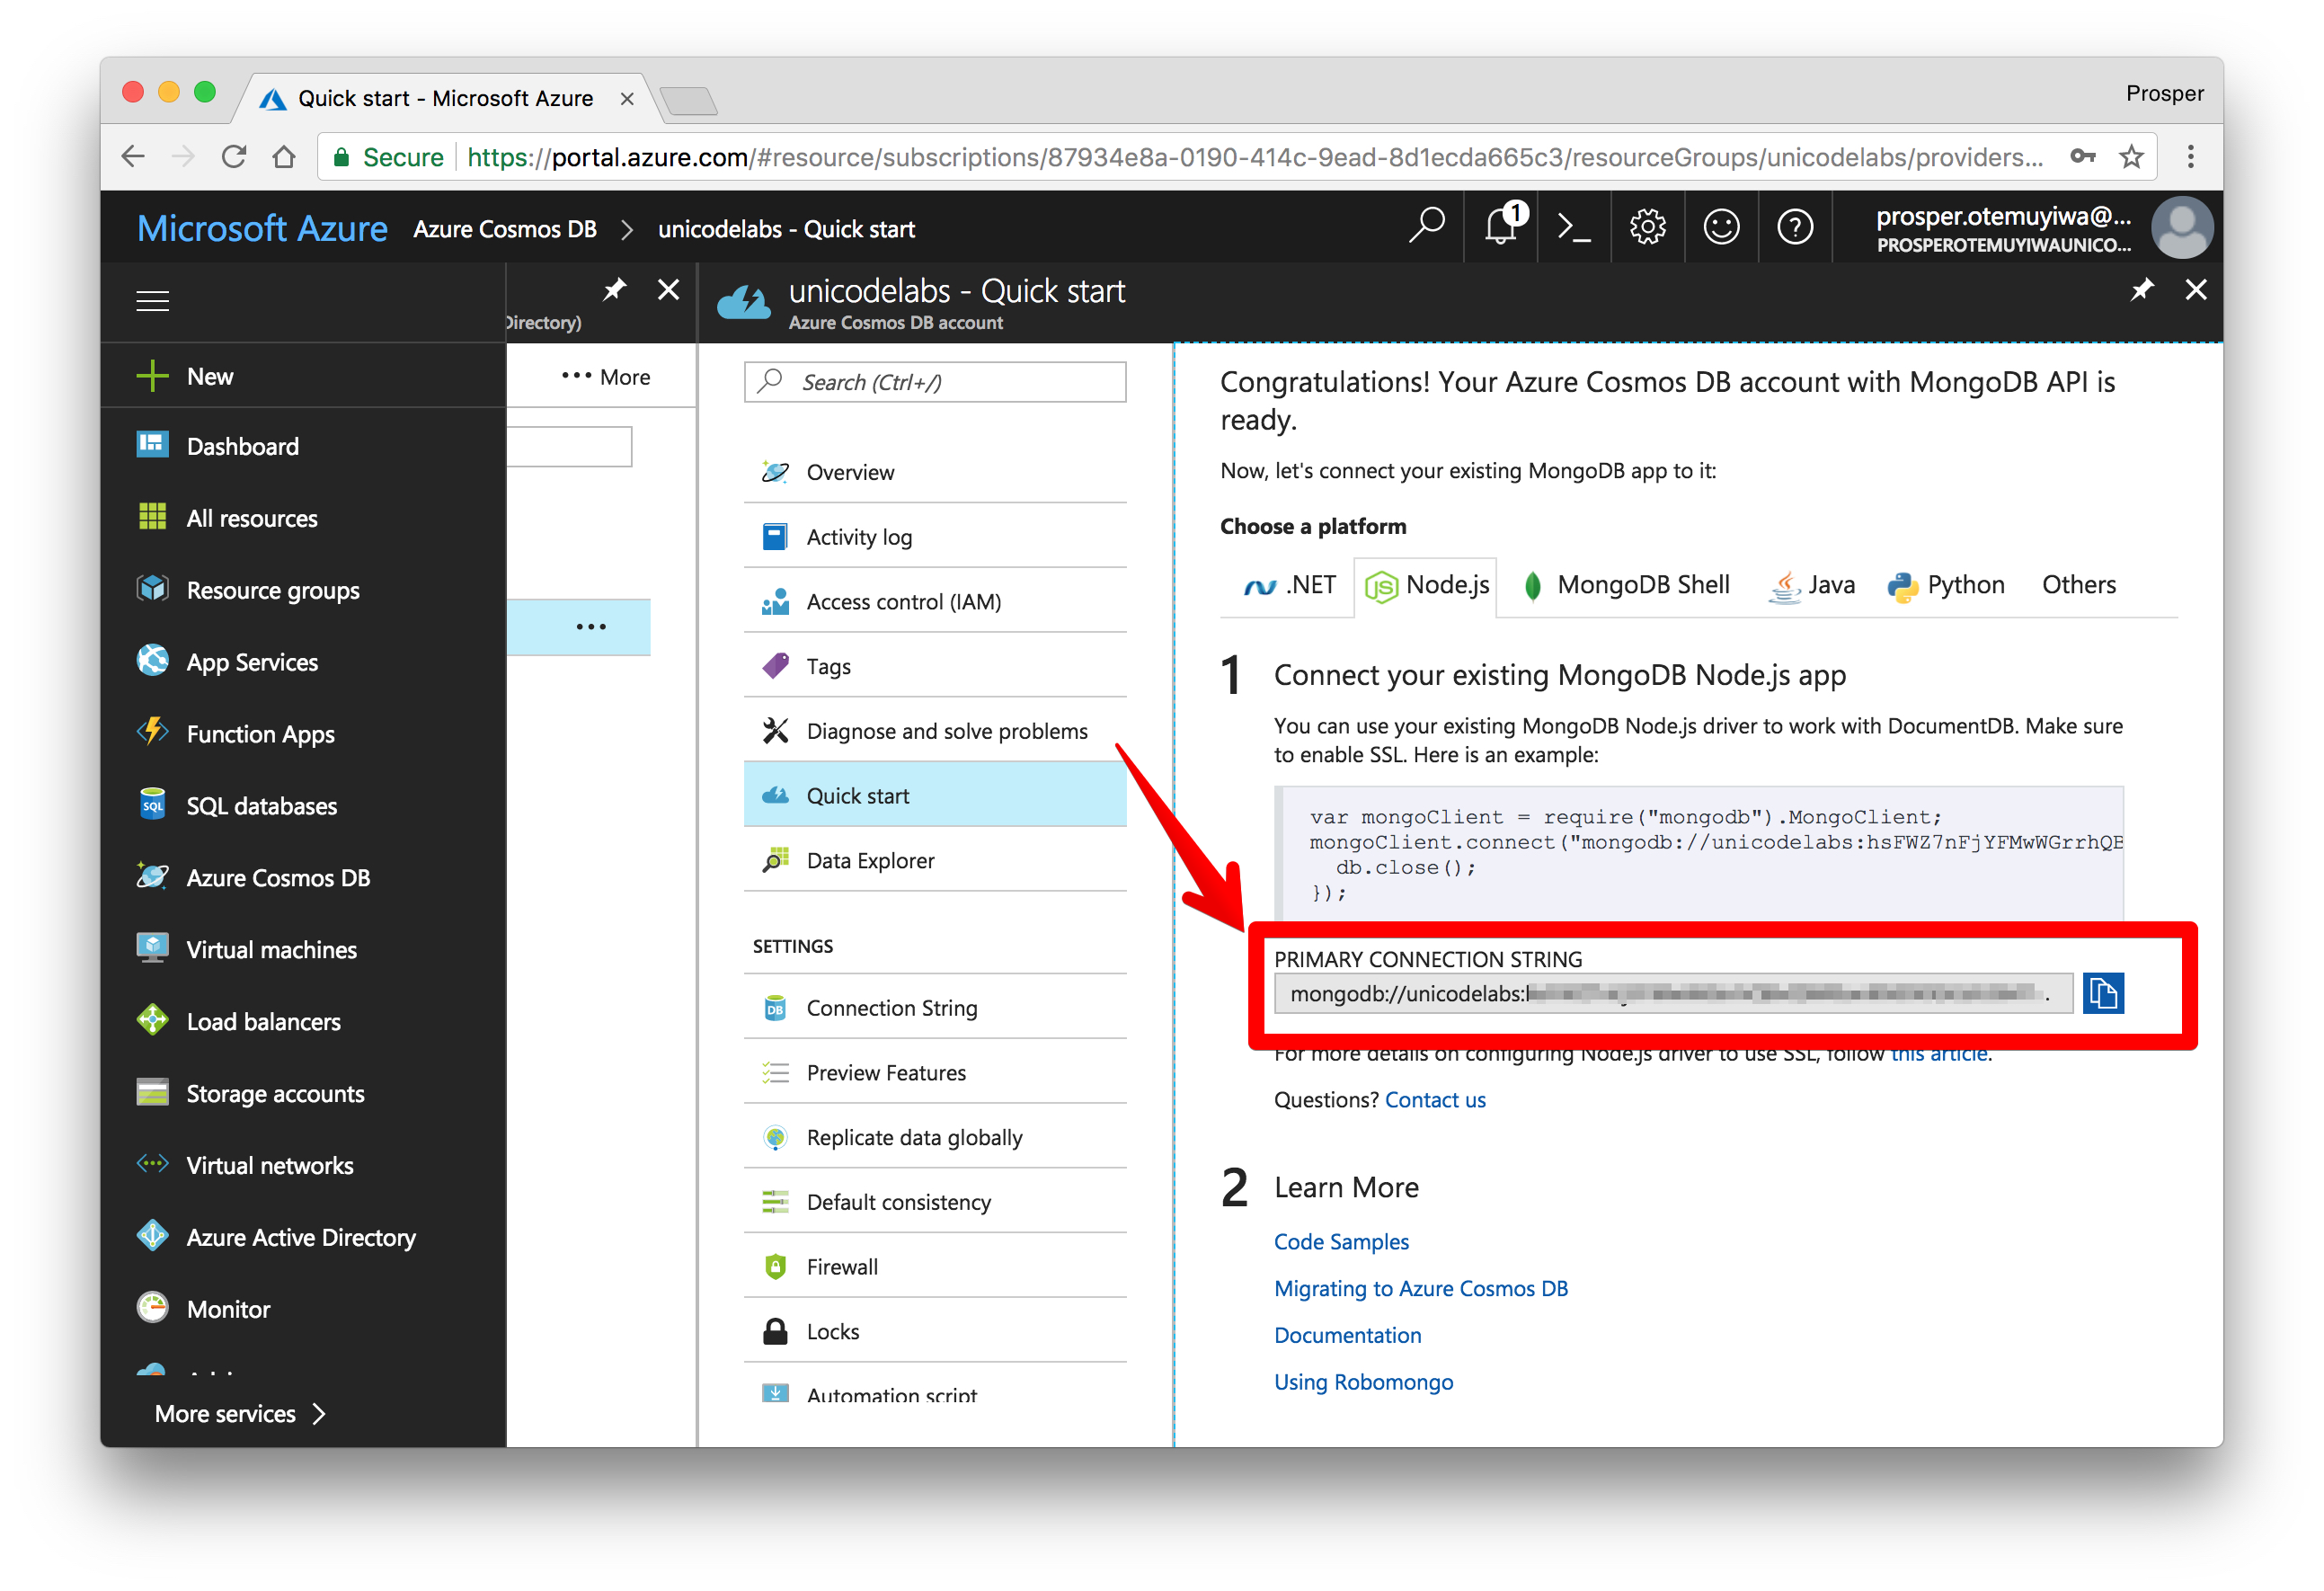
Use the URL Connection string in your application to connect to the remote database.
### Cloud Firestore
Cloud Firestore is a cloud-hosted, NoSQL database that your iOS, Android, and web apps can access directly via native SDKs. It is currently in beta release. It supports the following:
- Flexible, hierarchical data structures.
- Stores data in documents, organized into collections.
- Queries for retrieving individual, specific documents or to retrieve all the documents in a collection that match your query parameters.
- Real-time updates via data synchronization.
- Offline usage.
Follow the steps below to create a database.
- Sign up for an [account on Firebase](https://console.firebase.google.com/).
- Create a new project.
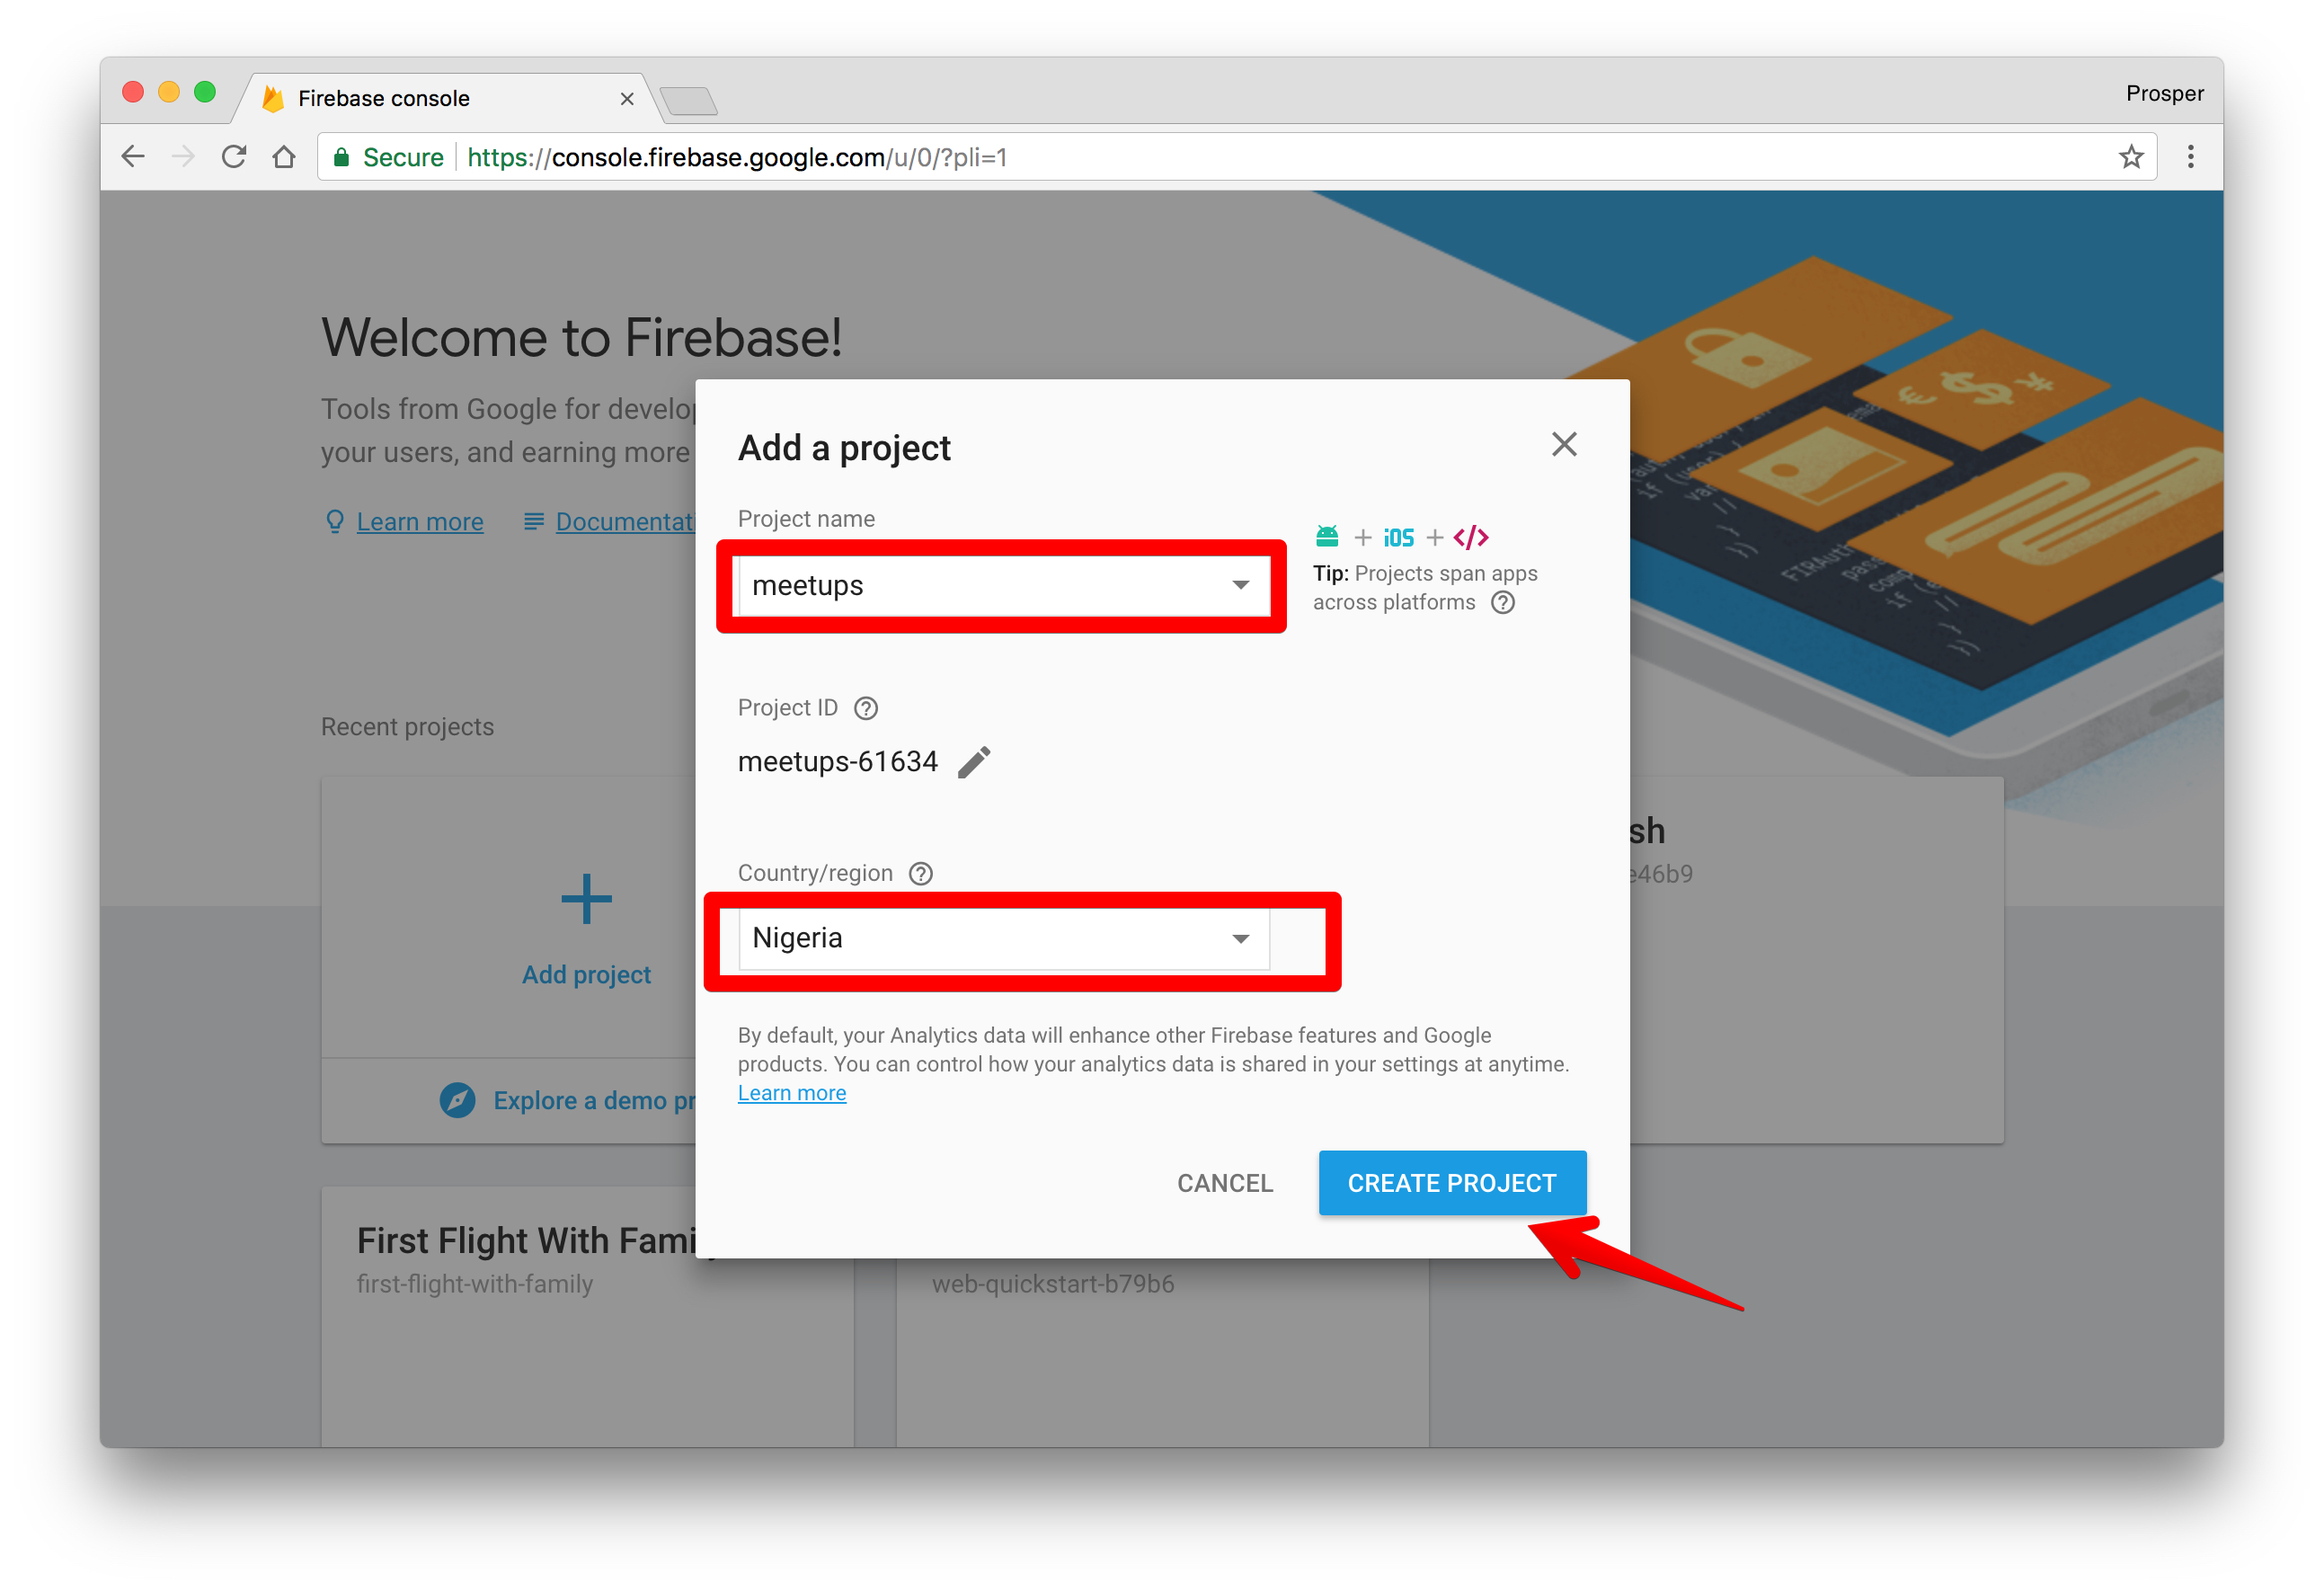
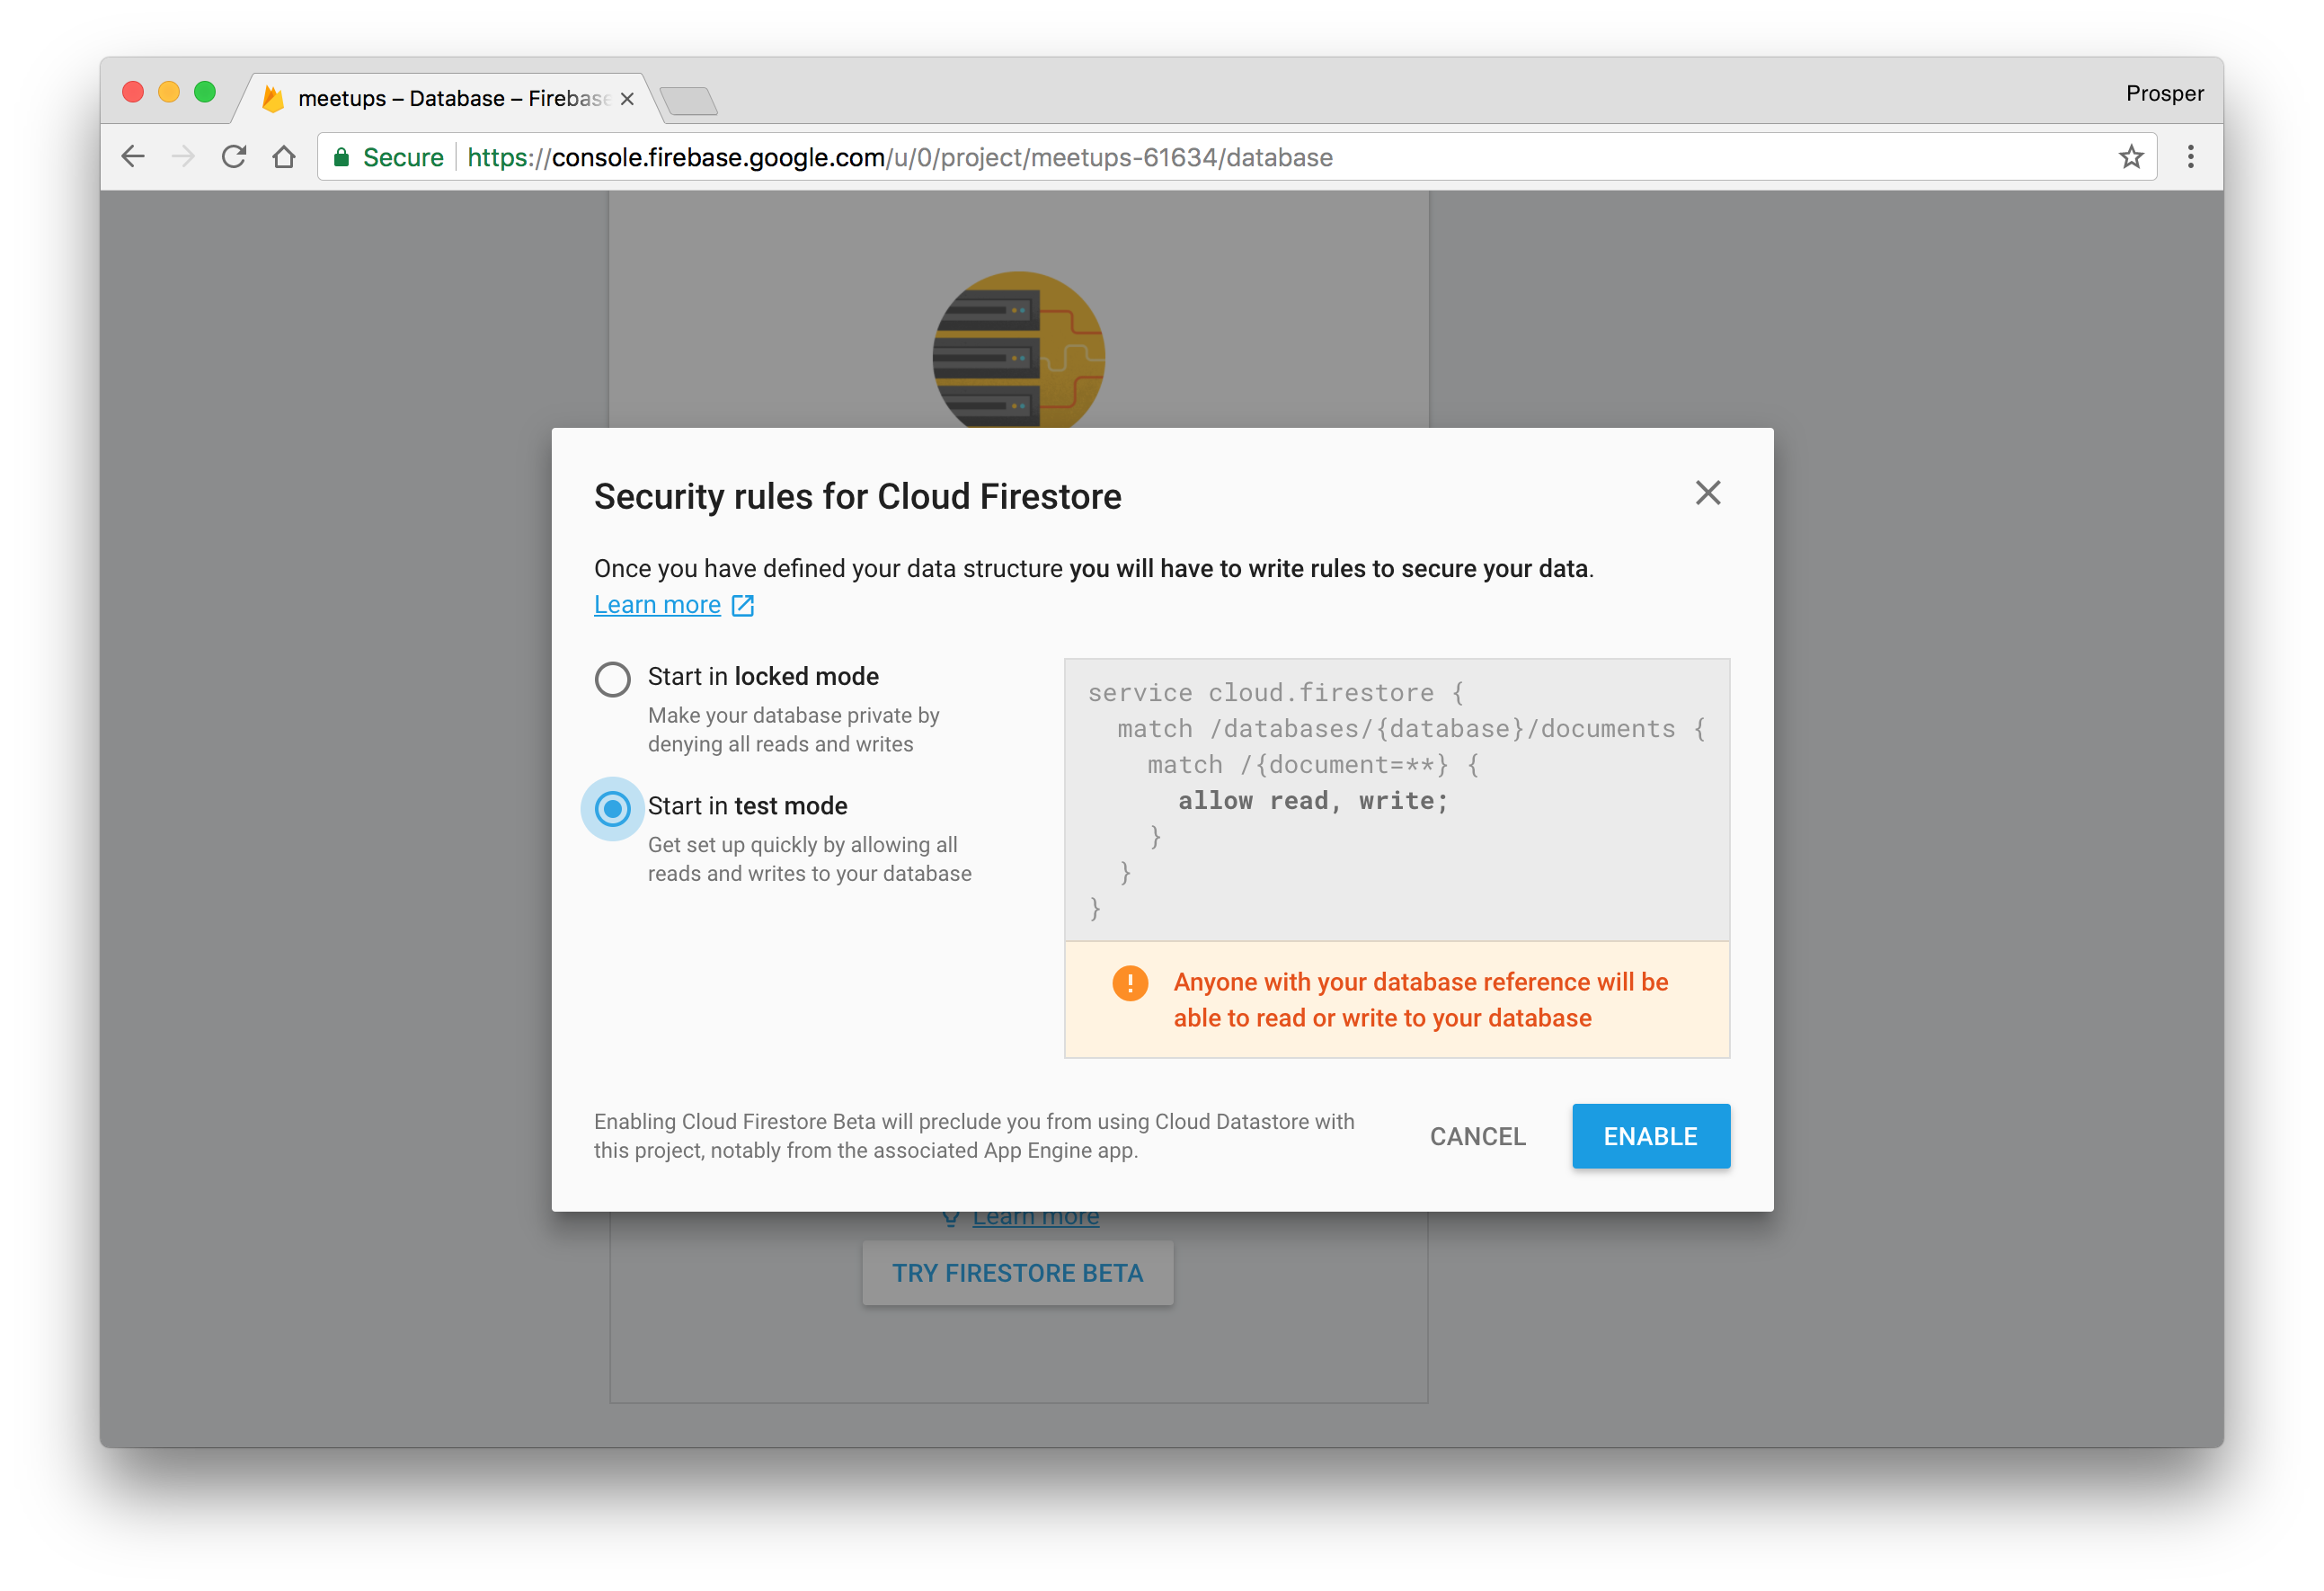
- In the database section, scroll down and click **TRY FIRESTORE BETA**. Choose **test mode** to get started. However, do not forget to switch away from this mode in production.
- Go ahead and install the Firebase admin SDK via `npm`.
```bash
npm install --save firebase-admin@^5.5.1
```
- If your Node.js server is running on **Google Cloud Platform**, all you need to do is initialize it like so:
```js
const admin = require('firebase-admin');
admin.initializeApp({
credential: admin.credential.applicationDefault()
});
var db = admin.firestore();
```
- If your Node.js server is running on a different platform, you'll need a [Google service account](https://cloud.google.com/compute/docs/authentication). Head over to **Project Settings > Service Accounts** in the Cloud Platform Console. Generate a new private key and save the JSON file. Then use the file to initialize the SDK:
```js
const admin = require('firebase-admin');
var serviceAccount = require("path/to/serviceAccountKey.json");
admin.initializeApp({
credential: admin.credential.cert(serviceAccount)
});
var db = admin.firestore();
```
- Creating a new collection, `meetups` is as easy as:
```js
var meetupRef = db.collection('meetups').doc('meets')
var publicMeetup = meetupRef.set({
'name': 'forLoop Lagos',
'host': 'Prosper Otemuyiwa',
'attendees': '700',
'type': 'public'
});
```
- Reading data from the `meetups` collection, is as easy as:
```js
db.collection('meetups').get()
.then((snapshot) => {
snapshot.forEach((meetup) => {
console.log(meetup.name);
});
})
.catch((err) => {
console.log('Error getting documents', err);
});
```
Check out more [information on using Firestore](https://firebase.google.com/docs/firestore/data-model). Next, let's cover SQL databases.
### Google Cloud SQL
**Google Cloud SQL** is a fully-managed database service that makes it easy to set up, maintain, manage, and administer your relational `PostgreSQL BETA` and `MySQL` databases in the cloud. Cloud SQL offers high performance, scalability, and convenience. Hosted on Google Cloud Platform, Cloud SQL provides a database infrastructure for applications running anywhere.
It offers:
- Up to 10TB of storage capacity, 40,000 IOPS, and 416GB of RAM per instance.
- Automatic data encryption.
- Google Cloud SQL is SSAE 16, ISO 27001, PCI DSS v3.0, and HIPAA compliant.
- High performance and more.
You can follow the steps below to get started with provisioning a database.
- Head over to [Google Cloud SQL](https://console.cloud.google.com/sql/). If you don't have a google account, sign up for one.
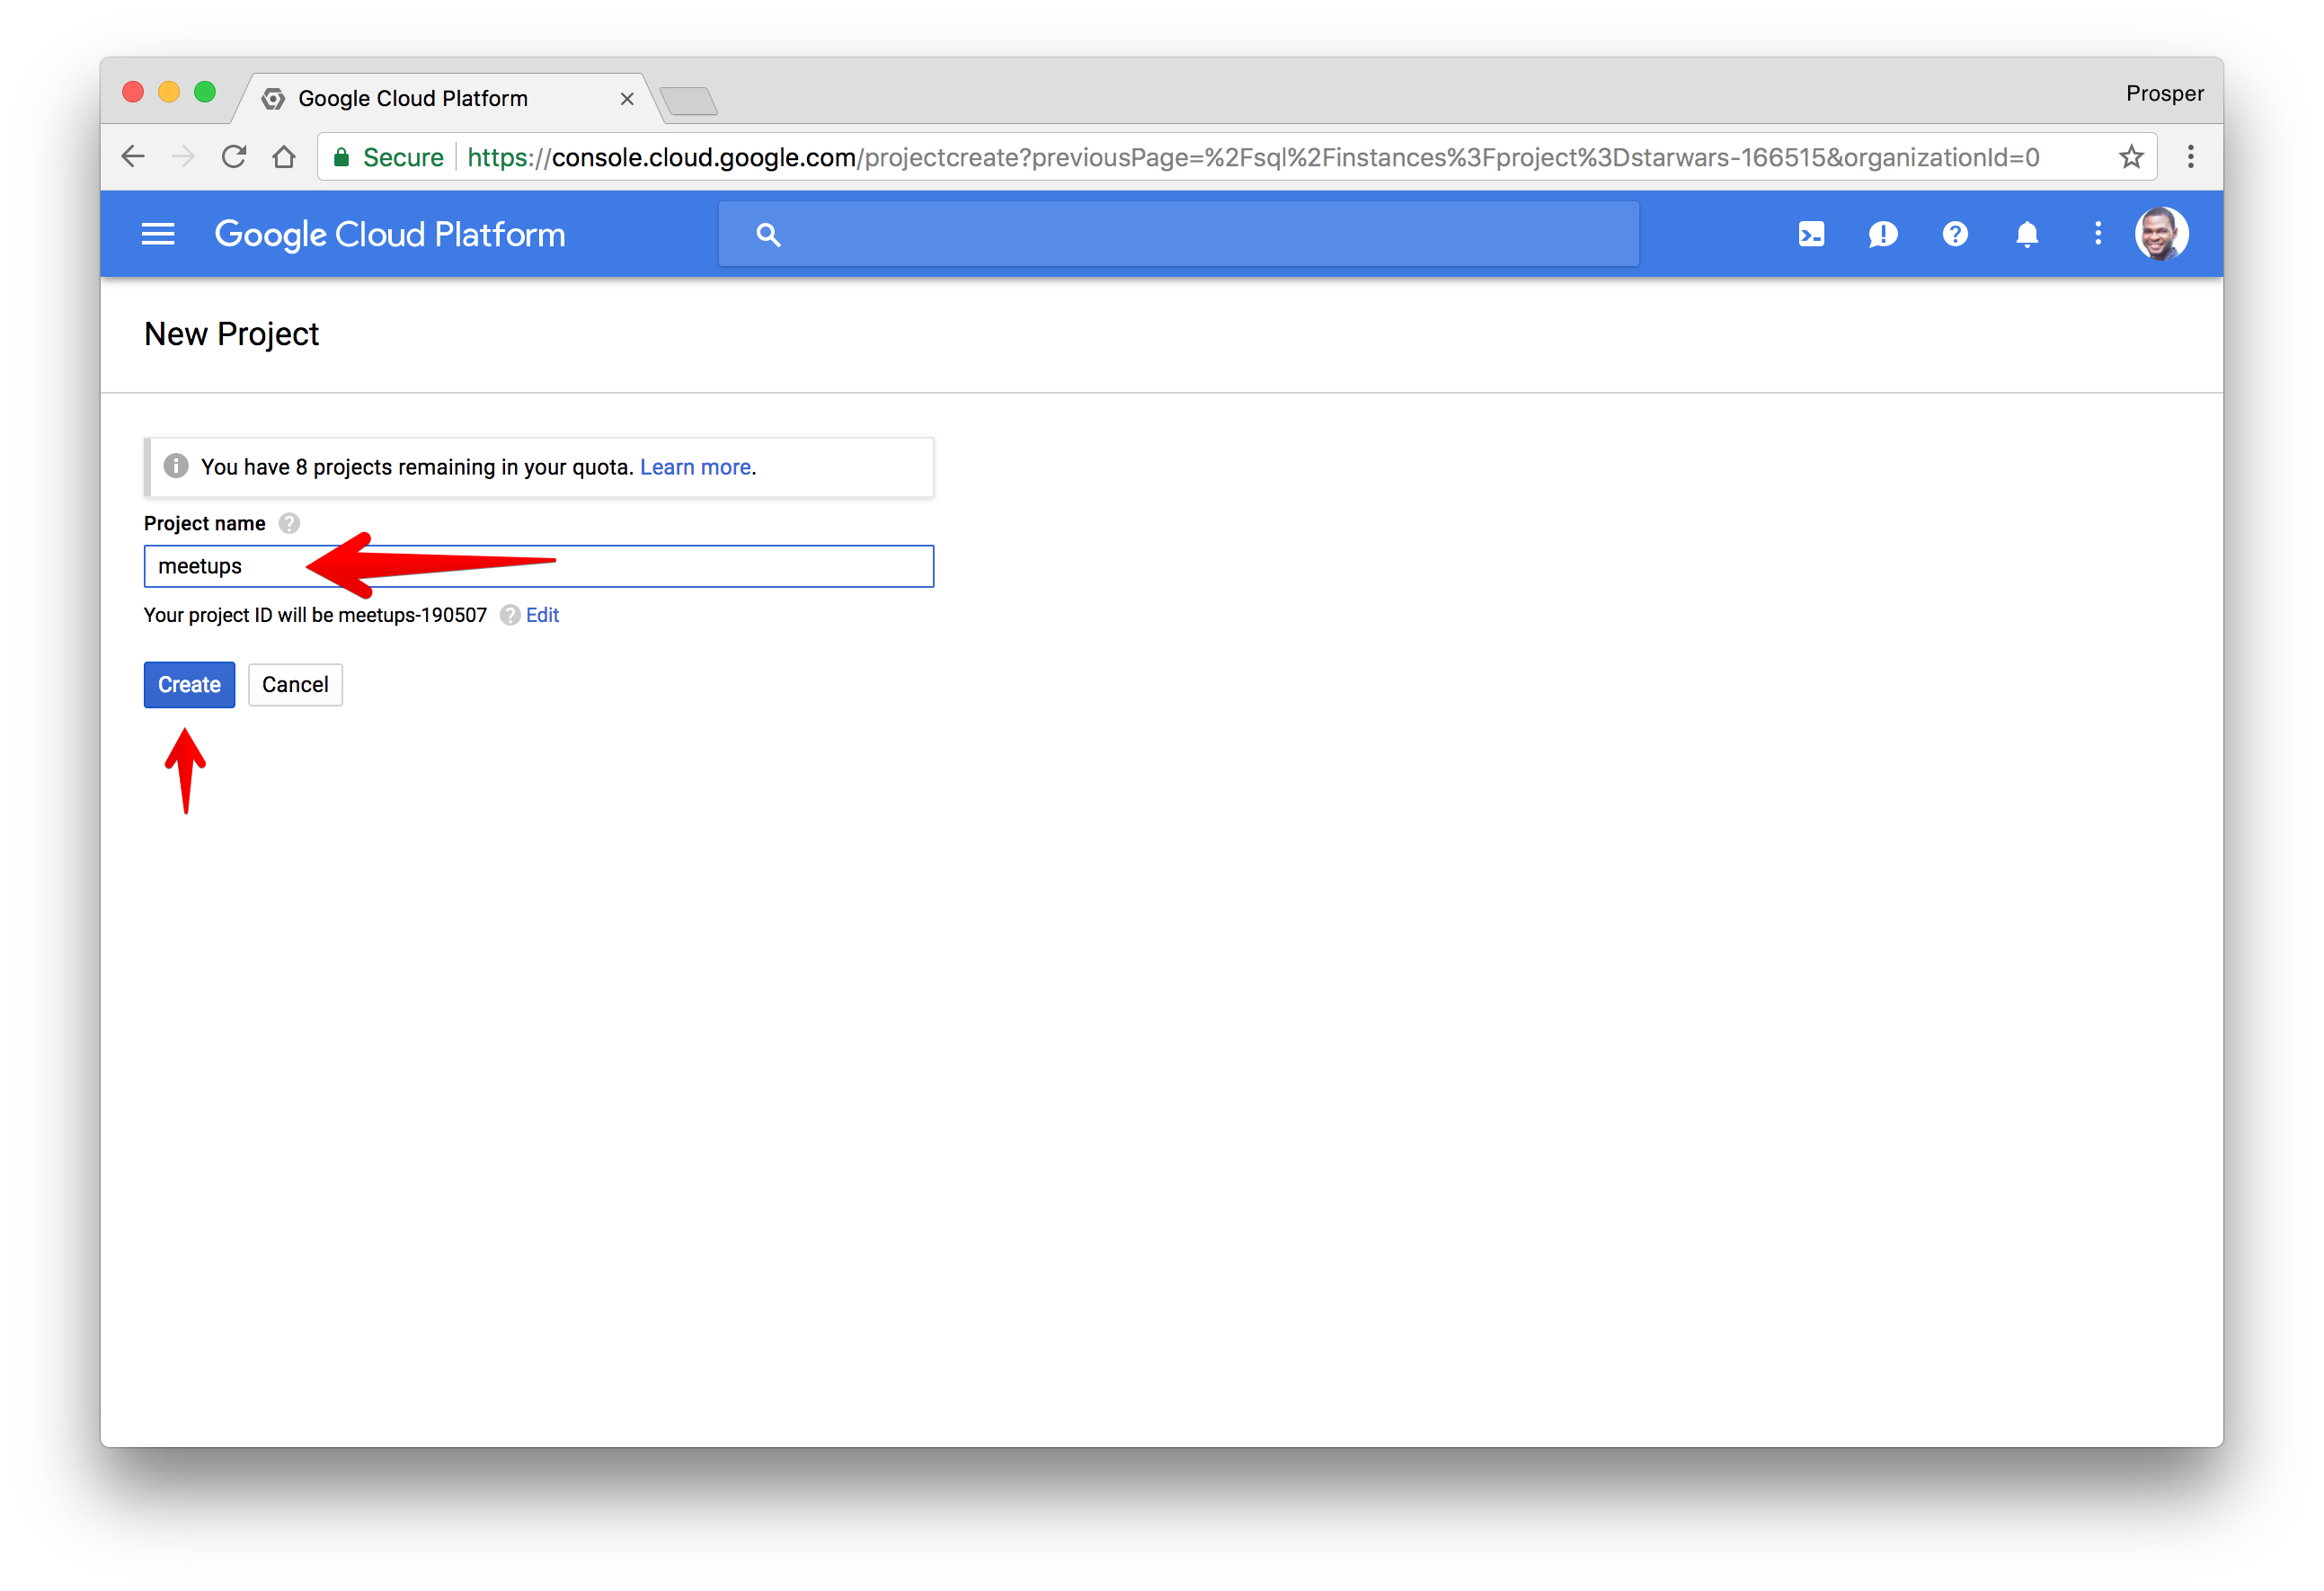
- Create a new project.
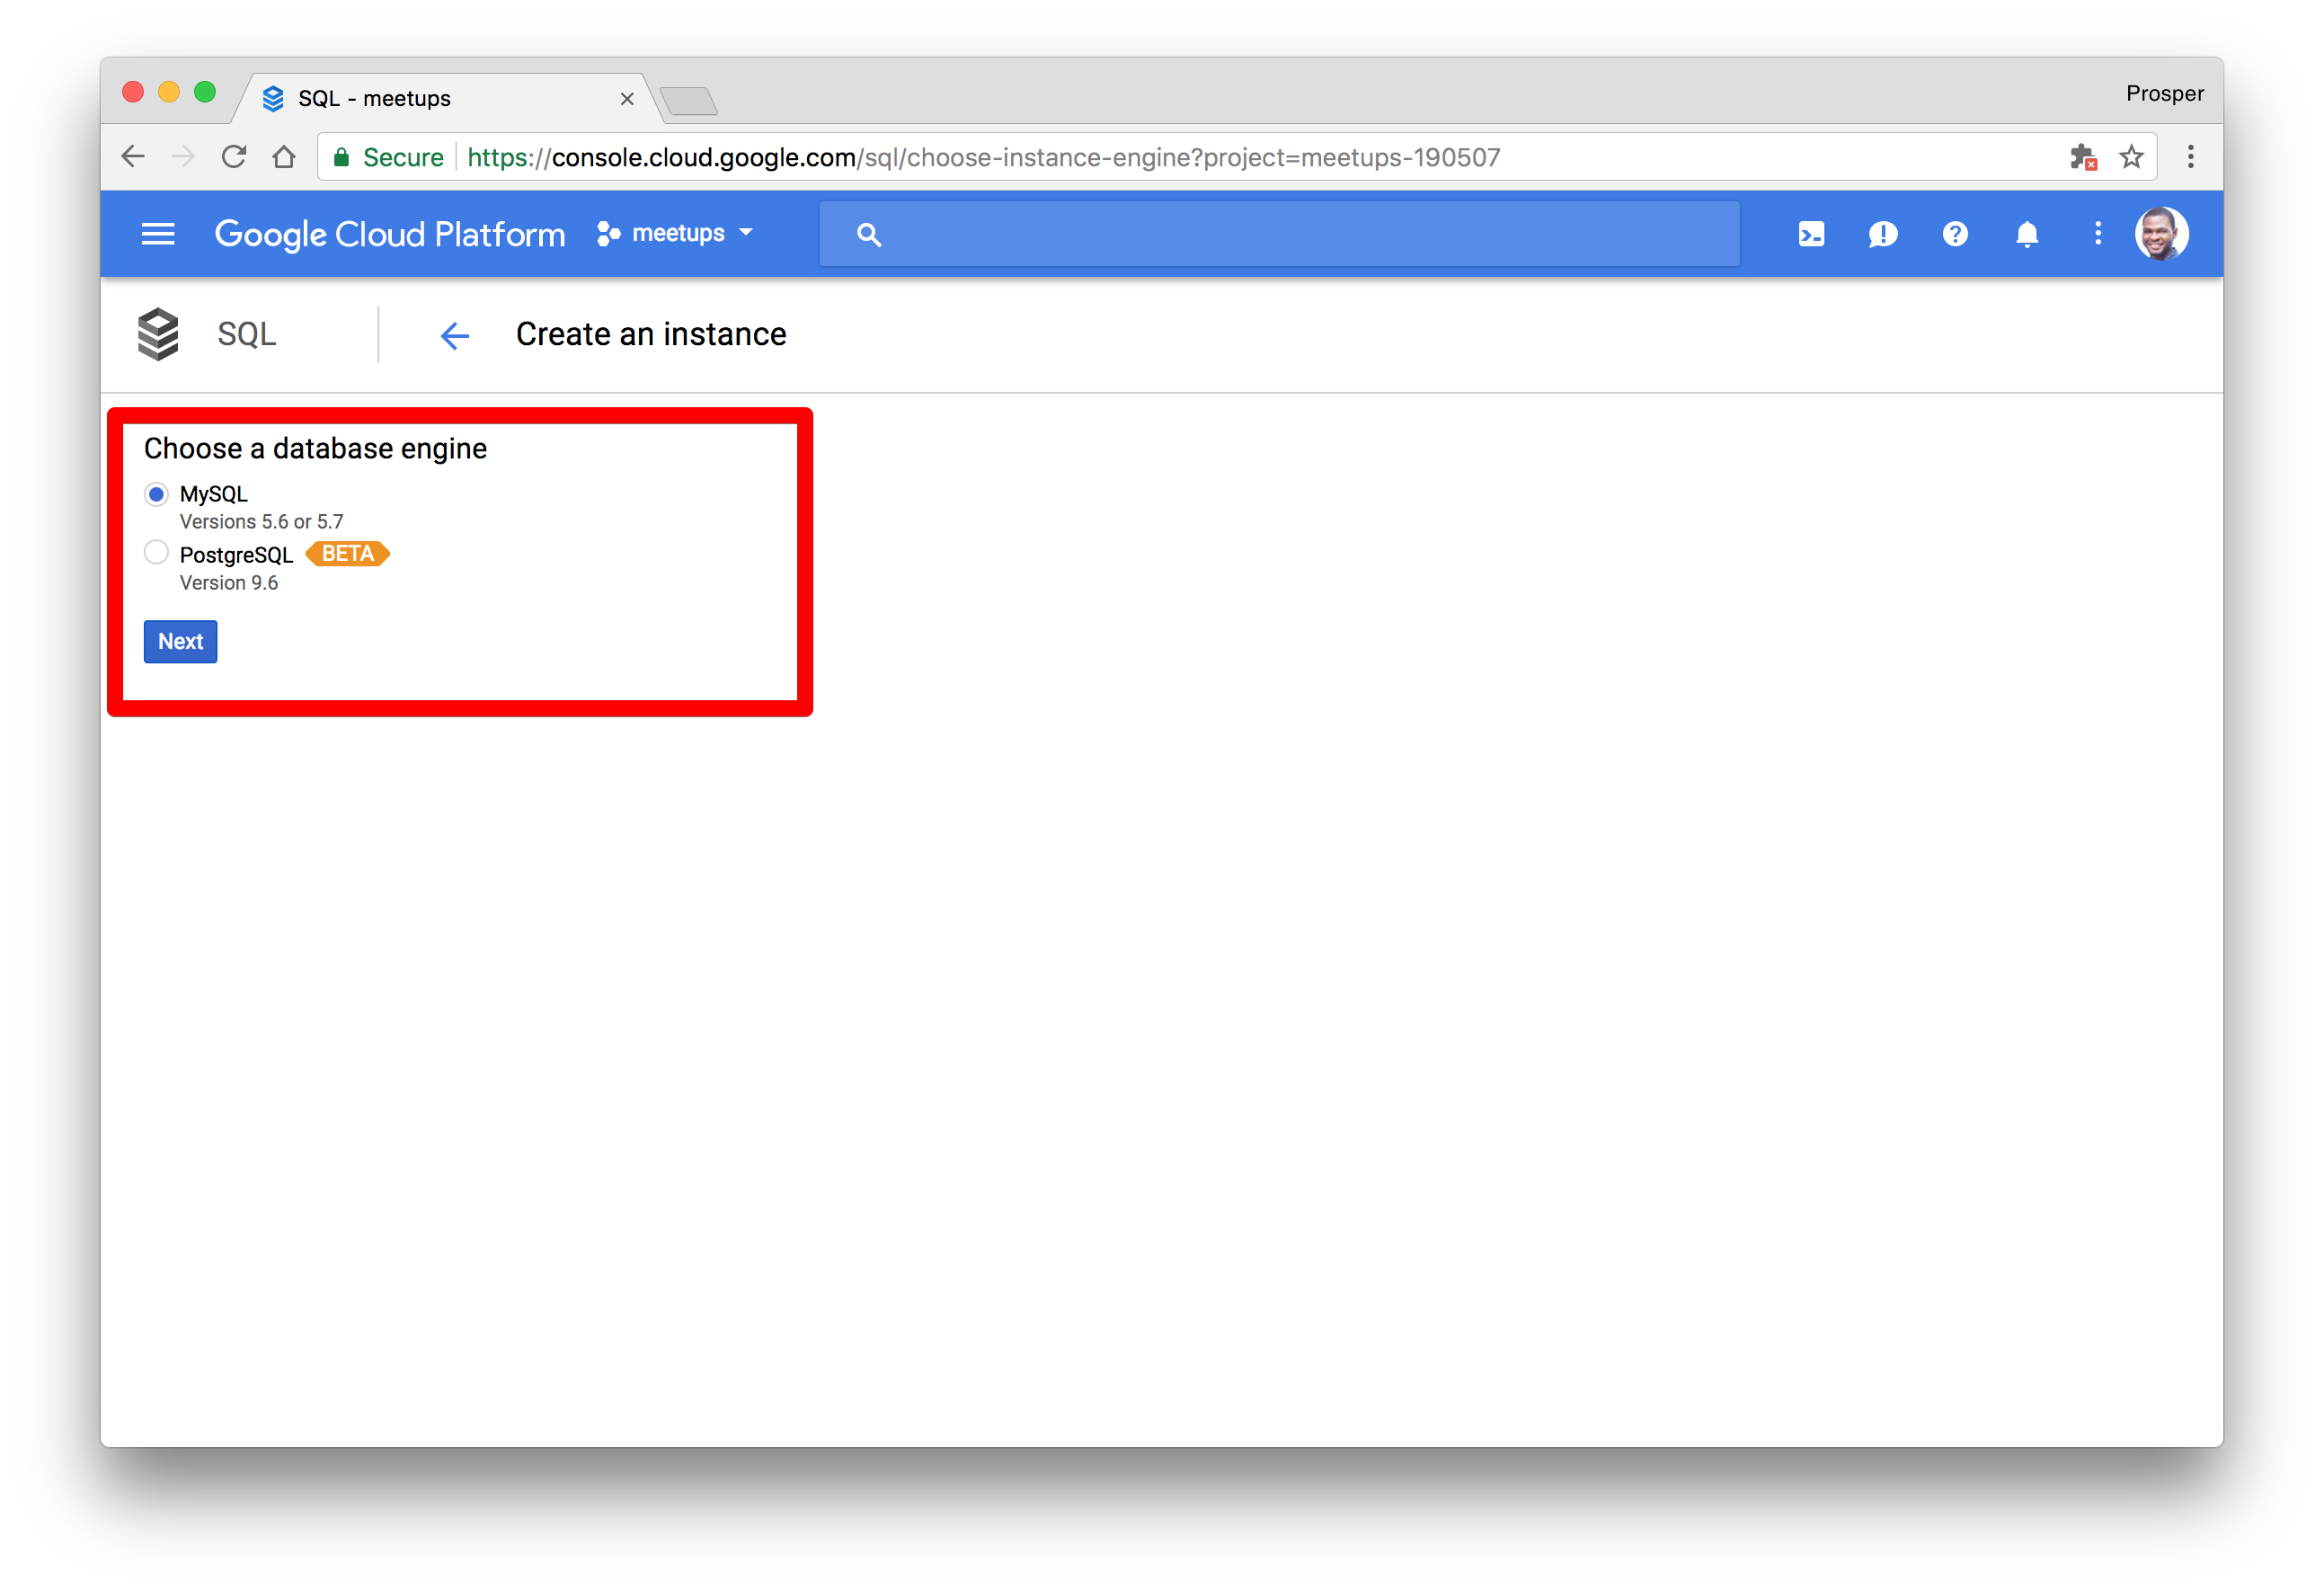
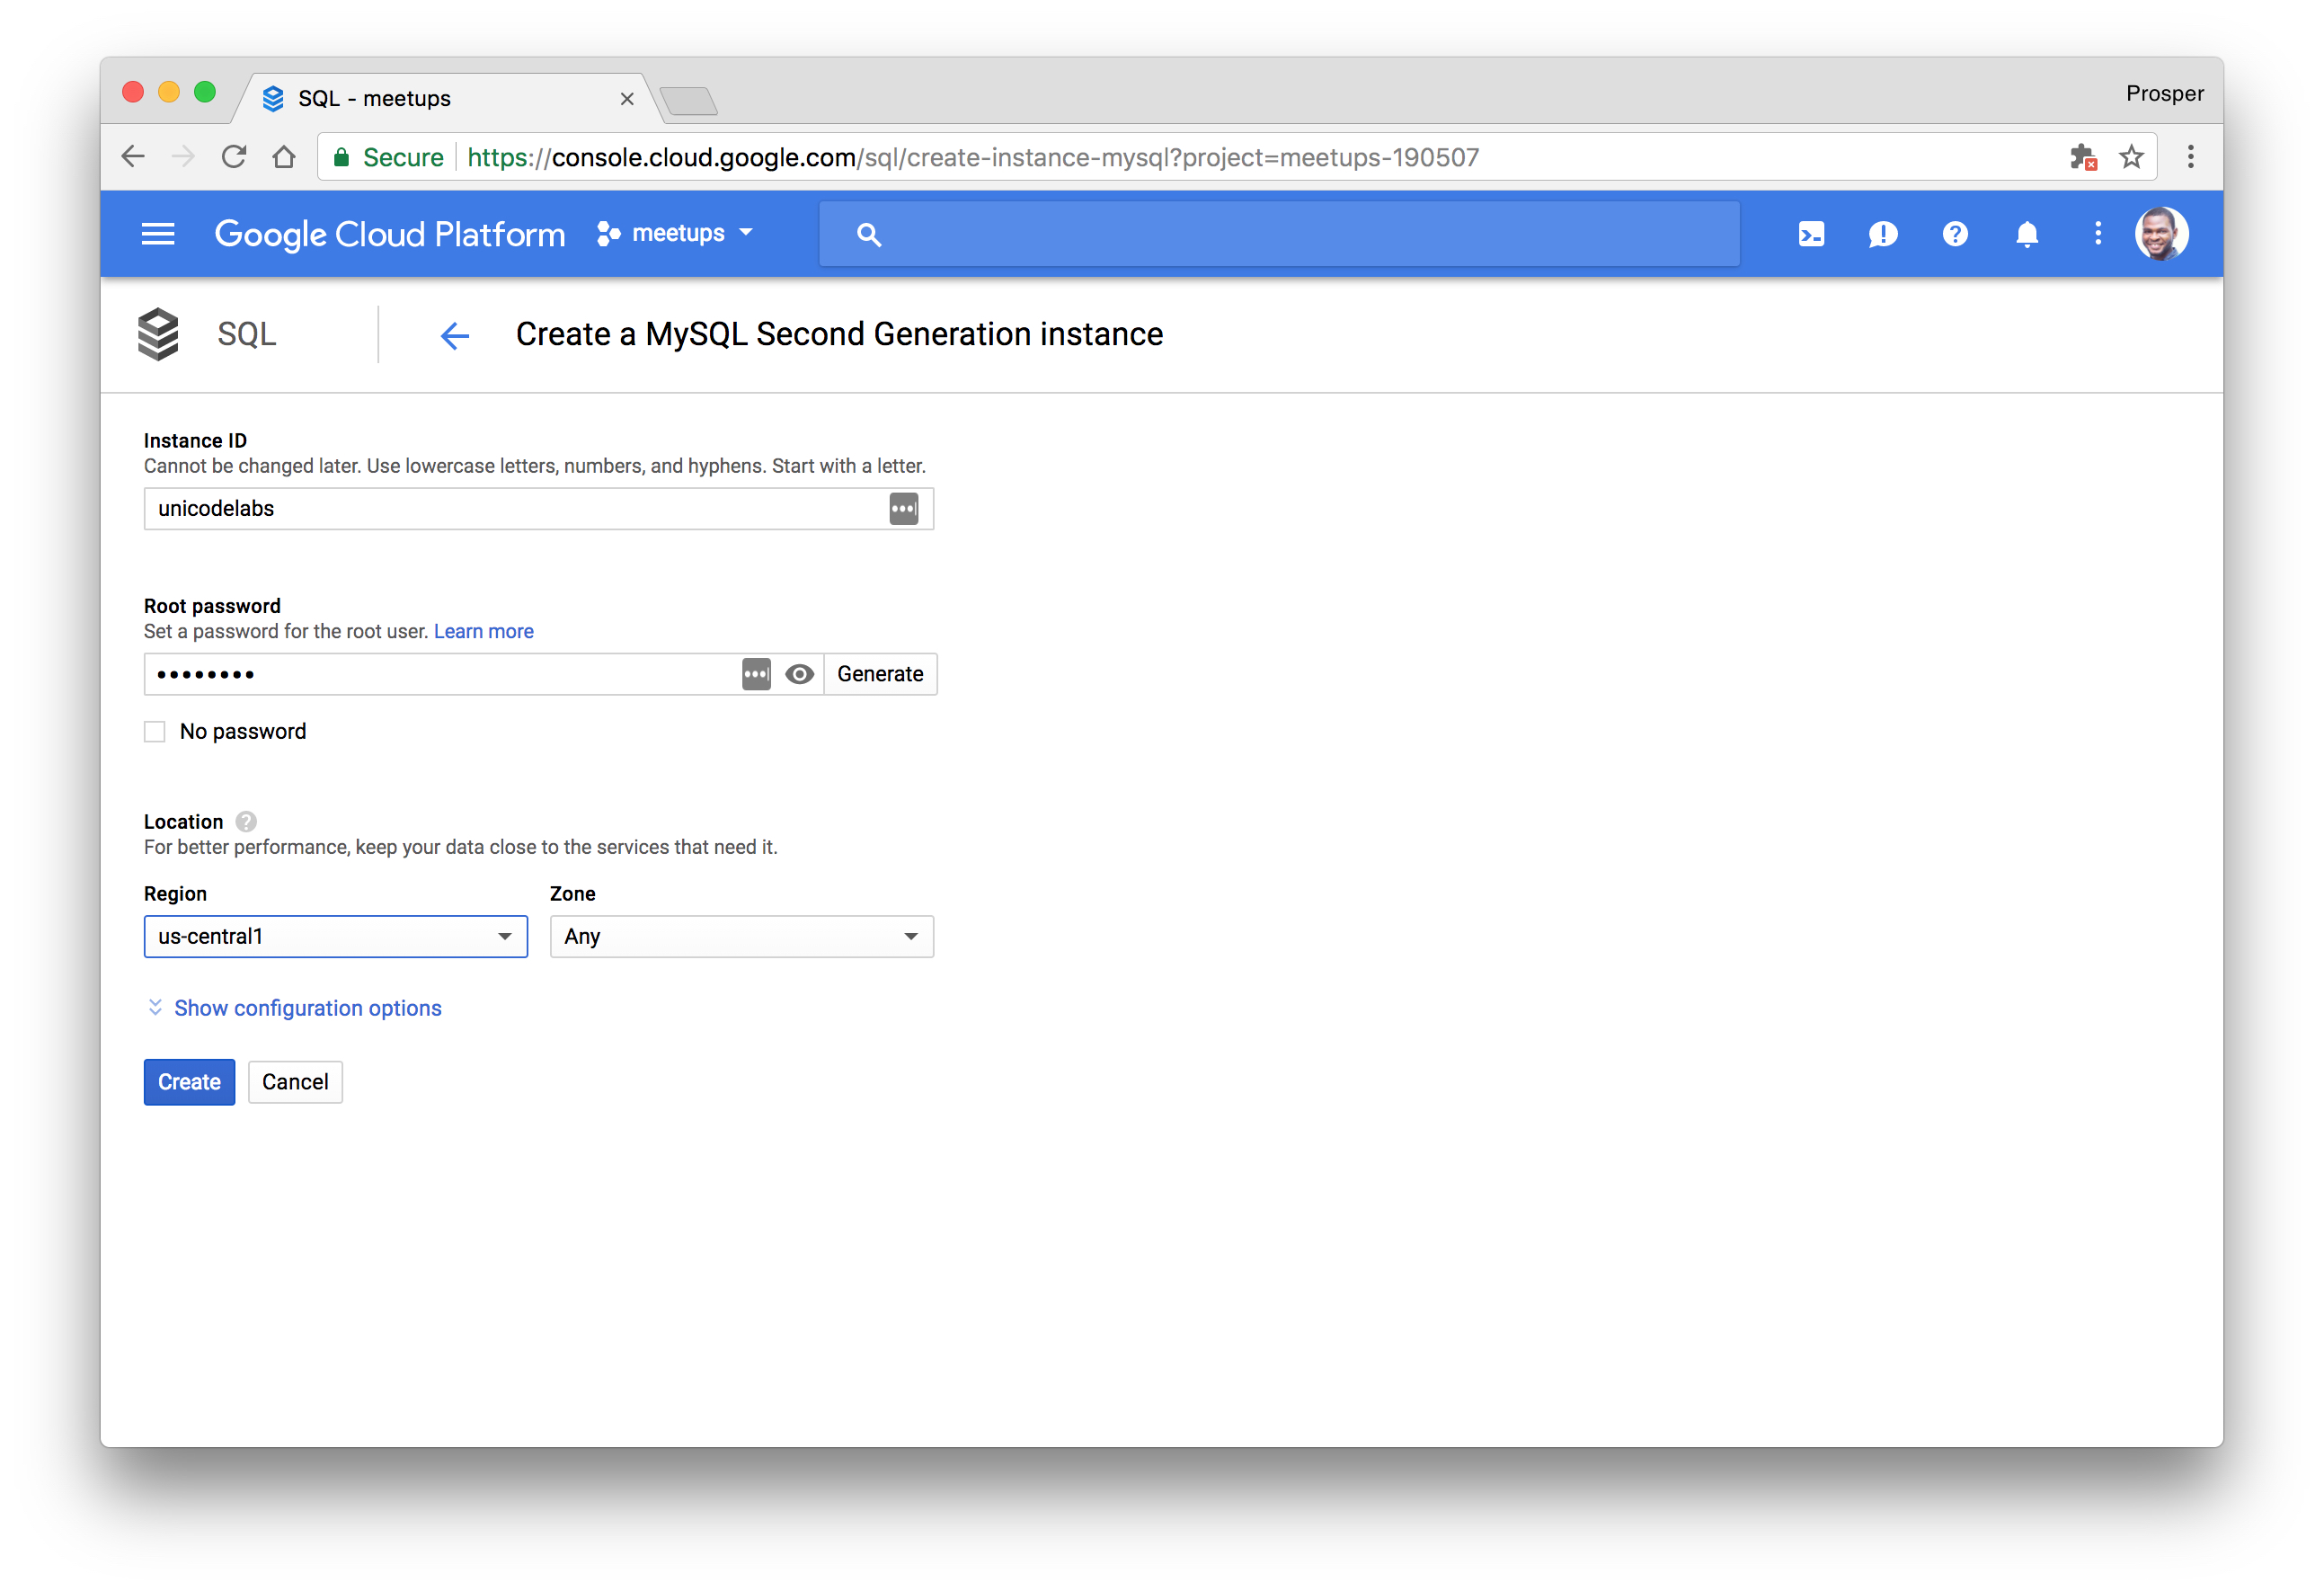
- Create a new cluster instance.

- Choose the type of database, **MySQL**, or **PostgreSQL**.
- Select the region, choose an ID and password for database access and finally create the instance.
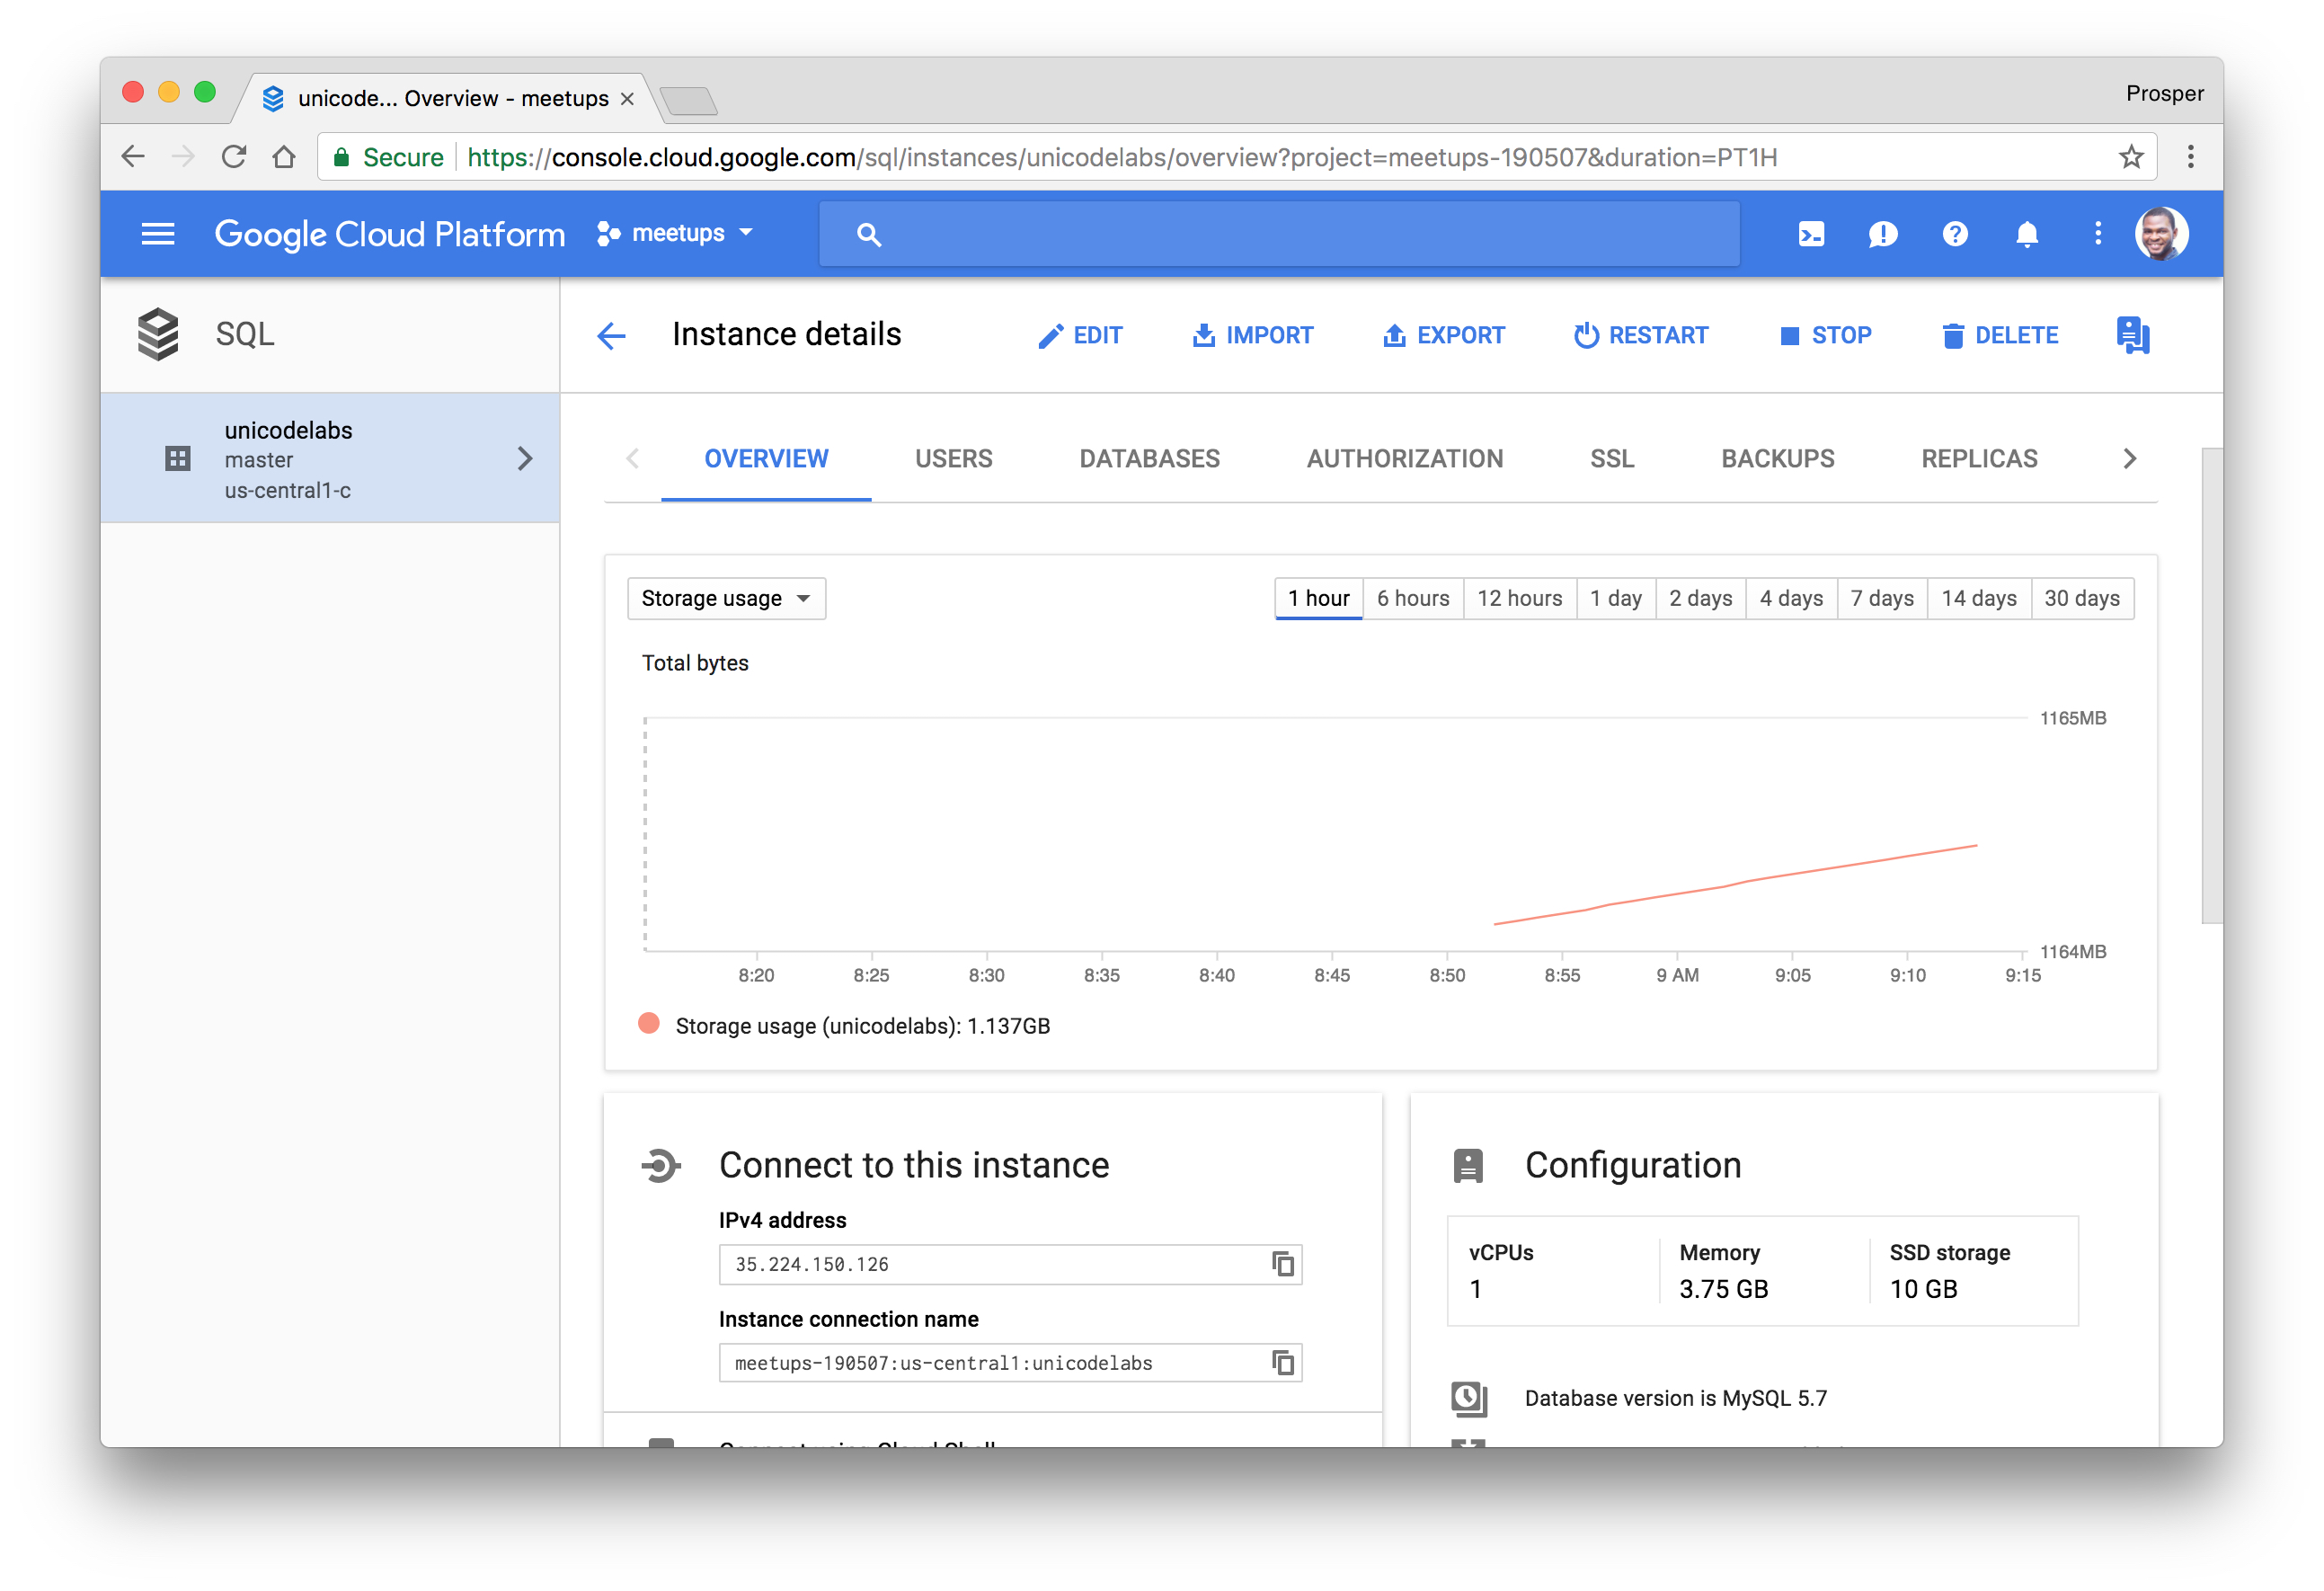
- You should be presented with a dashboard after the instance has been created.
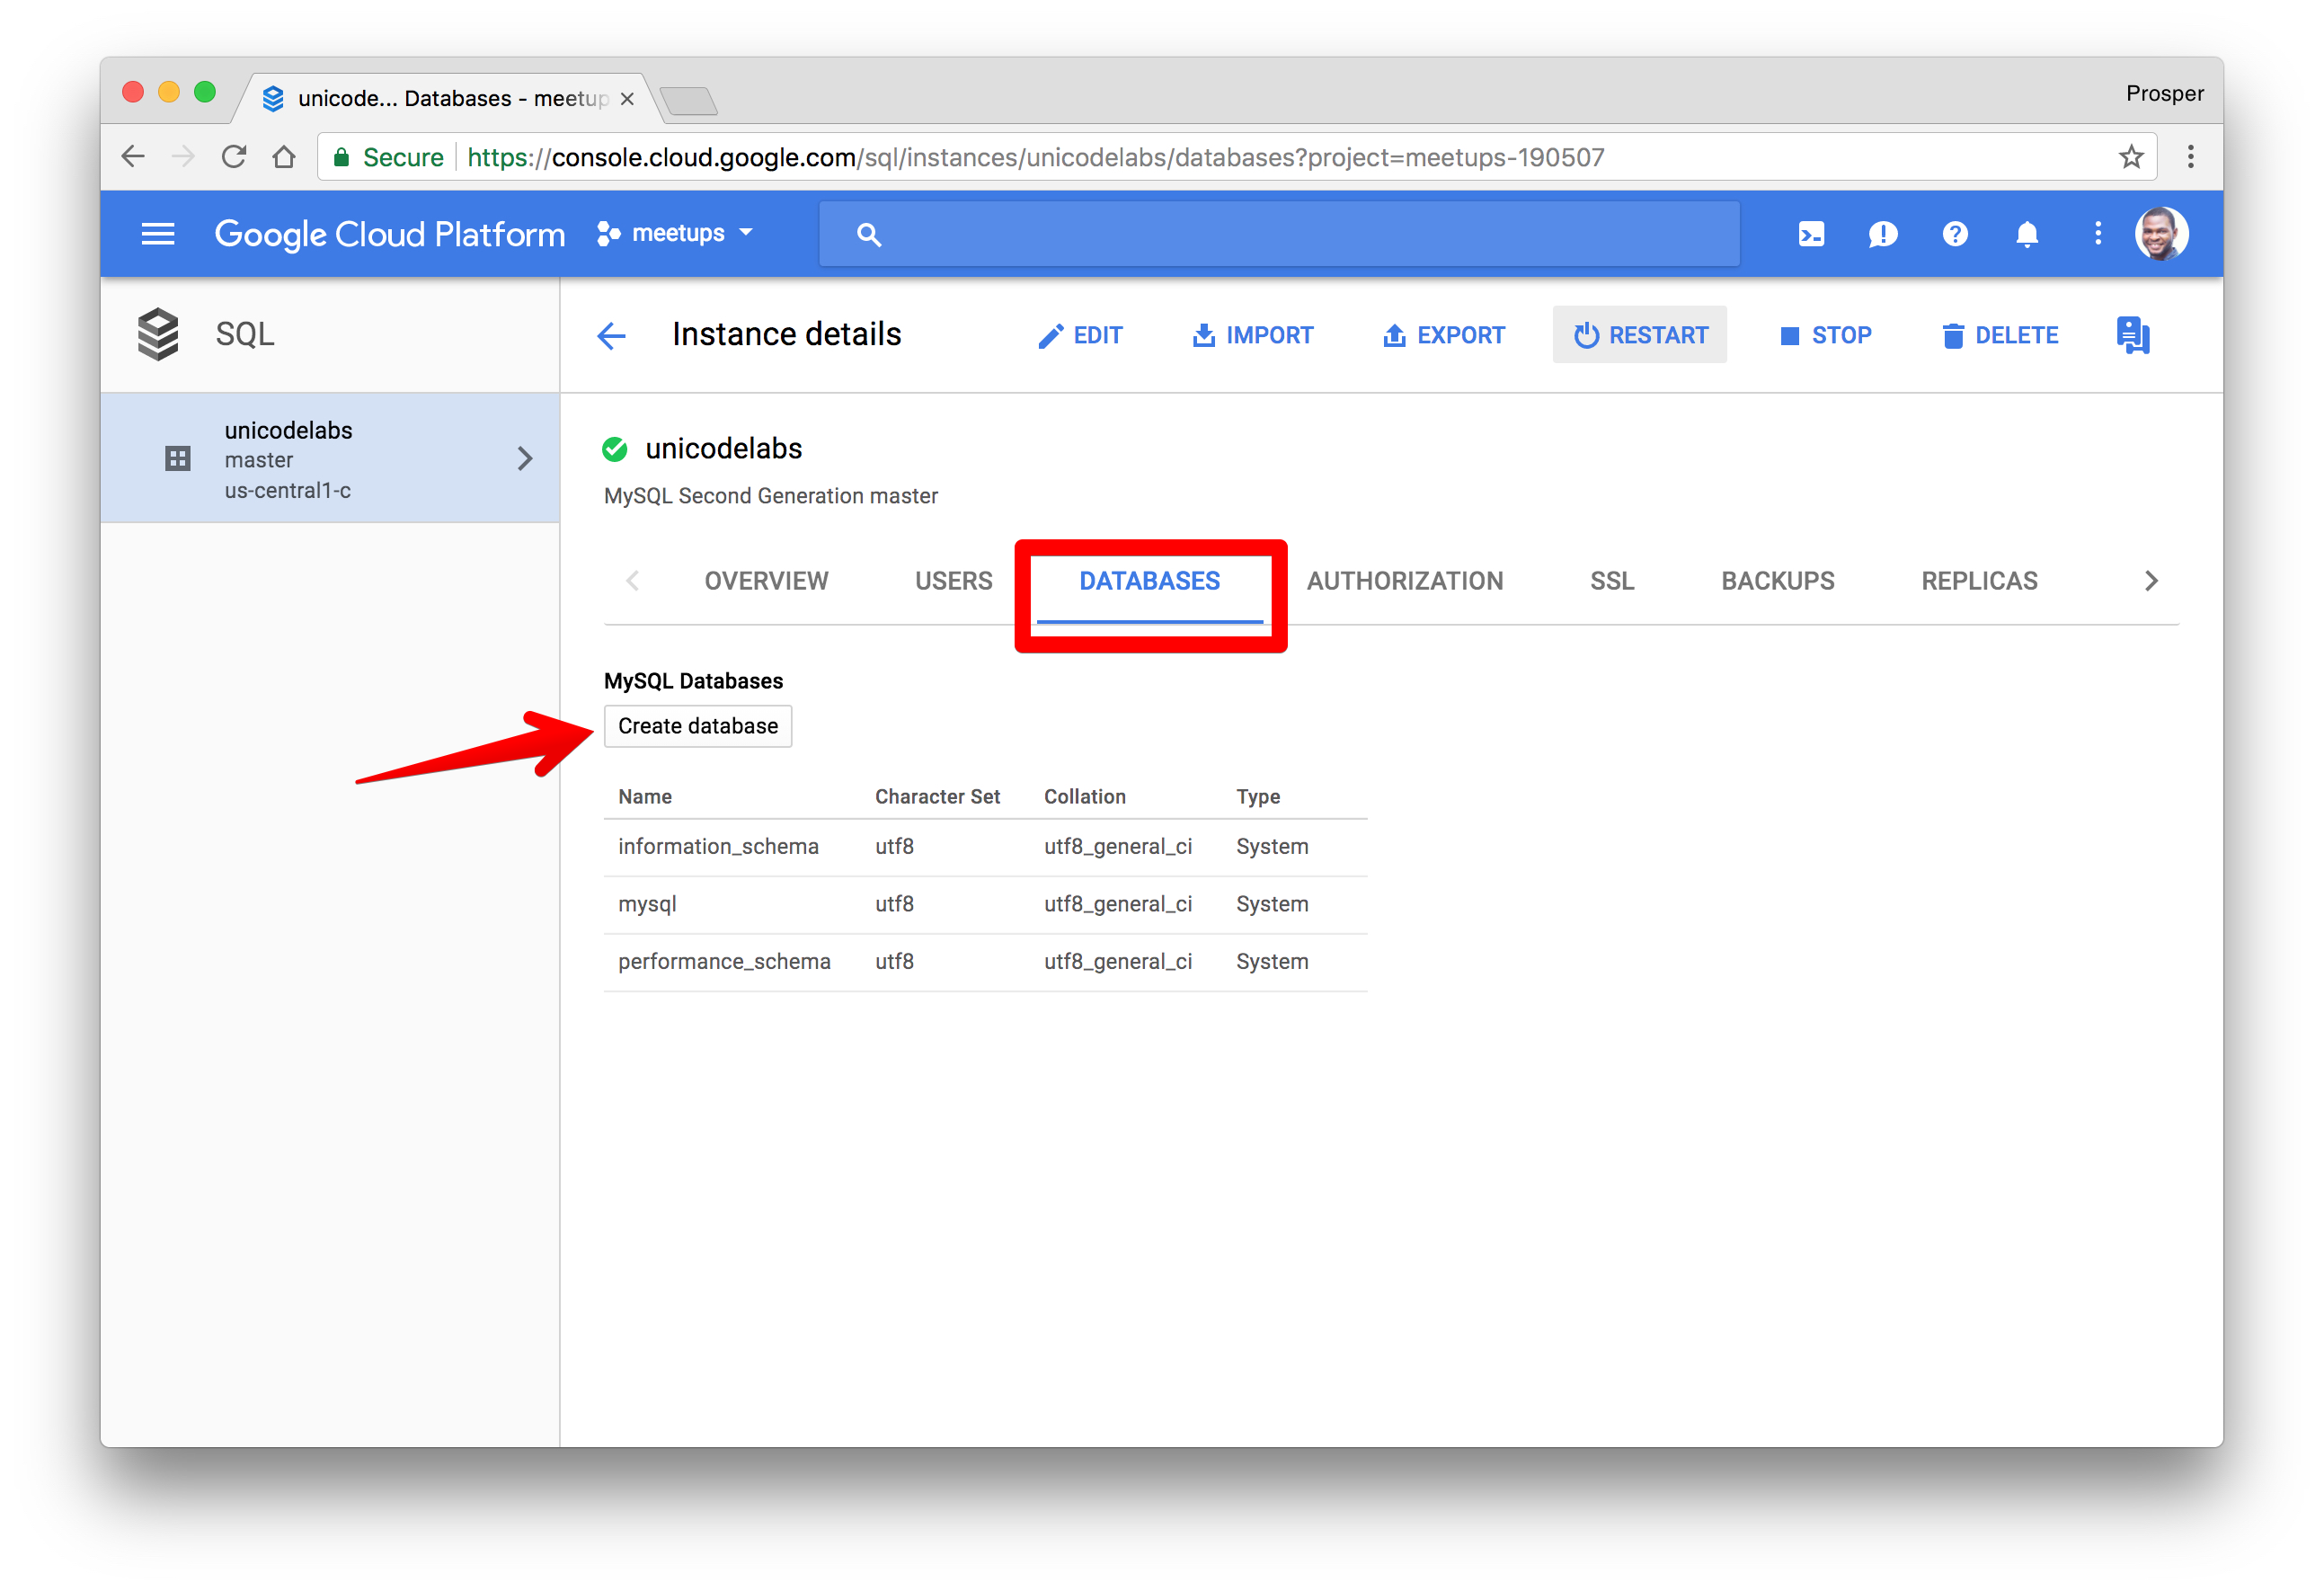
- Head over to the **DATABASES** section and create a database for your application.
The next step is to choose the connection methods. Check out the [documentation](https://cloud.google.com/sql/docs/mysql/external-connection-methods) on the connection options for external applications.
### Elephant SQL
**Elephant SQL** is a cloud platform that offers PostgreSQL as a service. It offers a shared and dedicated instance. The free shared instance offers 20MB data storage and 5 concurrent connections.
You can follow the steps below to get started with provisioning a database.
- Create a new [account](https://customer.elephantsql.com/instance/create?plan=turtle#).
- Create a new instance.
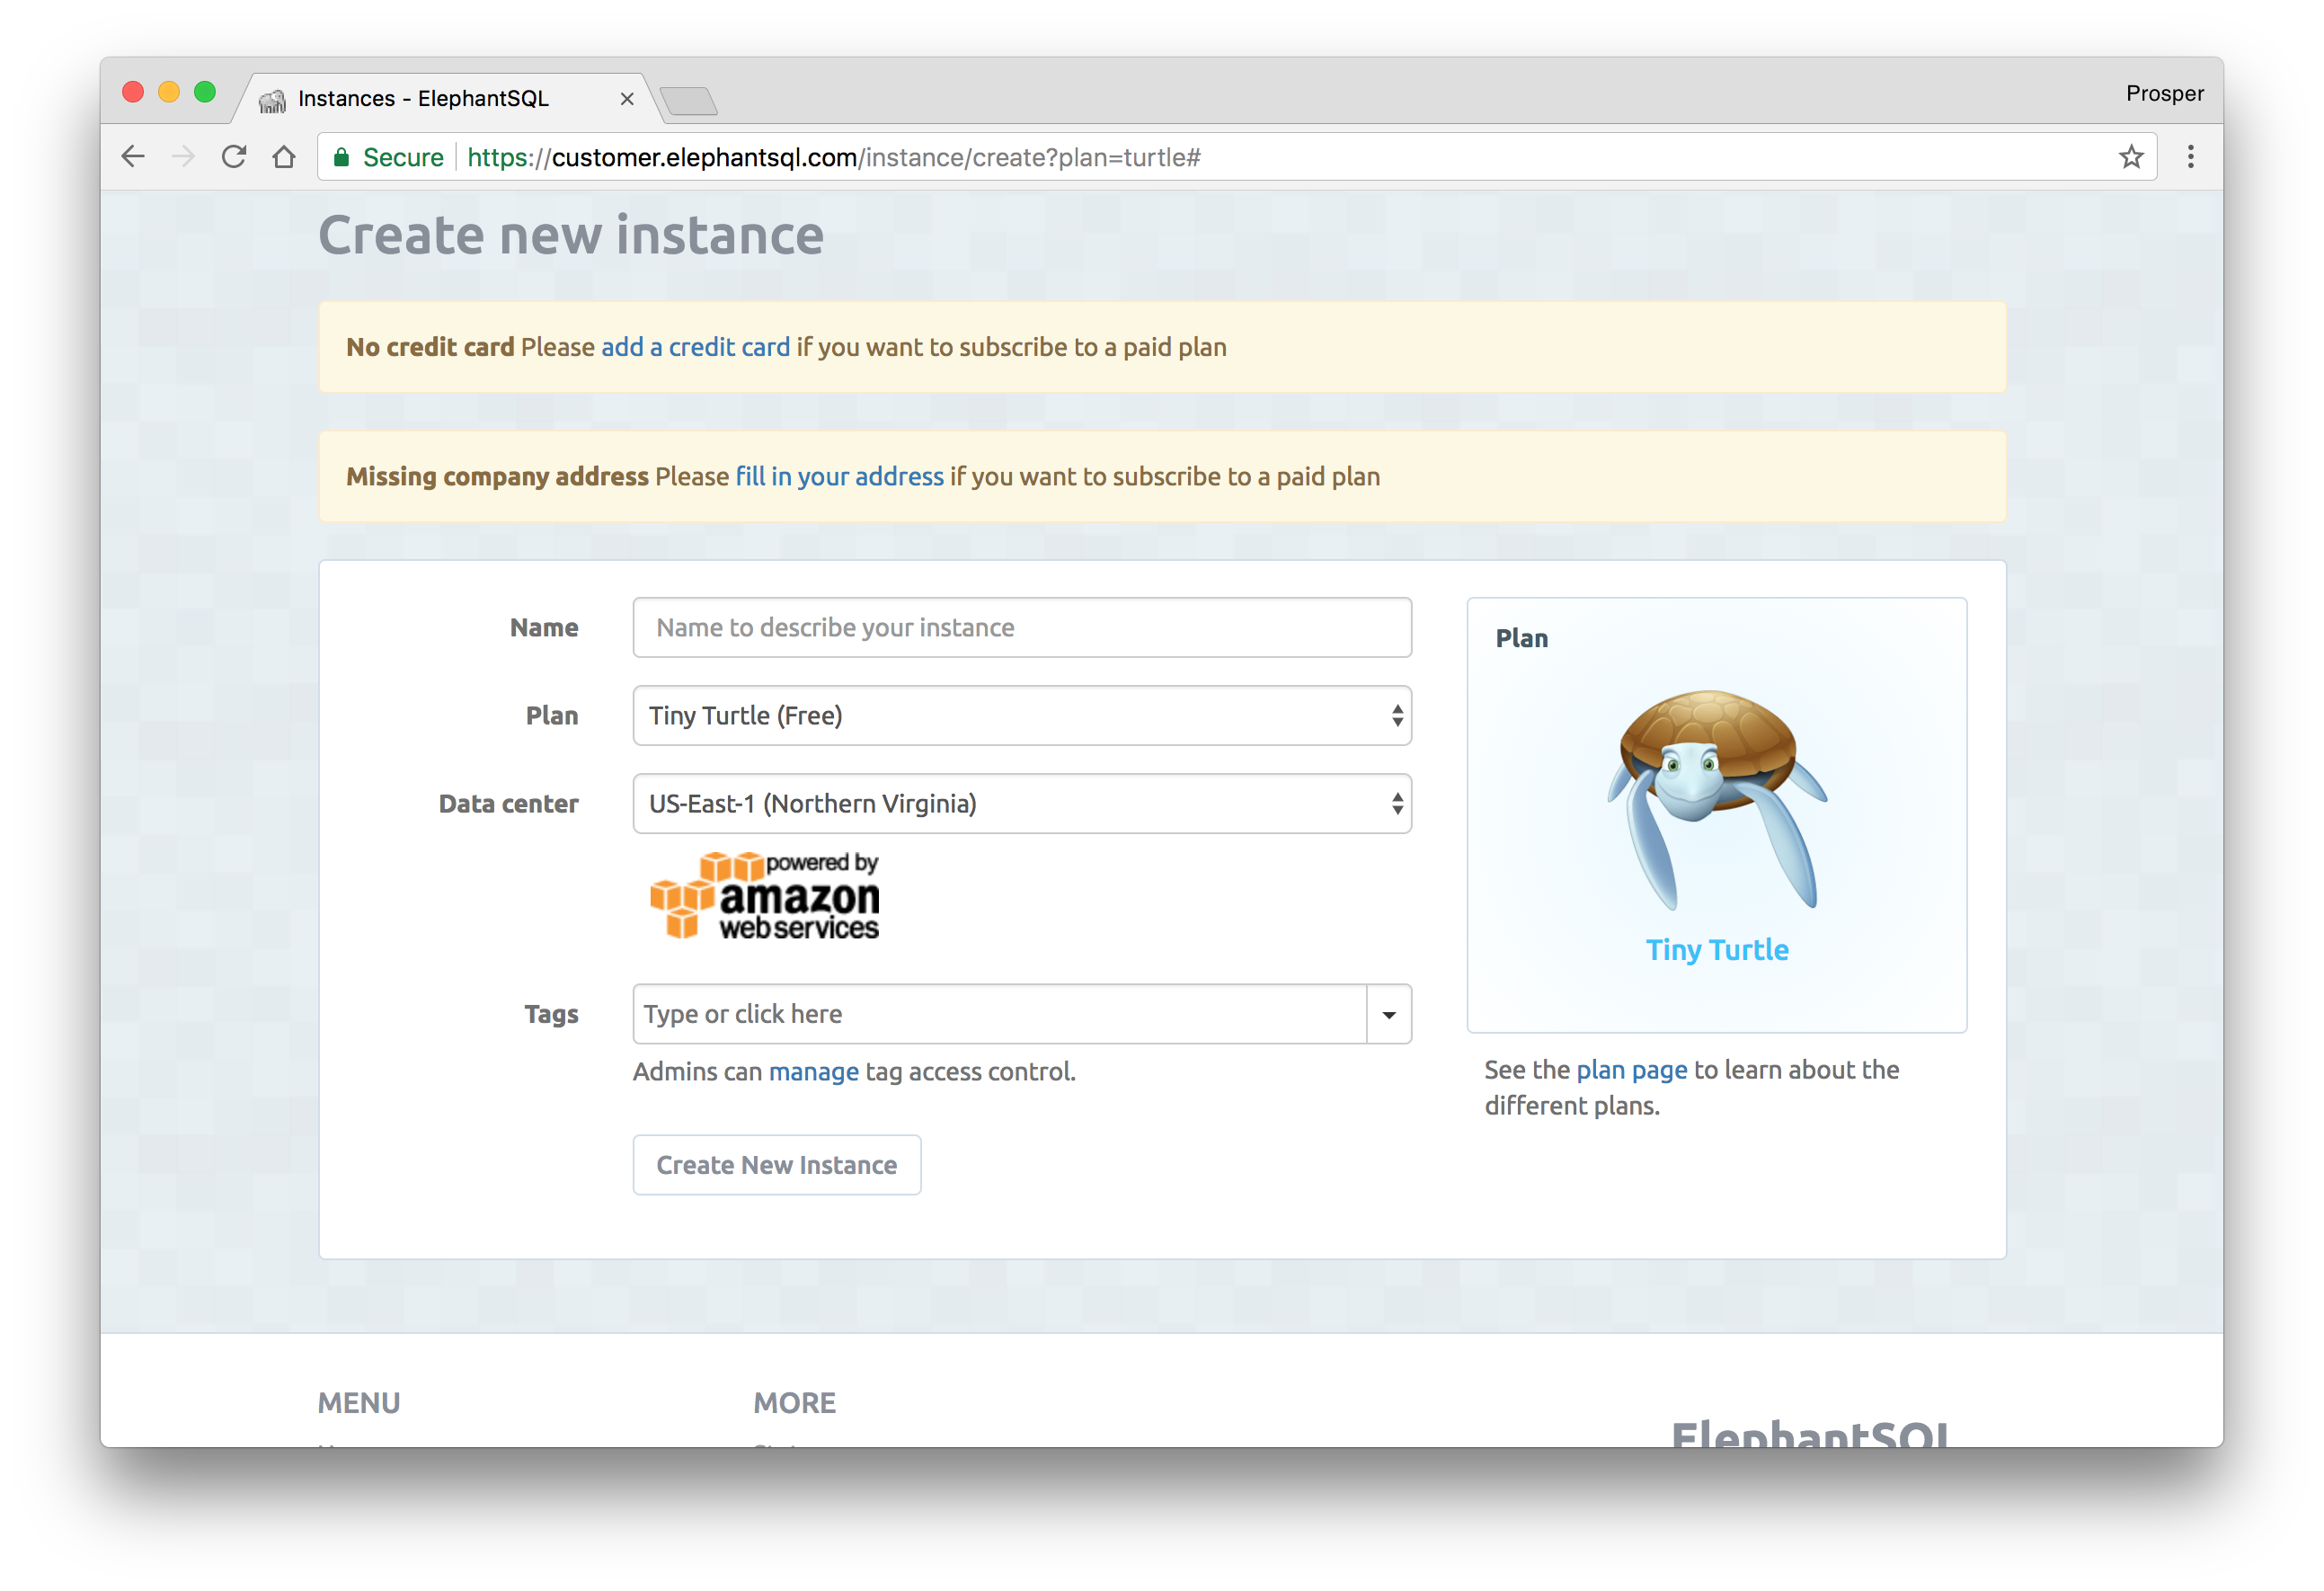

- Click on the recently created instance. You'll be directed to a dashboard that shows the URL connection string.
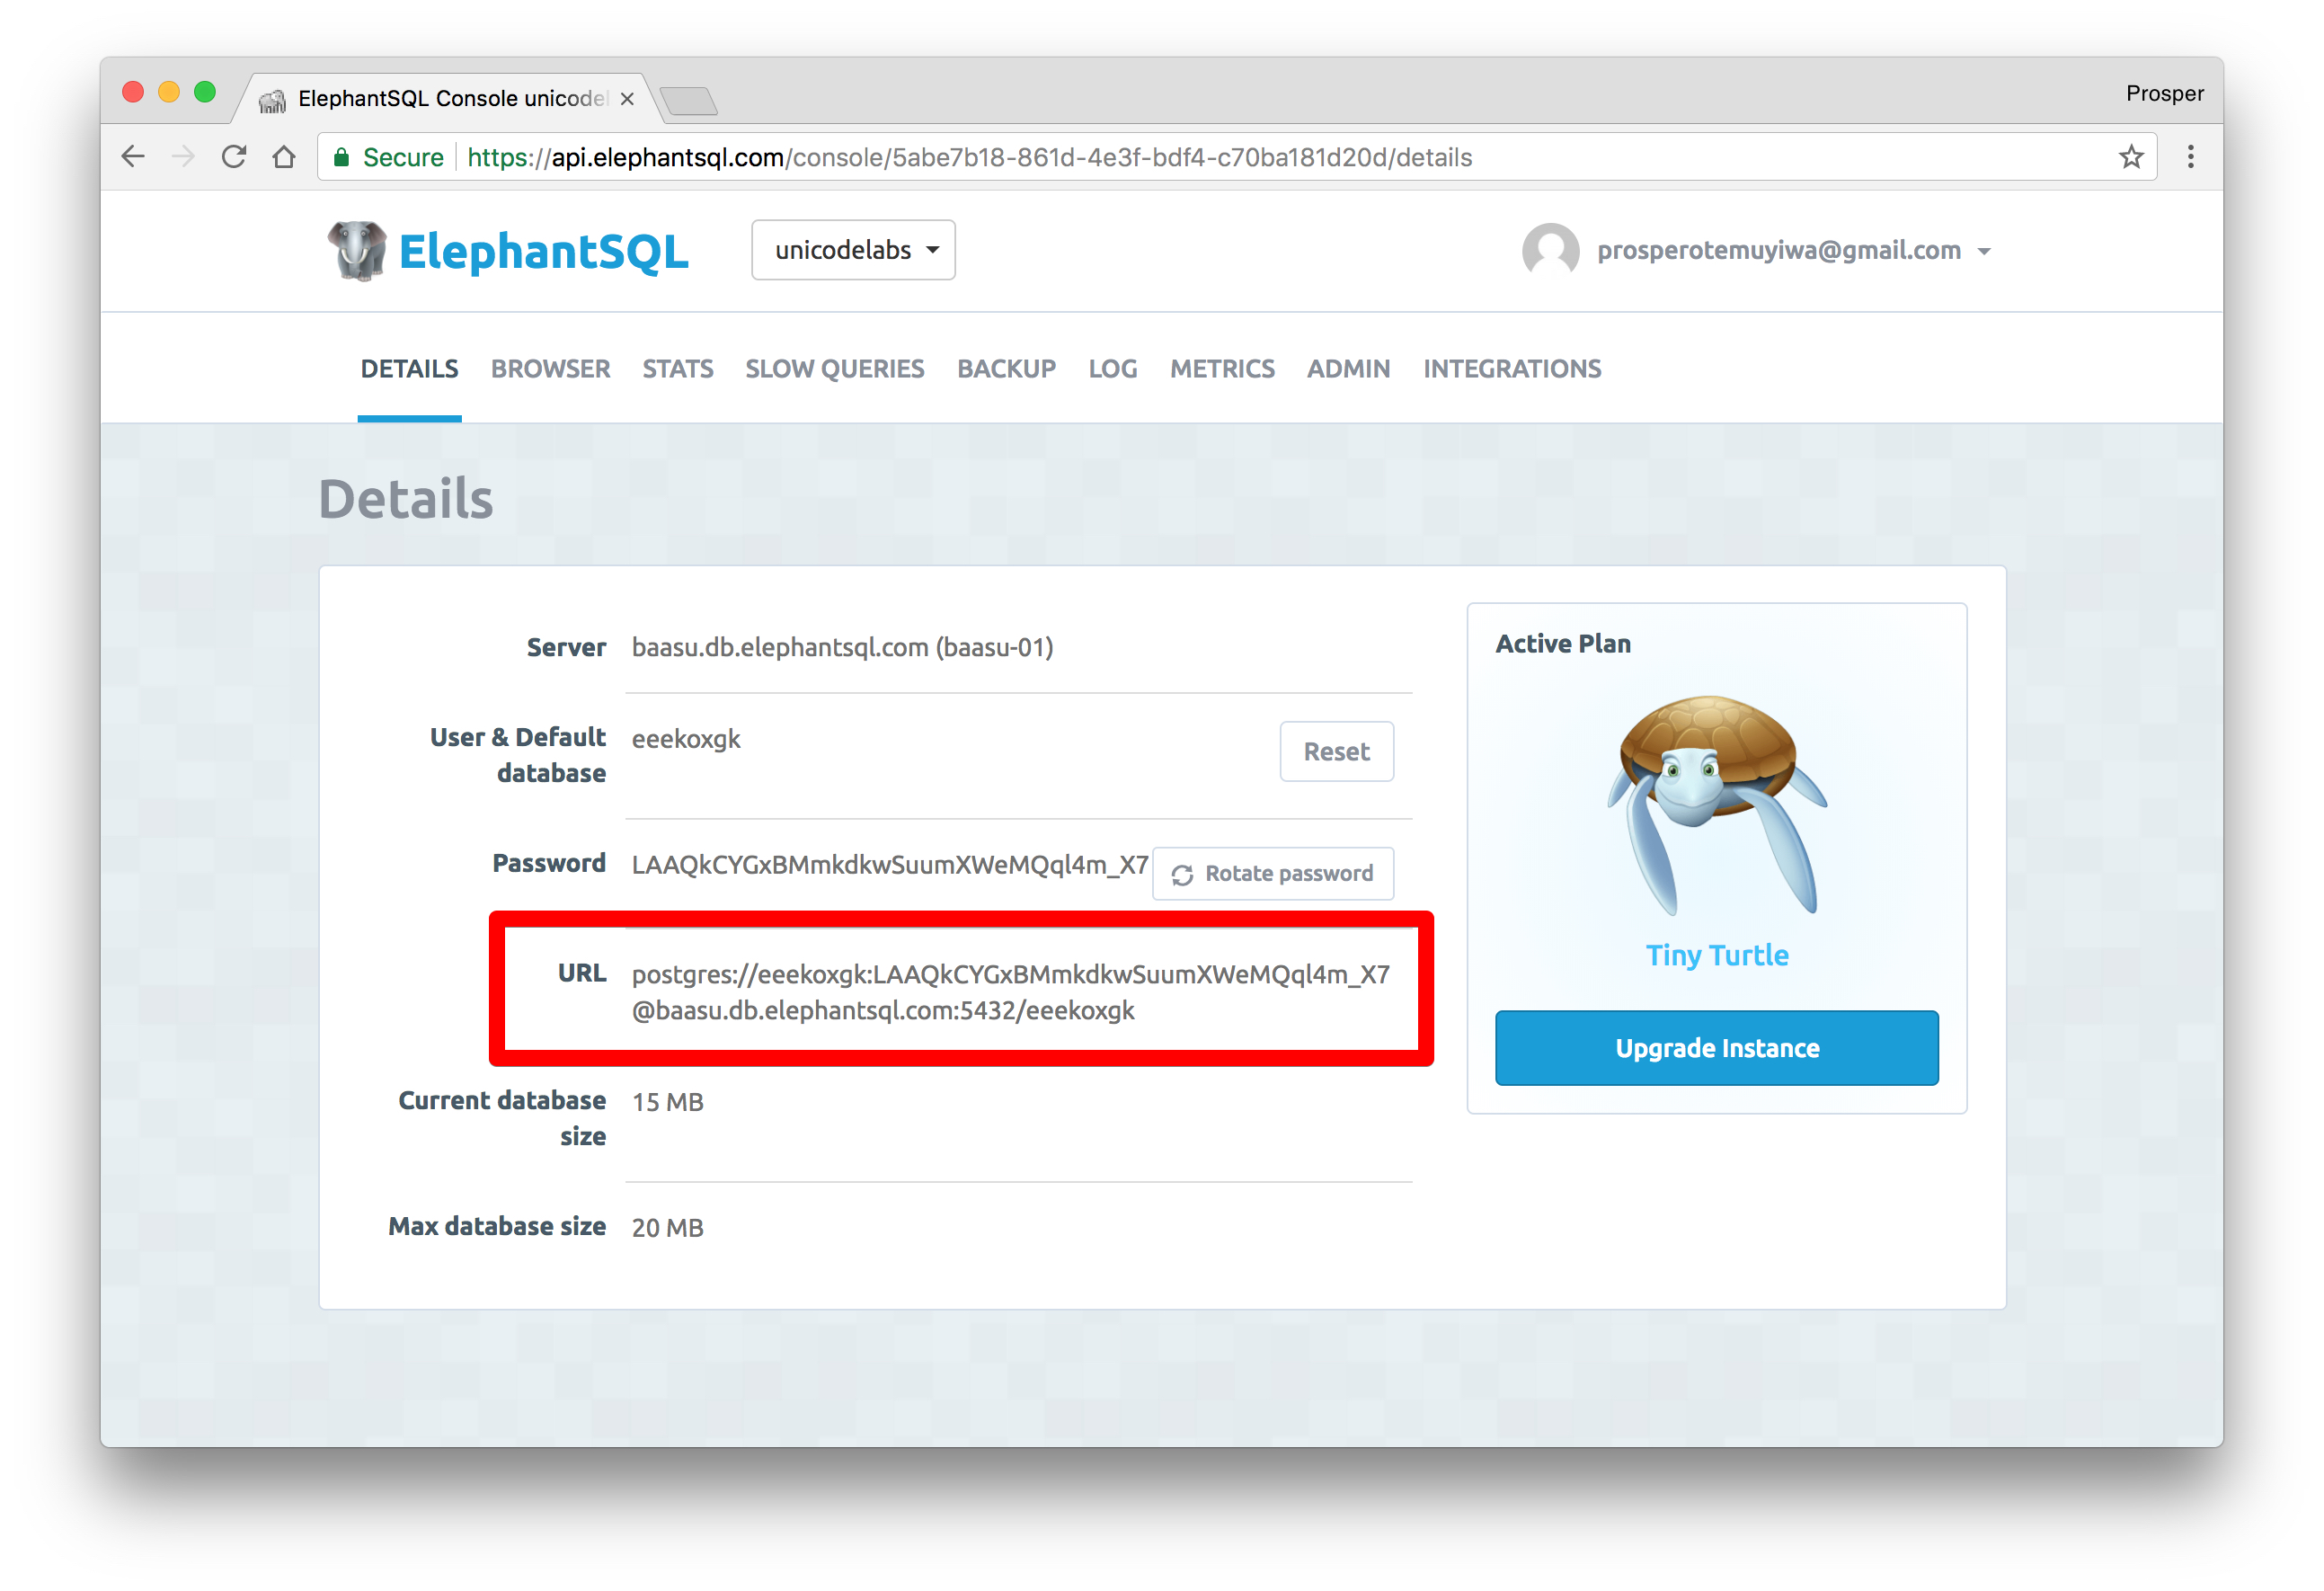
Use the URL Connection string in your application to connect to the remote database. It's really simple.
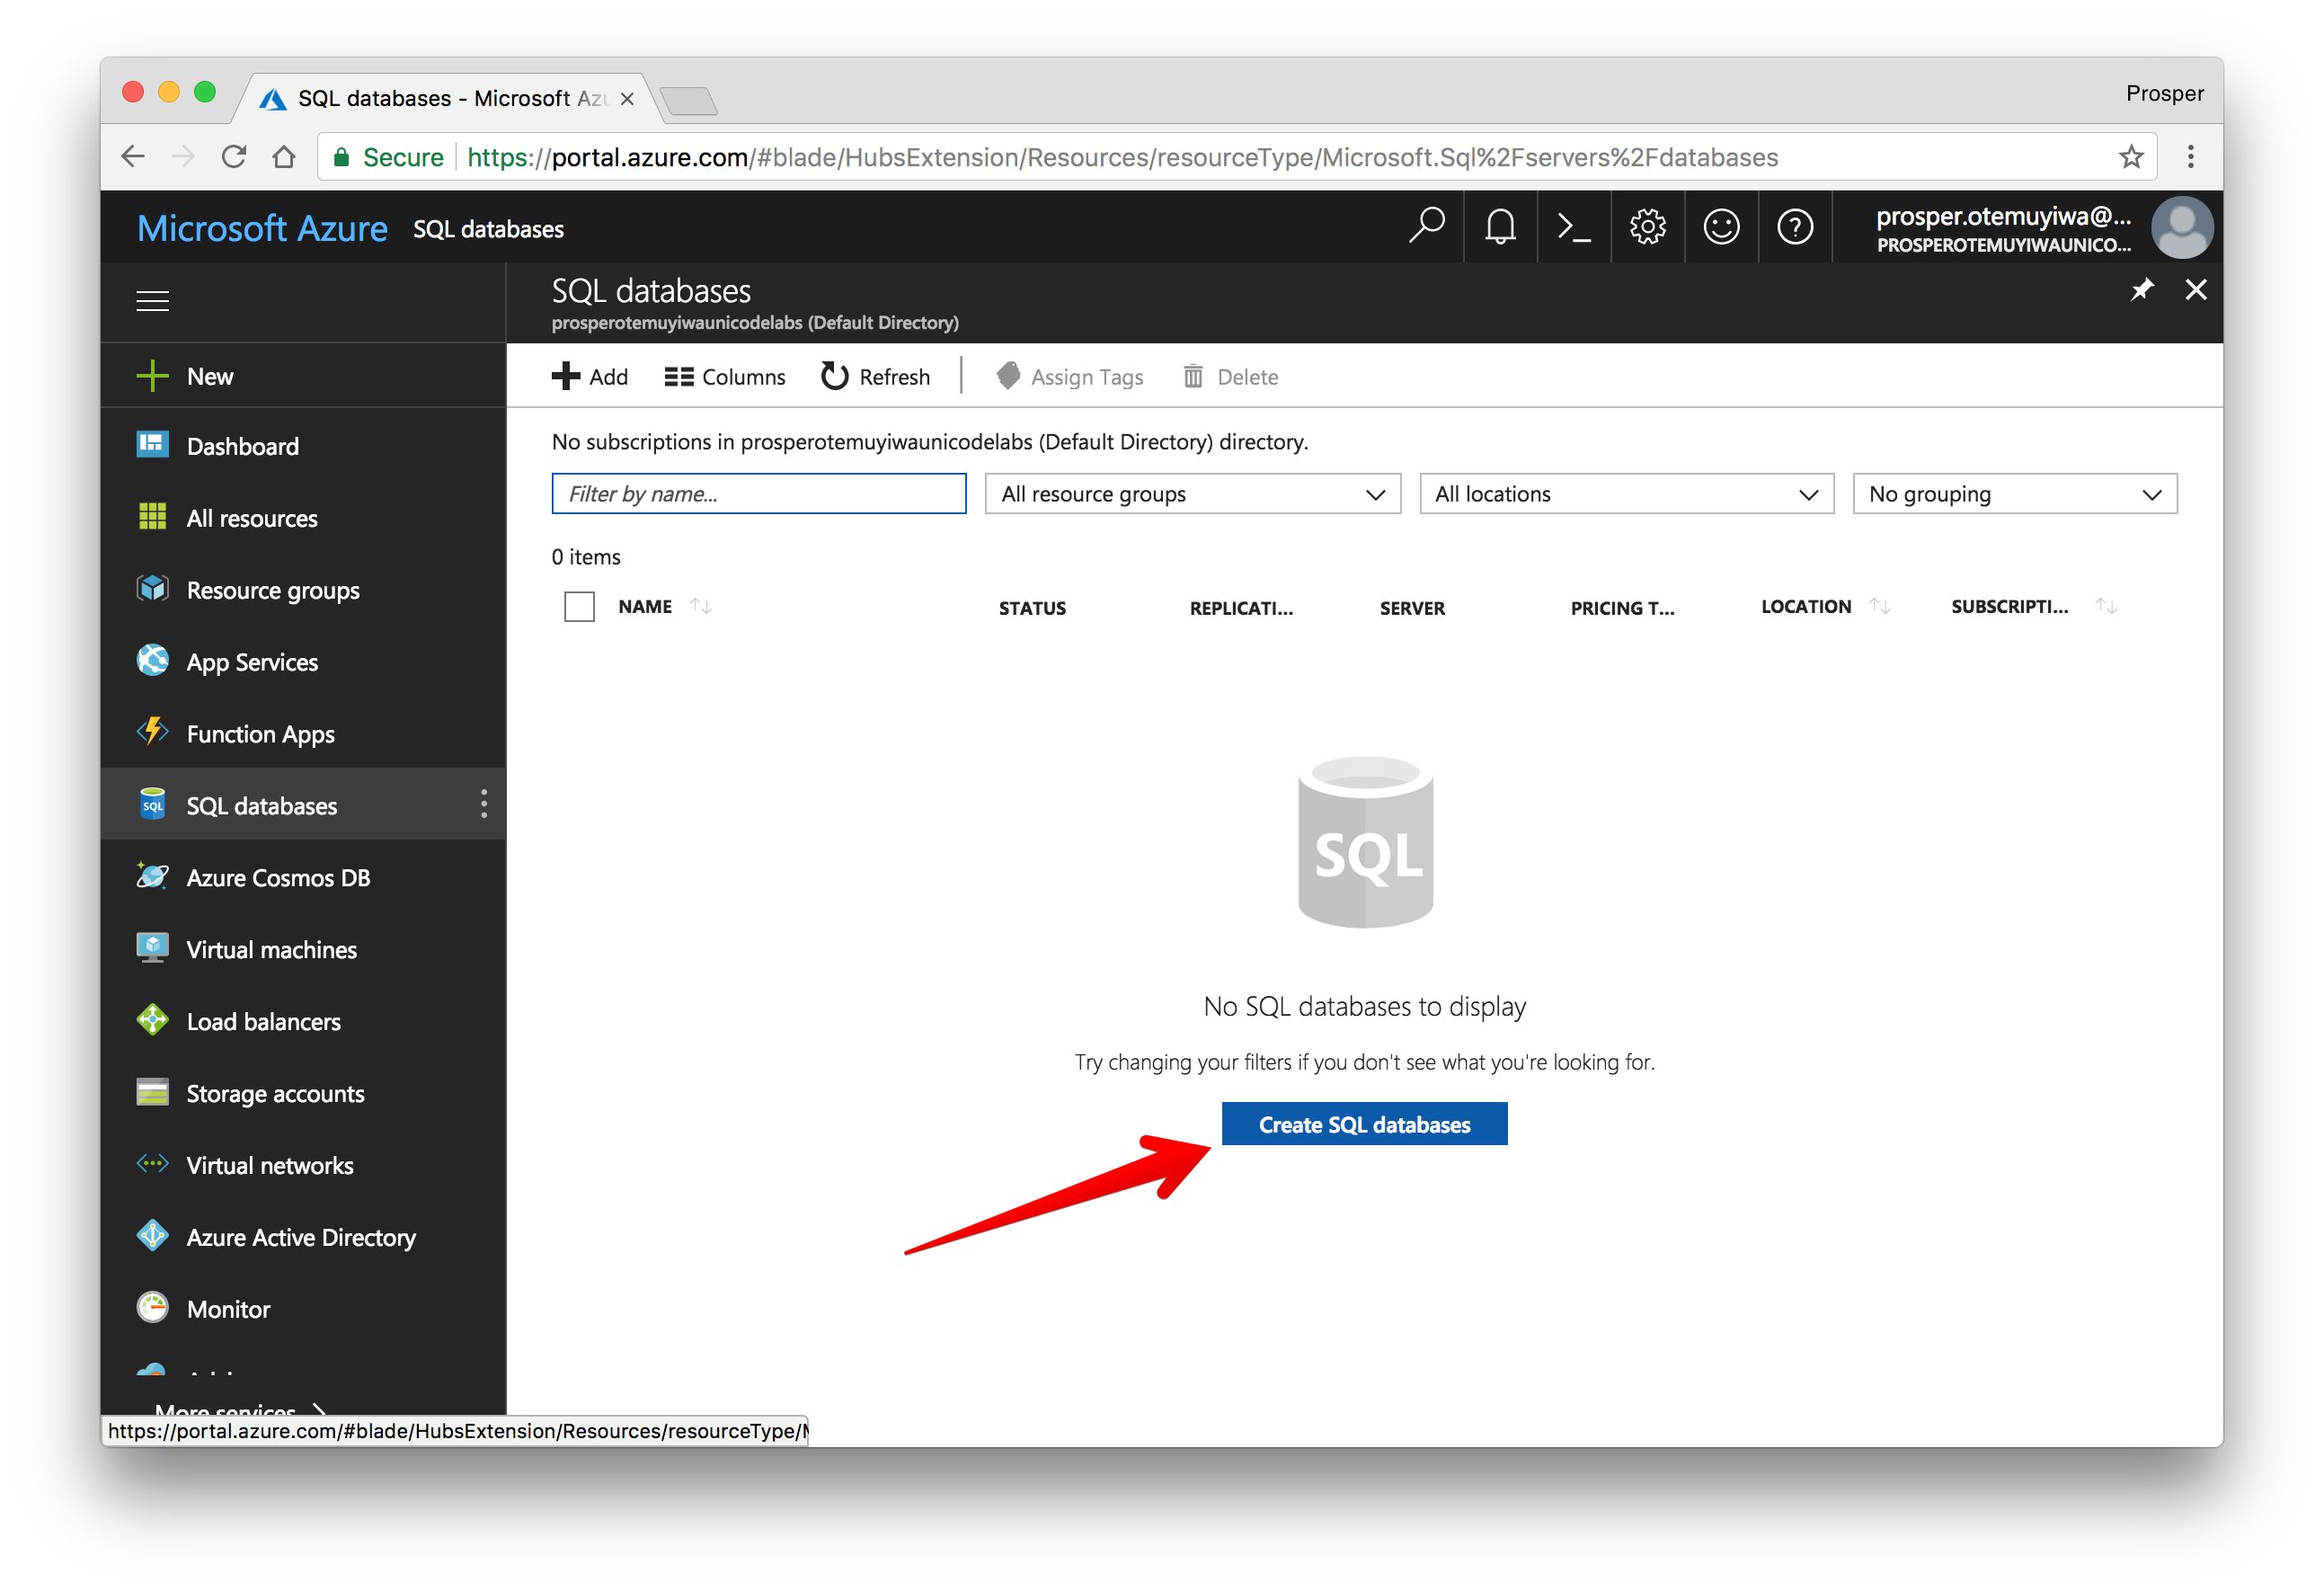
### Microsoft Azure SQL
**Microsoft Azure SQL** is a cloud platform that offers SQL Server as a service.
You can follow the steps below to get started with provisioning a database.
- Create a new [account](https://portal.azure.com).
- Select `SQL Databases` by the left sidebar and create database.
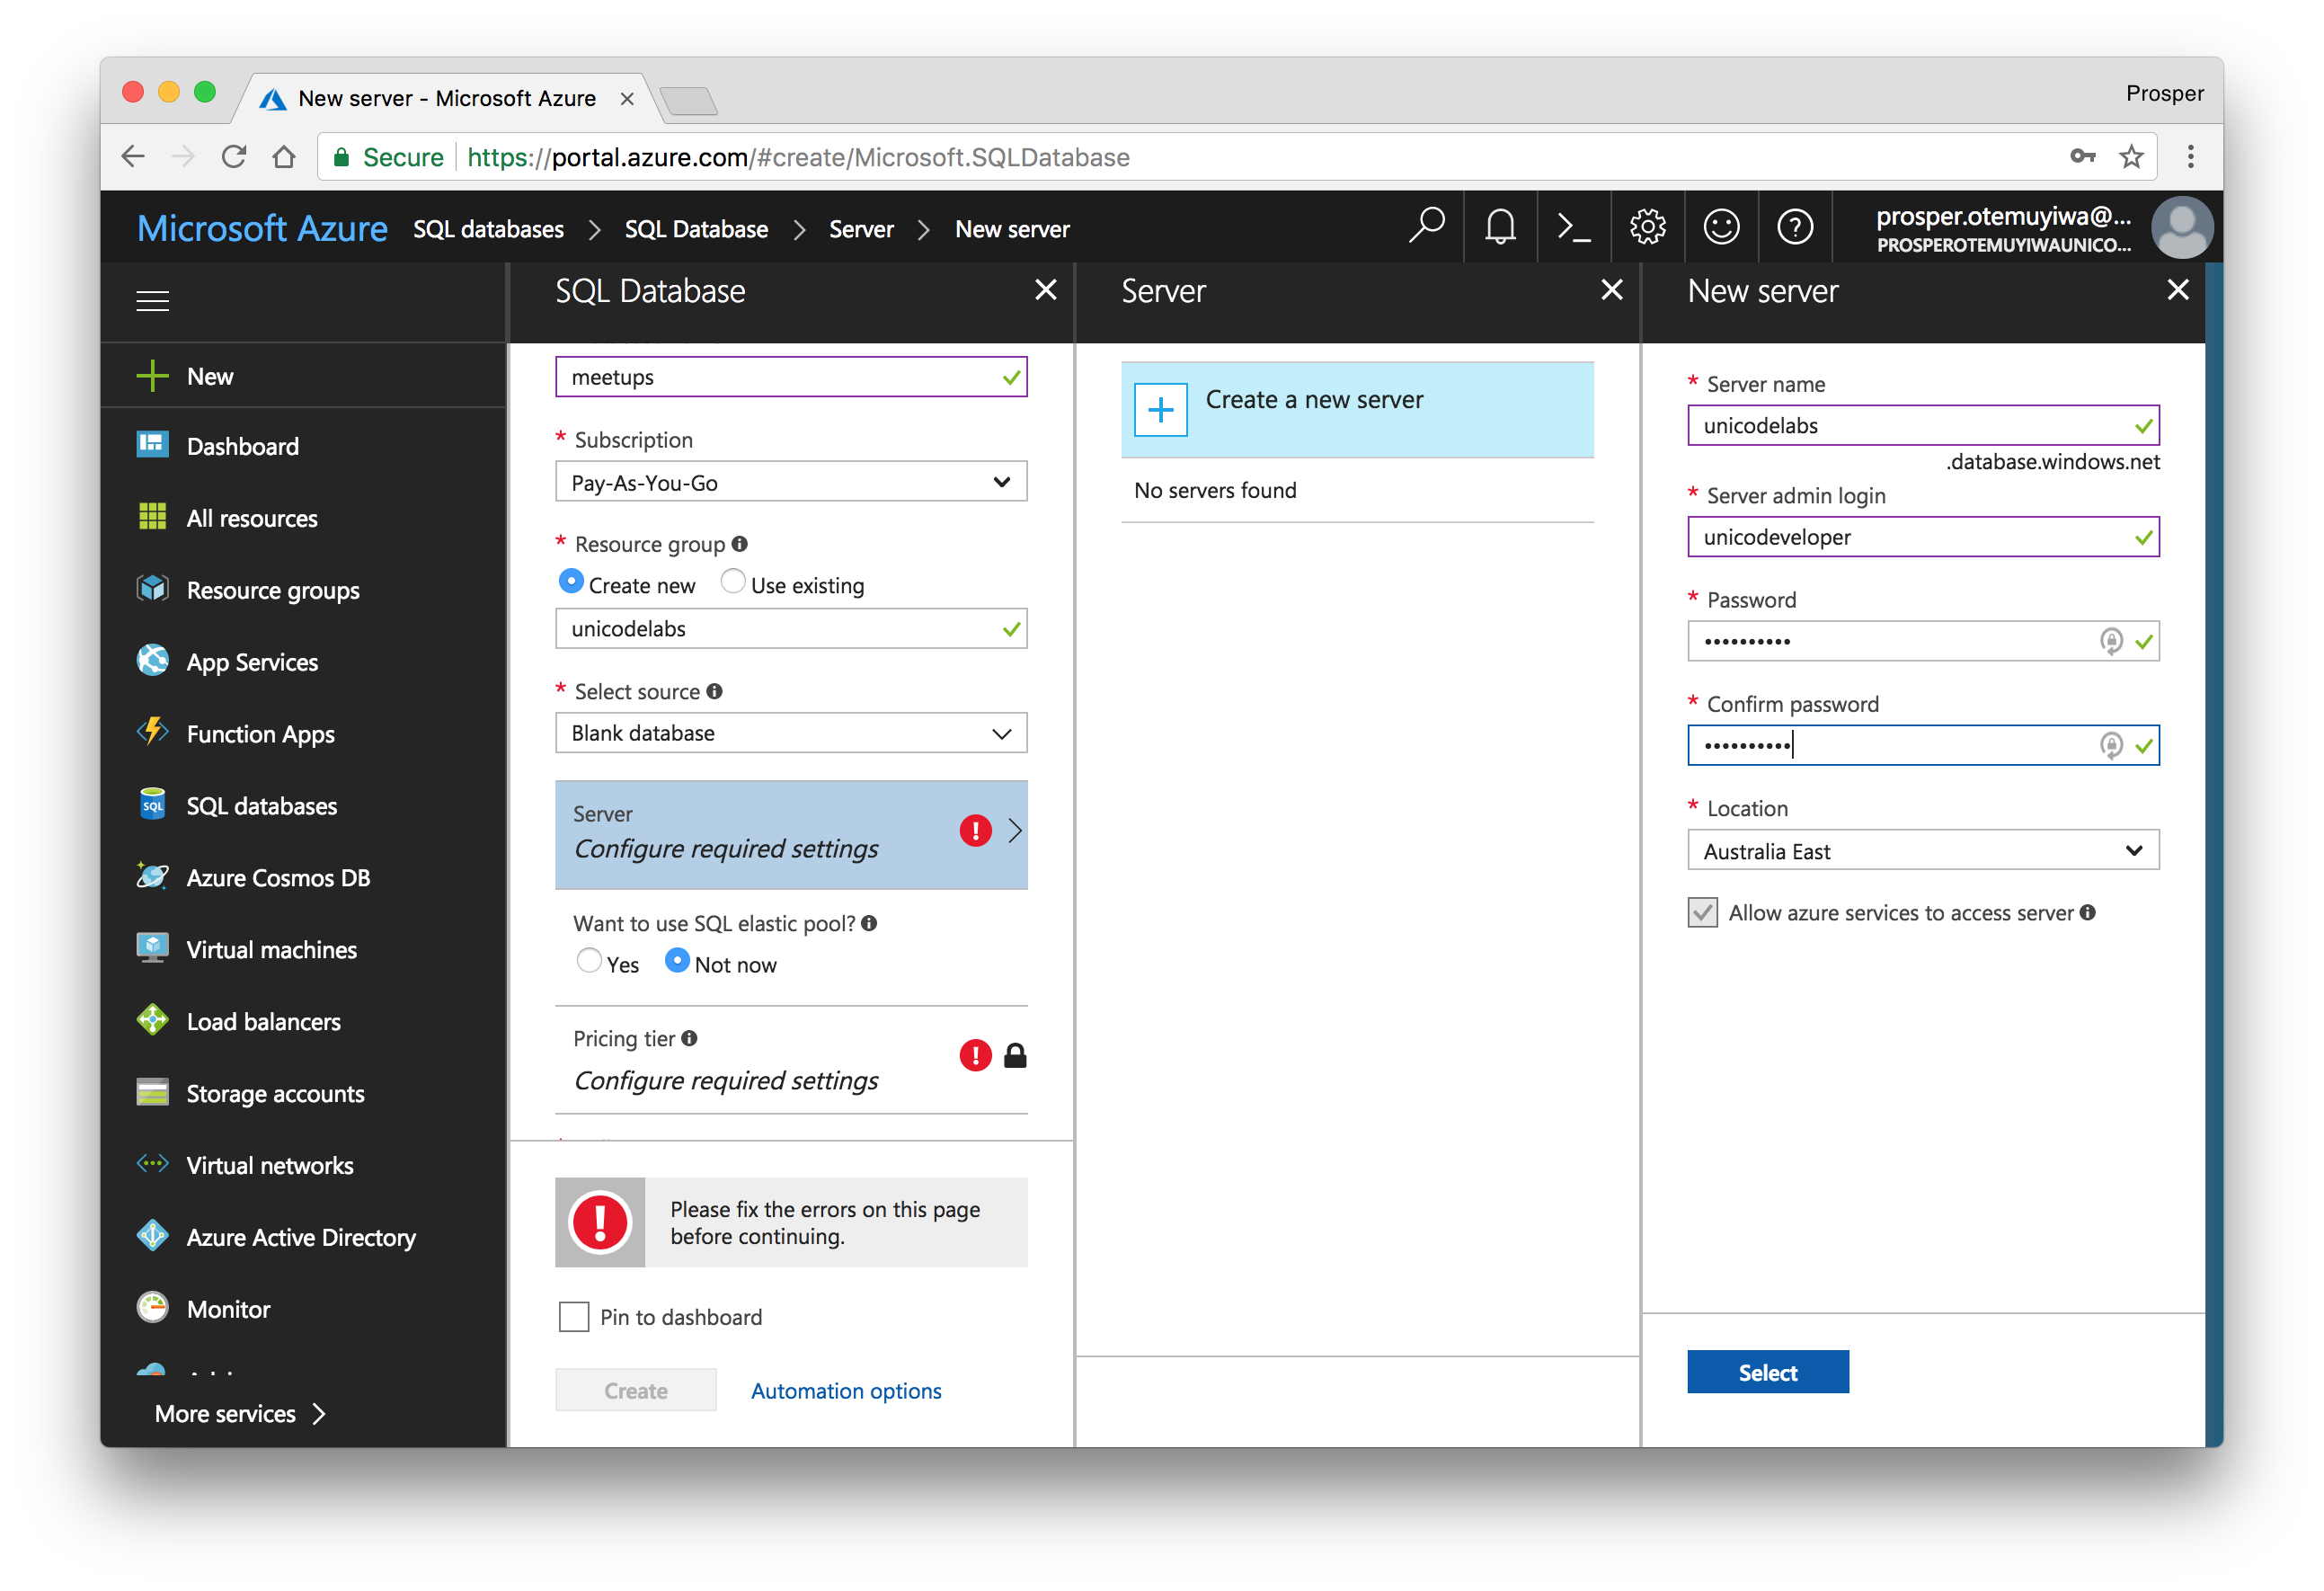
- During creation, create a new server by filling in the right details and clicking on `Select`.
- Once you are done, create the database and click on _Show database connection strings_.
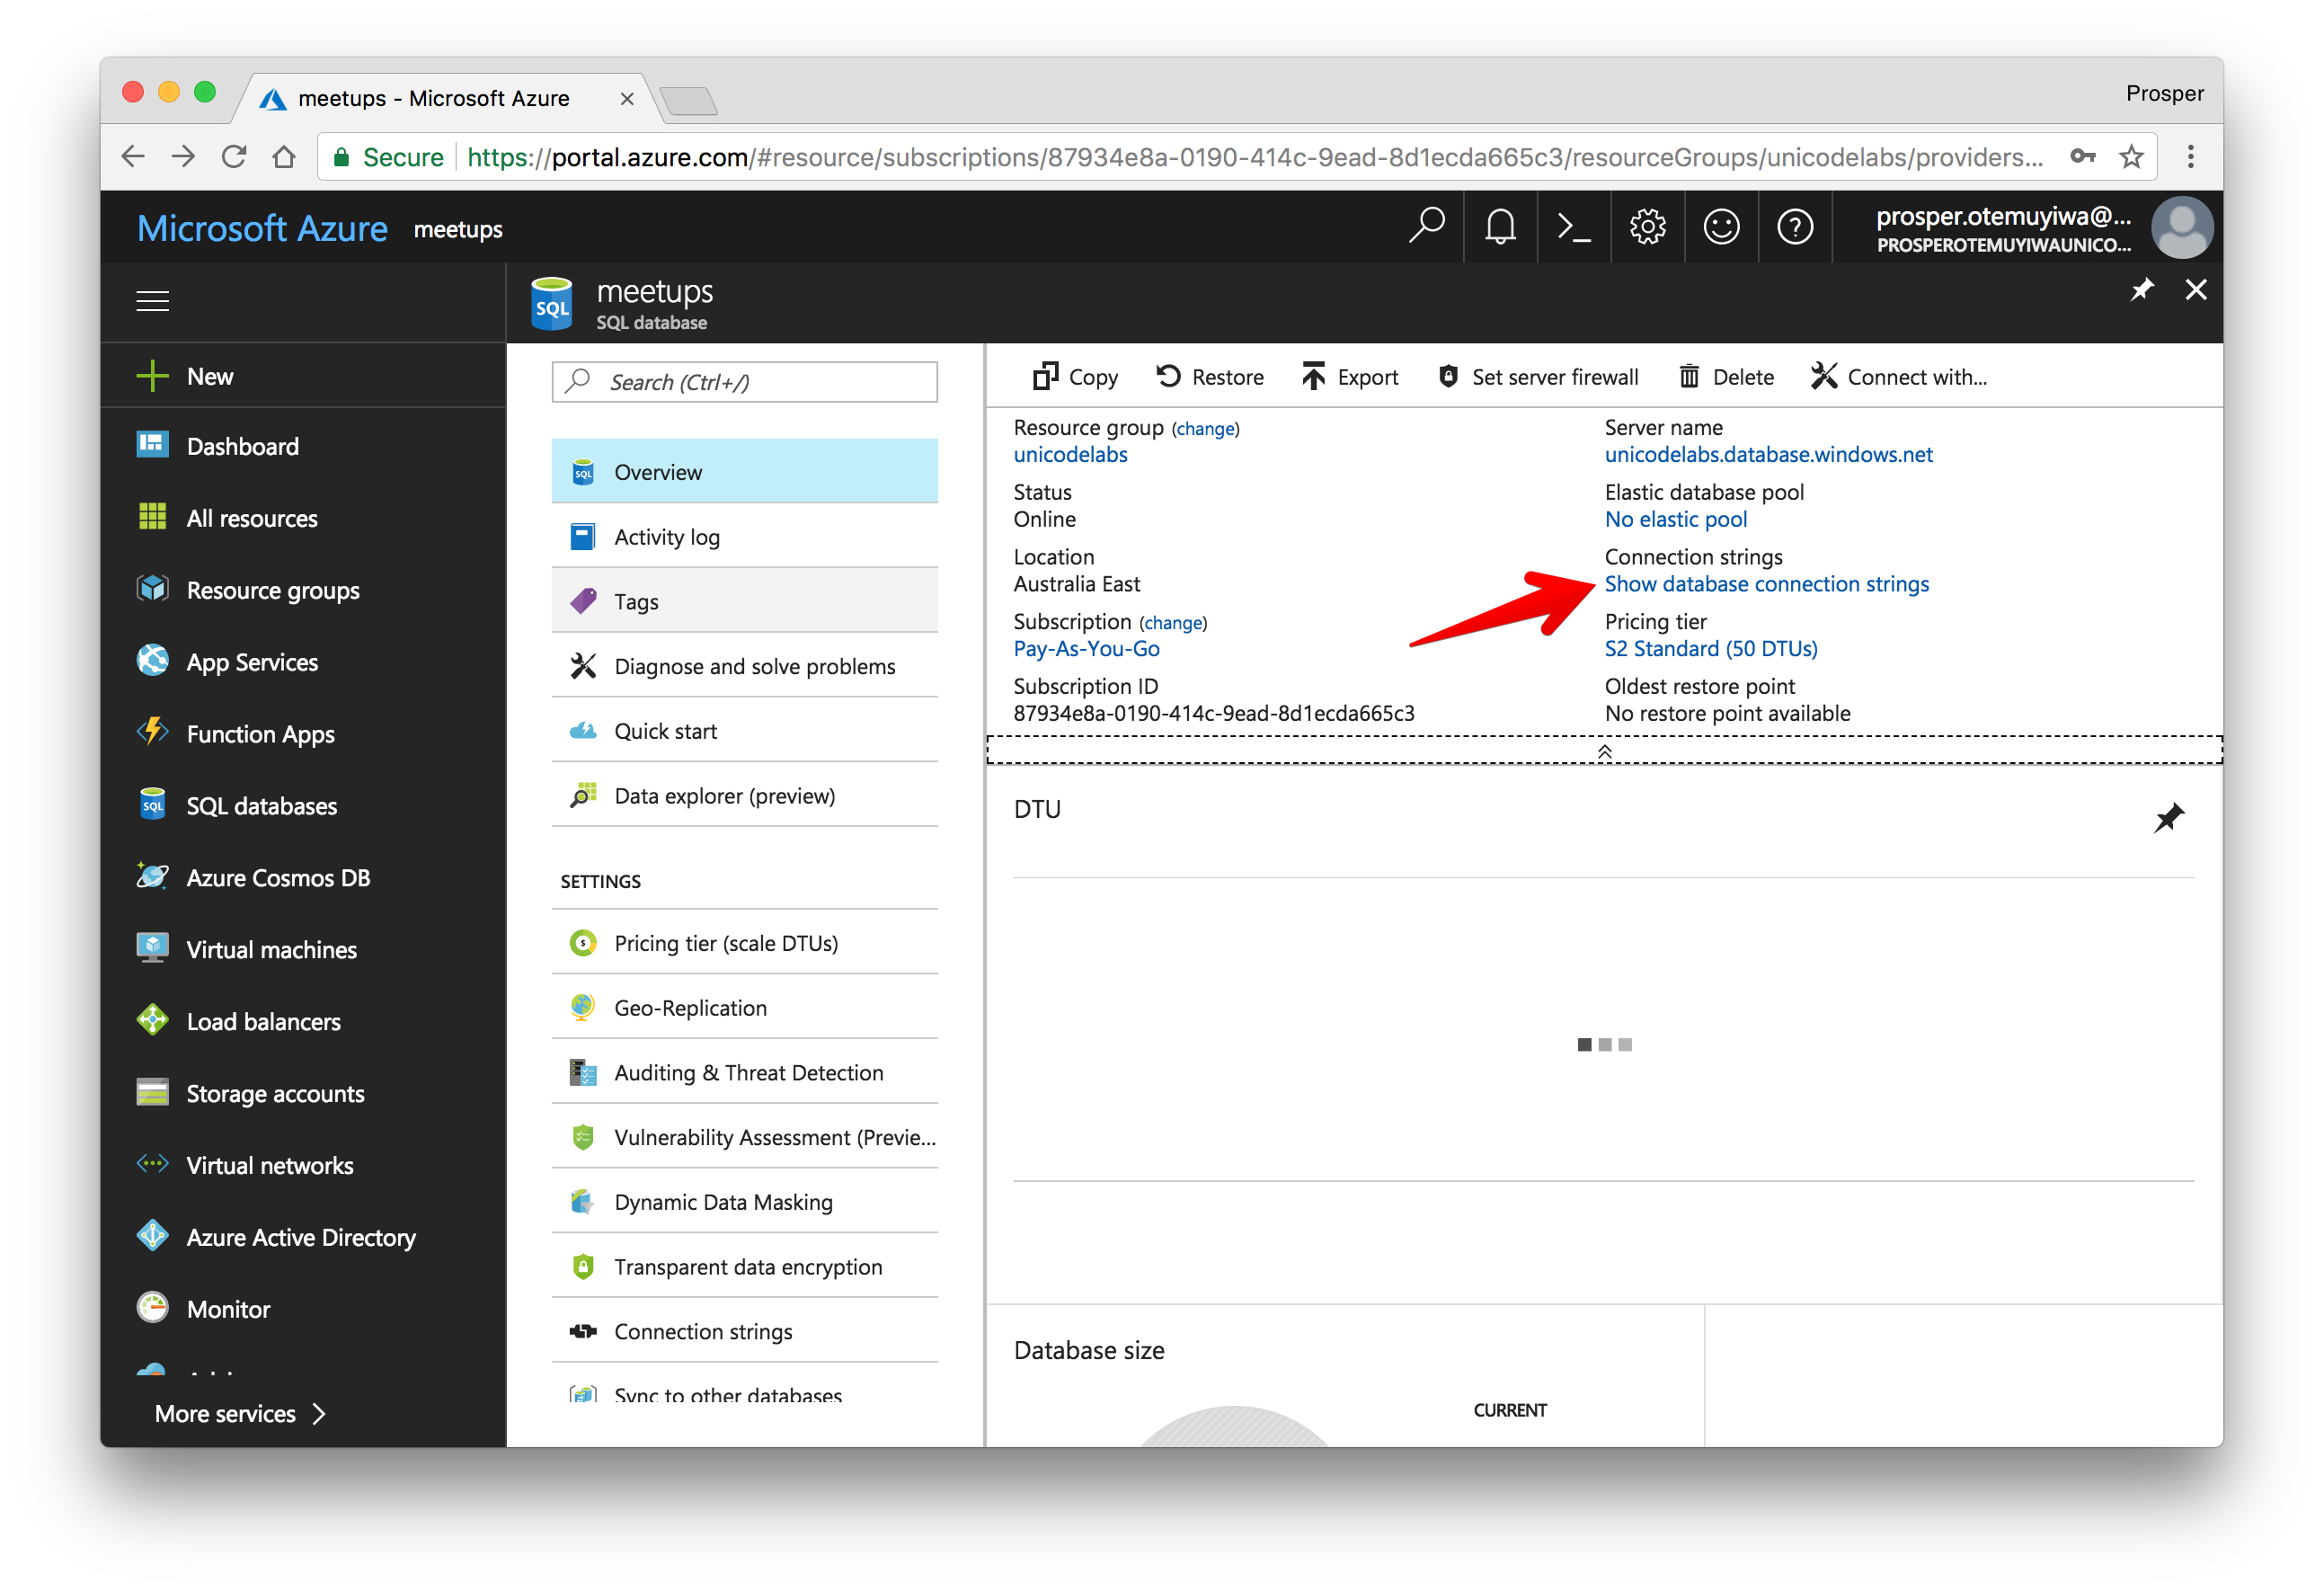
Use the URL Connection string in your application to connect to the remote database.
### Amazon RDS
Amazon Relational Database Service (RDS) is a cloud platform that makes it easy to set up a relational database. It provides six popular database engines:
- [Aurora](https://aws.amazon.com/rds/aurora/)
- [PostgreSQL](https://aws.amazon.com/rds/postgresql/)
- [MySQL](https://aws.amazon.com/rds/mysql/)
- [MariaDB](https://aws.amazon.com/rds/mariadb/)
- [Oracle](https://aws.amazon.com/rds/oracle/)
- [Microsoft SQL Server](https://aws.amazon.com/rds/sqlserver/)
It is highly optimized for memory, I/O and performance.
## Code Deployment
We have briefly discussed the several ways and services you can deploy your database. Now, let's talk about the code. Here, we'll deploy the backend. There are several awesome cloud platforms that do a very awesome job at backend deployments.
### Heroku
Heroku is a cloud platform that helps you deploy and host your applications the modern way. It does all the heavy-lifting for you. Let's quickly take a look at how to deploy and maintain a Node.js application on heroku.
Heroku runs a first-class experience for Node.js so every developer can run successful production apps.
If you don't have an account, go ahead and create one on [heroku.com](https://www.heroku.com/). Go ahead and install the [Heroku CLI](https://devcenter.heroku.com/articles/heroku-cli).
> Heroku runs your Node.js app in a dyno, a smart container which provides a modern stack with your choice of web server and runtime.
Clone the backend from [GitHub](https://github.com/auth0-blog/jsbackend).
Heroku looks for a [Procfile](https://devcenter.heroku.com/articles/procfile). If no `Procfile` exists for the Node.js app, Heroku will attempt to start a default web process via the `start script` in your `package.json`. In our app's backend, we have a `start script`.
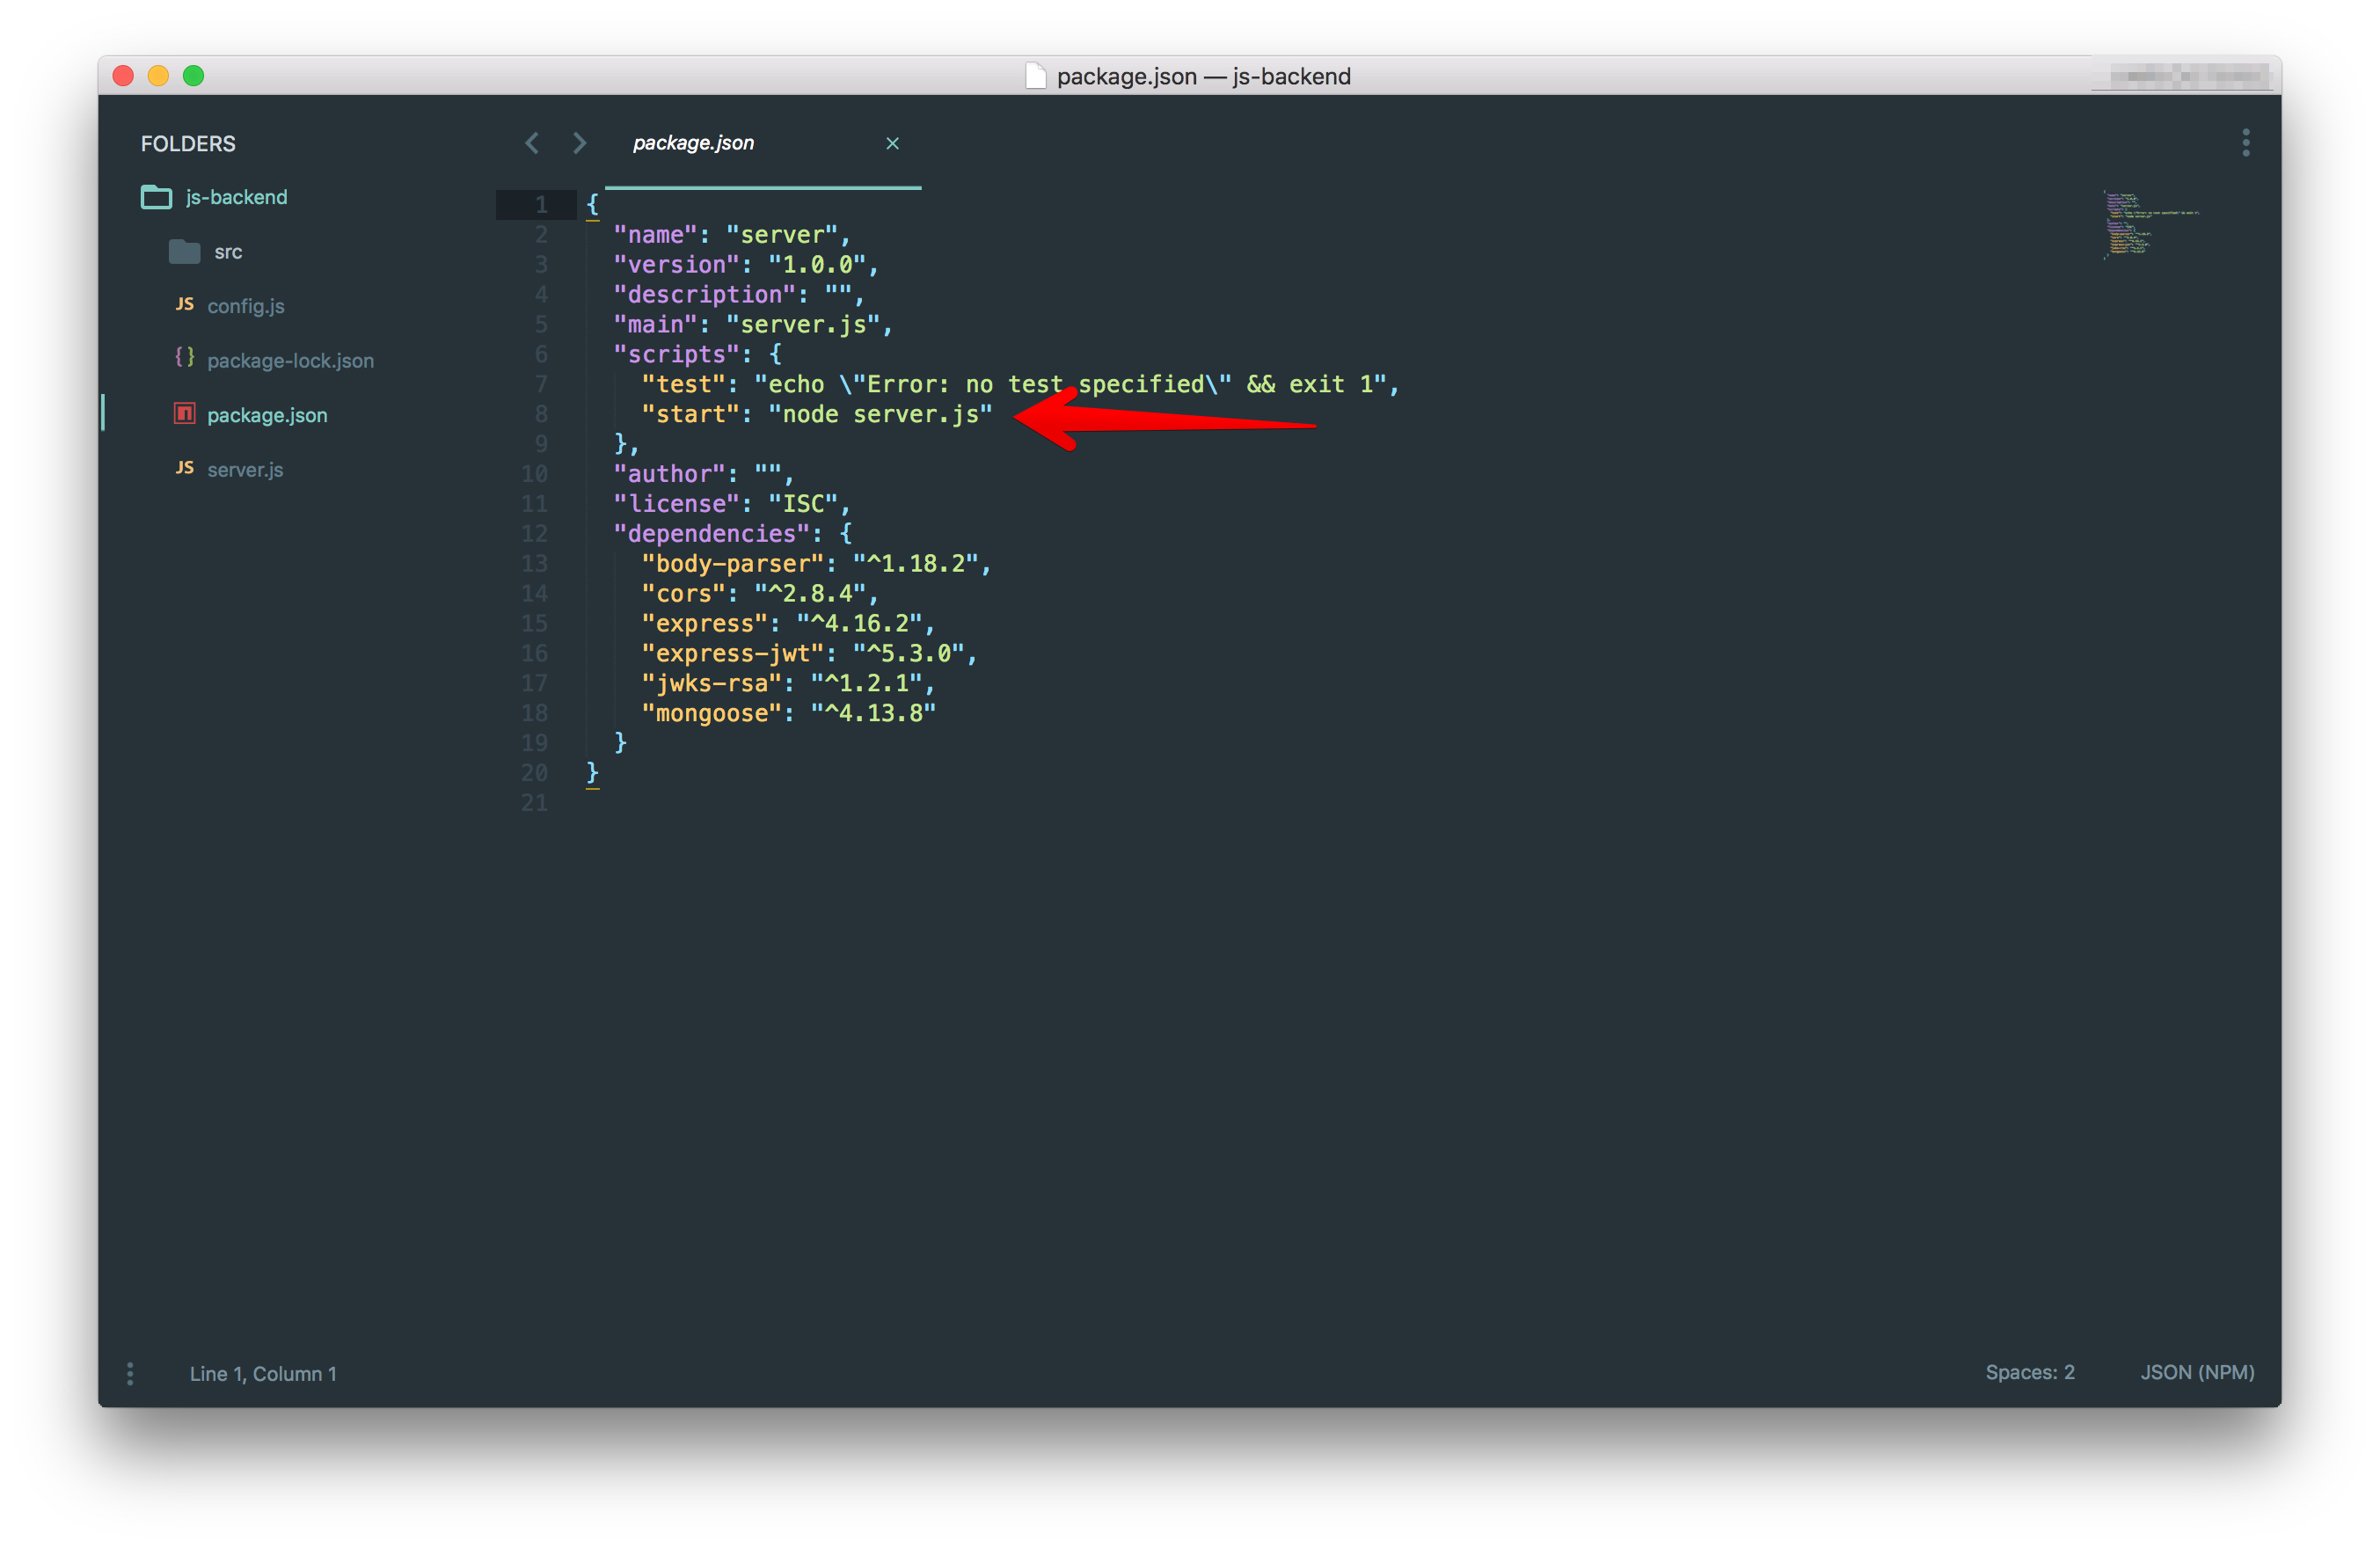
>Note: A Procfile is a text file in the root directory of your application that defines process types and explicitly declares what command should be executed to start your app on Heroku.
You can go ahead to upload the project to your [GitHub](https://github.com) or [Bitbucket](https://bitbucket.org) account.
Head over to [dashboard.heroku.com/apps](https://dashboard.heroku.com/apps) and create a new app like so:
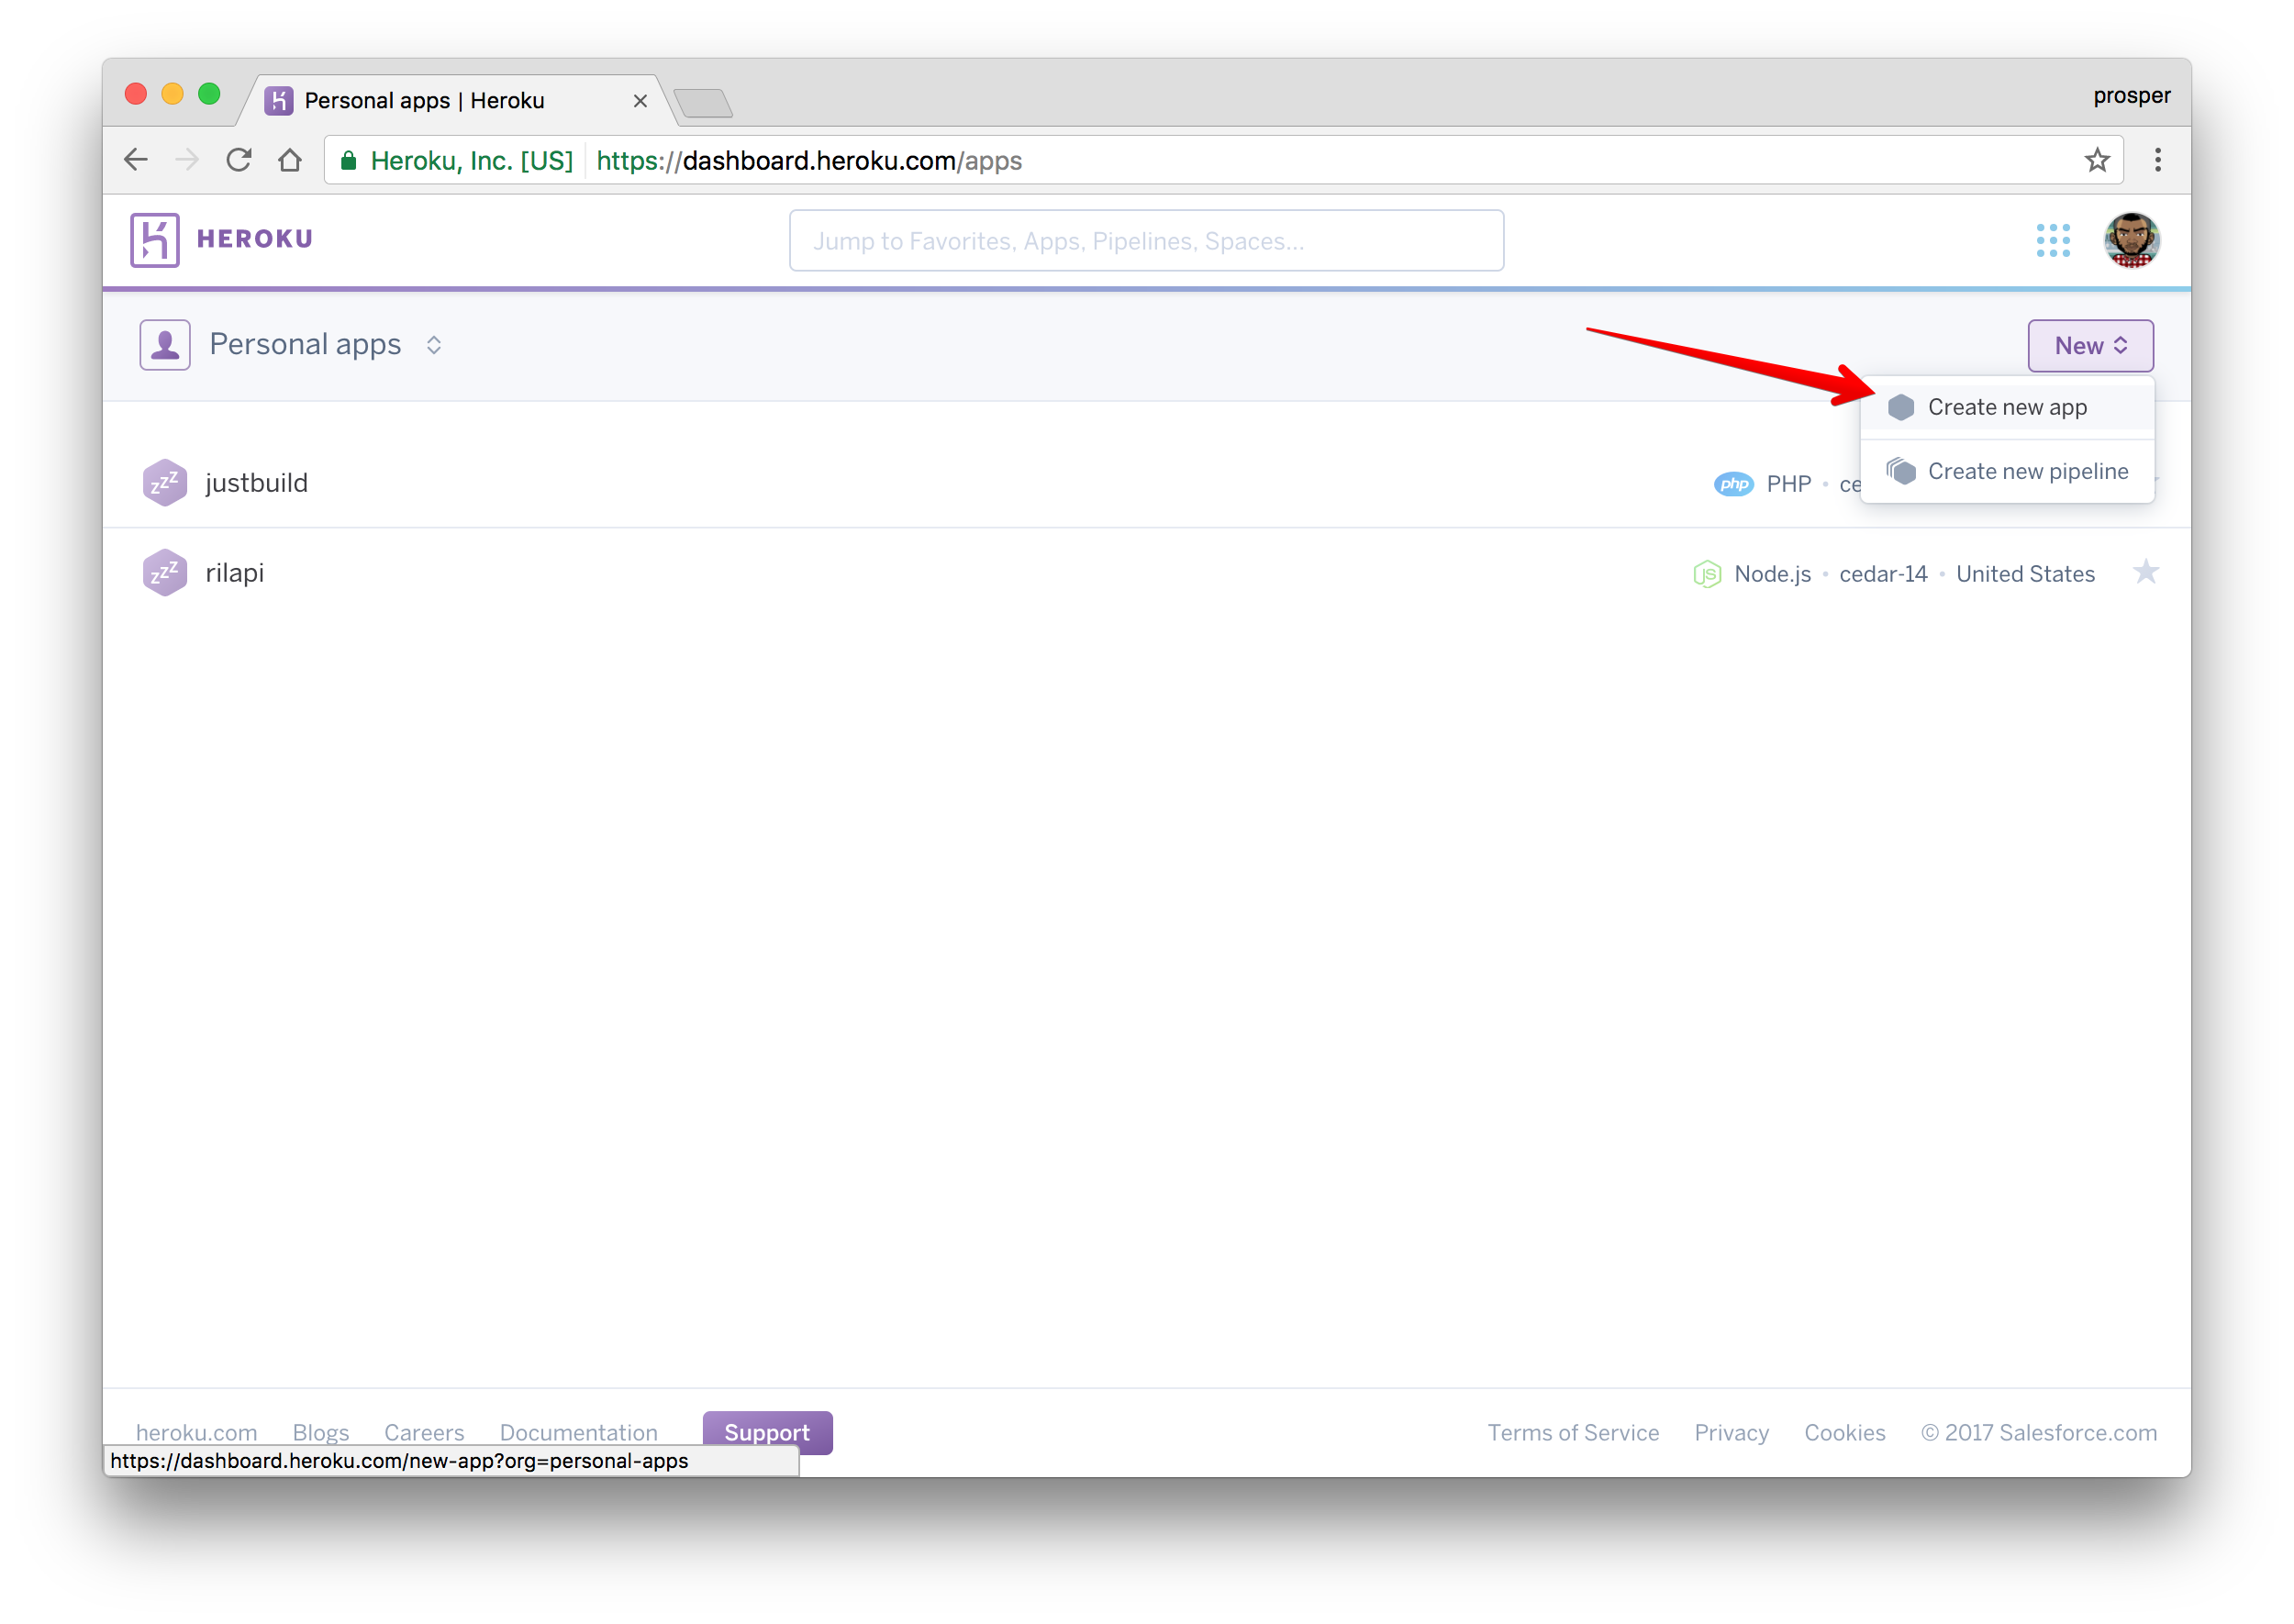
_Create a new app from the dashboard_
Give it a name like so:
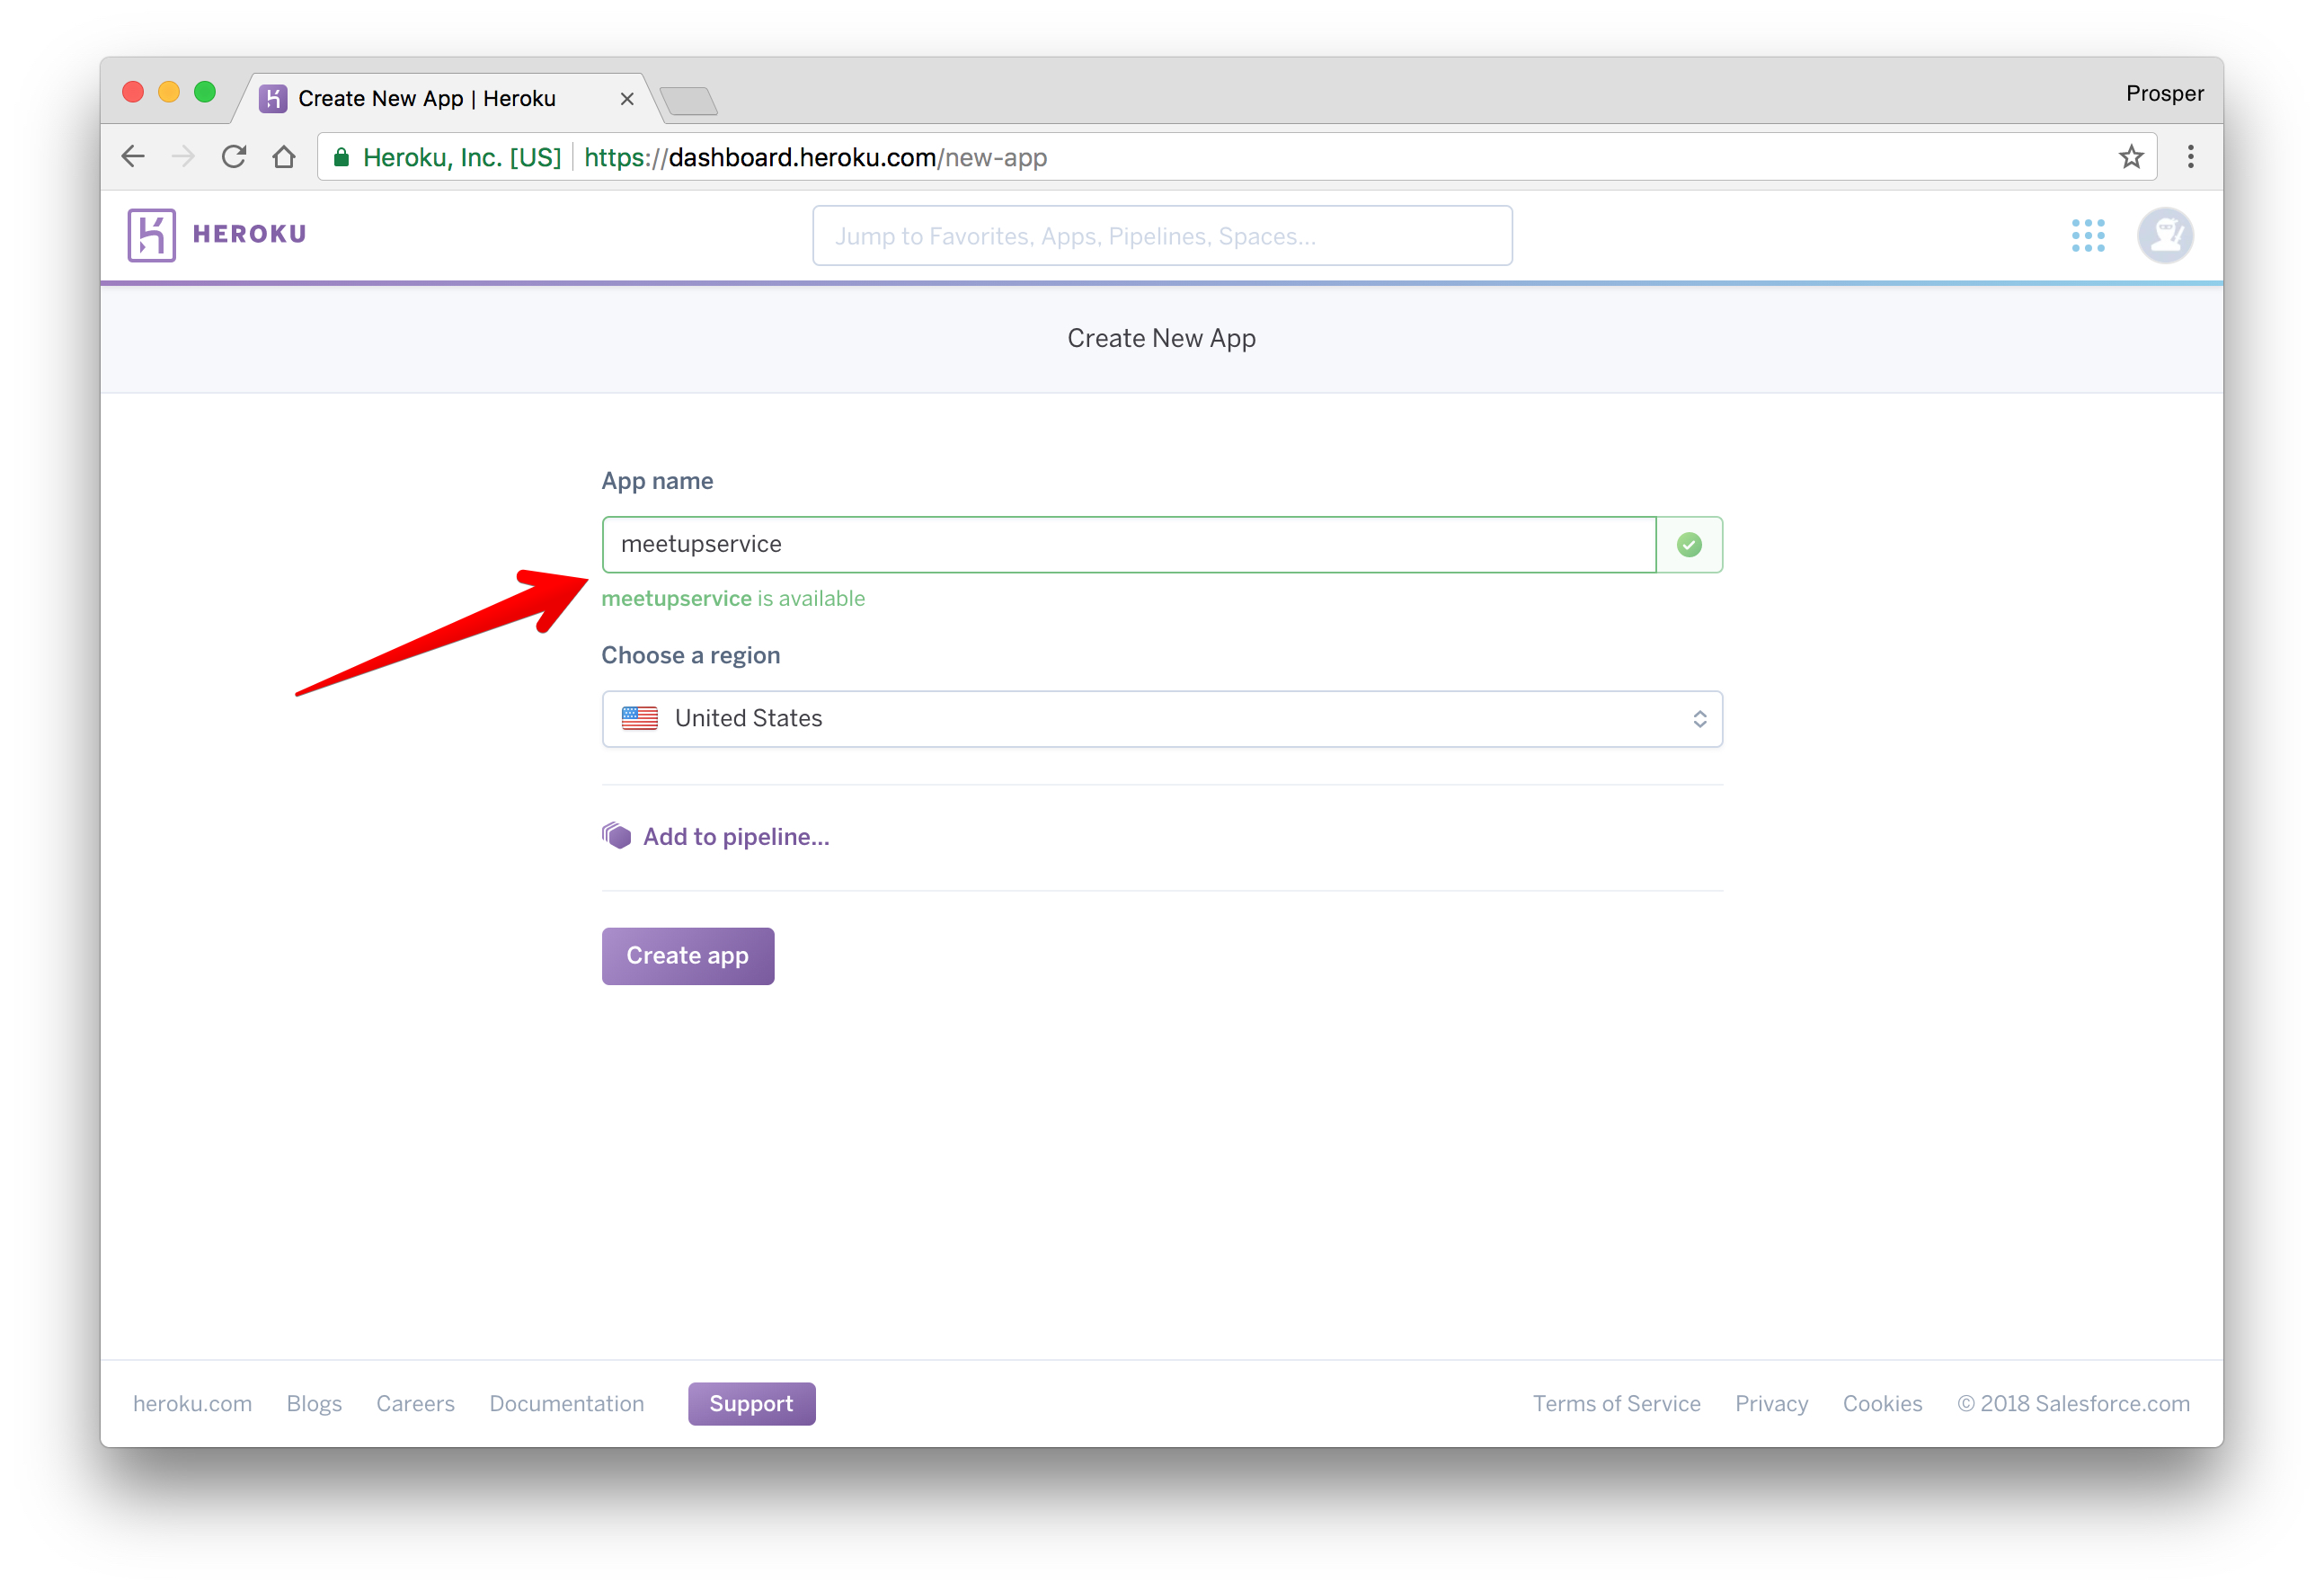
_Give app a name_
Choose a deployment method. In our case, we'll use GitHub like so:

_Connect to GitHub_
> The reason for choosing GitHub is to make development and maintenance process very smooth. Developers can work on new features using the git workflow.
Now, type the name of the repo in the circled area and click **Search**. Heroku will search for your repo under your GitHub account and display it like so

_Search for repo_
Click on `connect` like so
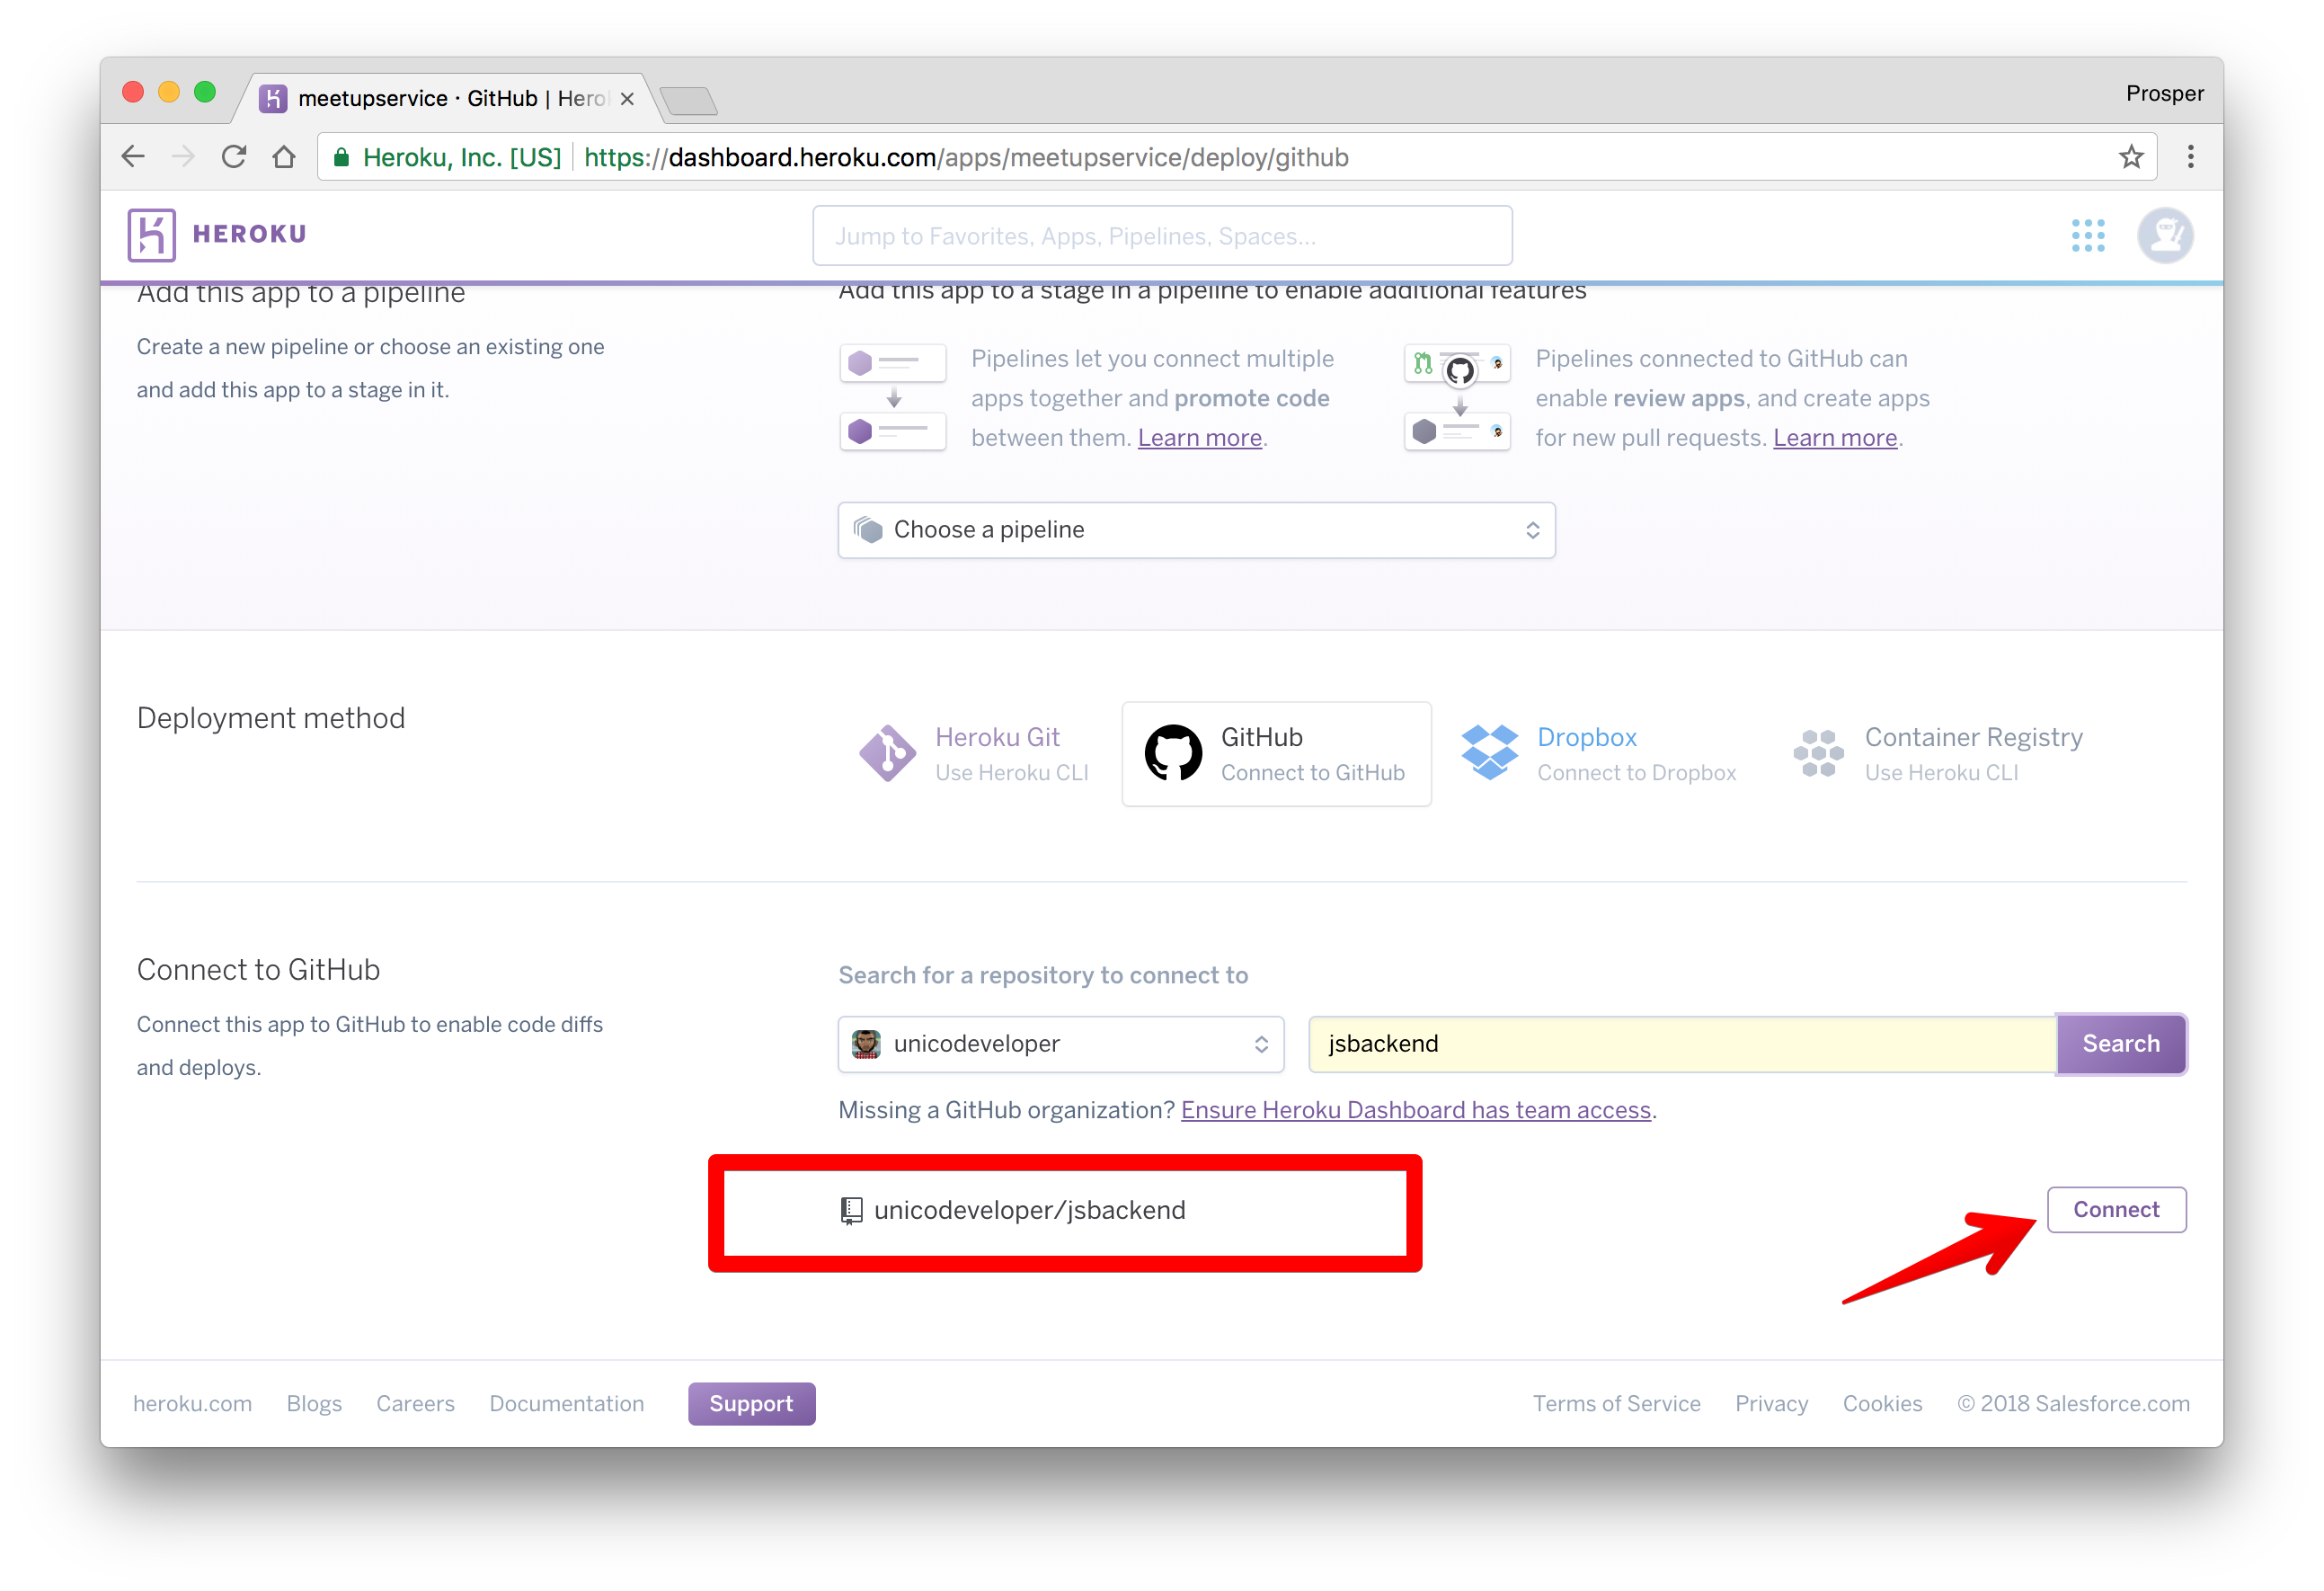
_Click on the connect button_
Heroku will connect the repo like so
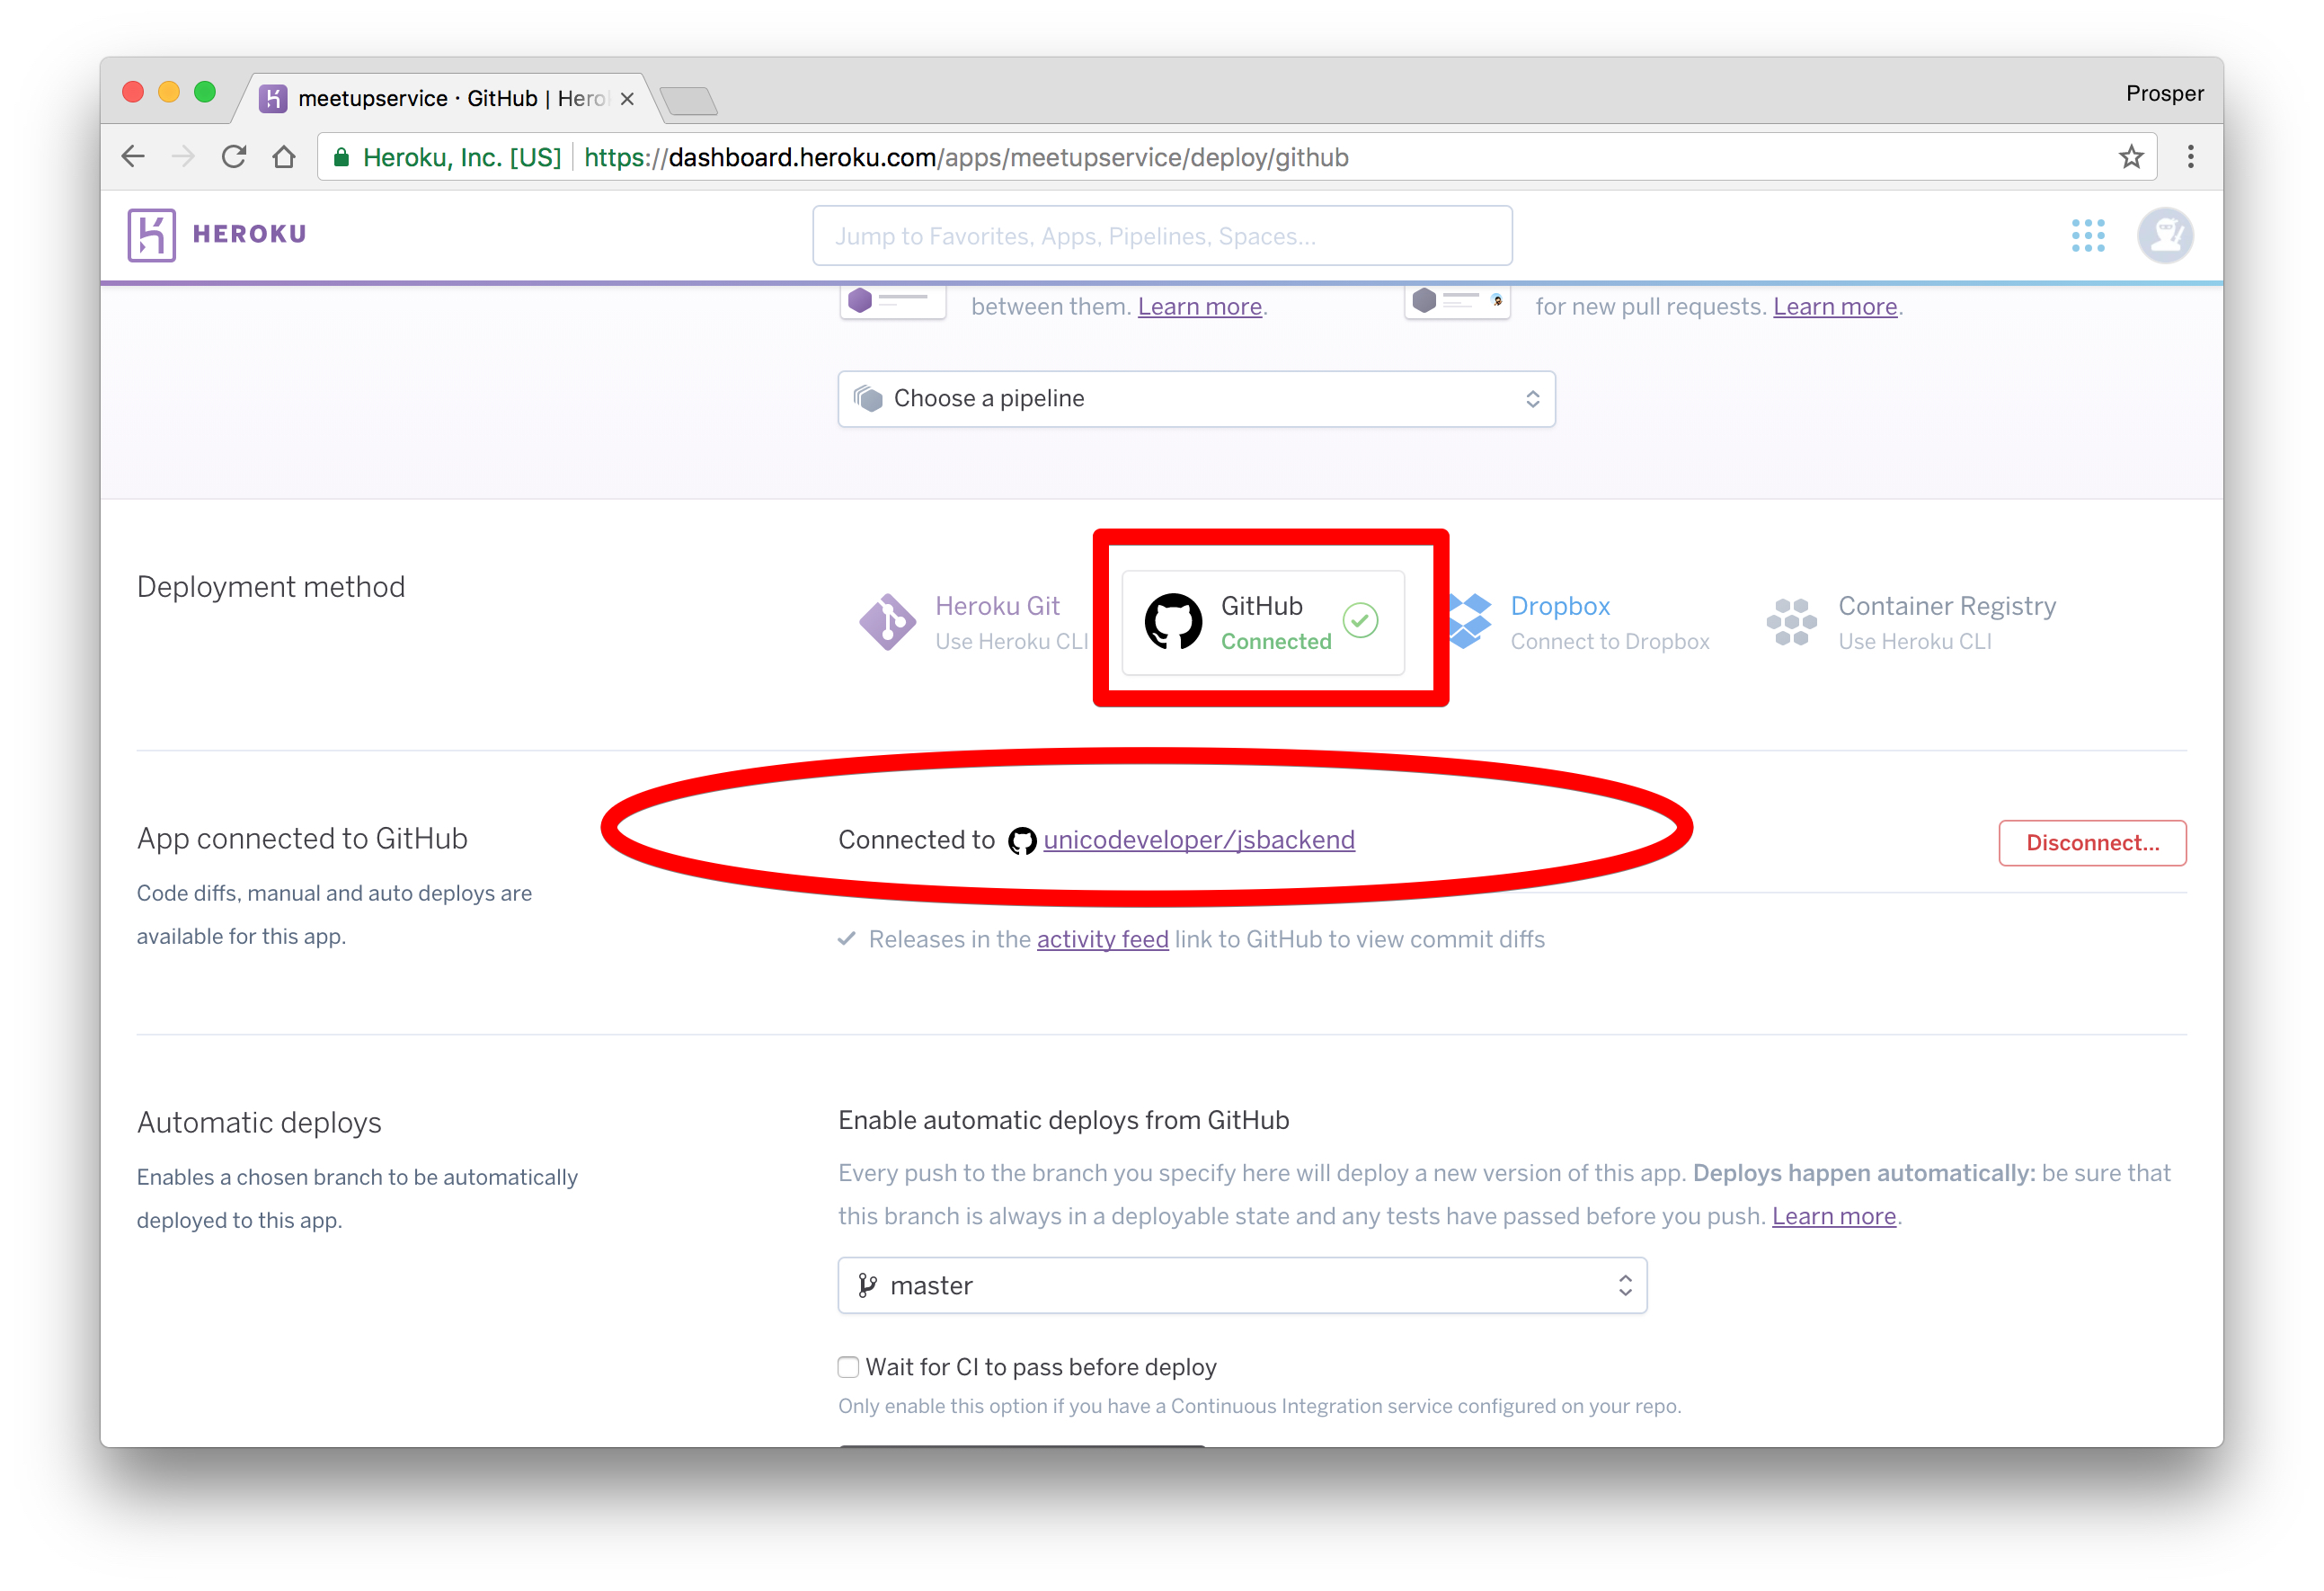
_Connected Project_
Scroll down a bit. This is the interesting part. Heroku allows you to enable automatic deploys with the push of a button. It also gives you an option to wait for your continuous integration process to pass before deploying to production. In a real world app, you'll have a test suite for your codebase. A developers' code runs against the test suite. If it passes, the code will be pushed to production.
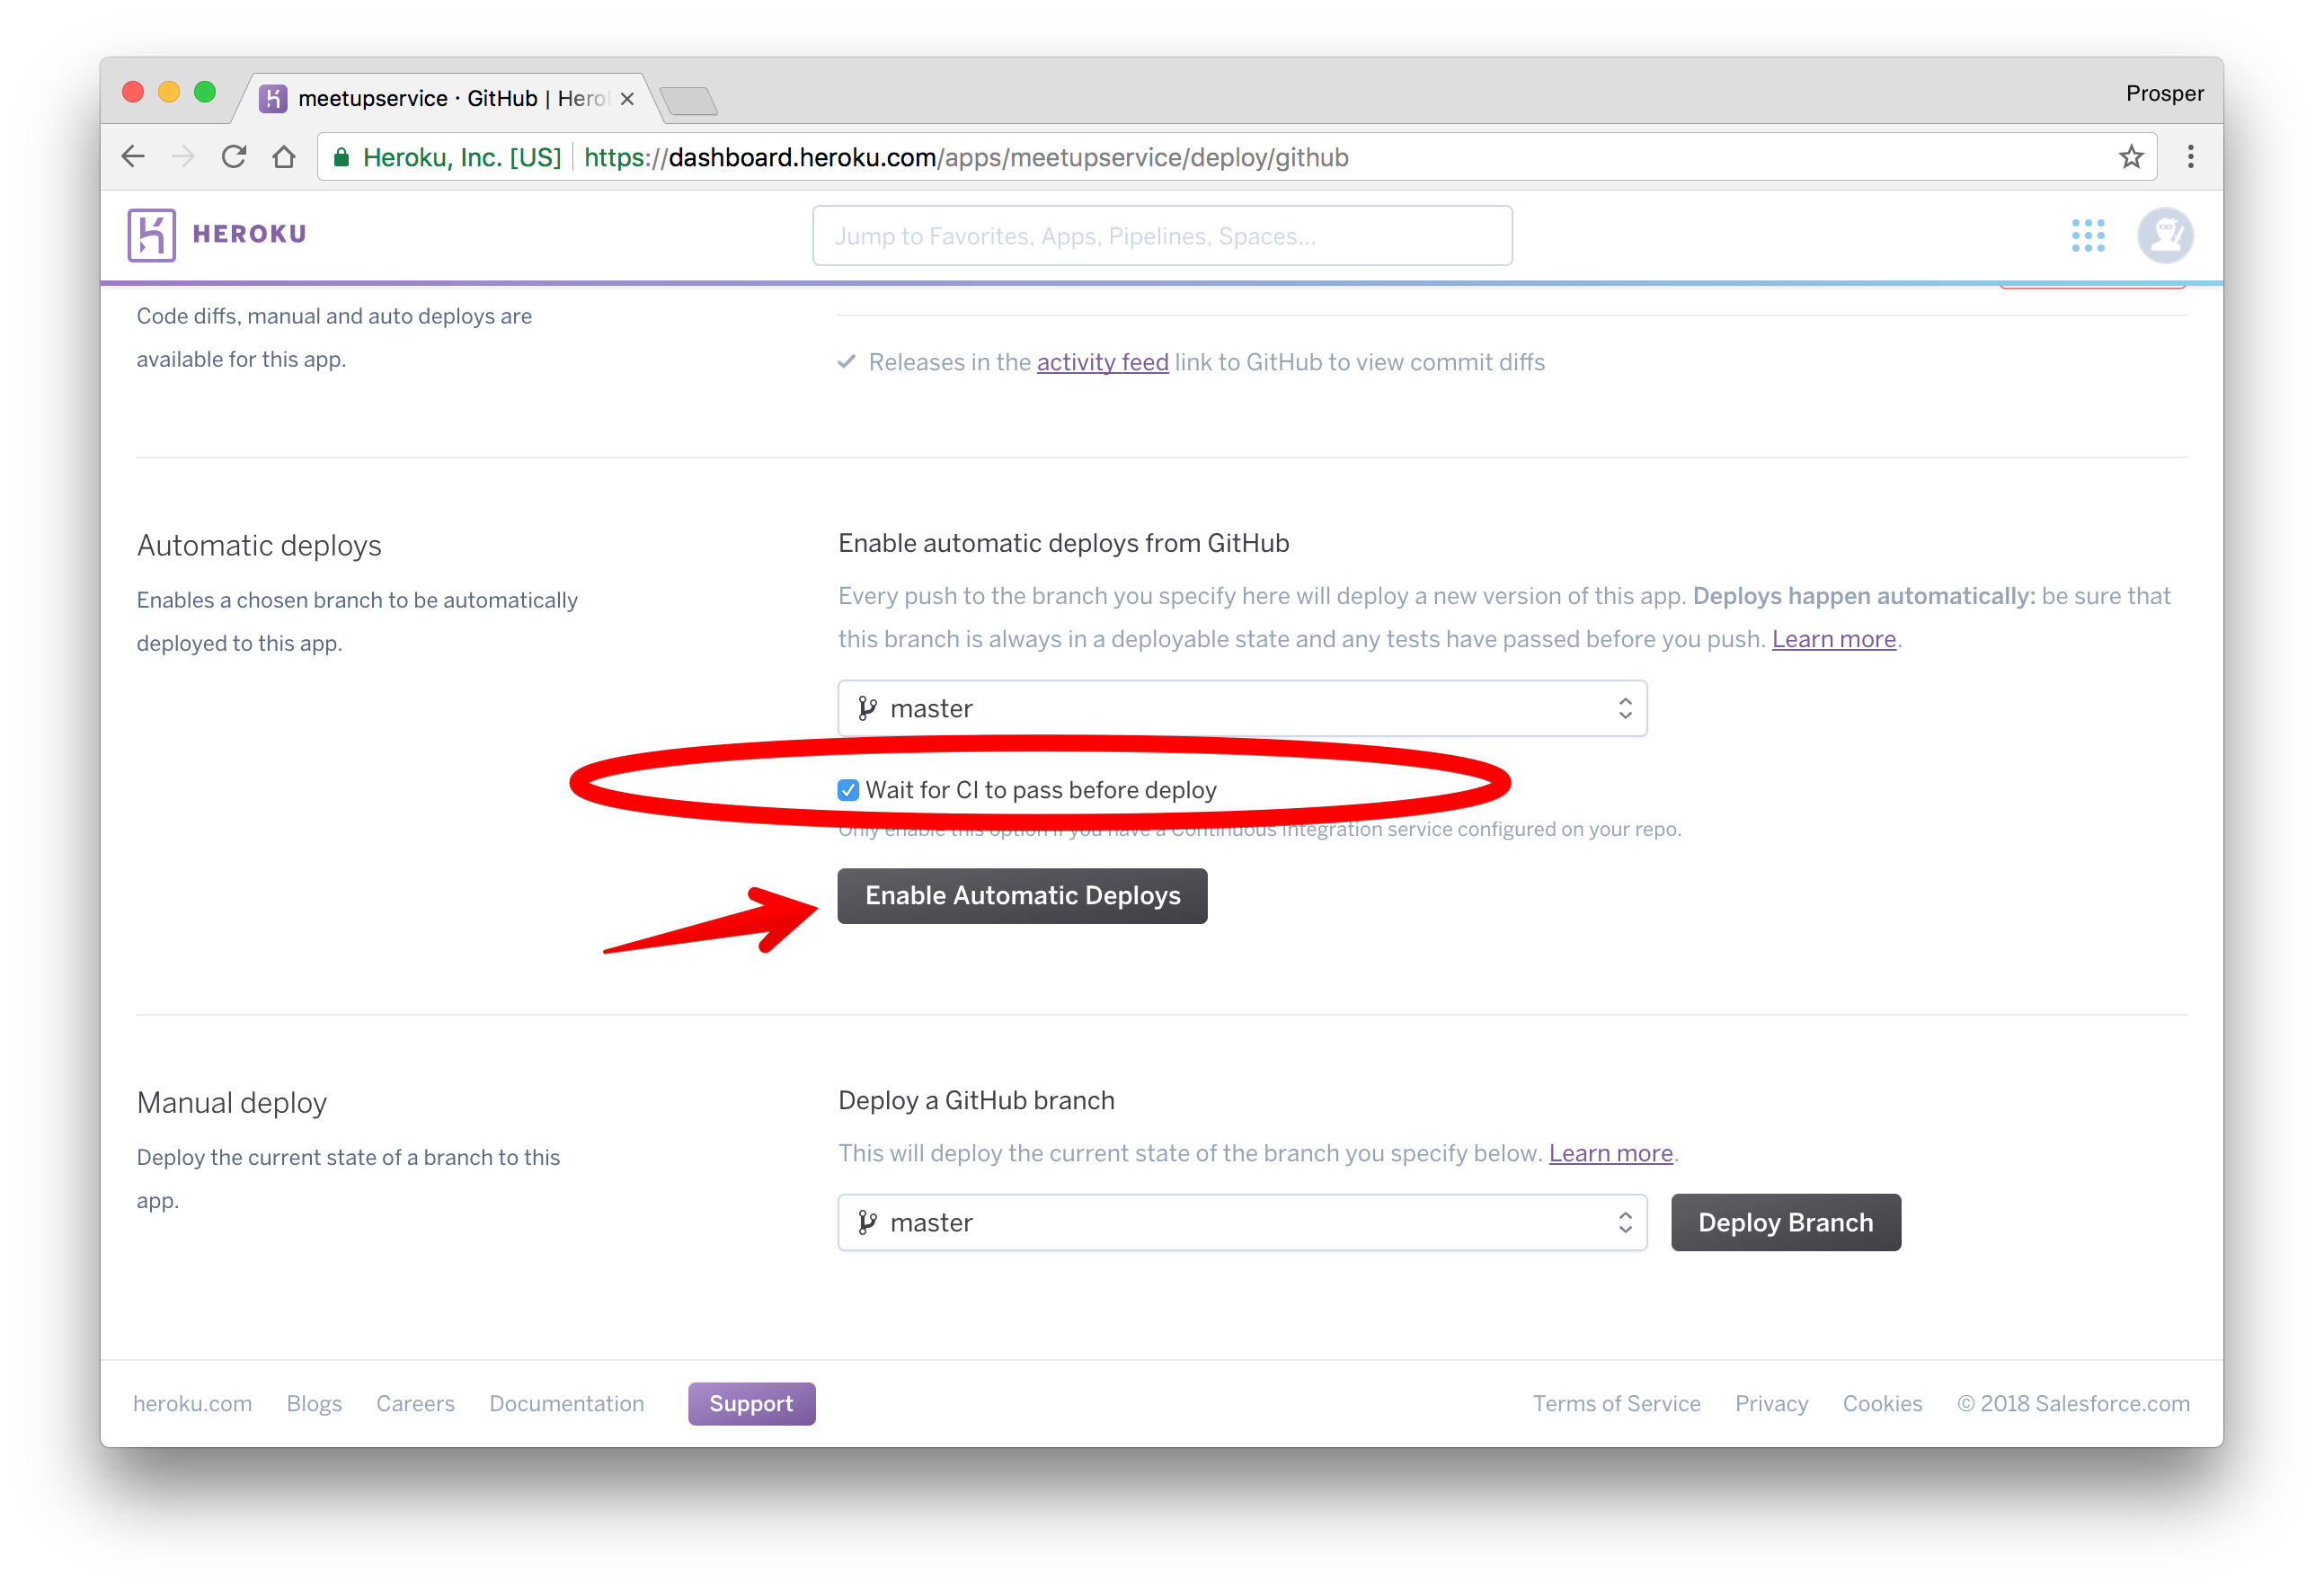
Click to enable automatic deploys. We don't have any CI service, so we don't need to enable that option. Now, let's deploy the master branch.
> **Note:** You can have other branches and specify which branch you want for production. In our case, the master branch is the prod. branch.
Click on the **Deploy branch**. Heroku will scan through your `package.json` file, install the necessary packages and deploy!
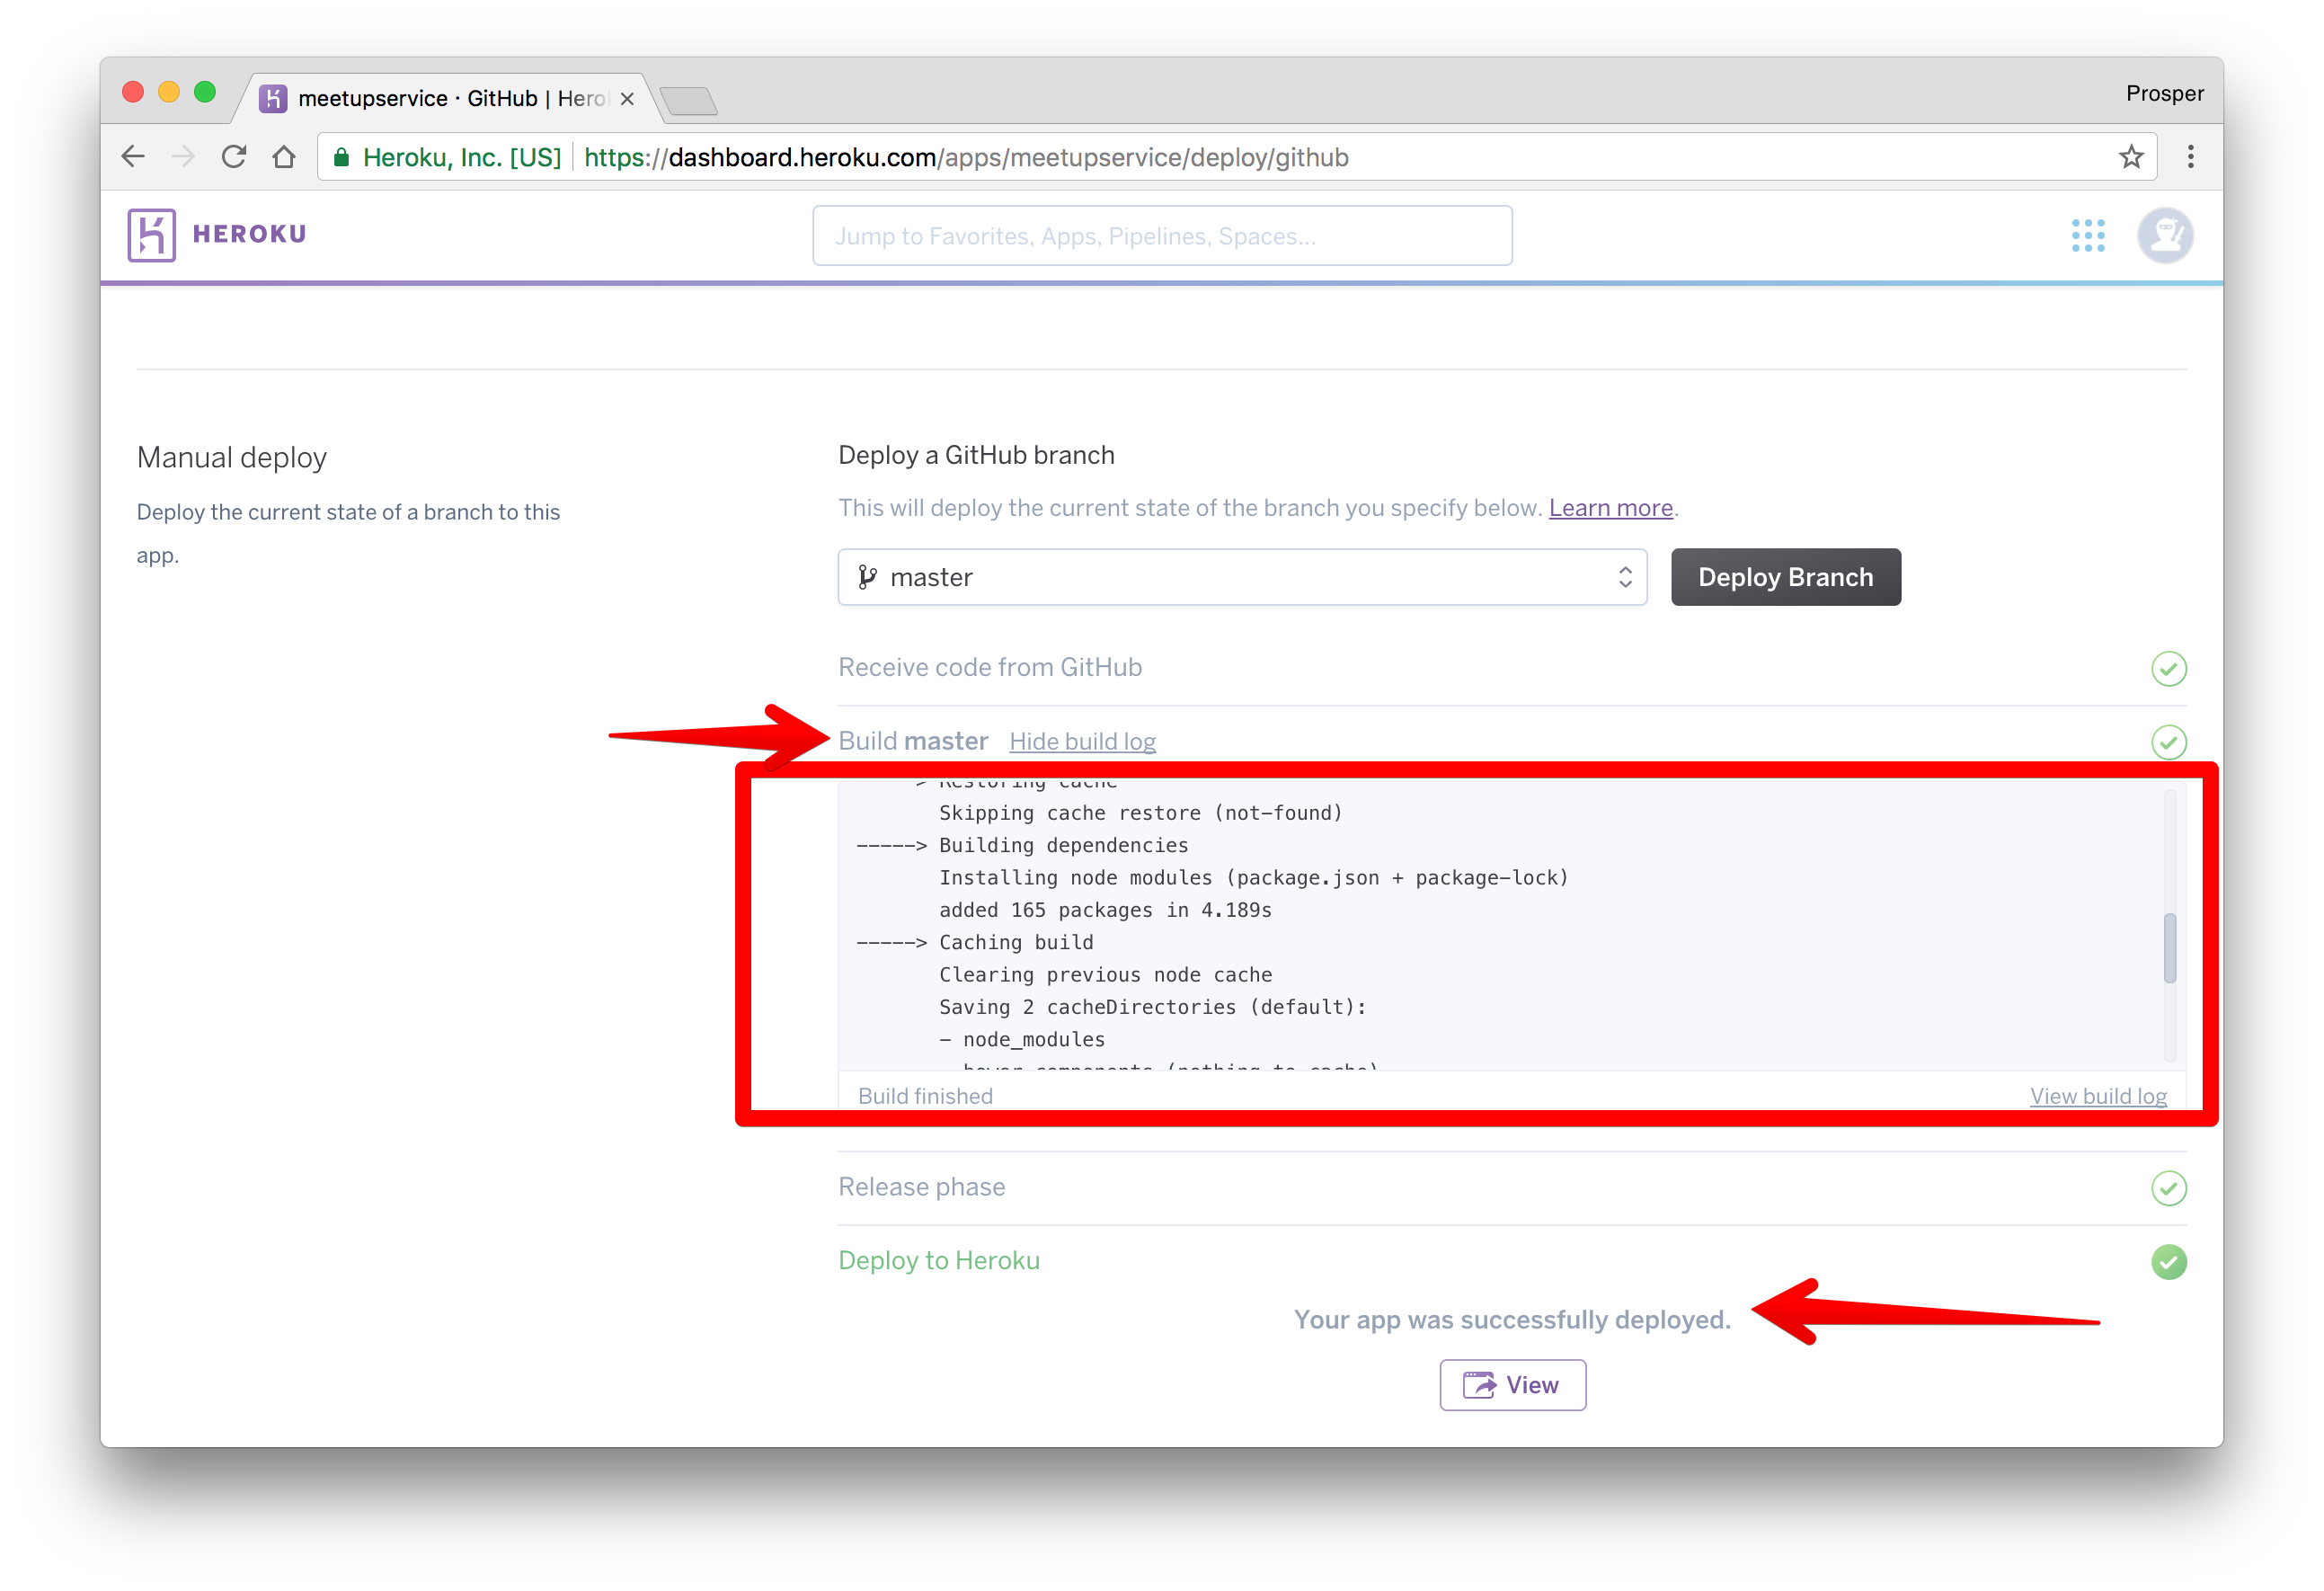
_Deploy finally_
Click on the **View** button to check out your app. Now, we don't have any root route, so enter this route in the browser, `https://meetupservice.herokuapp.com/api/meetups/public`.
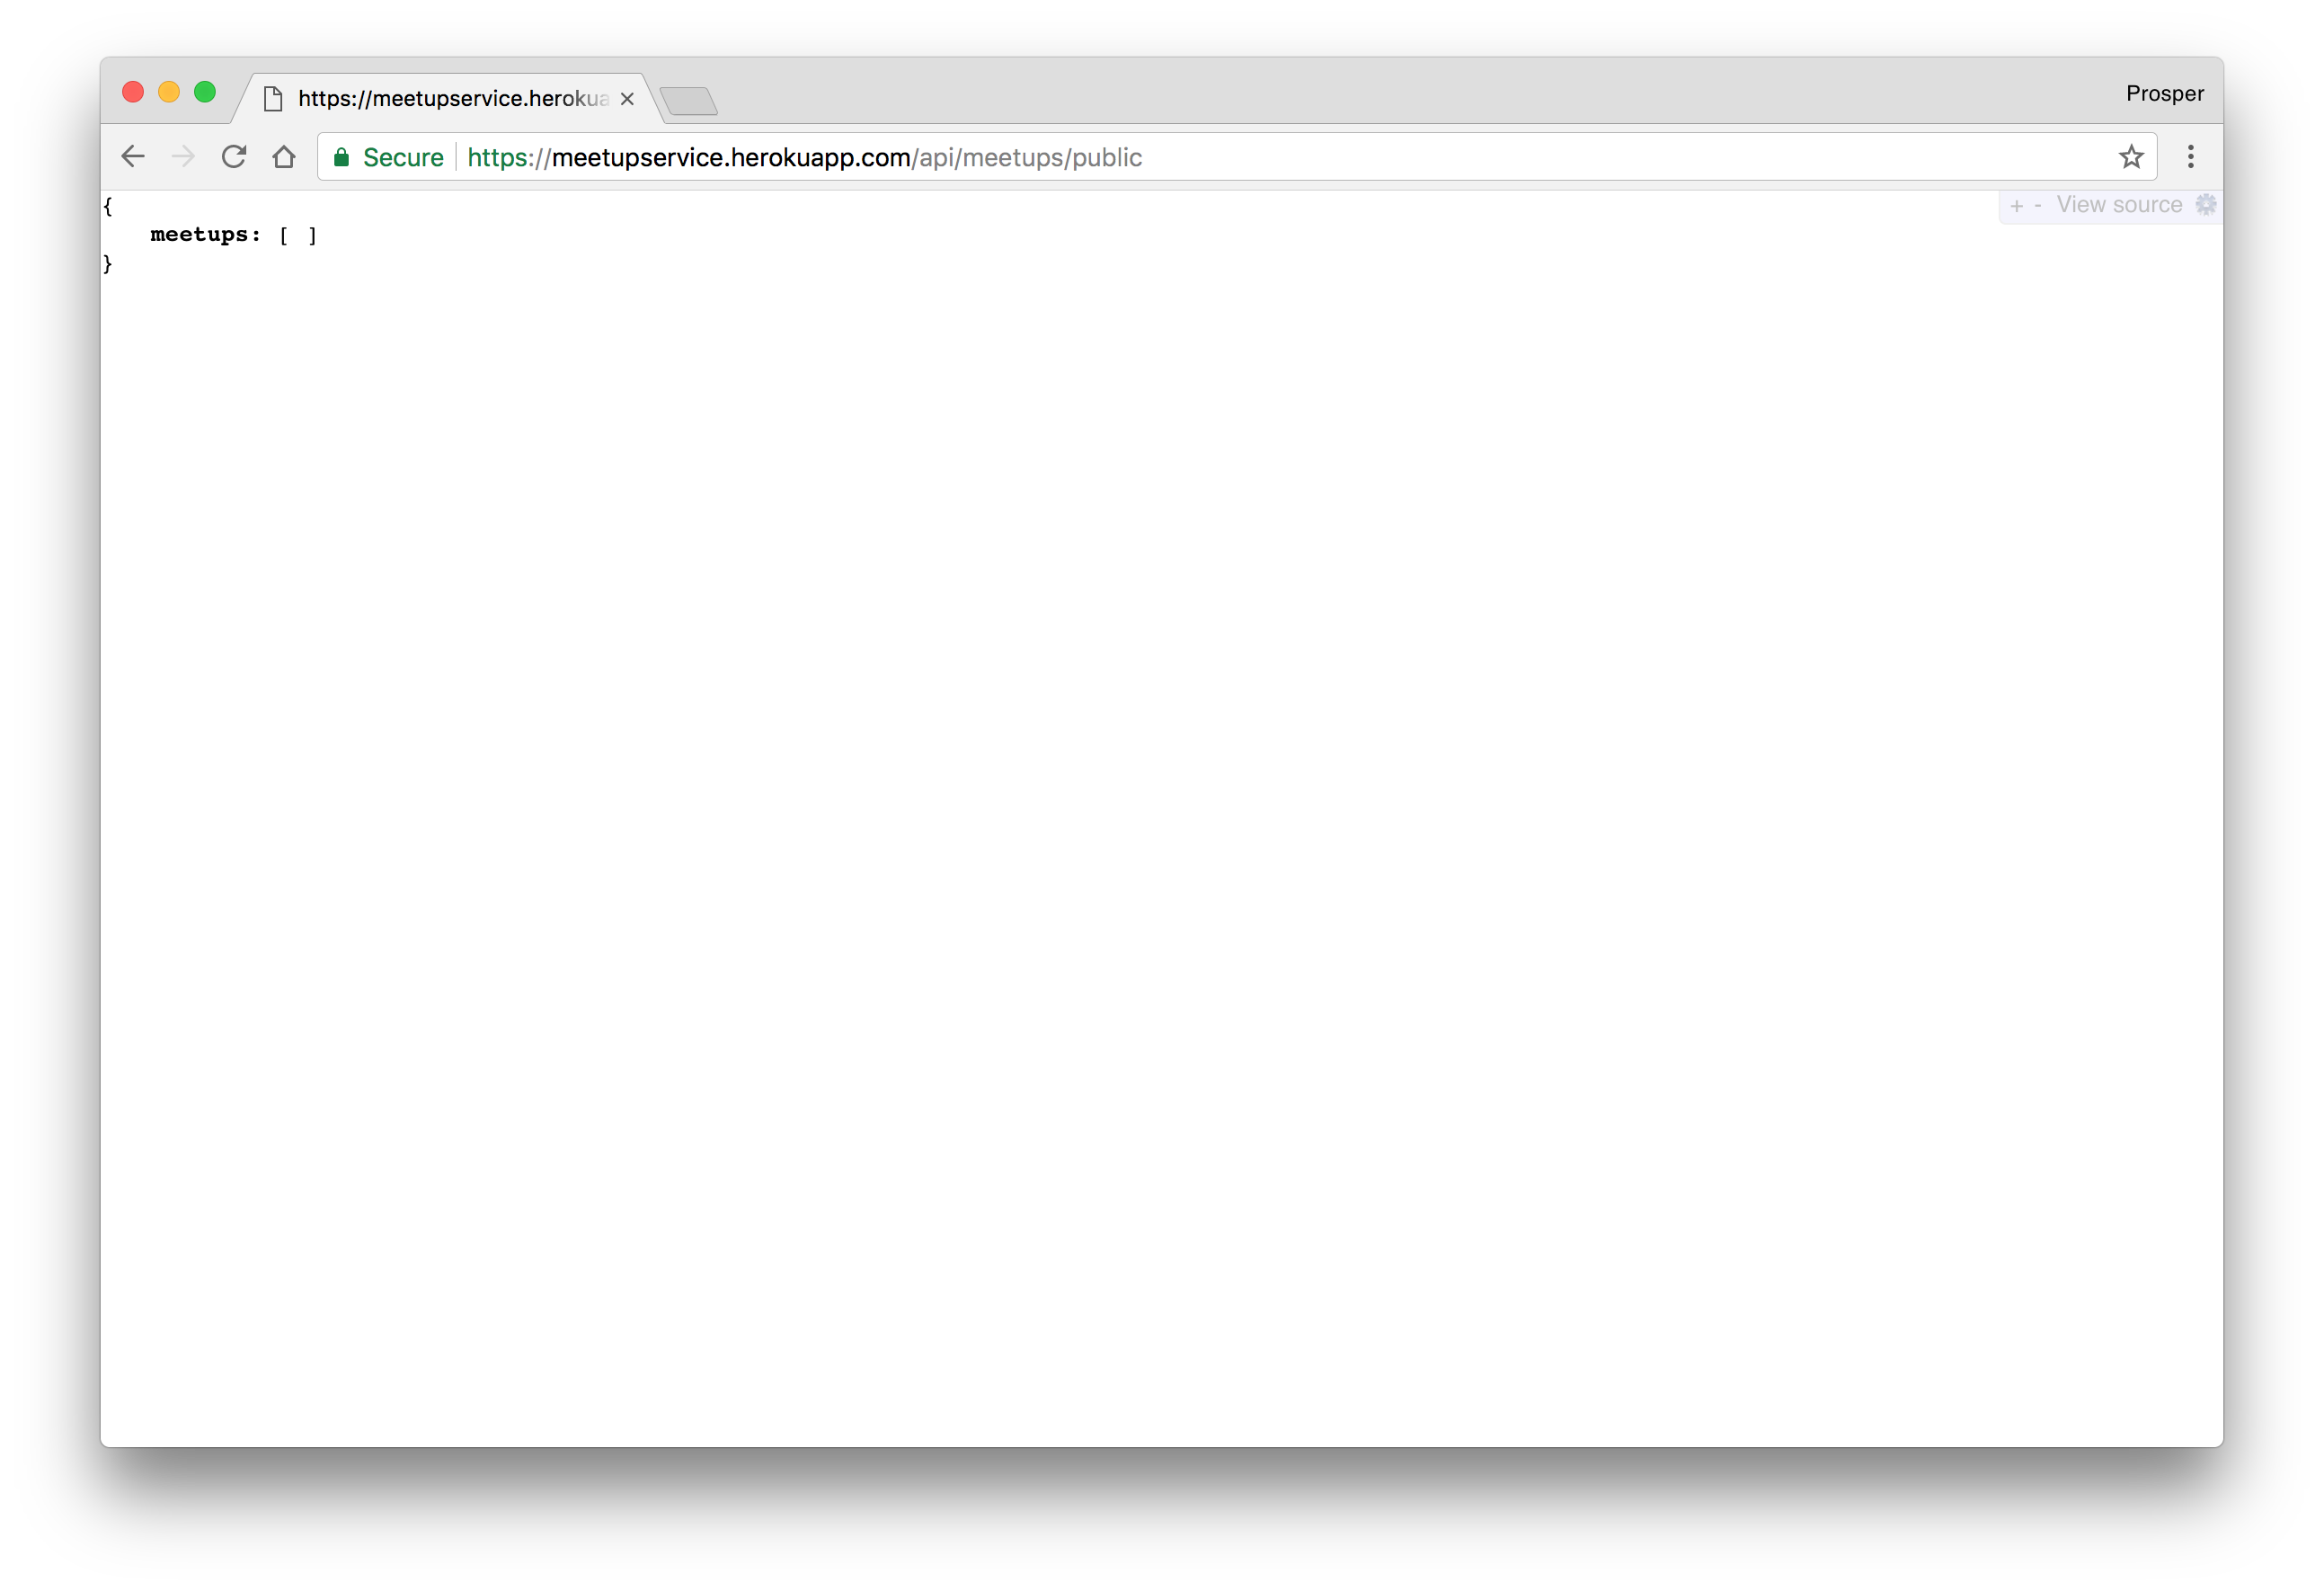
_It works!_
Let's make a POST request to the meetups API, `https://meetupservice.herokuapp.com/api/meetups`.
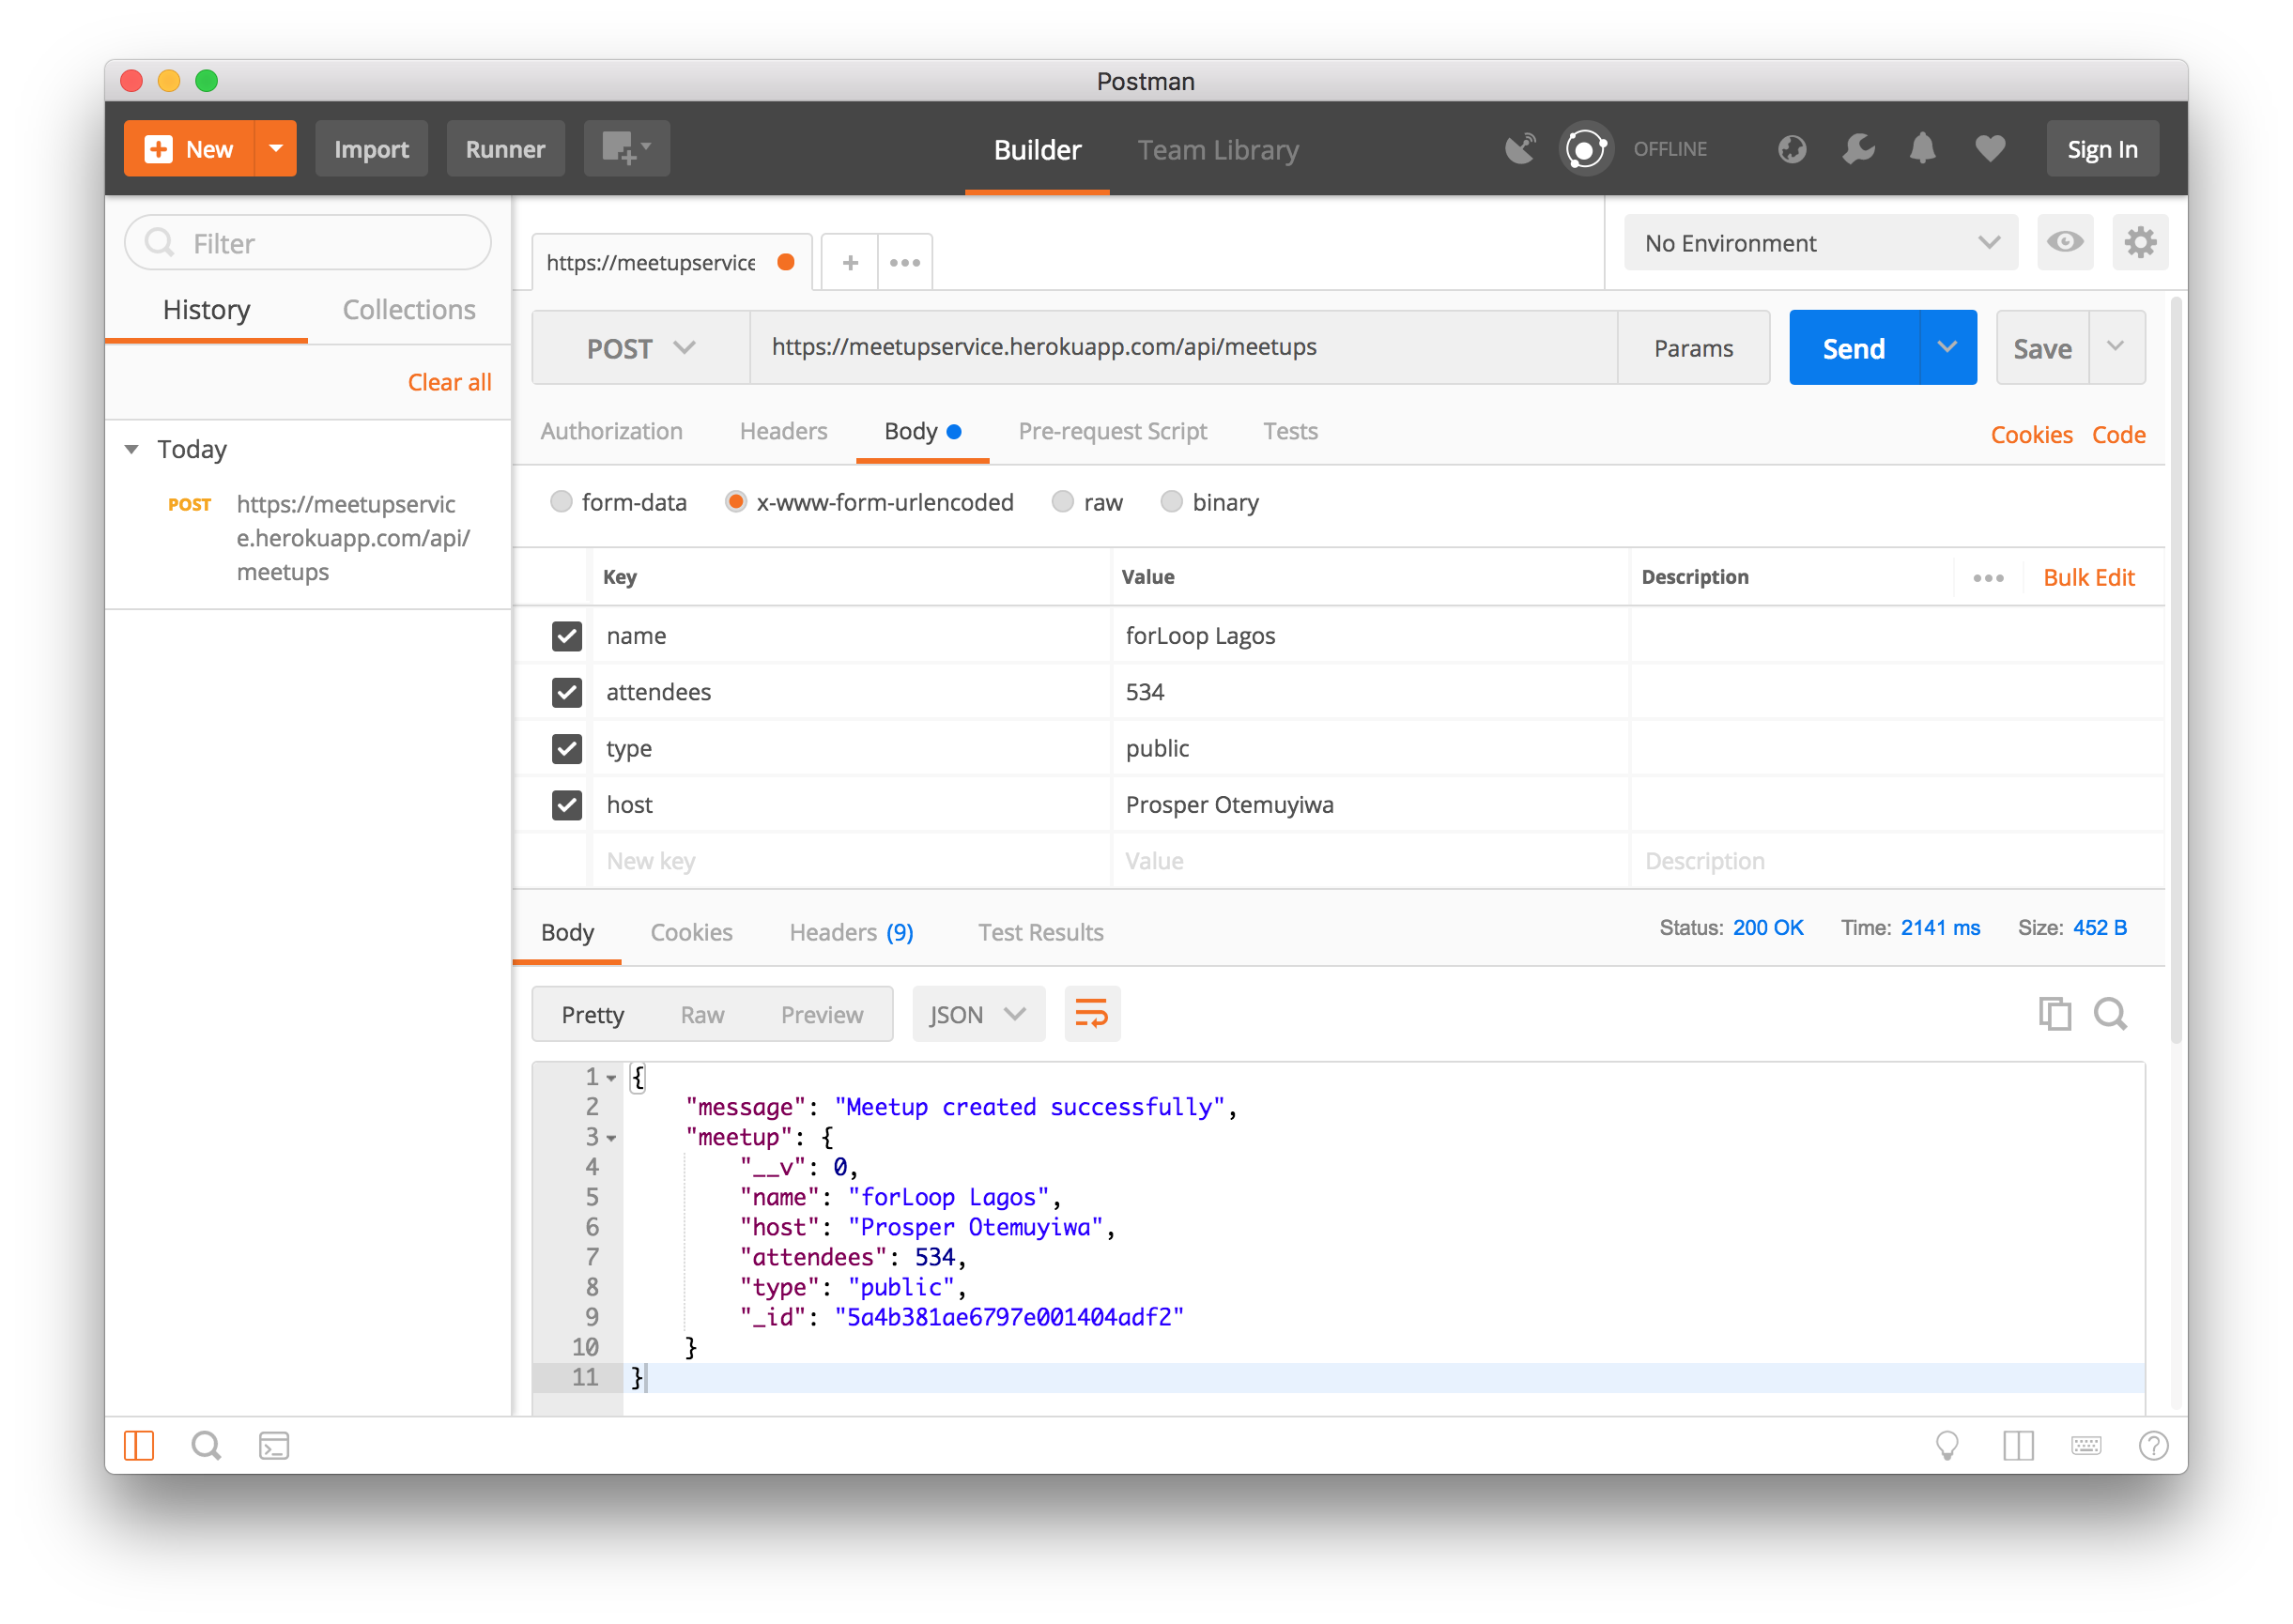
_It works!_
> Note: I used the mLab's database that we deployed earlier.
Log in to [mLab](https://mlab.com) and check to see if the data exists.
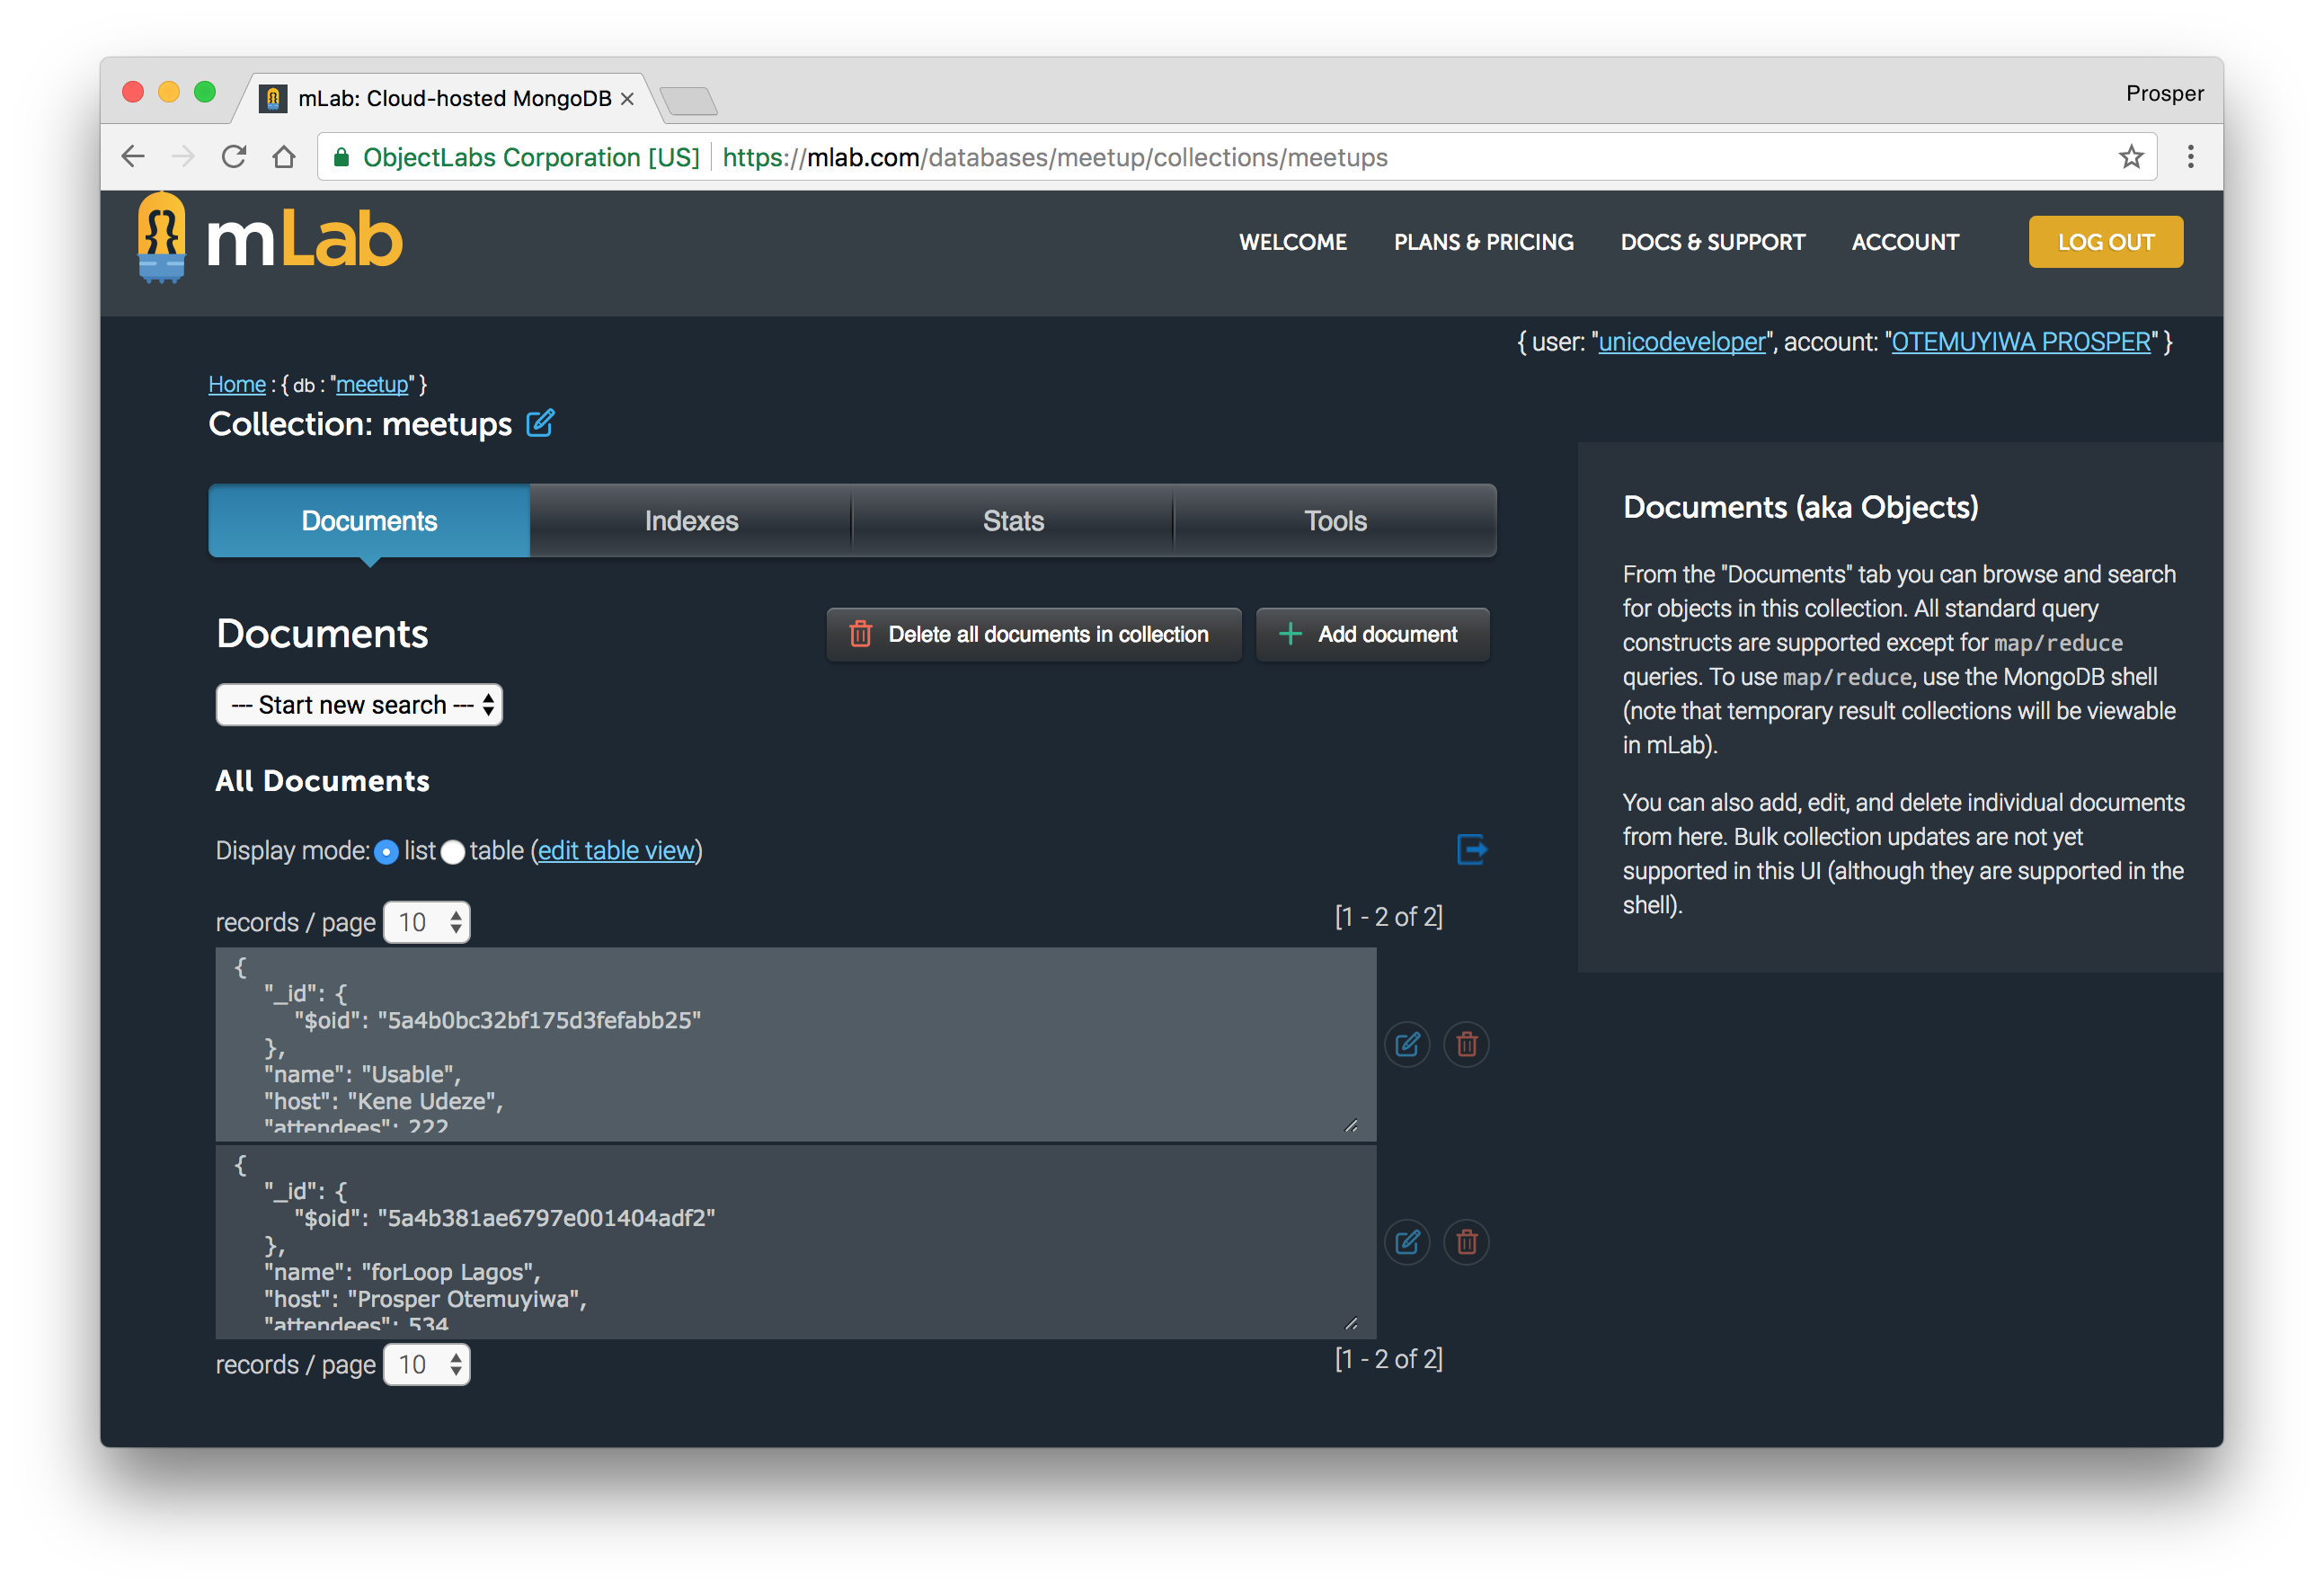
_Viola! It works!_
### Make a Change
Let's make a little change to our app and see how effortlessly it deploys to production. Add a new route to the app.
Open `server.js` and add the route like so:
```js
...
app.get('/', (req, res) => {
return res.json({ message: "Welcome to the Meetups API" });
});
...
```
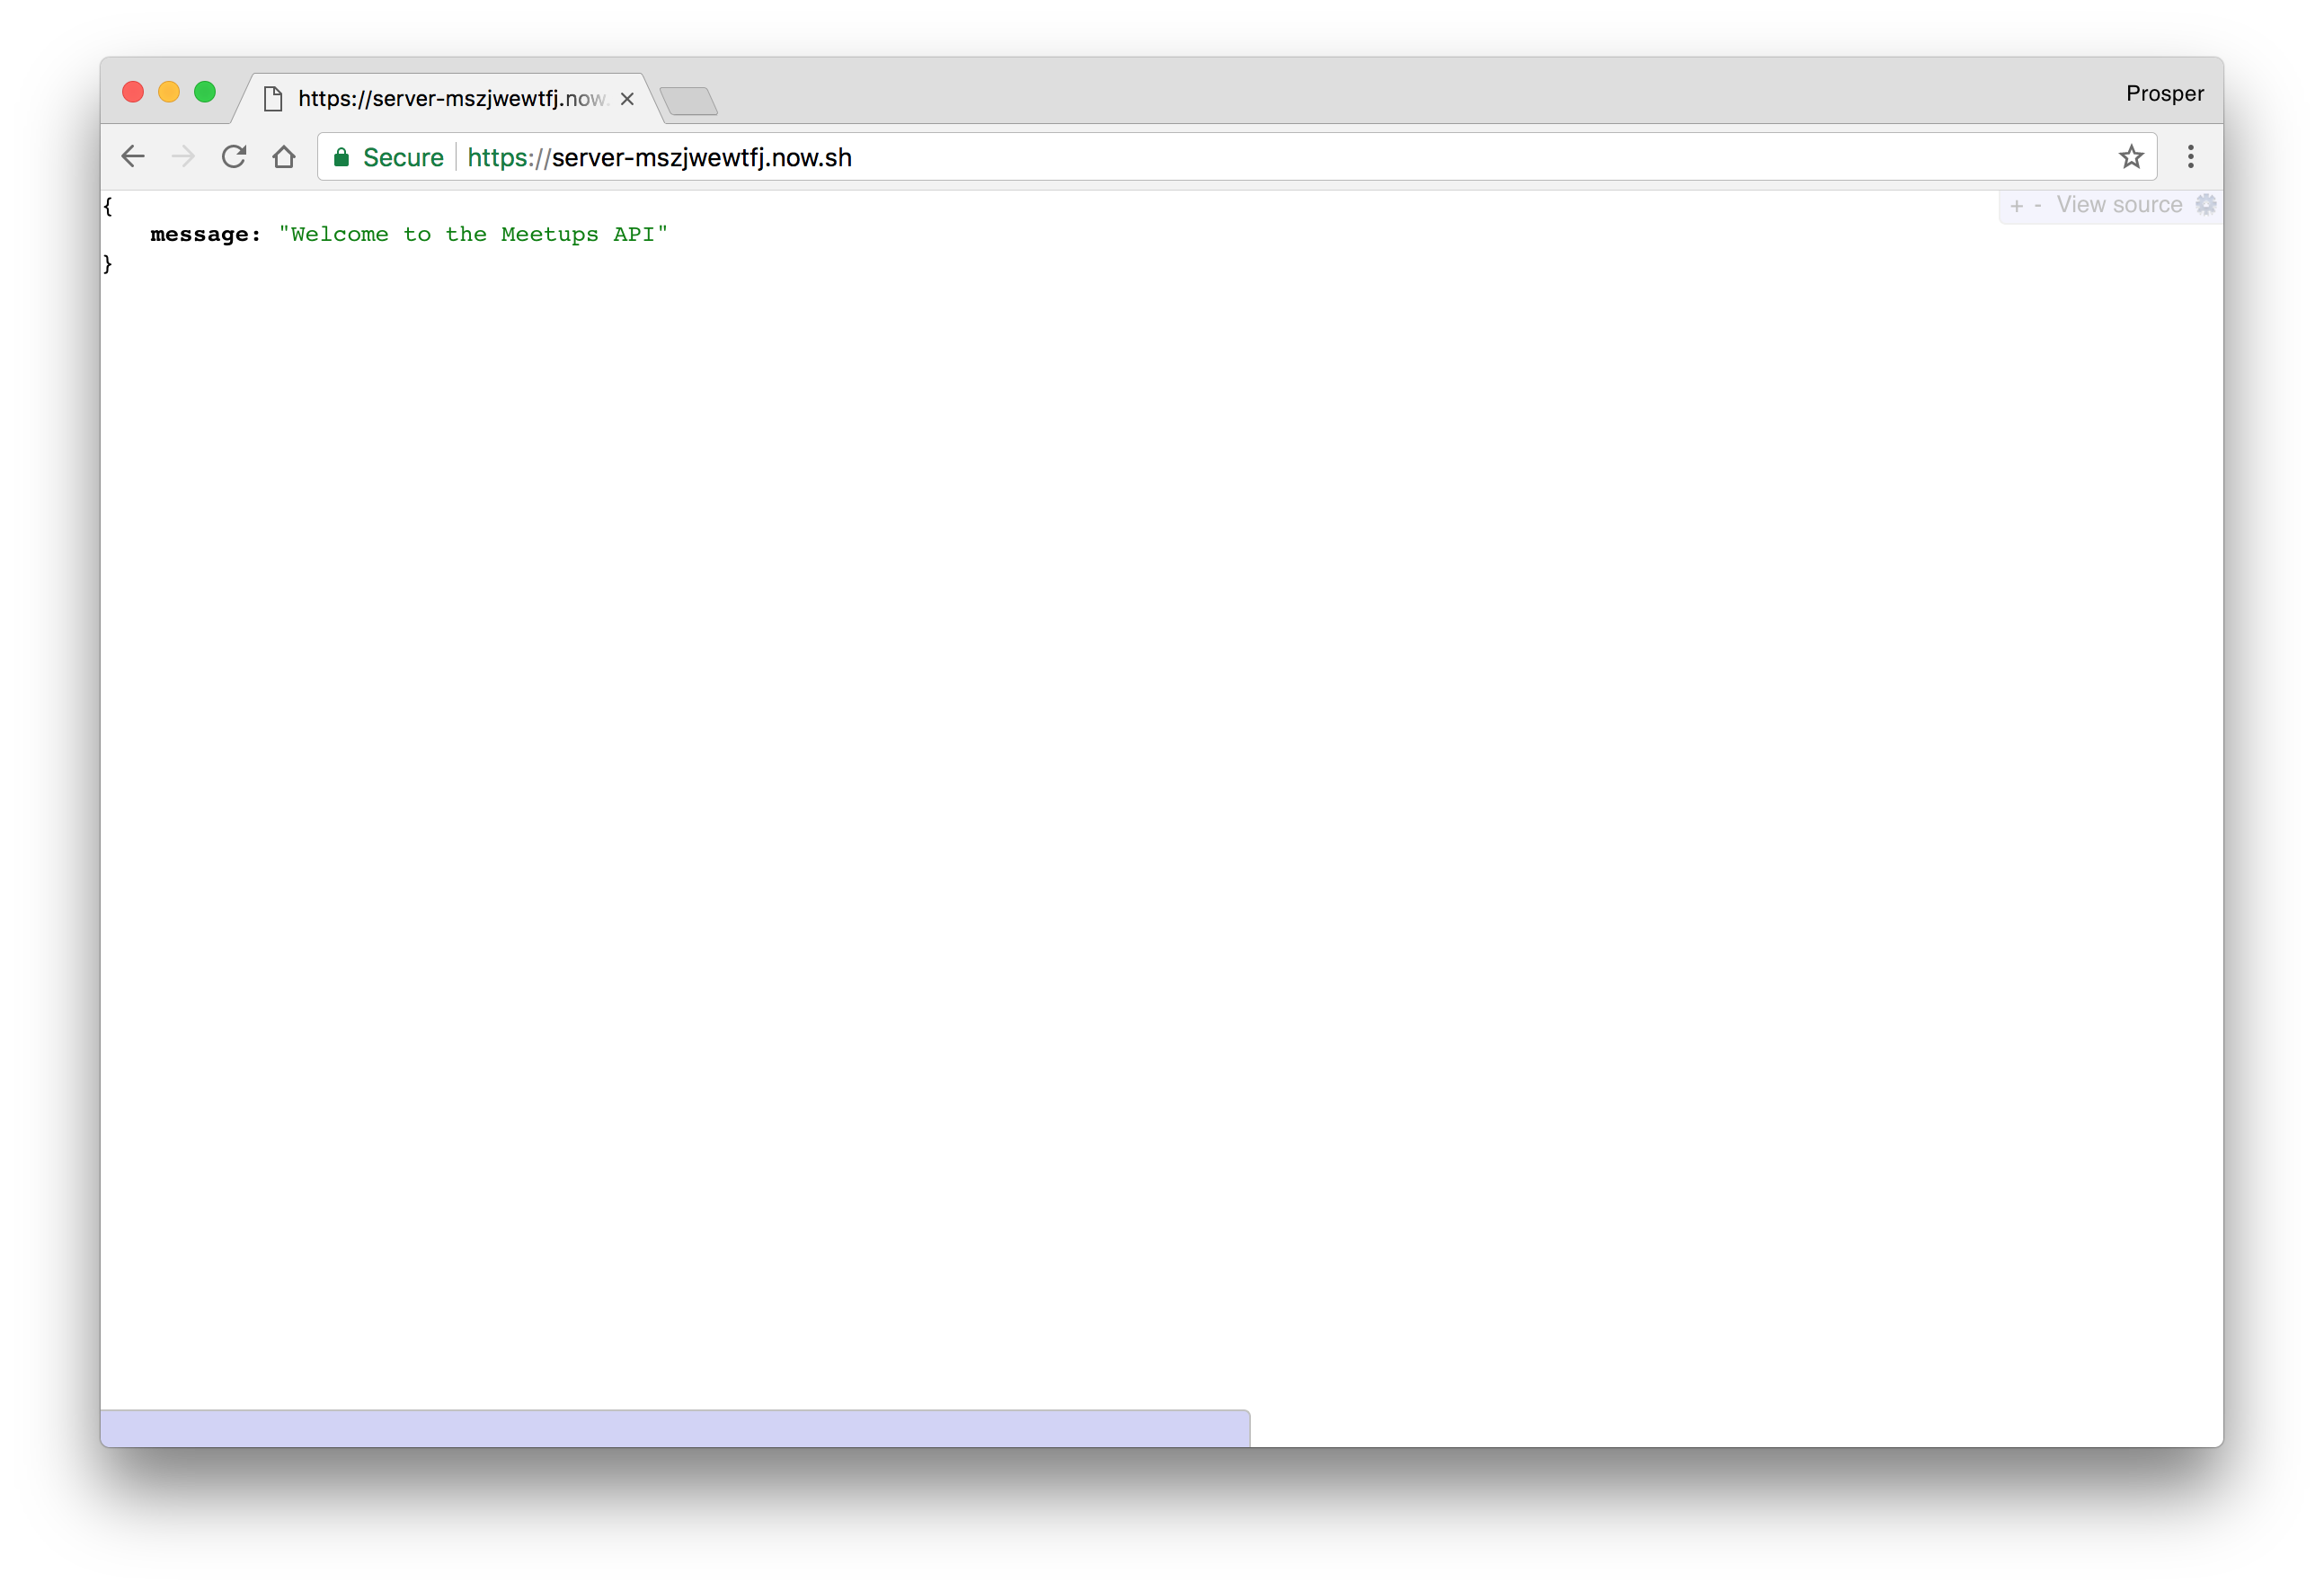
Commit and push to your master branch. Now, go to the **Activity** tab of your Heroku Dashboard and notice the build. Reload your app and you'll see the difference.
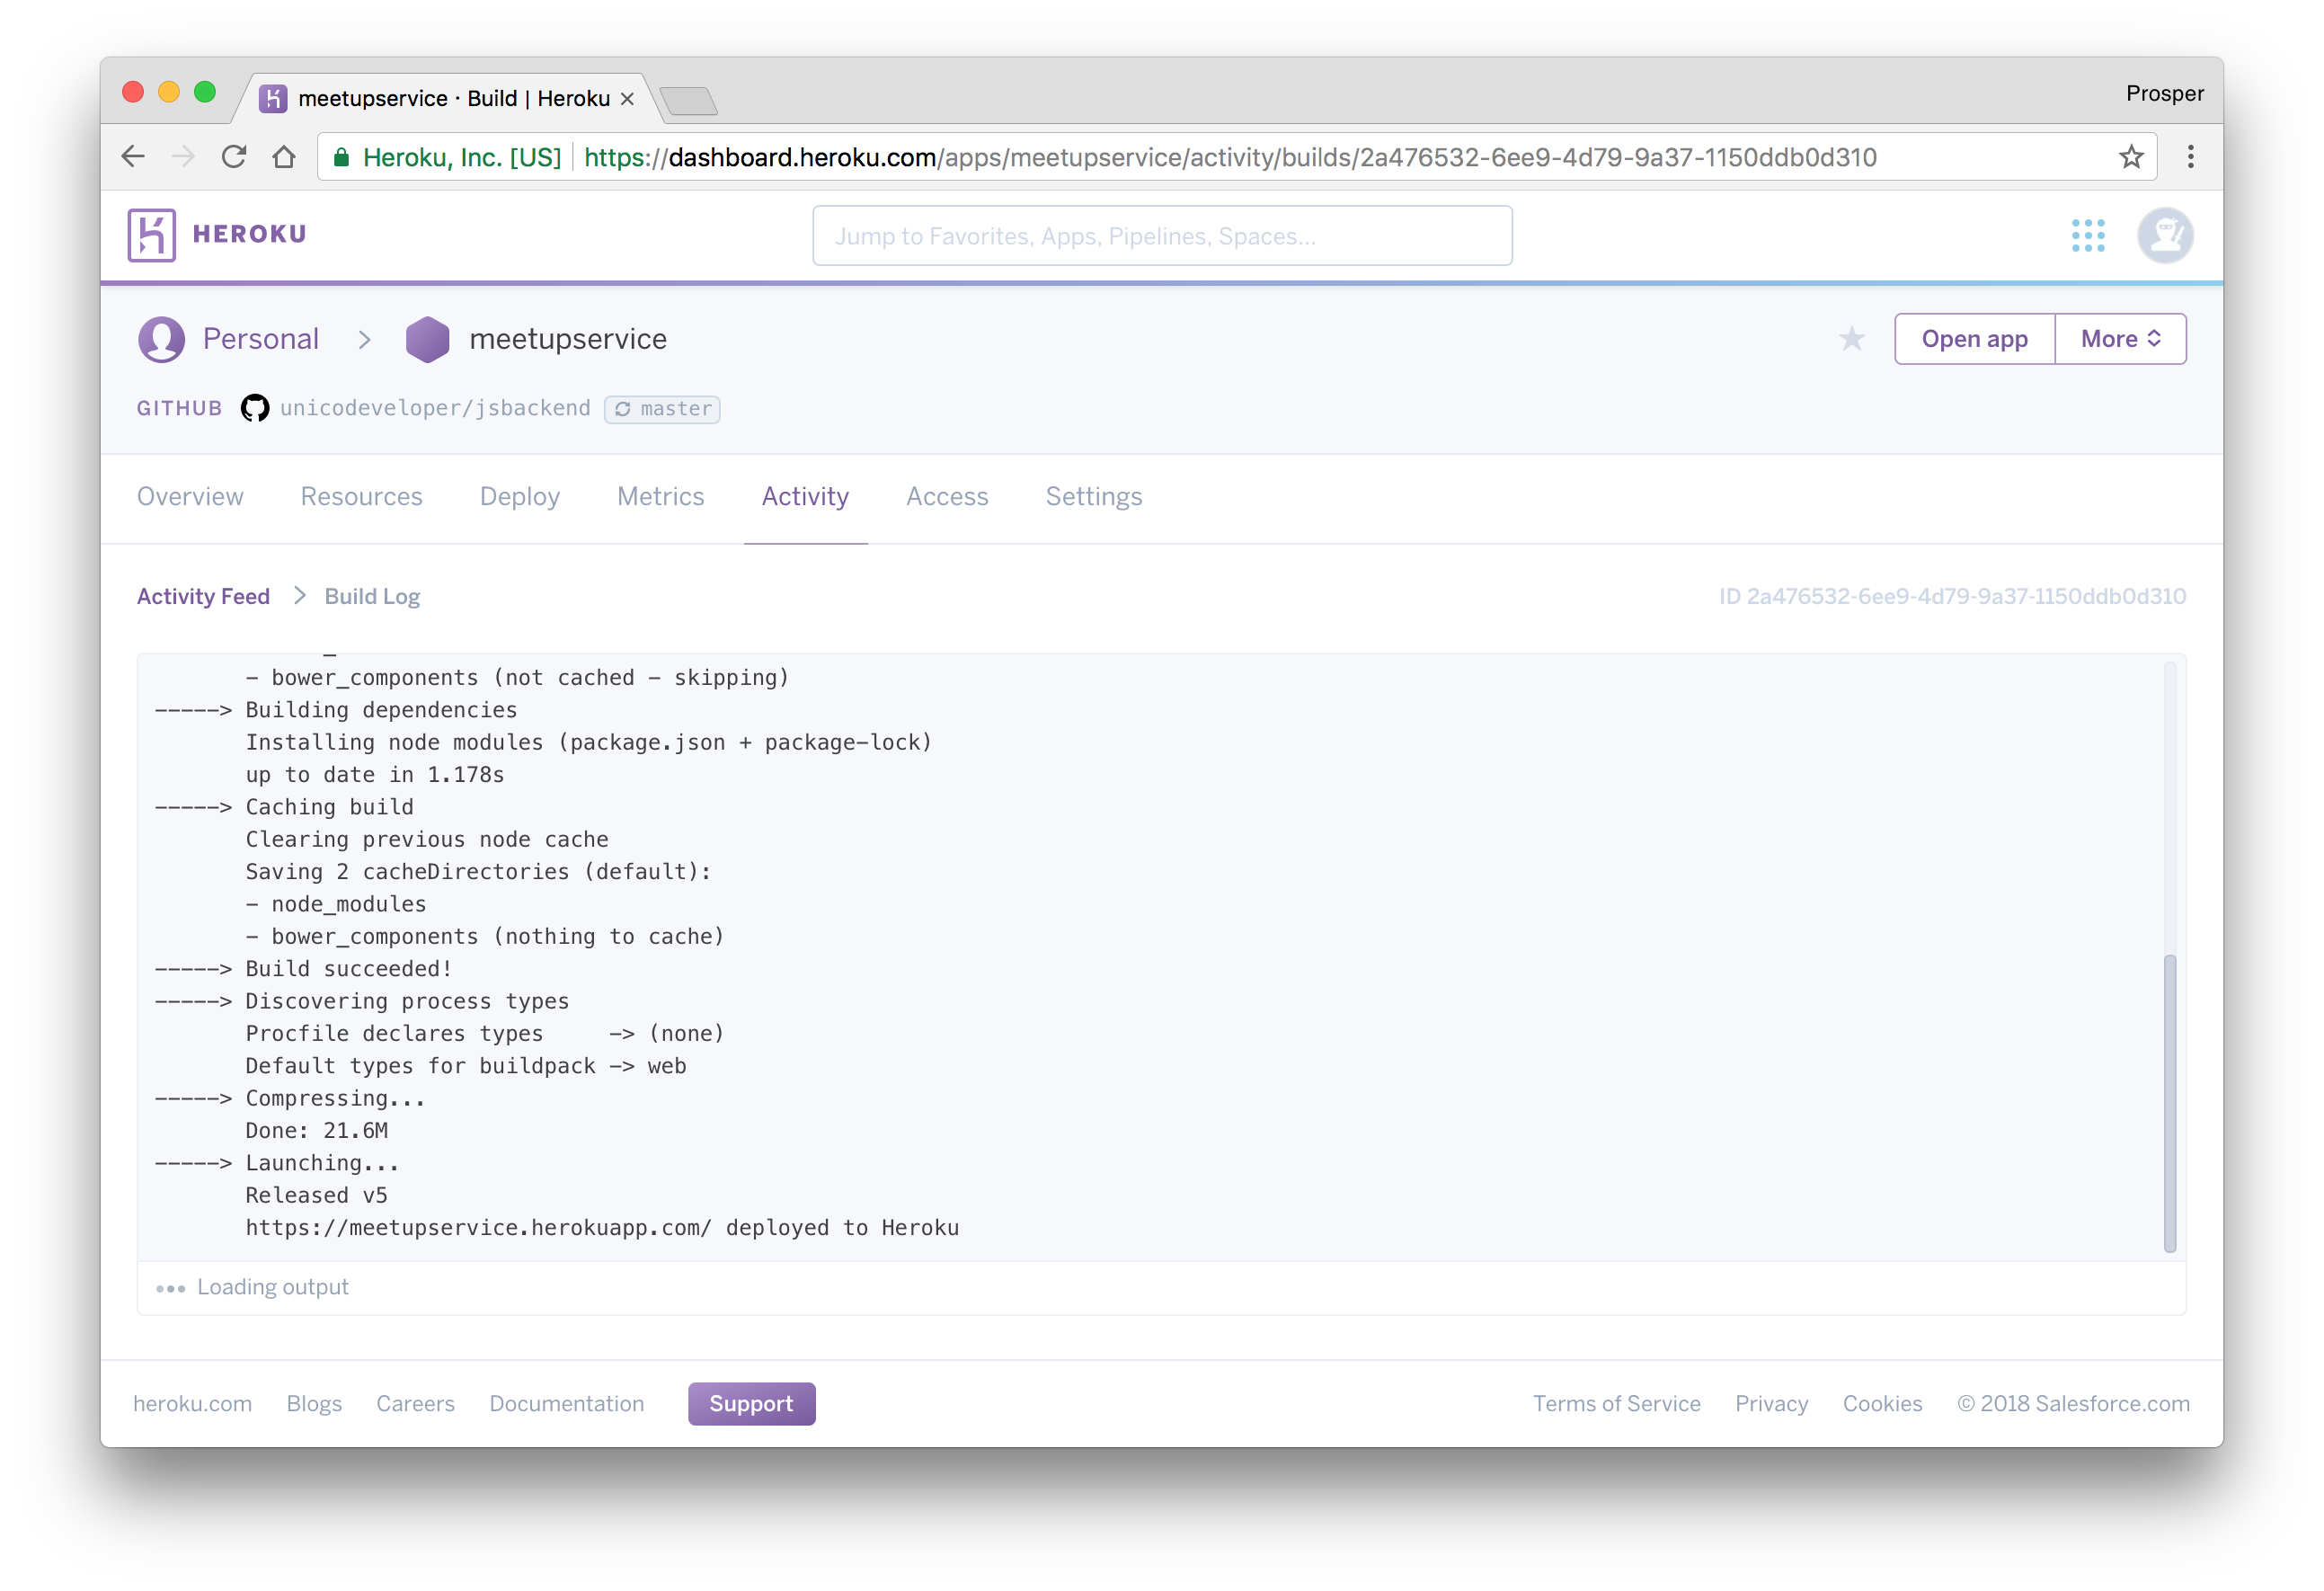
_Build Succeeded_
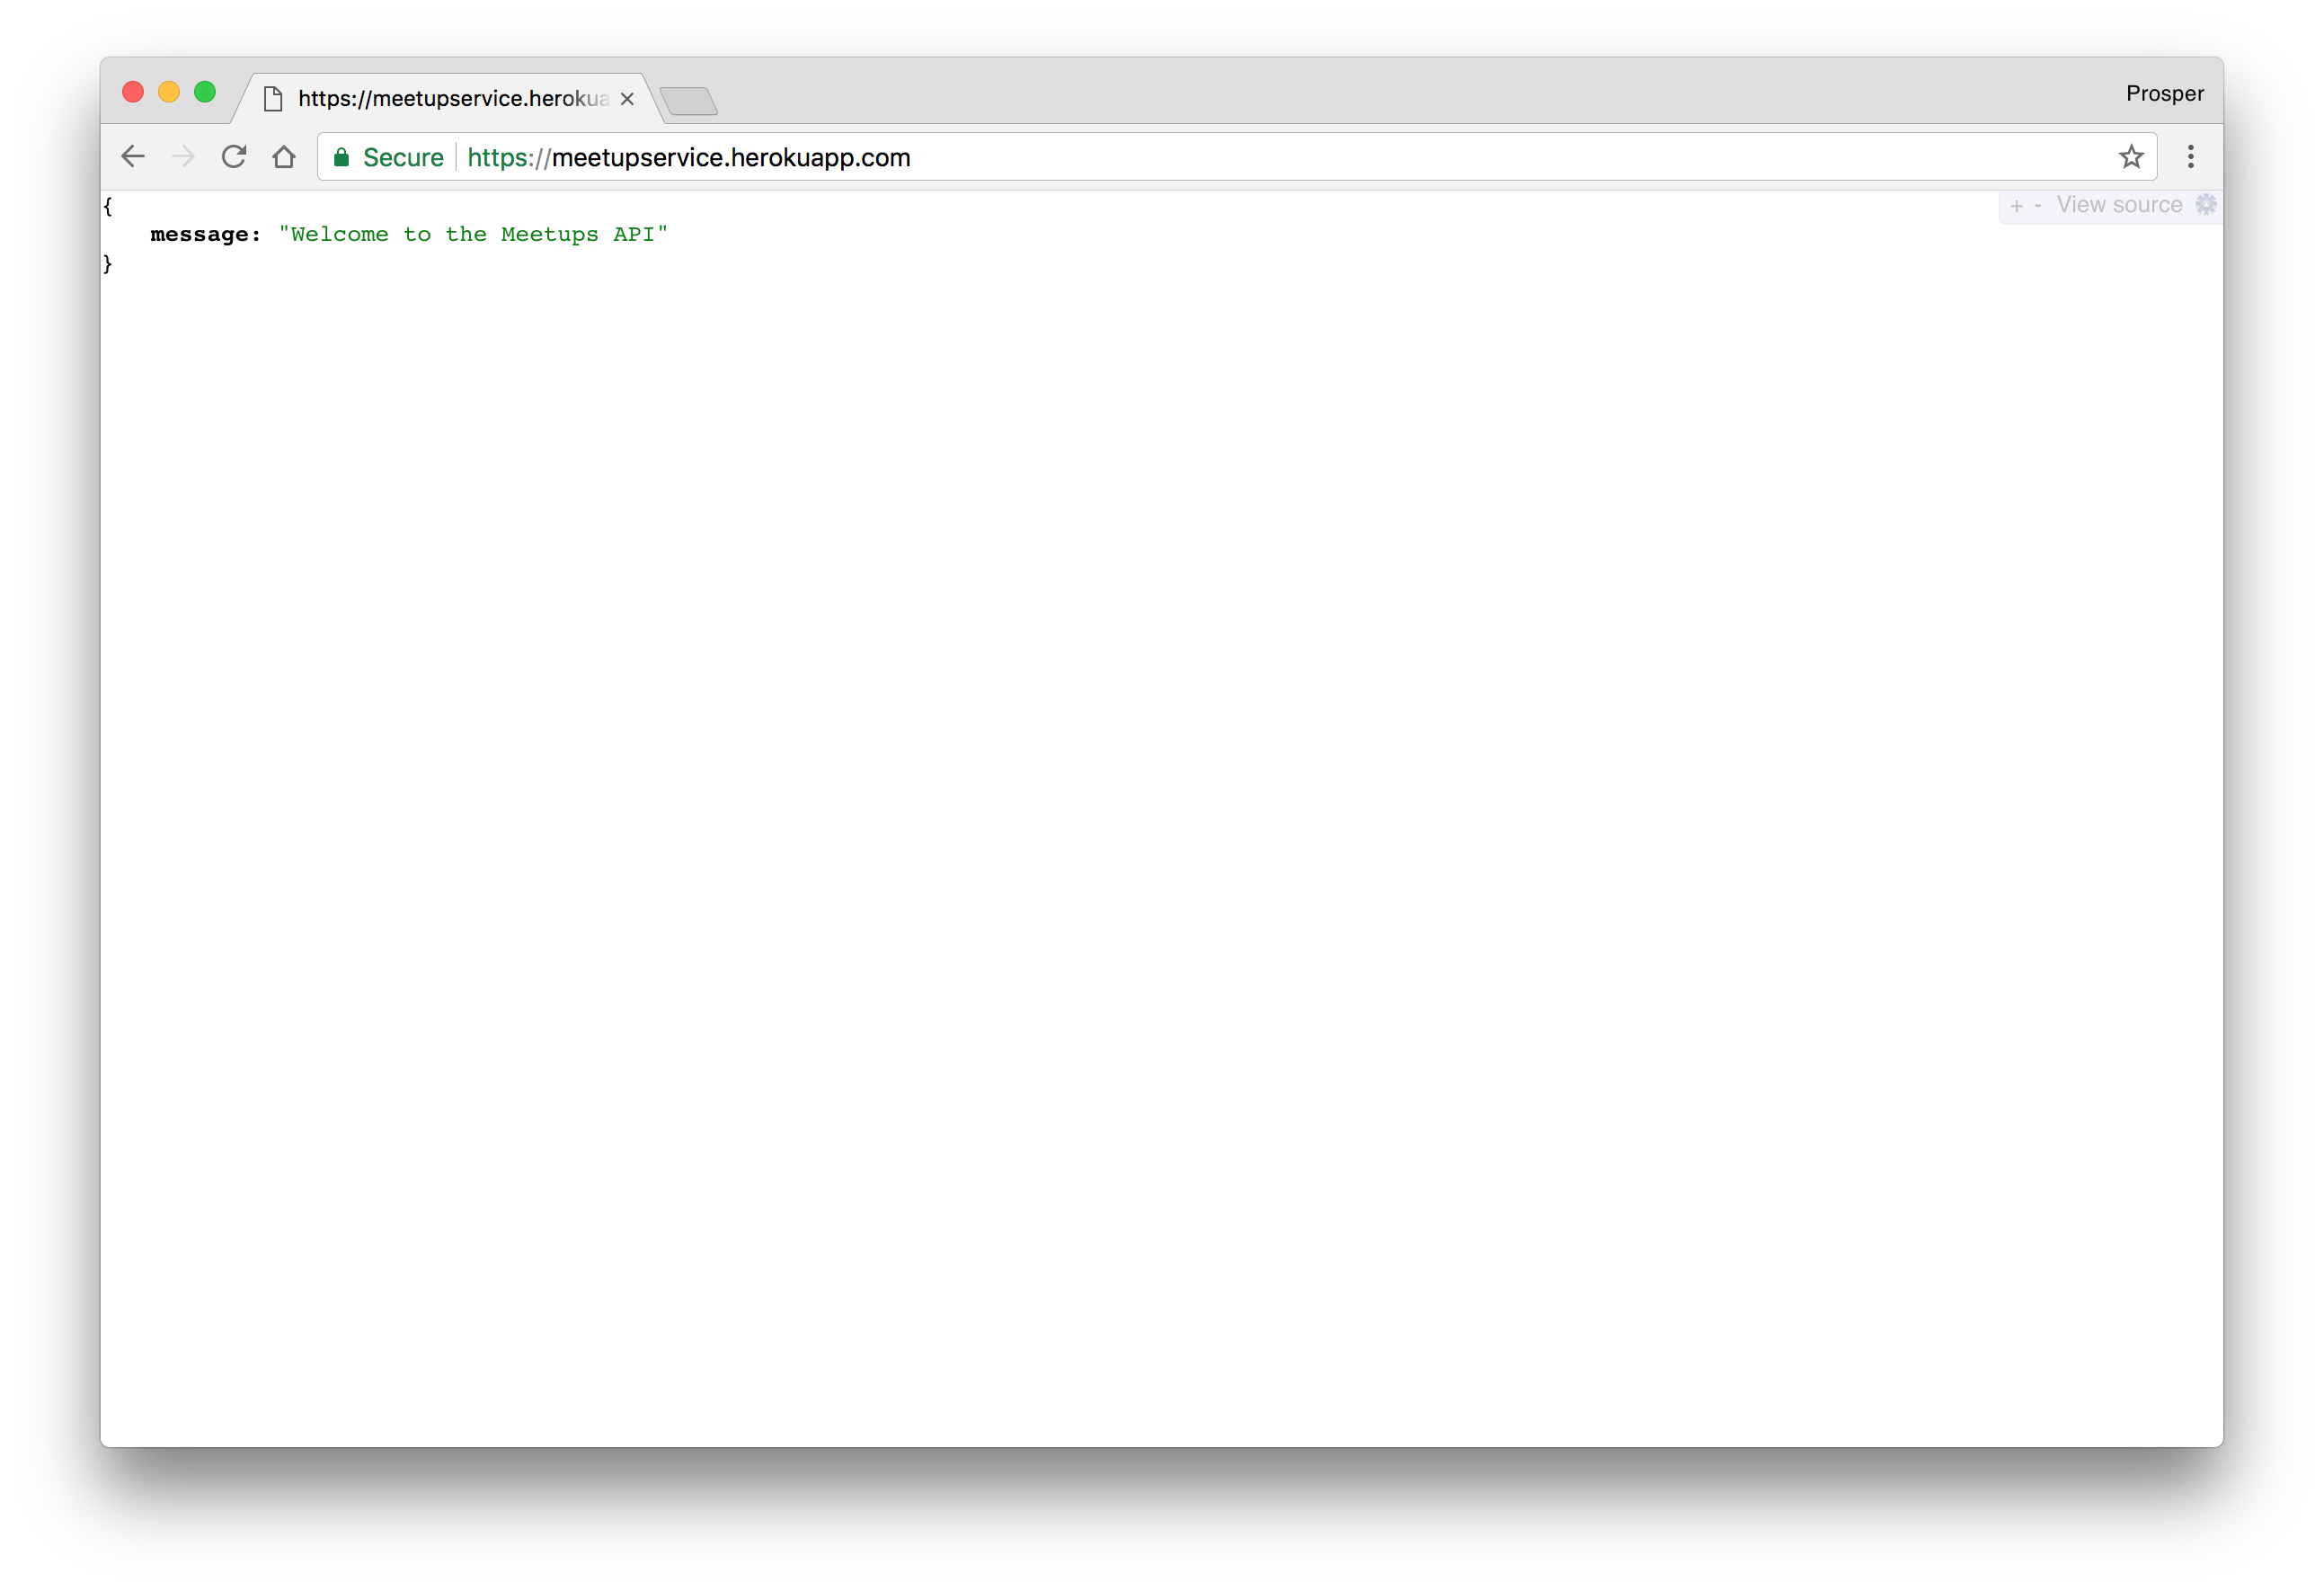
_New version of the app showing the index route_
### Caching & Cron Jobs
Heroku provides an array of addons for caching, from `memcache` to `[fastly](https://www.fastly.com/)` to `ironcache` and others. You can check out how to use [memcache with PHP on heroku](https://devcenter.heroku.com/articles/memcachedcloud#using-memcached-from-php).
Finally, you can use the [Heroku Scheduler](https://devcenter.heroku.com/articles/scheduler) for running jobs on your app at scheduled time intervals.
## Google Cloud
The [Google Cloud platform](https://cloud.google.com) is a trusted cloud platform that lots of companies and startups utilize in deploying and hosting their apps. The apps deployed on `Google Cloud` run on the same infrastructure that powers all of Google's products.
Google Cloud offers different options for hosting Node.js apps. The platform offers [App Engine (Full managed)](https://cloud.google.com/appengine/), [Compute Engine (Scalable VMs)](https://cloud.google.com/compute/) and [Container Engine (Kubernetes Clusters)](https://cloud.google.com/container-engine/).
In our case, we'll use Google App Engine to deploy our Node.js backend. It abstracts the infrastructure away. Let's dive right in!
When using Google App Engine, you can choose the **Standard** or **Flexible** environment. The latter, like the name implies, allows you to install a lot of extensions and allows you to run deployment scripts using `package.json`. We'll use the flexible environment. So, go ahead and [create a new project](https://console.cloud.google.com/projectselector/appengine/create). Click on **Create**, give the project a name, select the region you'll like to serve your app and enable billing.
> **Note:** You won't be charged without your permission.
Now, download the [Google SDK](https://cloud.google.com/sdk/docs/) and install the Google Cloud tools.
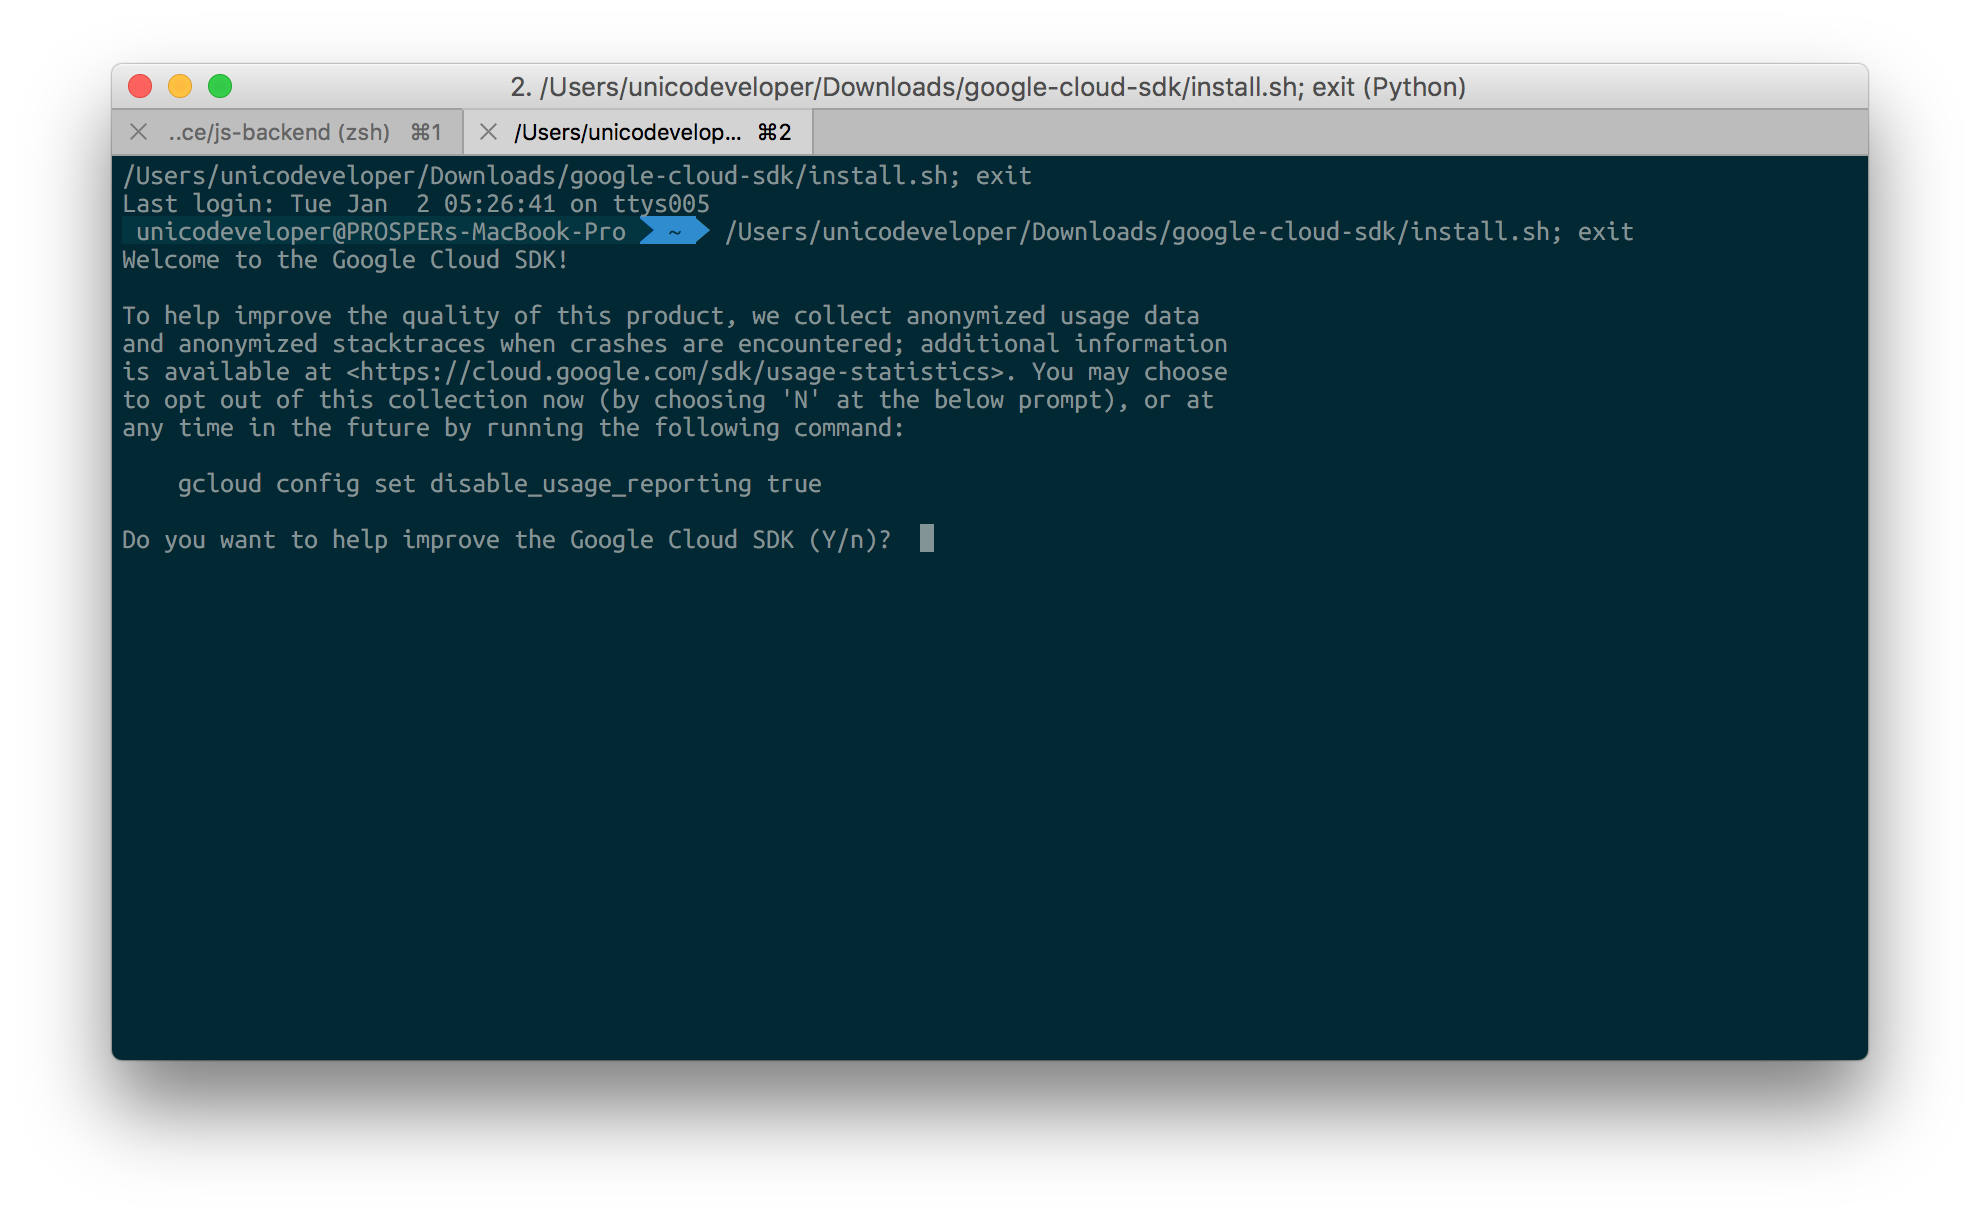
_Installing Google SDK_
Initialize `gcloud` like so:
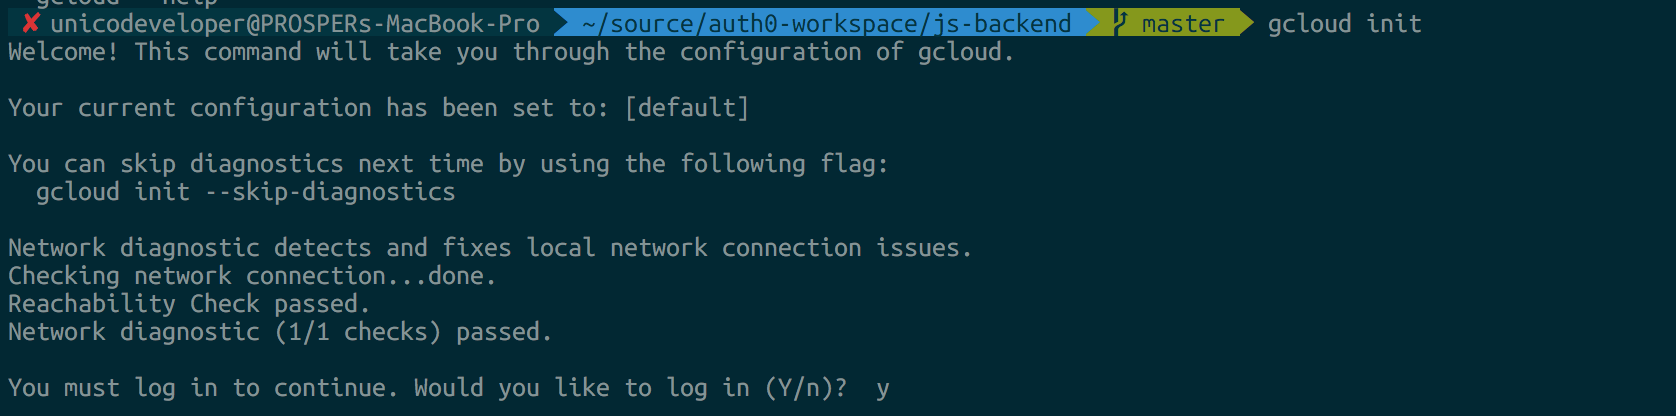
_Running gcloud_
Go ahead and create an `app.yaml` file in the root of our project like so:
_app.yaml_
```bash
runtime: nodejs
env: flex
manual_scaling:
instances: 1
resources:
cpu: 1
memory_gb: 0.5
disk_size_gb: 10
```
Configuration for the cloud servers are set in the `app.yaml` file.
In your terminal, run the command below to set `the project ID`:
```bash
gcloud config set project
```
Now go ahead and run the following command to deploy the app:
```bash
gcloud app deploy
```
Our backend is finally [live](https://meetupservice-190908.appspot.com).

_Live Backend_
### Caching & Cron Jobs
Google App Engine includes implementations of the standard Memcache and Memcached APIs. Check out how to use [Redis Labs Memcache in your app on Google Cloud](https://cloud.google.com/appengine/docs/flexible/nodejs/using-redislabs-memcache).
The App Engine Cron Service allows you to configure regularly scheduled tasks that operate at defined times or regular intervals. Check out how to [schedule cron jobs for your Node.js apps on Google Cloud](https://cloud.google.com/appengine/docs/flexible/nodejs/scheduling-jobs-with-cron-yaml).
## Now
[Now](https://vercel.com/home) is a tool that takes your JavaScript (Node.js) or Docker powered websites, applications and services to the cloud with ease, speed and reliability. Its deploy process is very simple. Any directory that contains a `package.json` file can be moved to the cloud with one command:
```bash
now
```
**Now** offers the following:
- It serves apps over HTTP/2 protocol.
- It is not dependent on a single cloud provider.
- A `build` script can be defined in the `package.json` file to allow a script to be run after the installation of the node modules.
- Oh, hosting static websites is a walk in the park too!
Deploying a Node.js app with **Now** involves the following:
- Download the [Now Desktop](https://vercel.com/download) or install the CLI via npm: `npm install -g now`.
- Switch to the project directory.
- Run the command `now`. There will be an authentication process.

_Authentication process with Now_

_Now deploy process_
_Live Backend_
## Microsoft Azure
Microsoft Azure is another massive cloud platform that allows you to scale your apps easily. Let's get started with deploying our Star Wars app on Azure.
With Microsoft Azure, you can deploy via:
- FTP.
- Syncing with a cloud folder.
- Local Git.
- Cloud based source control service such as GitHub or Bitbucket.
In our case, we'll set up deployment with Git.
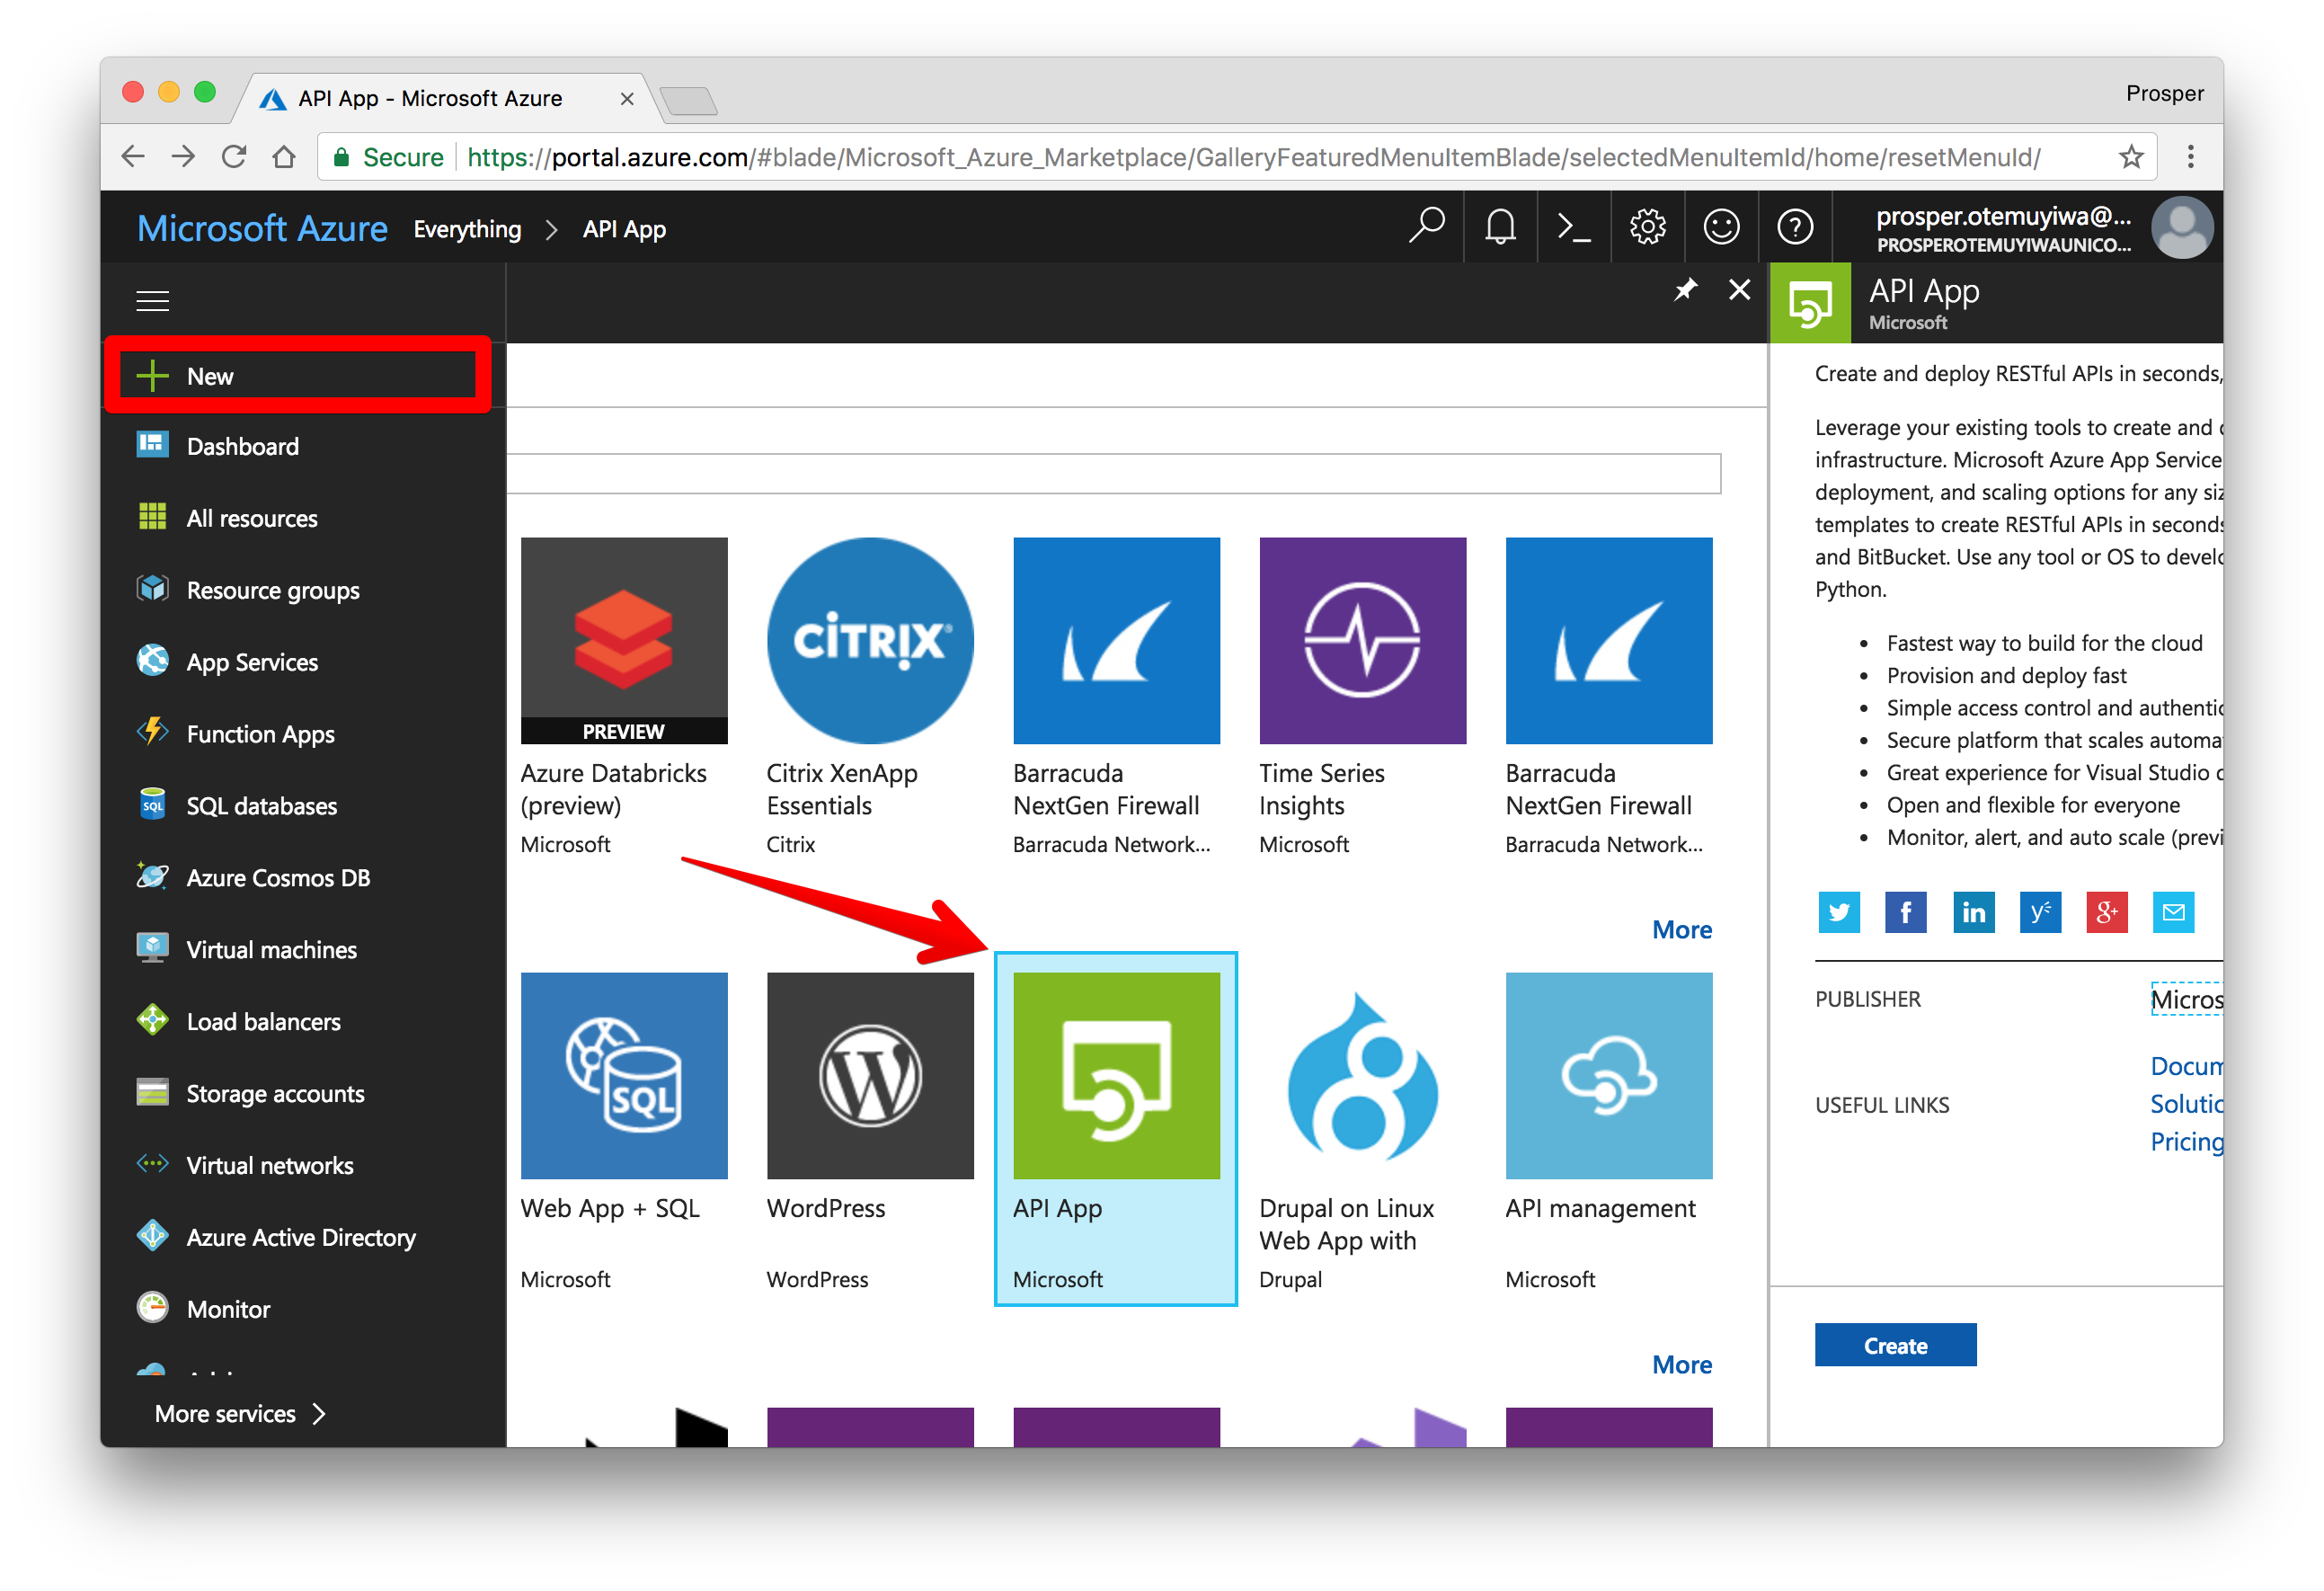
1. First, create an [account with Microsoft Azure](https://portal.azure.com).
2. Click on **New** on the left panel.
3. Click **See all** just next to Marketplace.
4. Click **API App**, then go ahead and create.
5. Select the type of subscription you are comfortable with.
6. Give your name an app, and select a resource group.
7. Now that our app has been created. Click on **App Services** by the left panel to see your app.
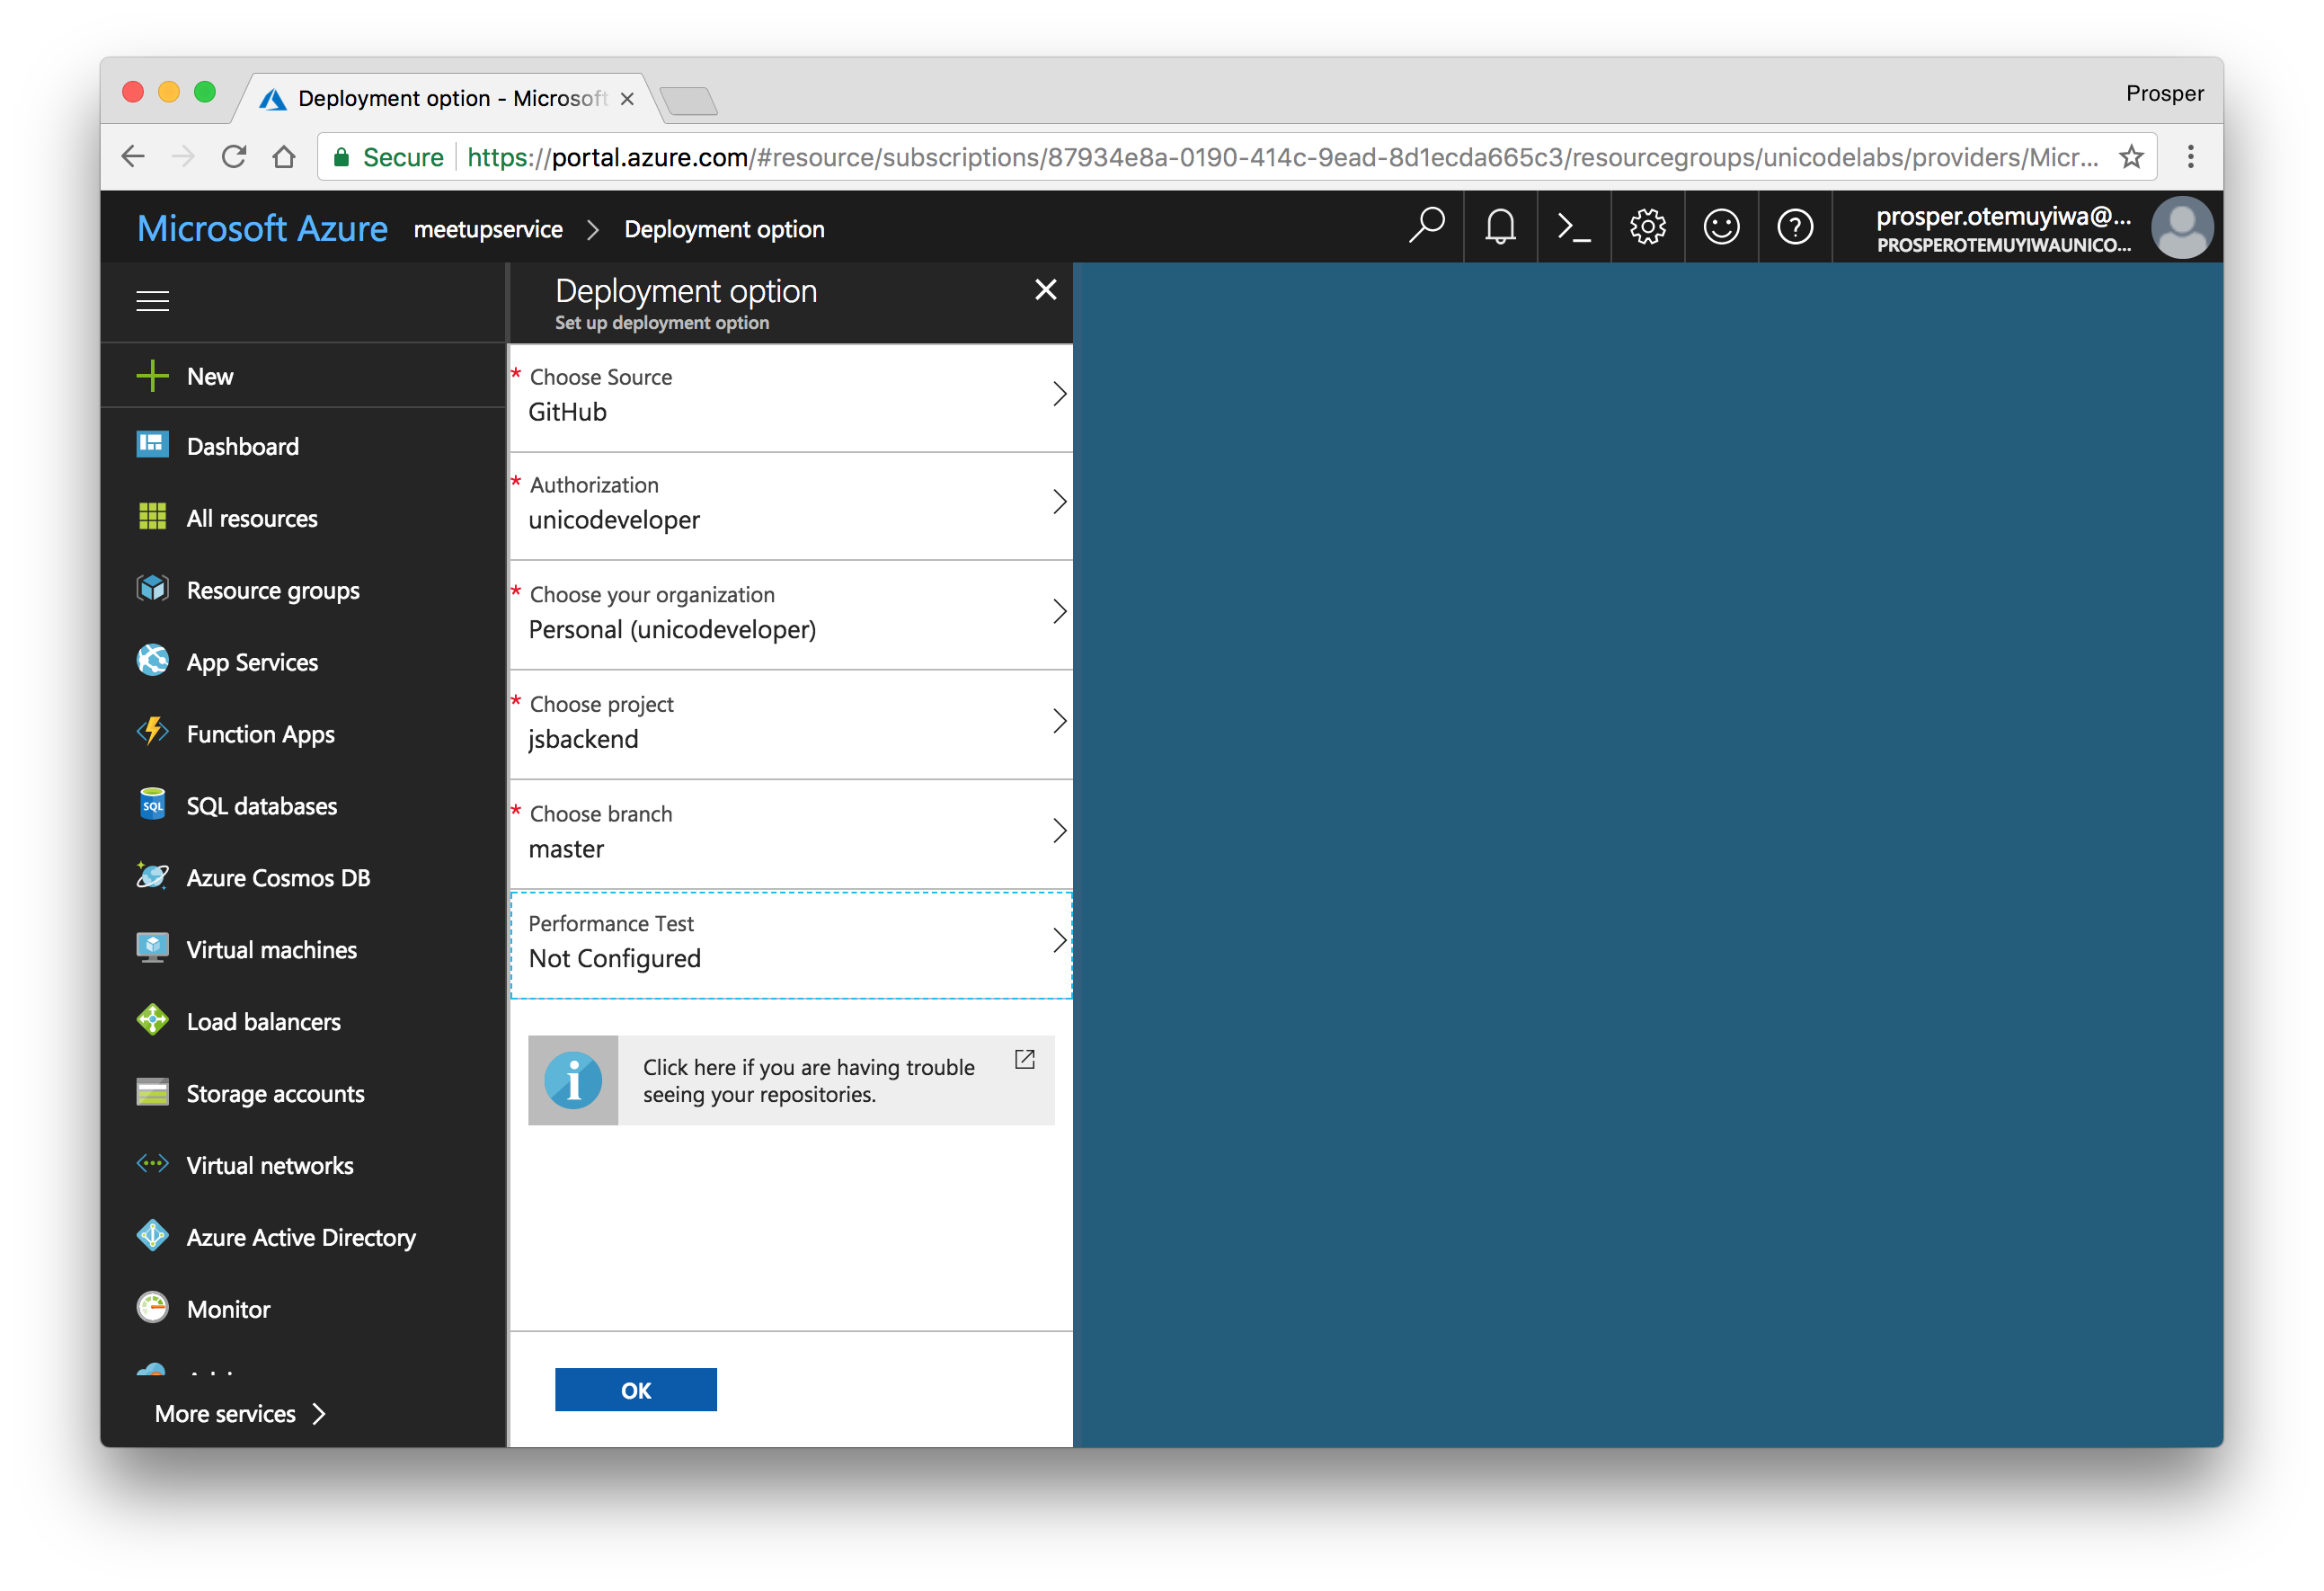
8. Click on the app, choose *Deployment options*, then click on `GitHub`.
9. Authorize GitHub to access your repo. Choose the Project. Choose the branch.
10. Now browse to `http://[yoursitename].azurewebsites.net`. In my case, it is `https://meetupservice.azurewebsites.net`.
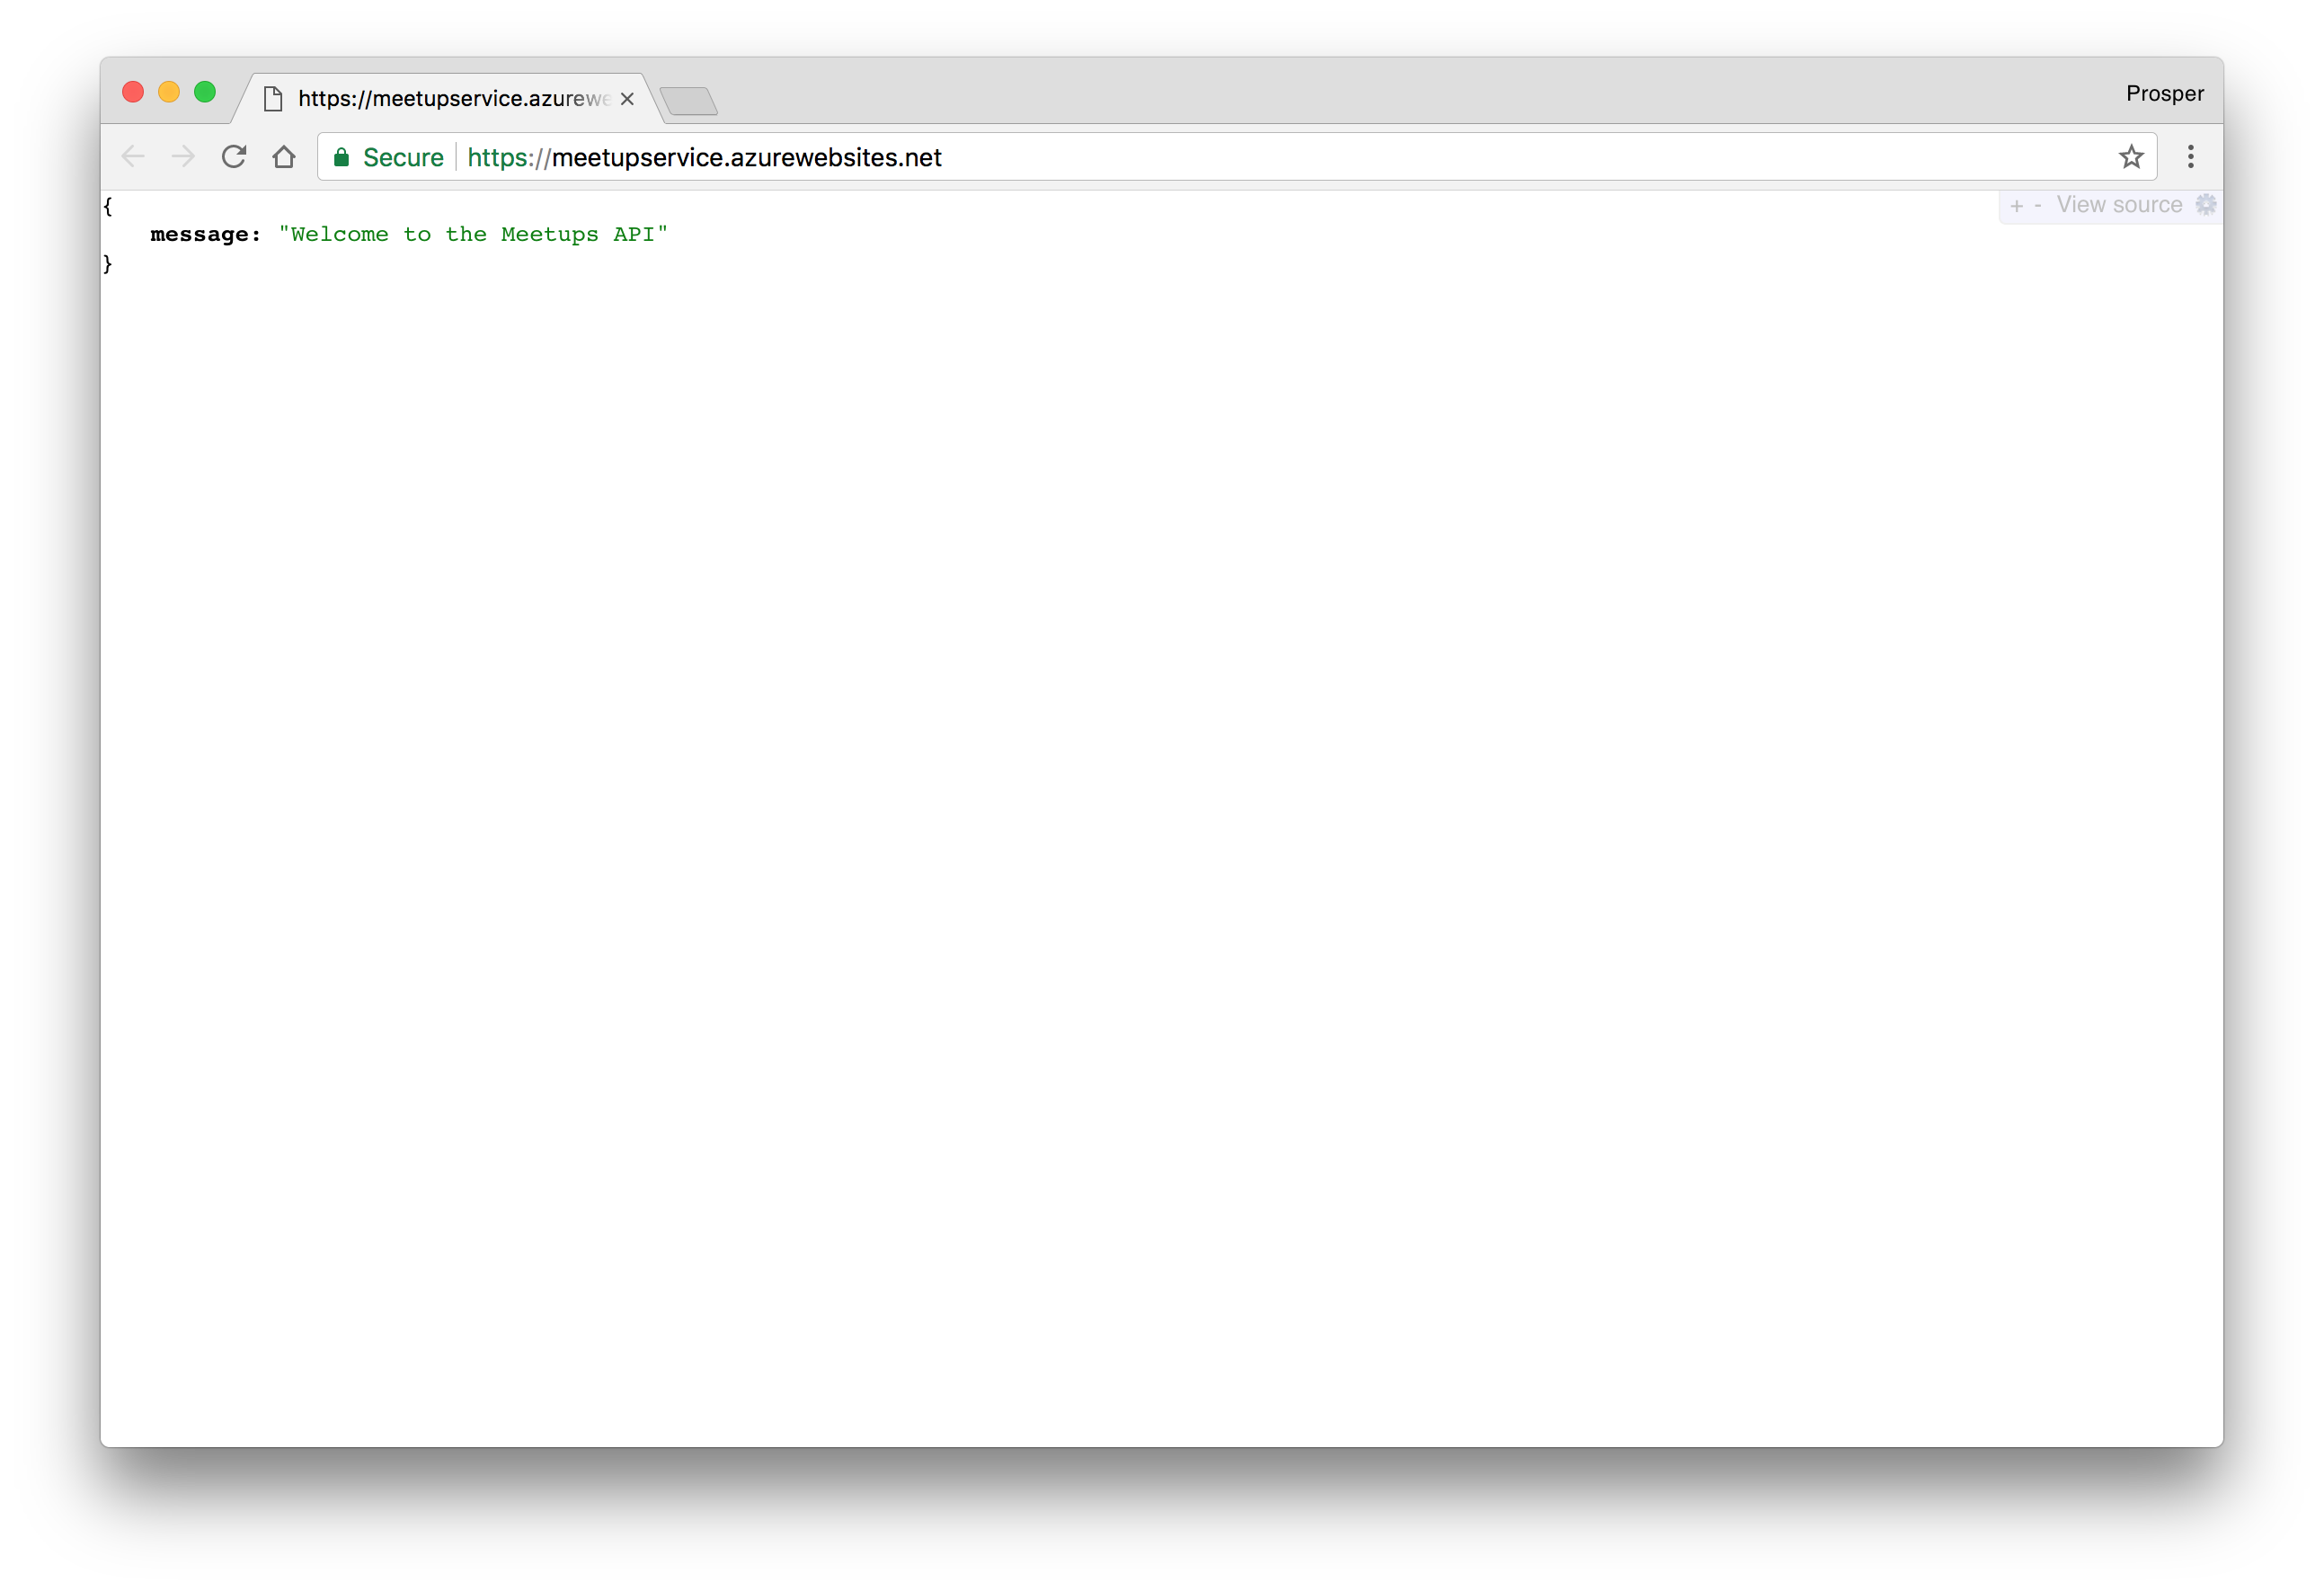
_Live Backend Works_
### Caching & Cron Jobs
Microsoft Azure offers *Azure Redis Cache*. It is based on the popular open source Redis cache. It's easy to create and use like so:
1. Click **New > Data + Storage > Redis Cache**.
2. Enter the name of the cache, select the region and create it.
Check out the [documentation](https://azure.microsoft.com/en-us/services/cache) on how to use it.
For scheduling and running tasks, Azure offers a [Scheduler](https://azure.microsoft.com/en-us/services/scheduler/). It allows you to:
- Call services inside or outside of Azure.
- Run jobs on any schedule.
- Use Azure Storage queues for long-running or offline jobs.
- Invoke Azure Service Bus queues.
Check out [how to create and manage jobs using the Scheduler](https://docs.microsoft.com/en-us/azure/scheduler/scheduler-get-started-portal).
## Amazon Web Services
More companies use AWS(Amazon Web Services) for storing all sorts of data ranging from images, mp3 files to videos than any other cloud platform. In fact, a lot of organizations like Uber, Spotify, Salesforce use Amazon Web Services wholly for hosting, deployment and infrastructure. AWS has a ton of developer products.
The service we'll use for deploying our backend Node.js app is **Amazon Elastic Beanstalk**. Let's get started.
- Sign up for an [AWS account](https://aws.amazon.com/account/) if you don't have one.
- Head over to [Elastic Beanstalk console](https://us-west-2.console.aws.amazon.com/elasticbeanstalk).
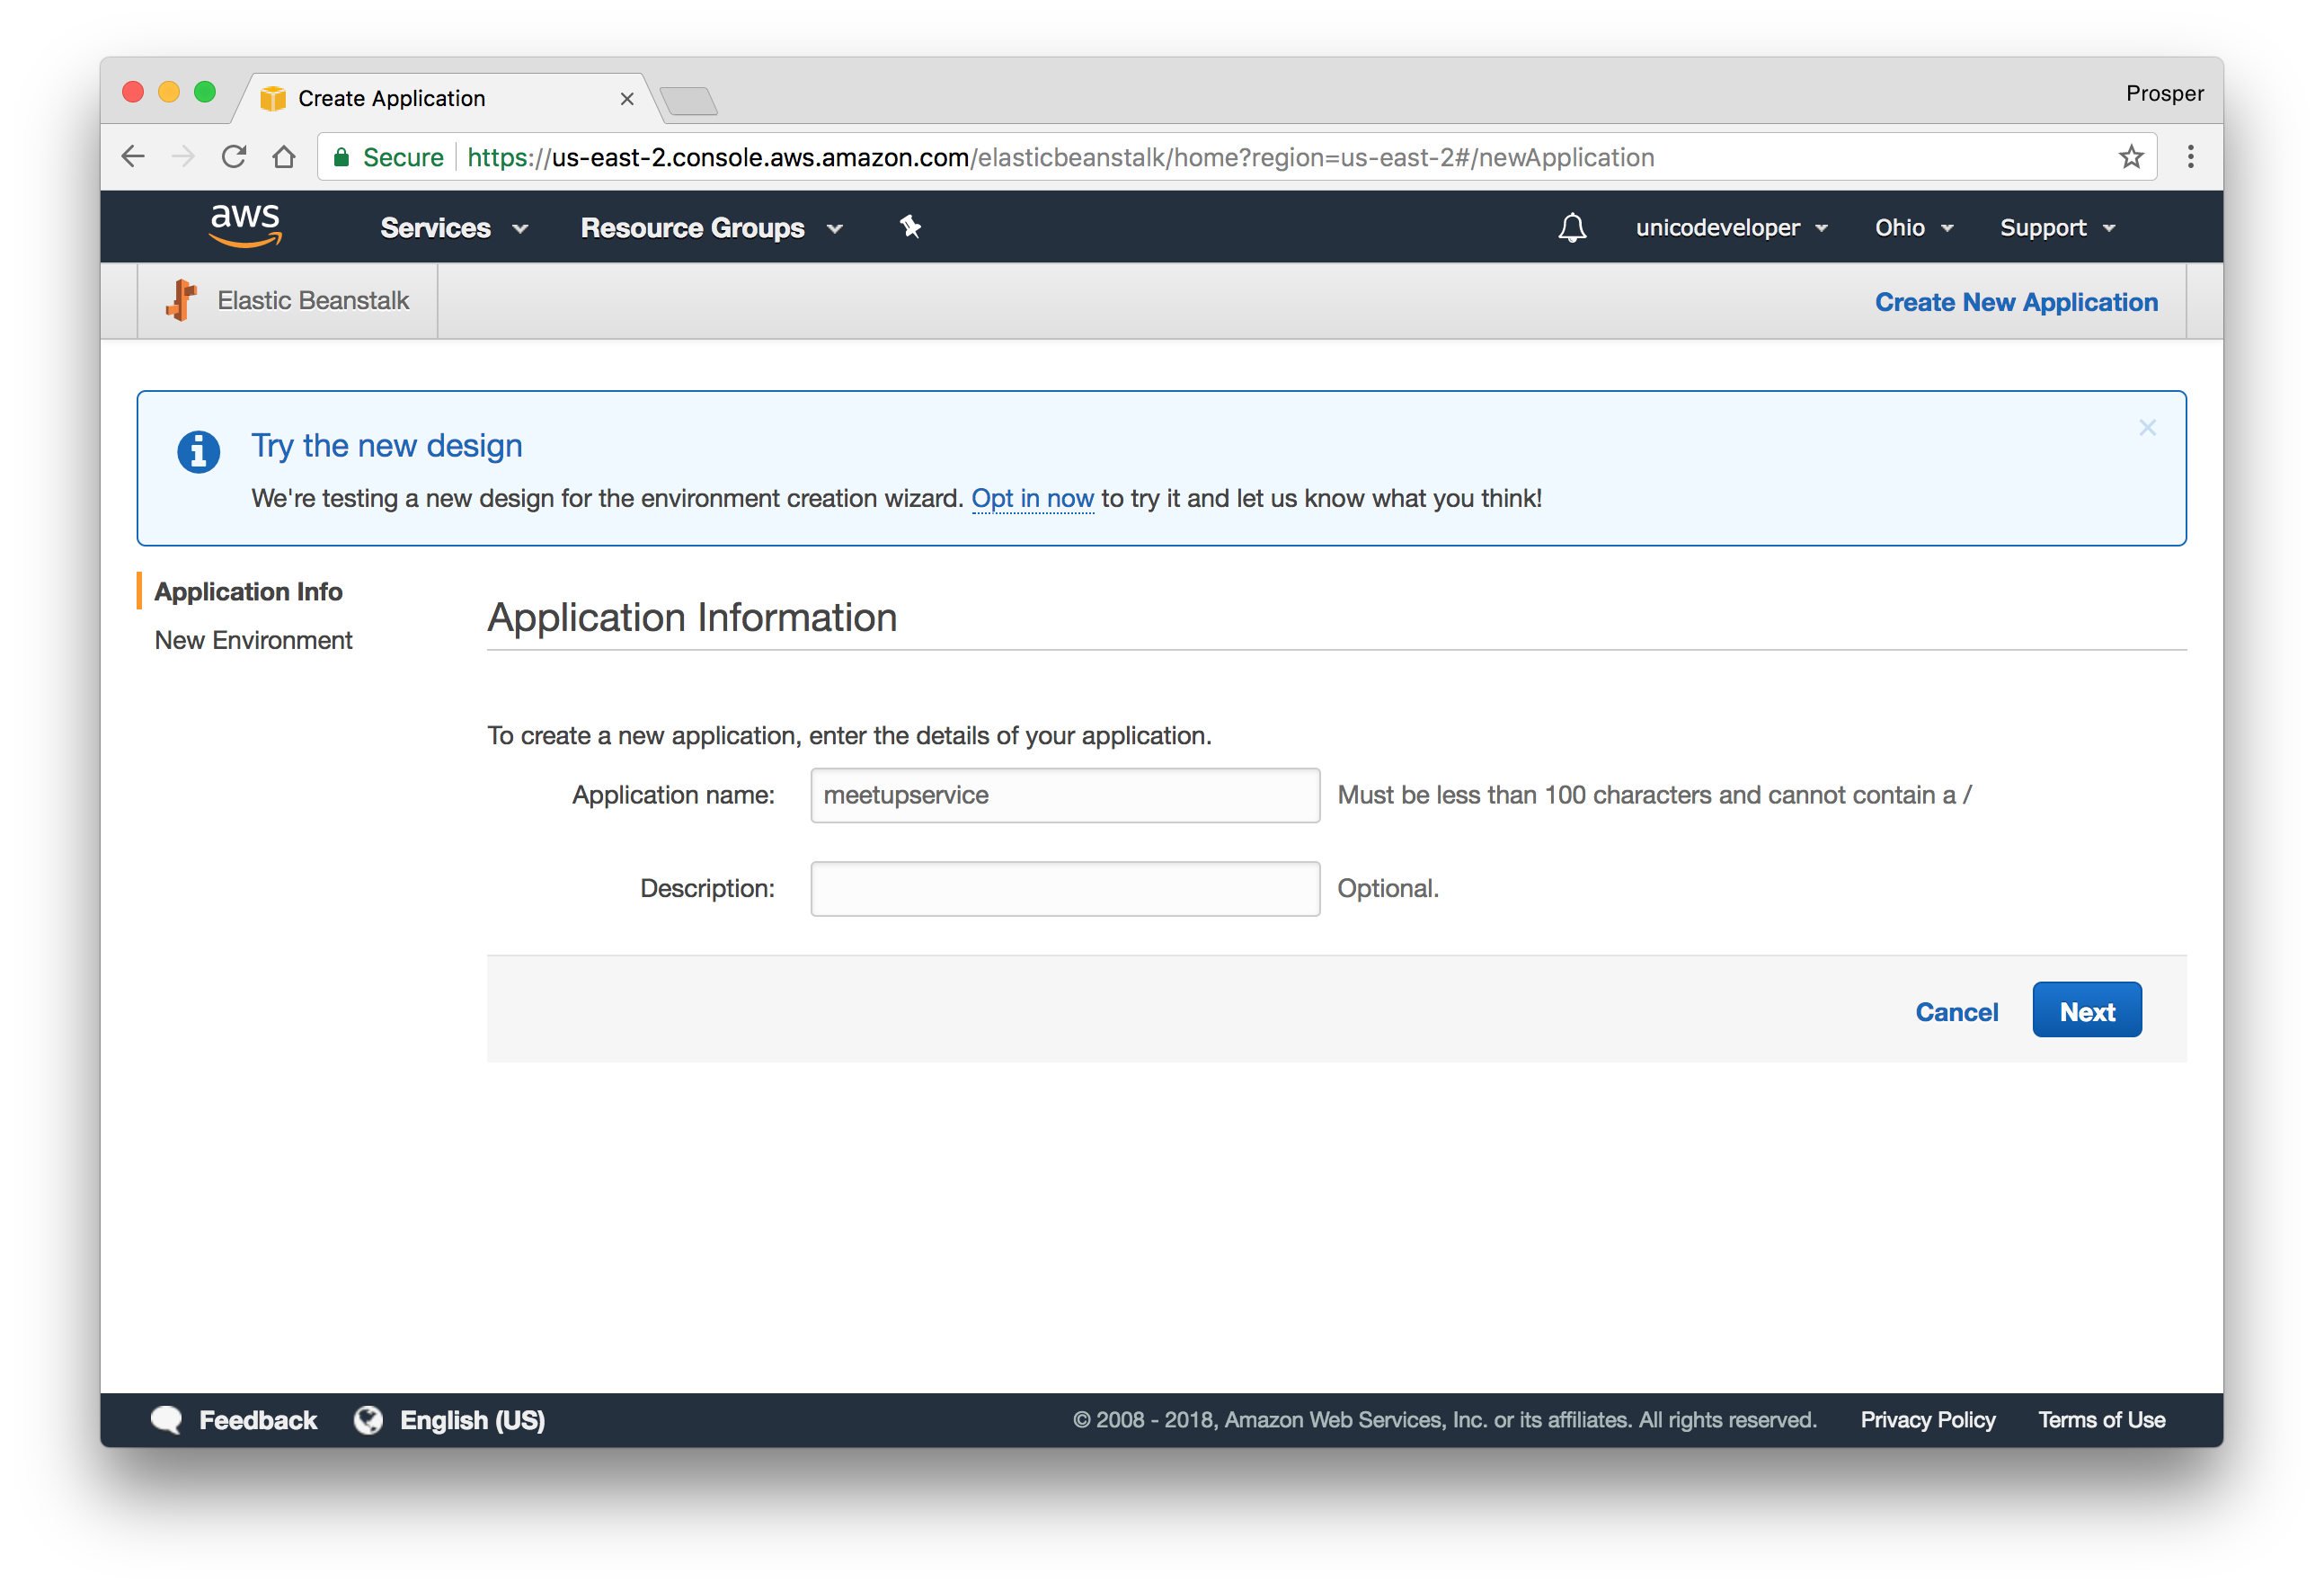
- Create a new app.
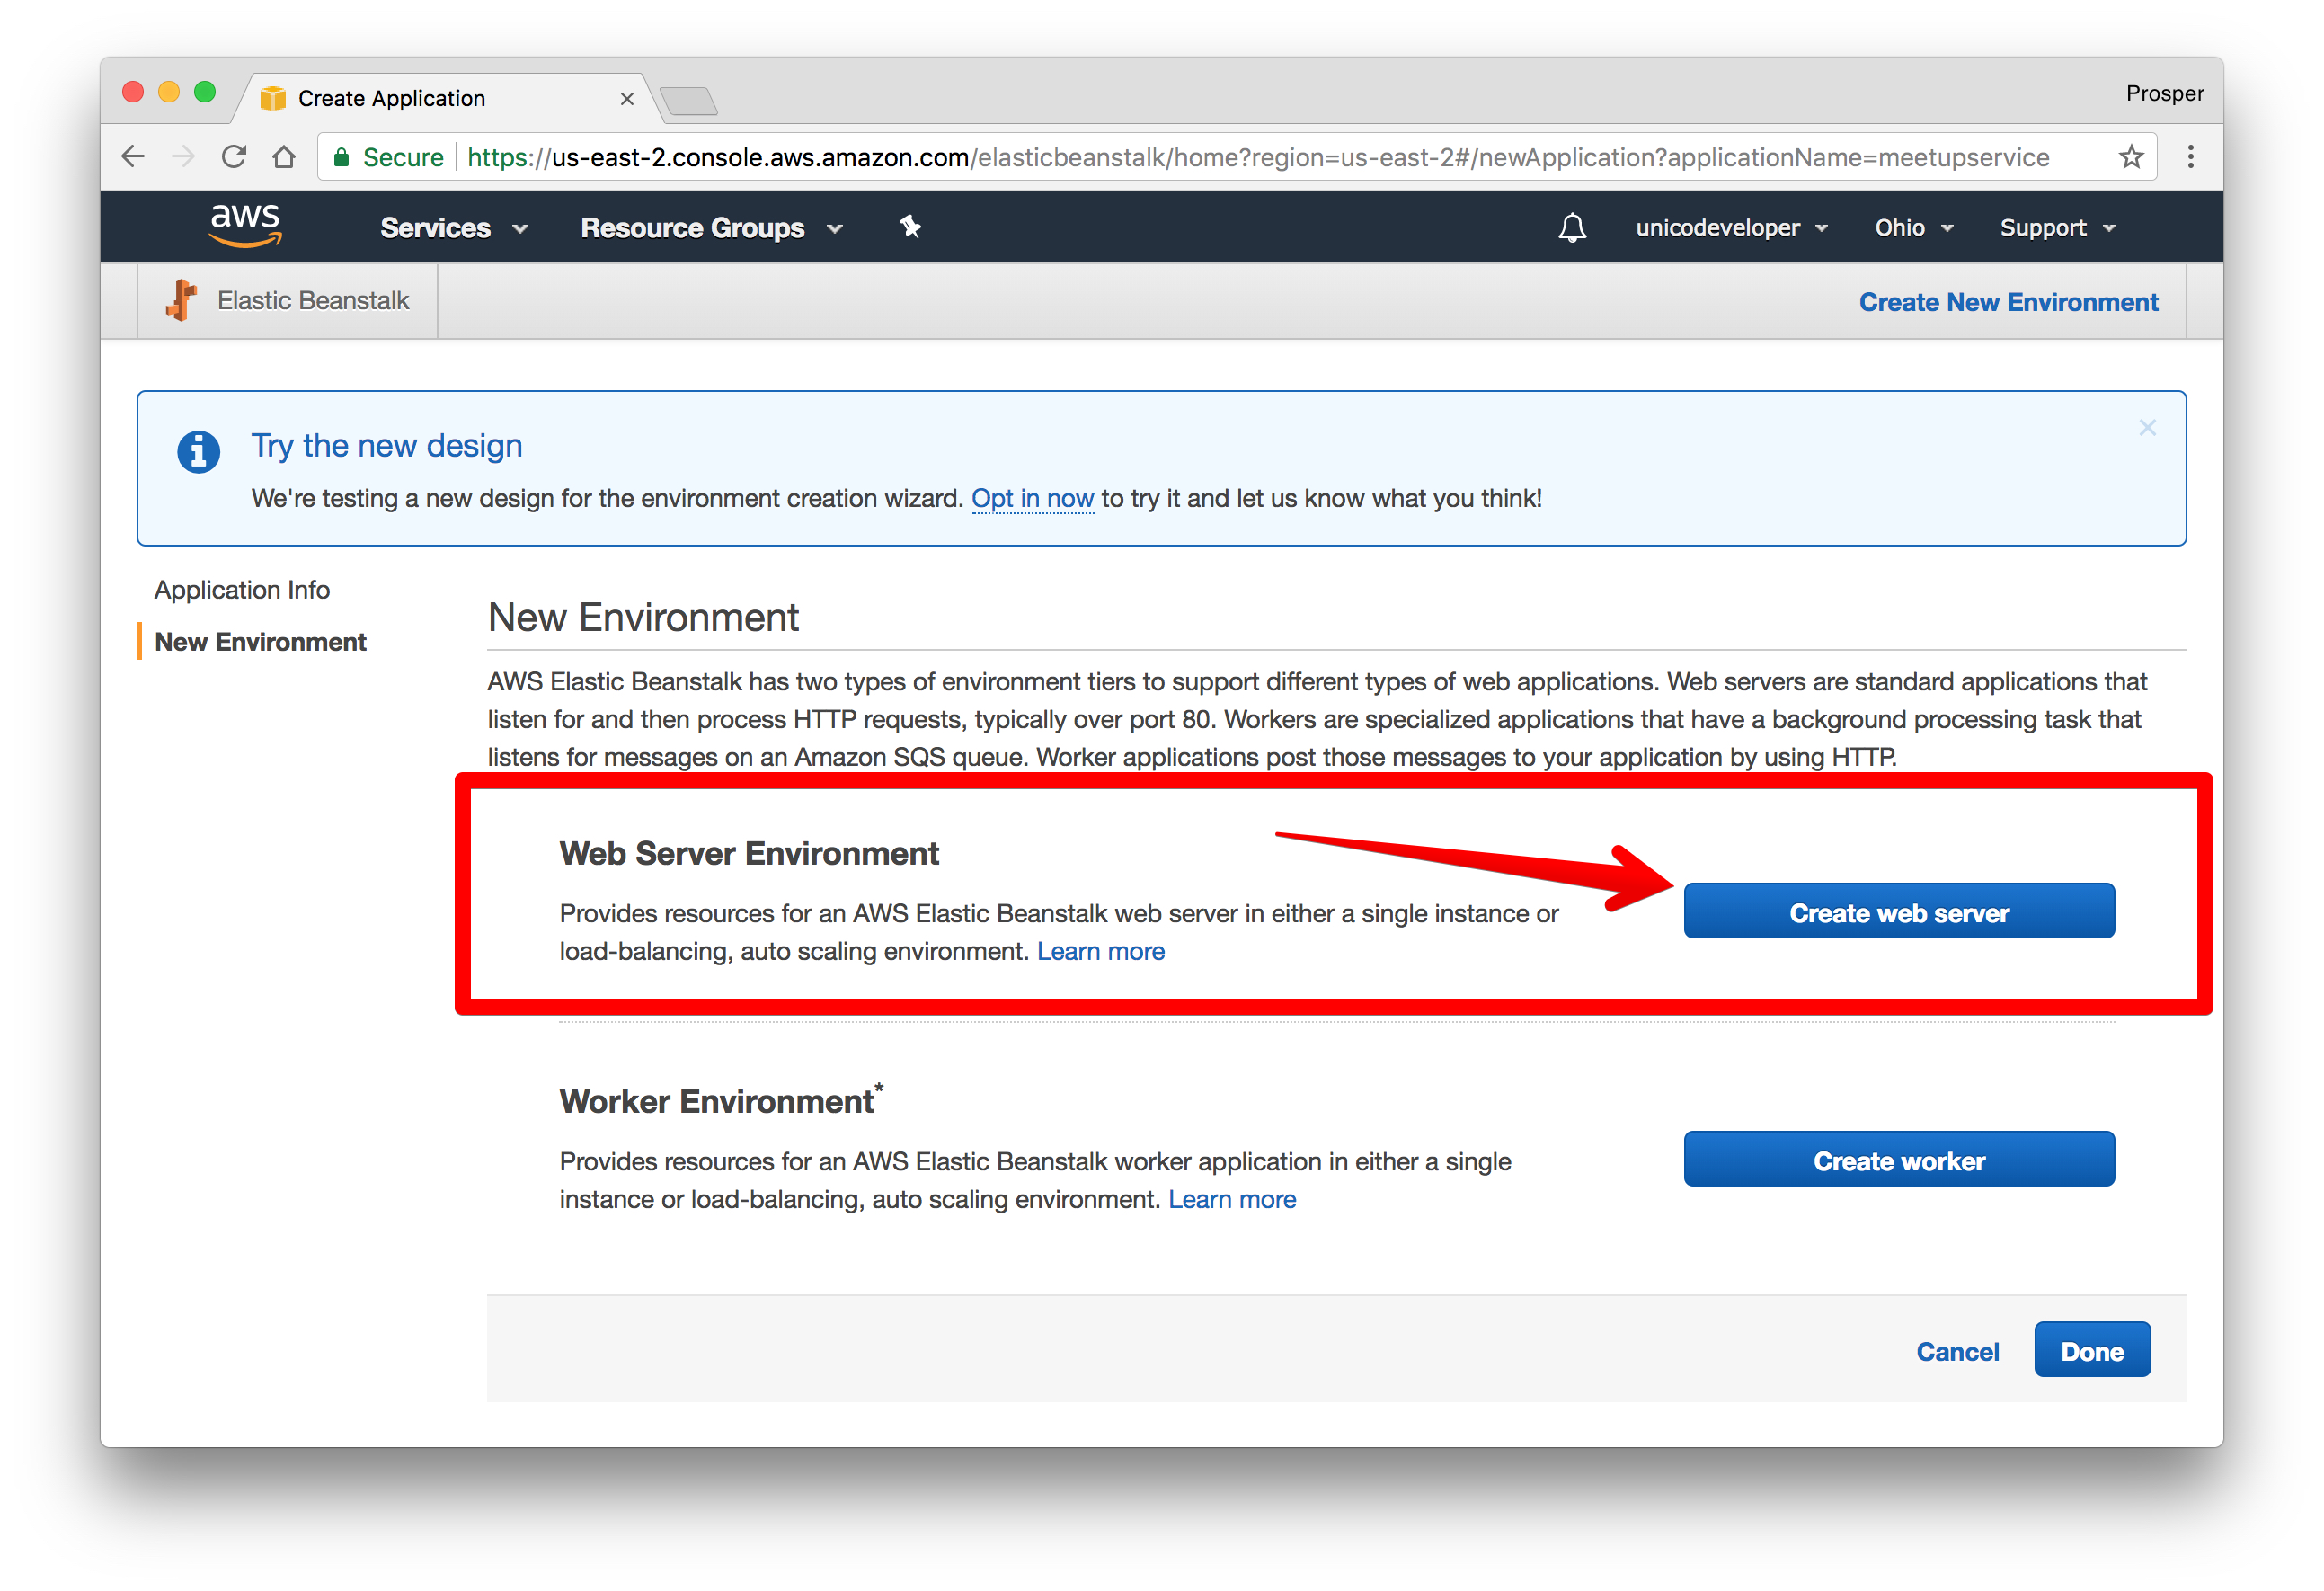
- Click on `create web server`.
- Create the web server environment.
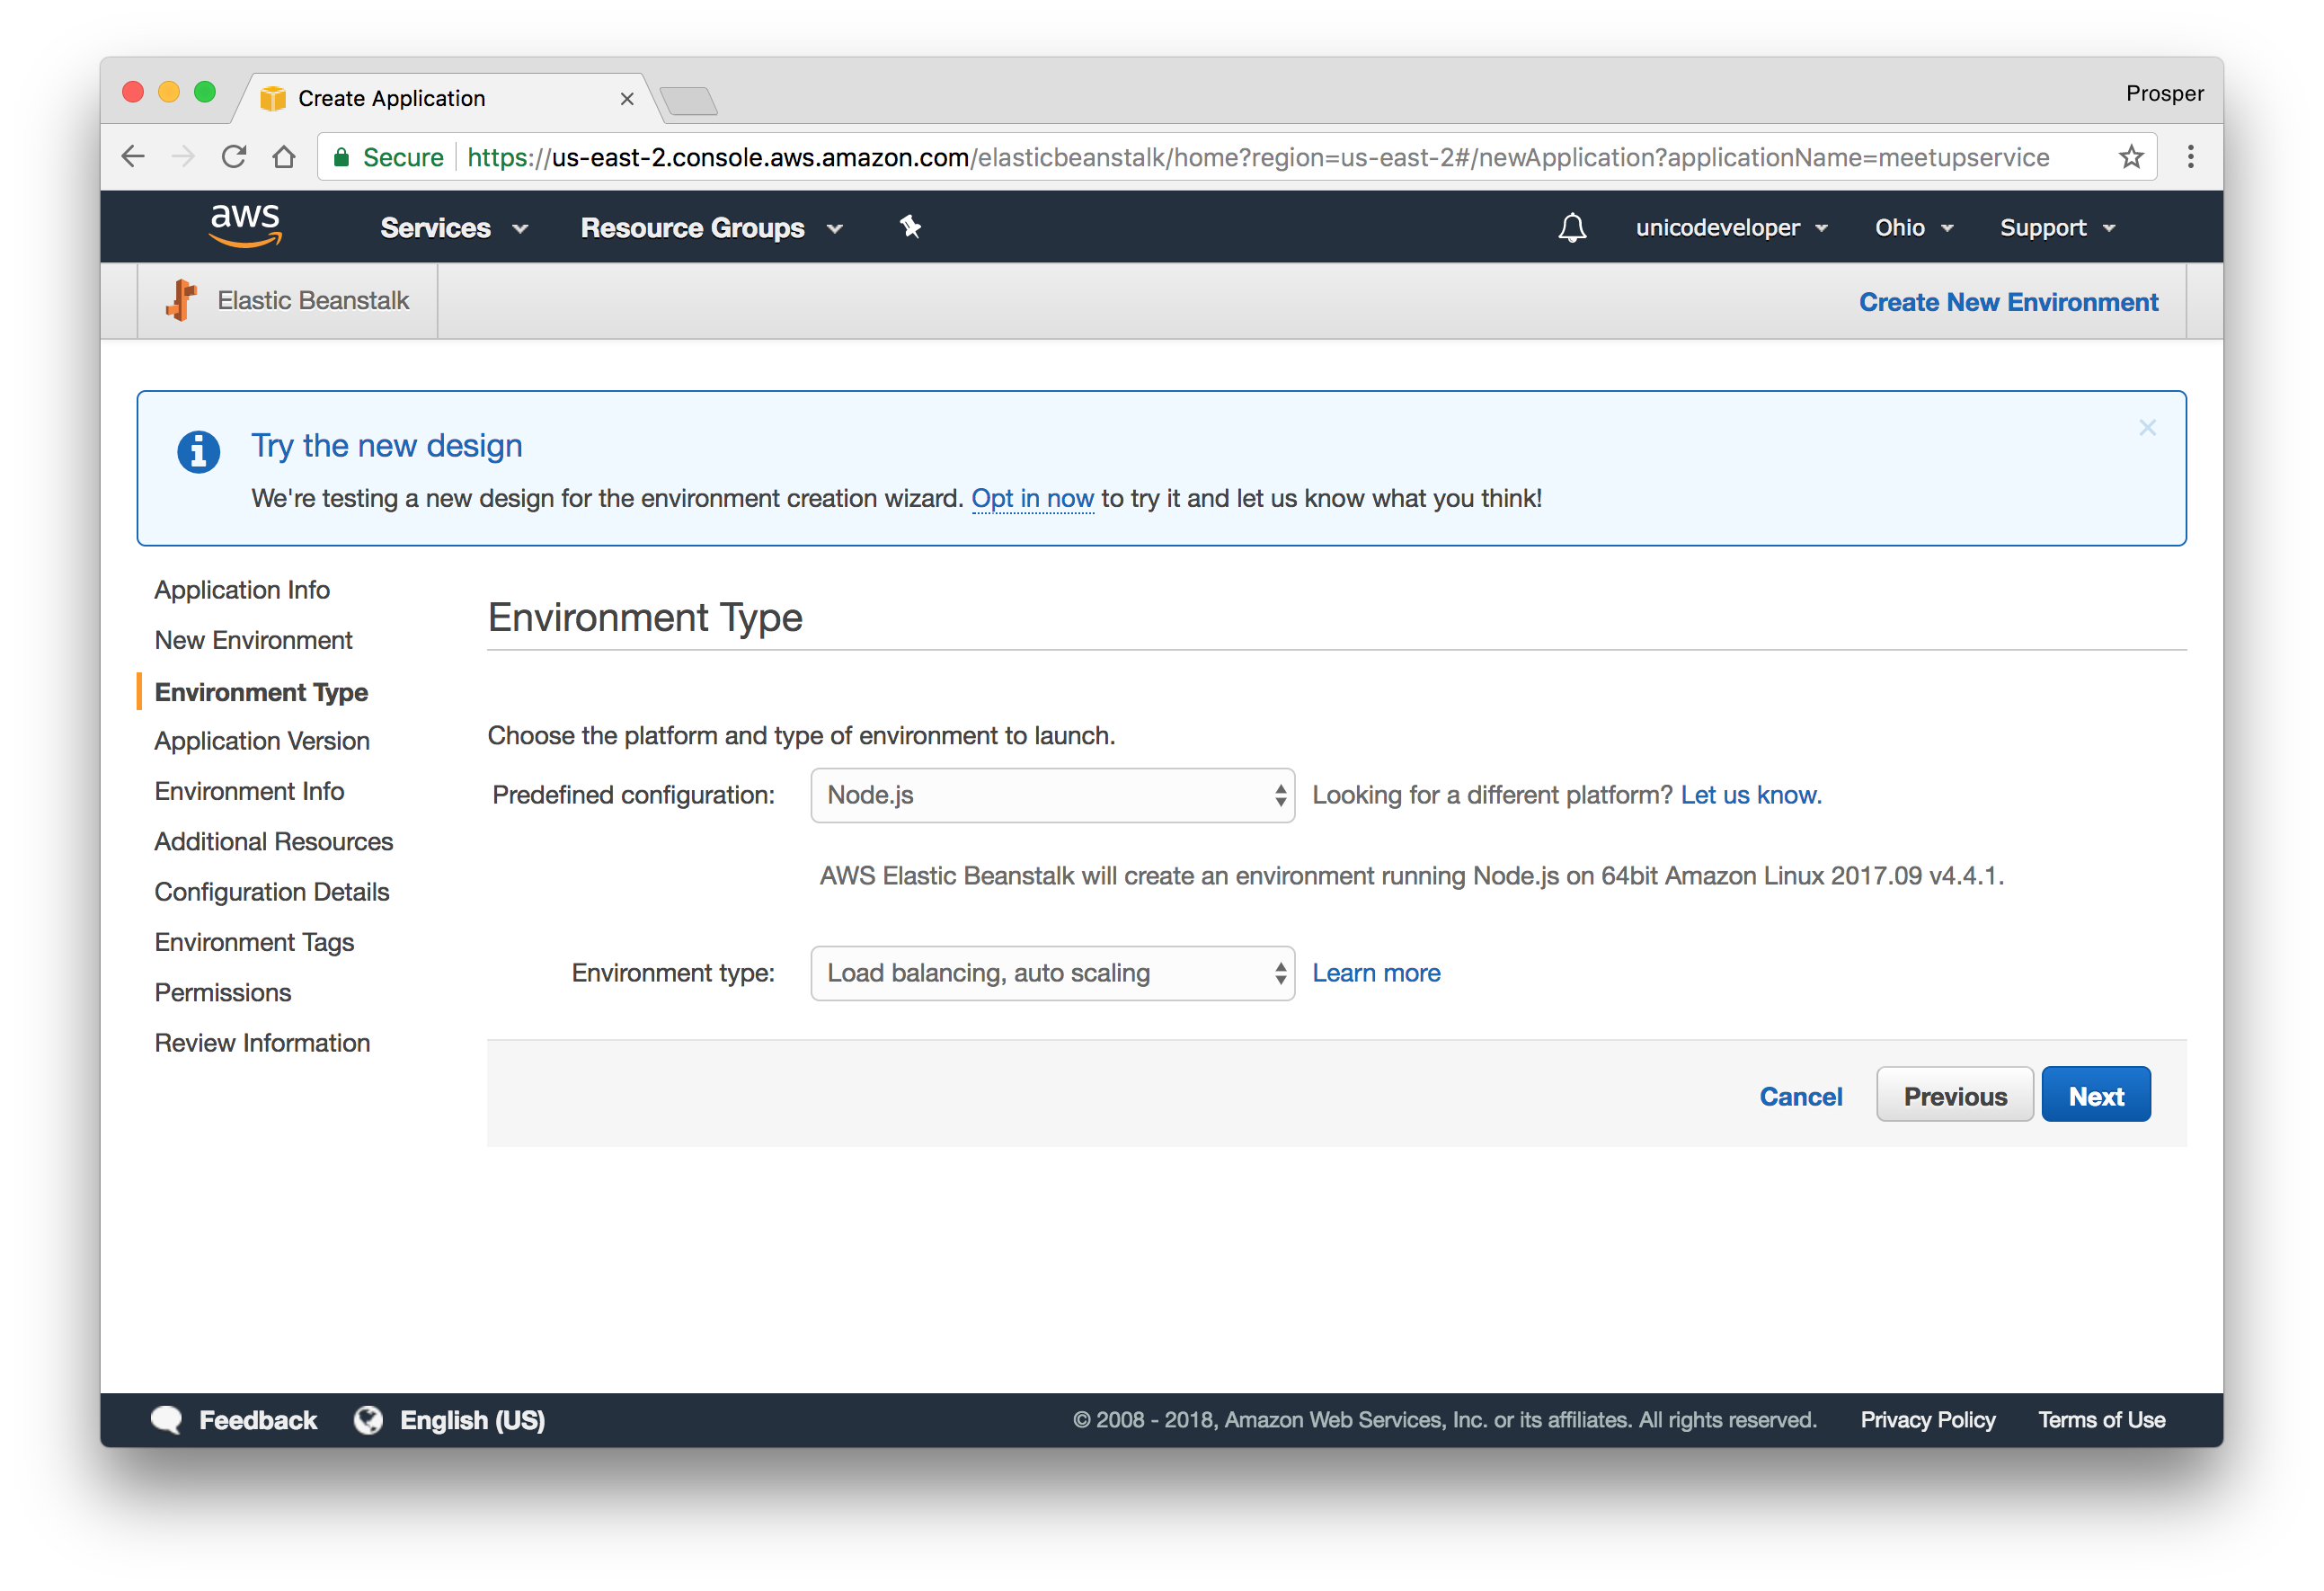
- Upload your code. Elastic Beanstalk requires that you upload a zip file of your codebase. You can manually zip it up. But I prefer to do that from my terminal like so:
```bash
zip ../meetupservice.zip -r * .[^.]*
```
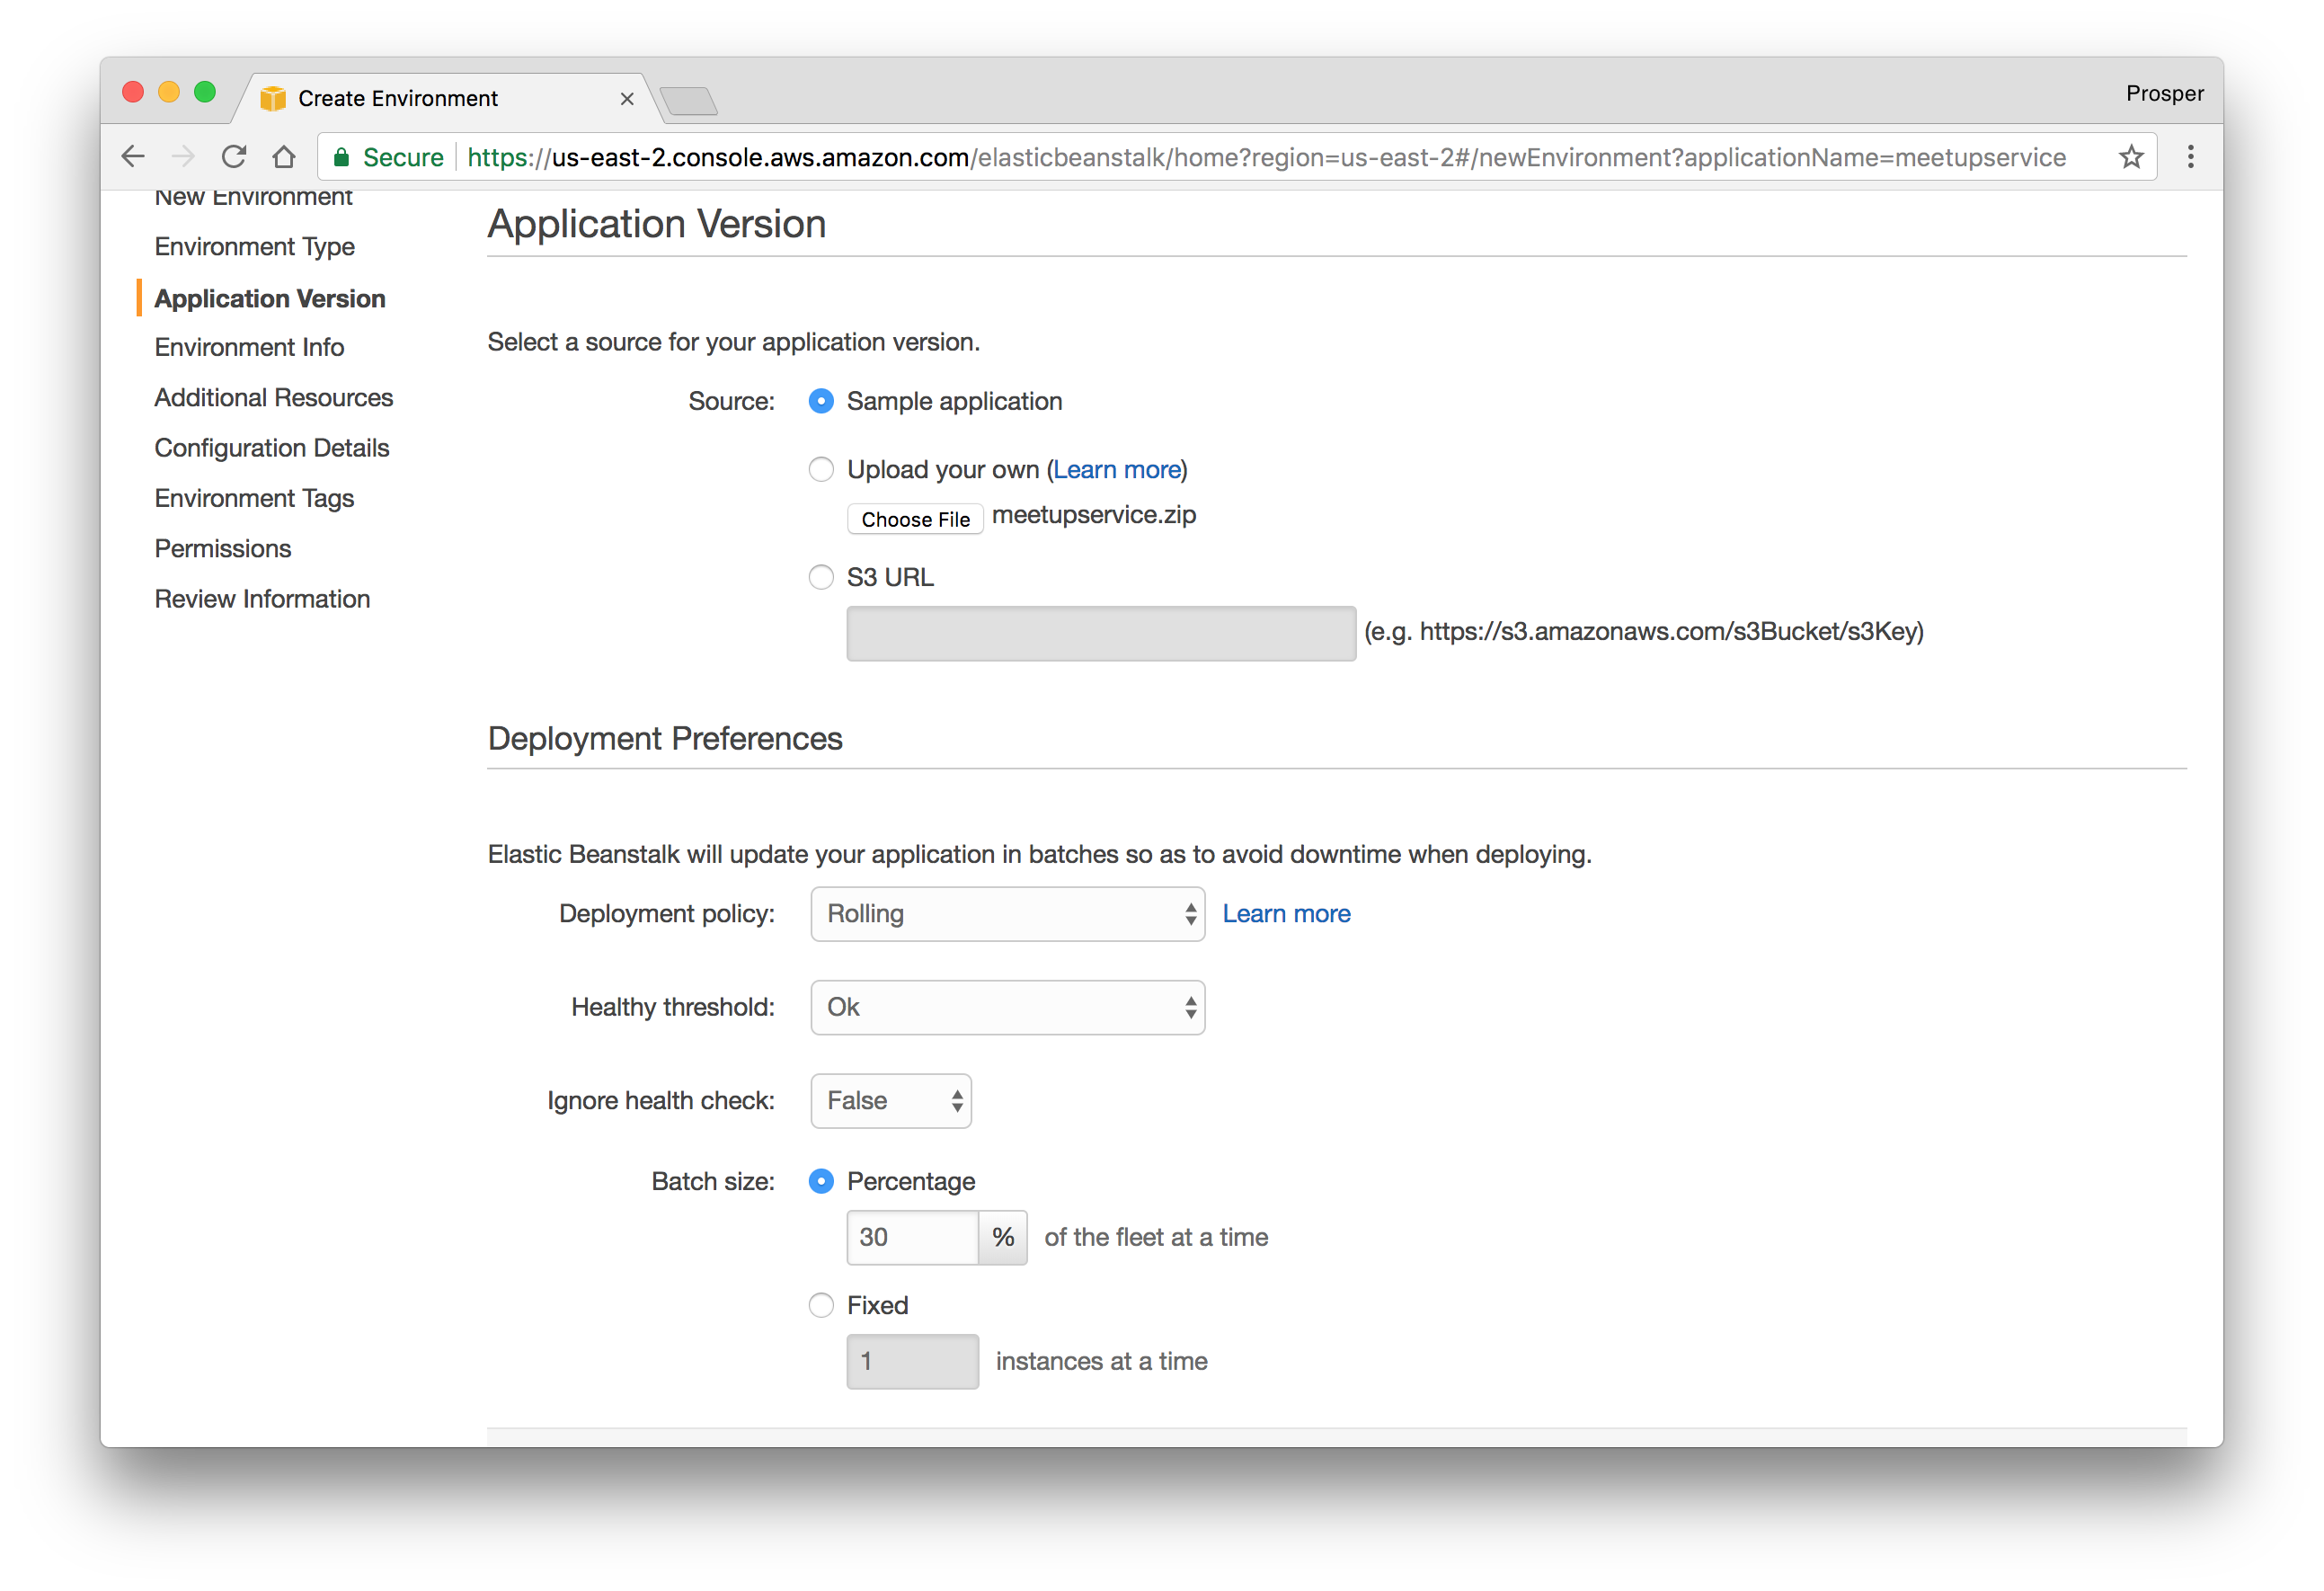
- Now, upload it to AWS like so:
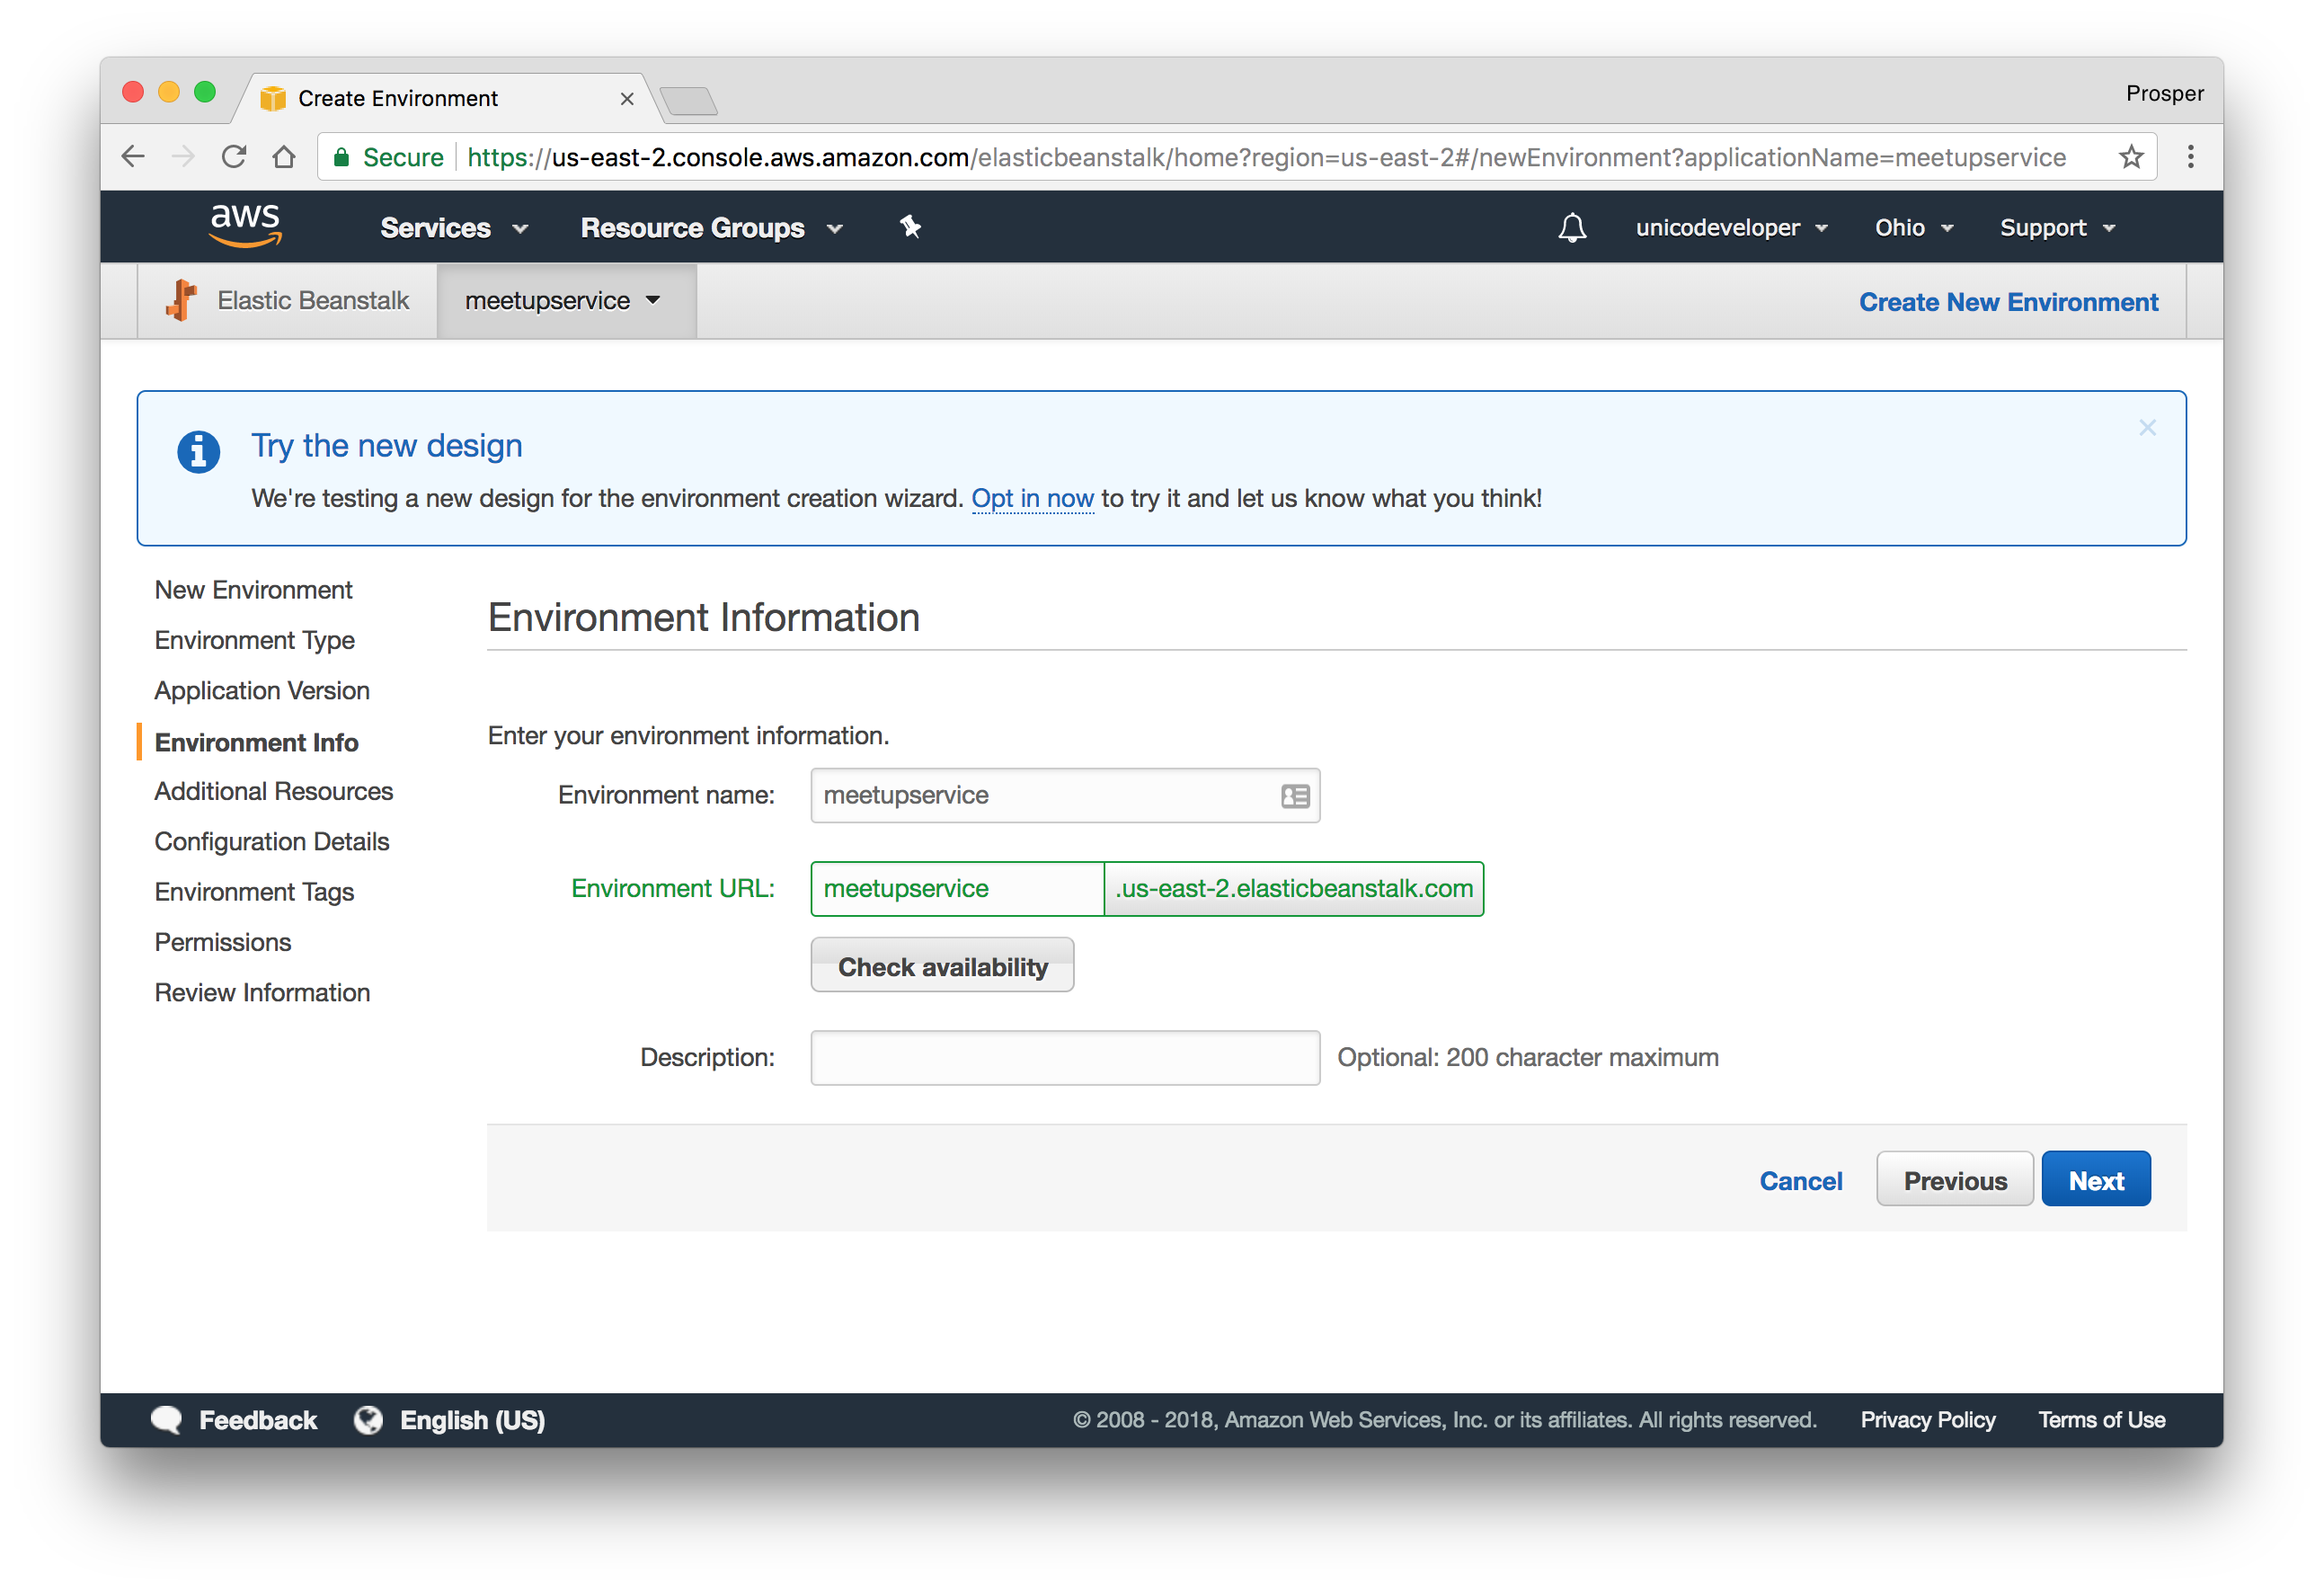
- Check availability for the app URL. Mine looks like this:
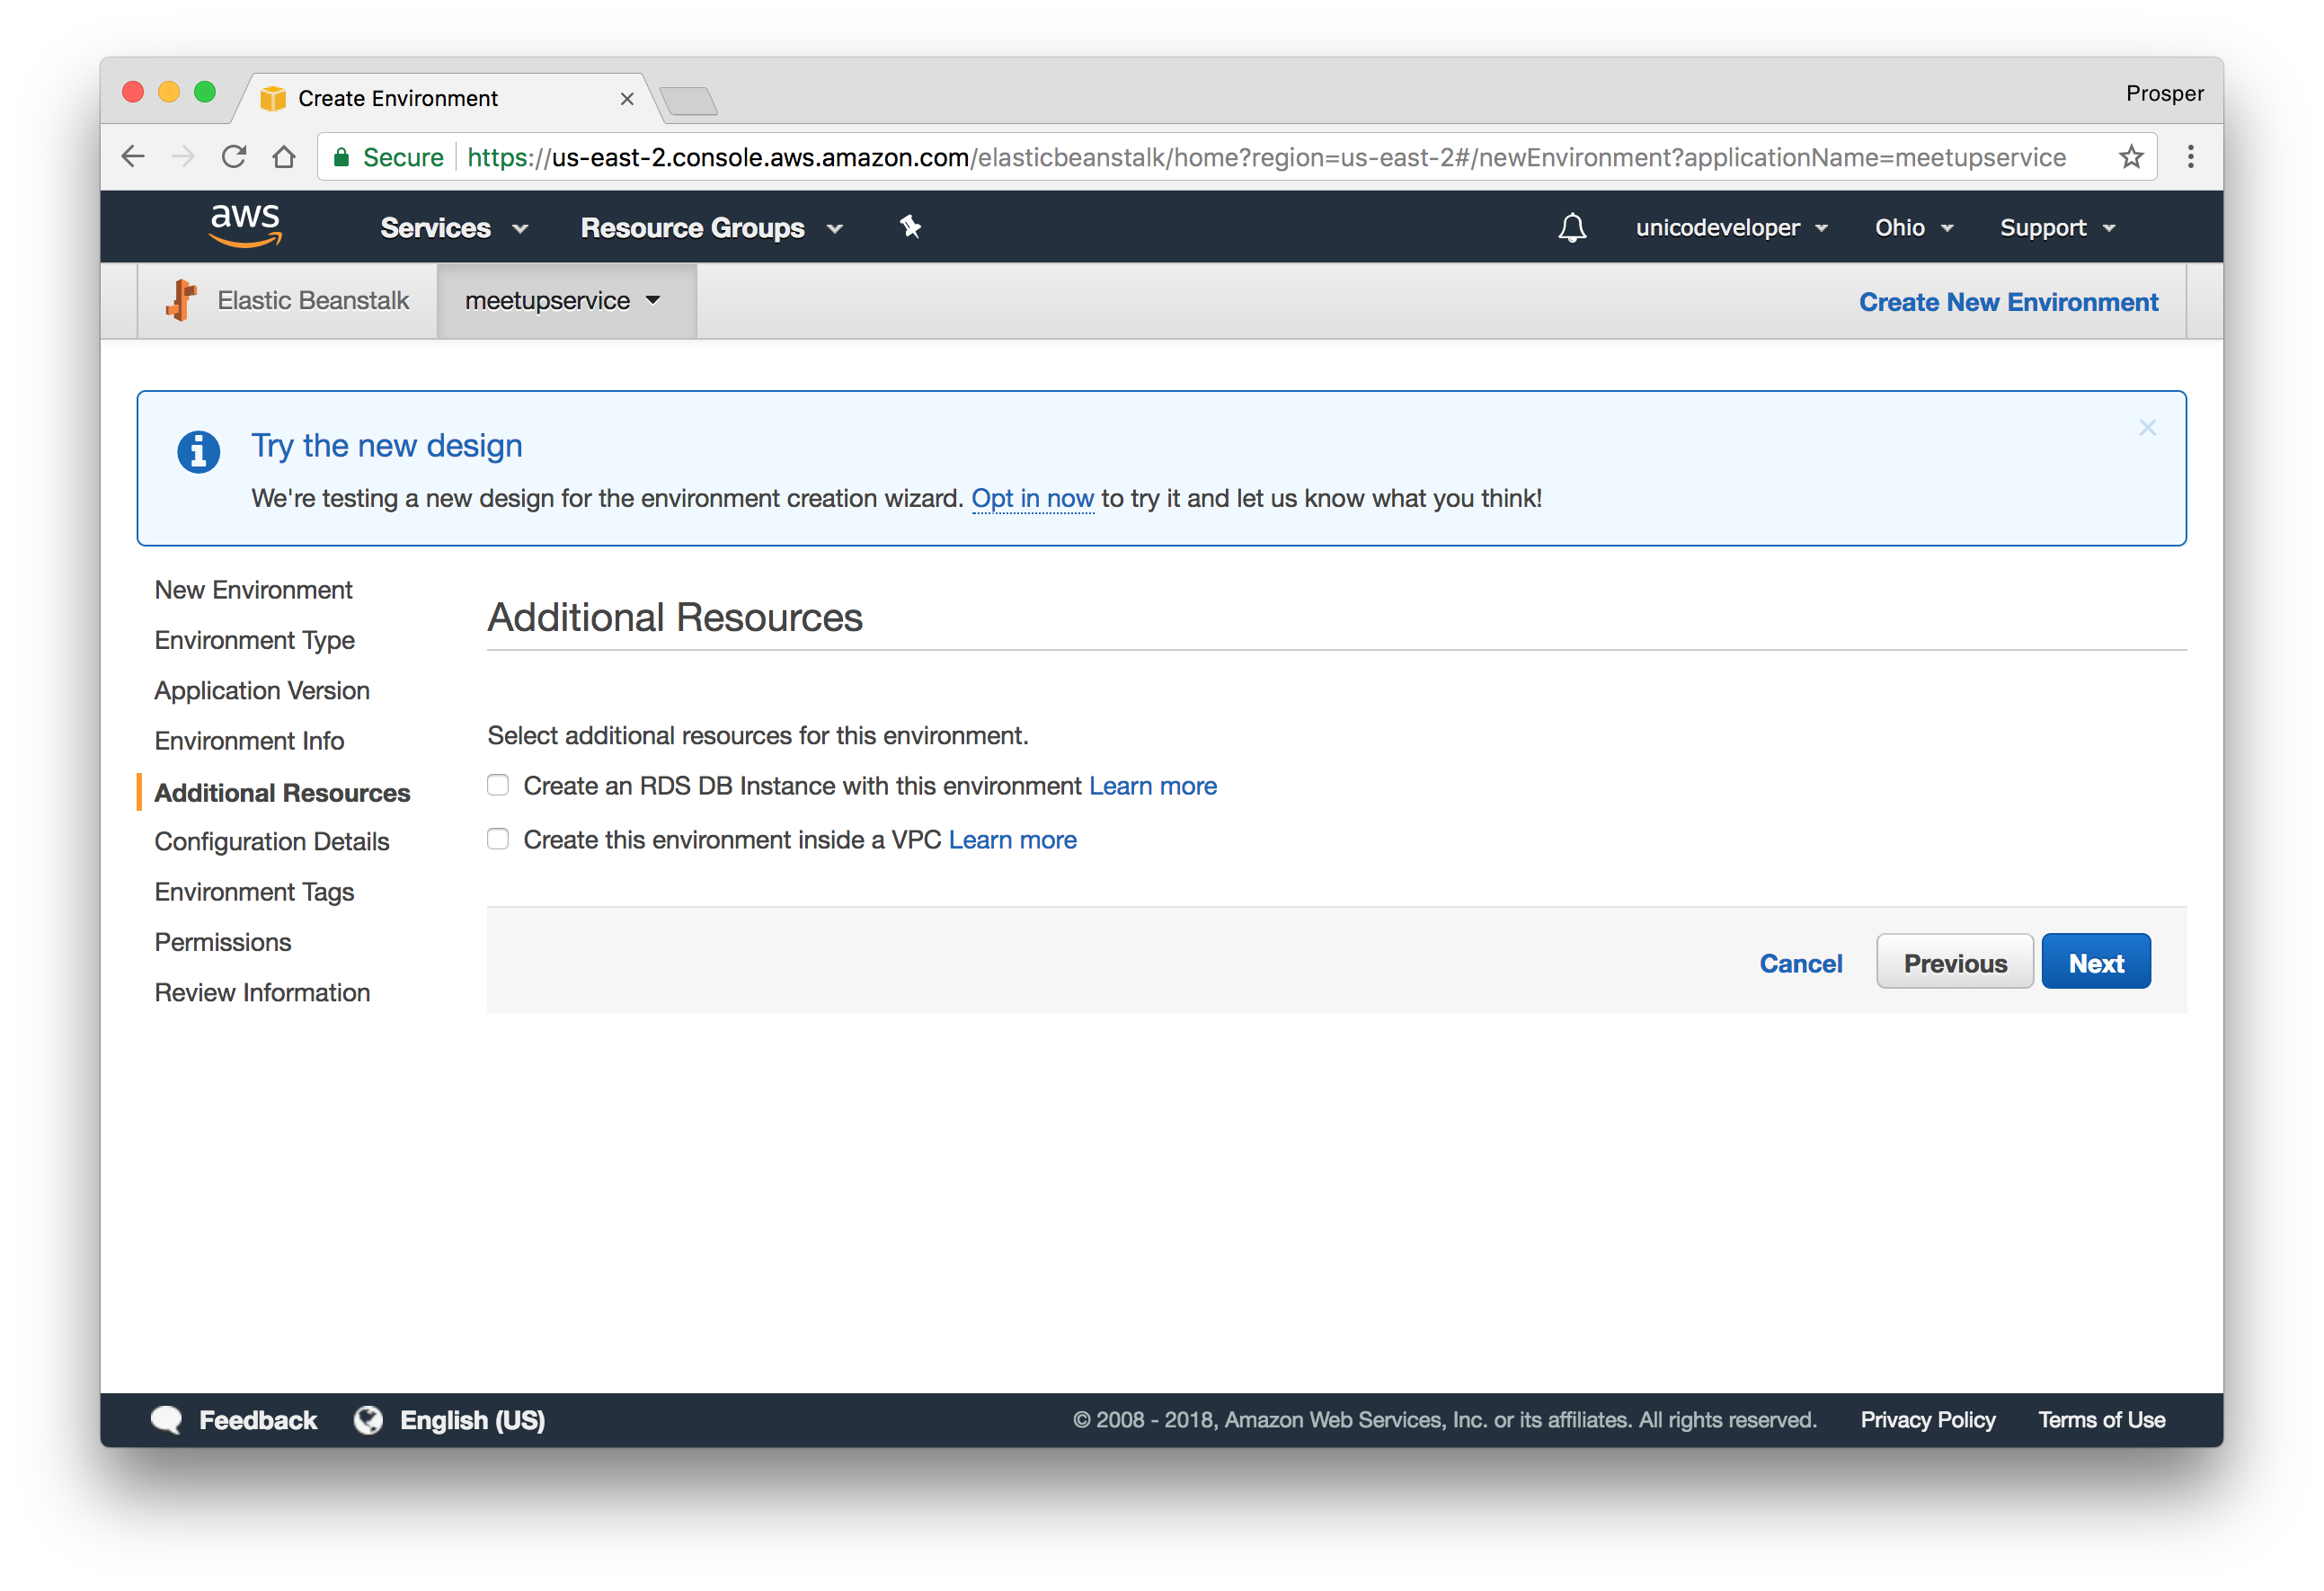
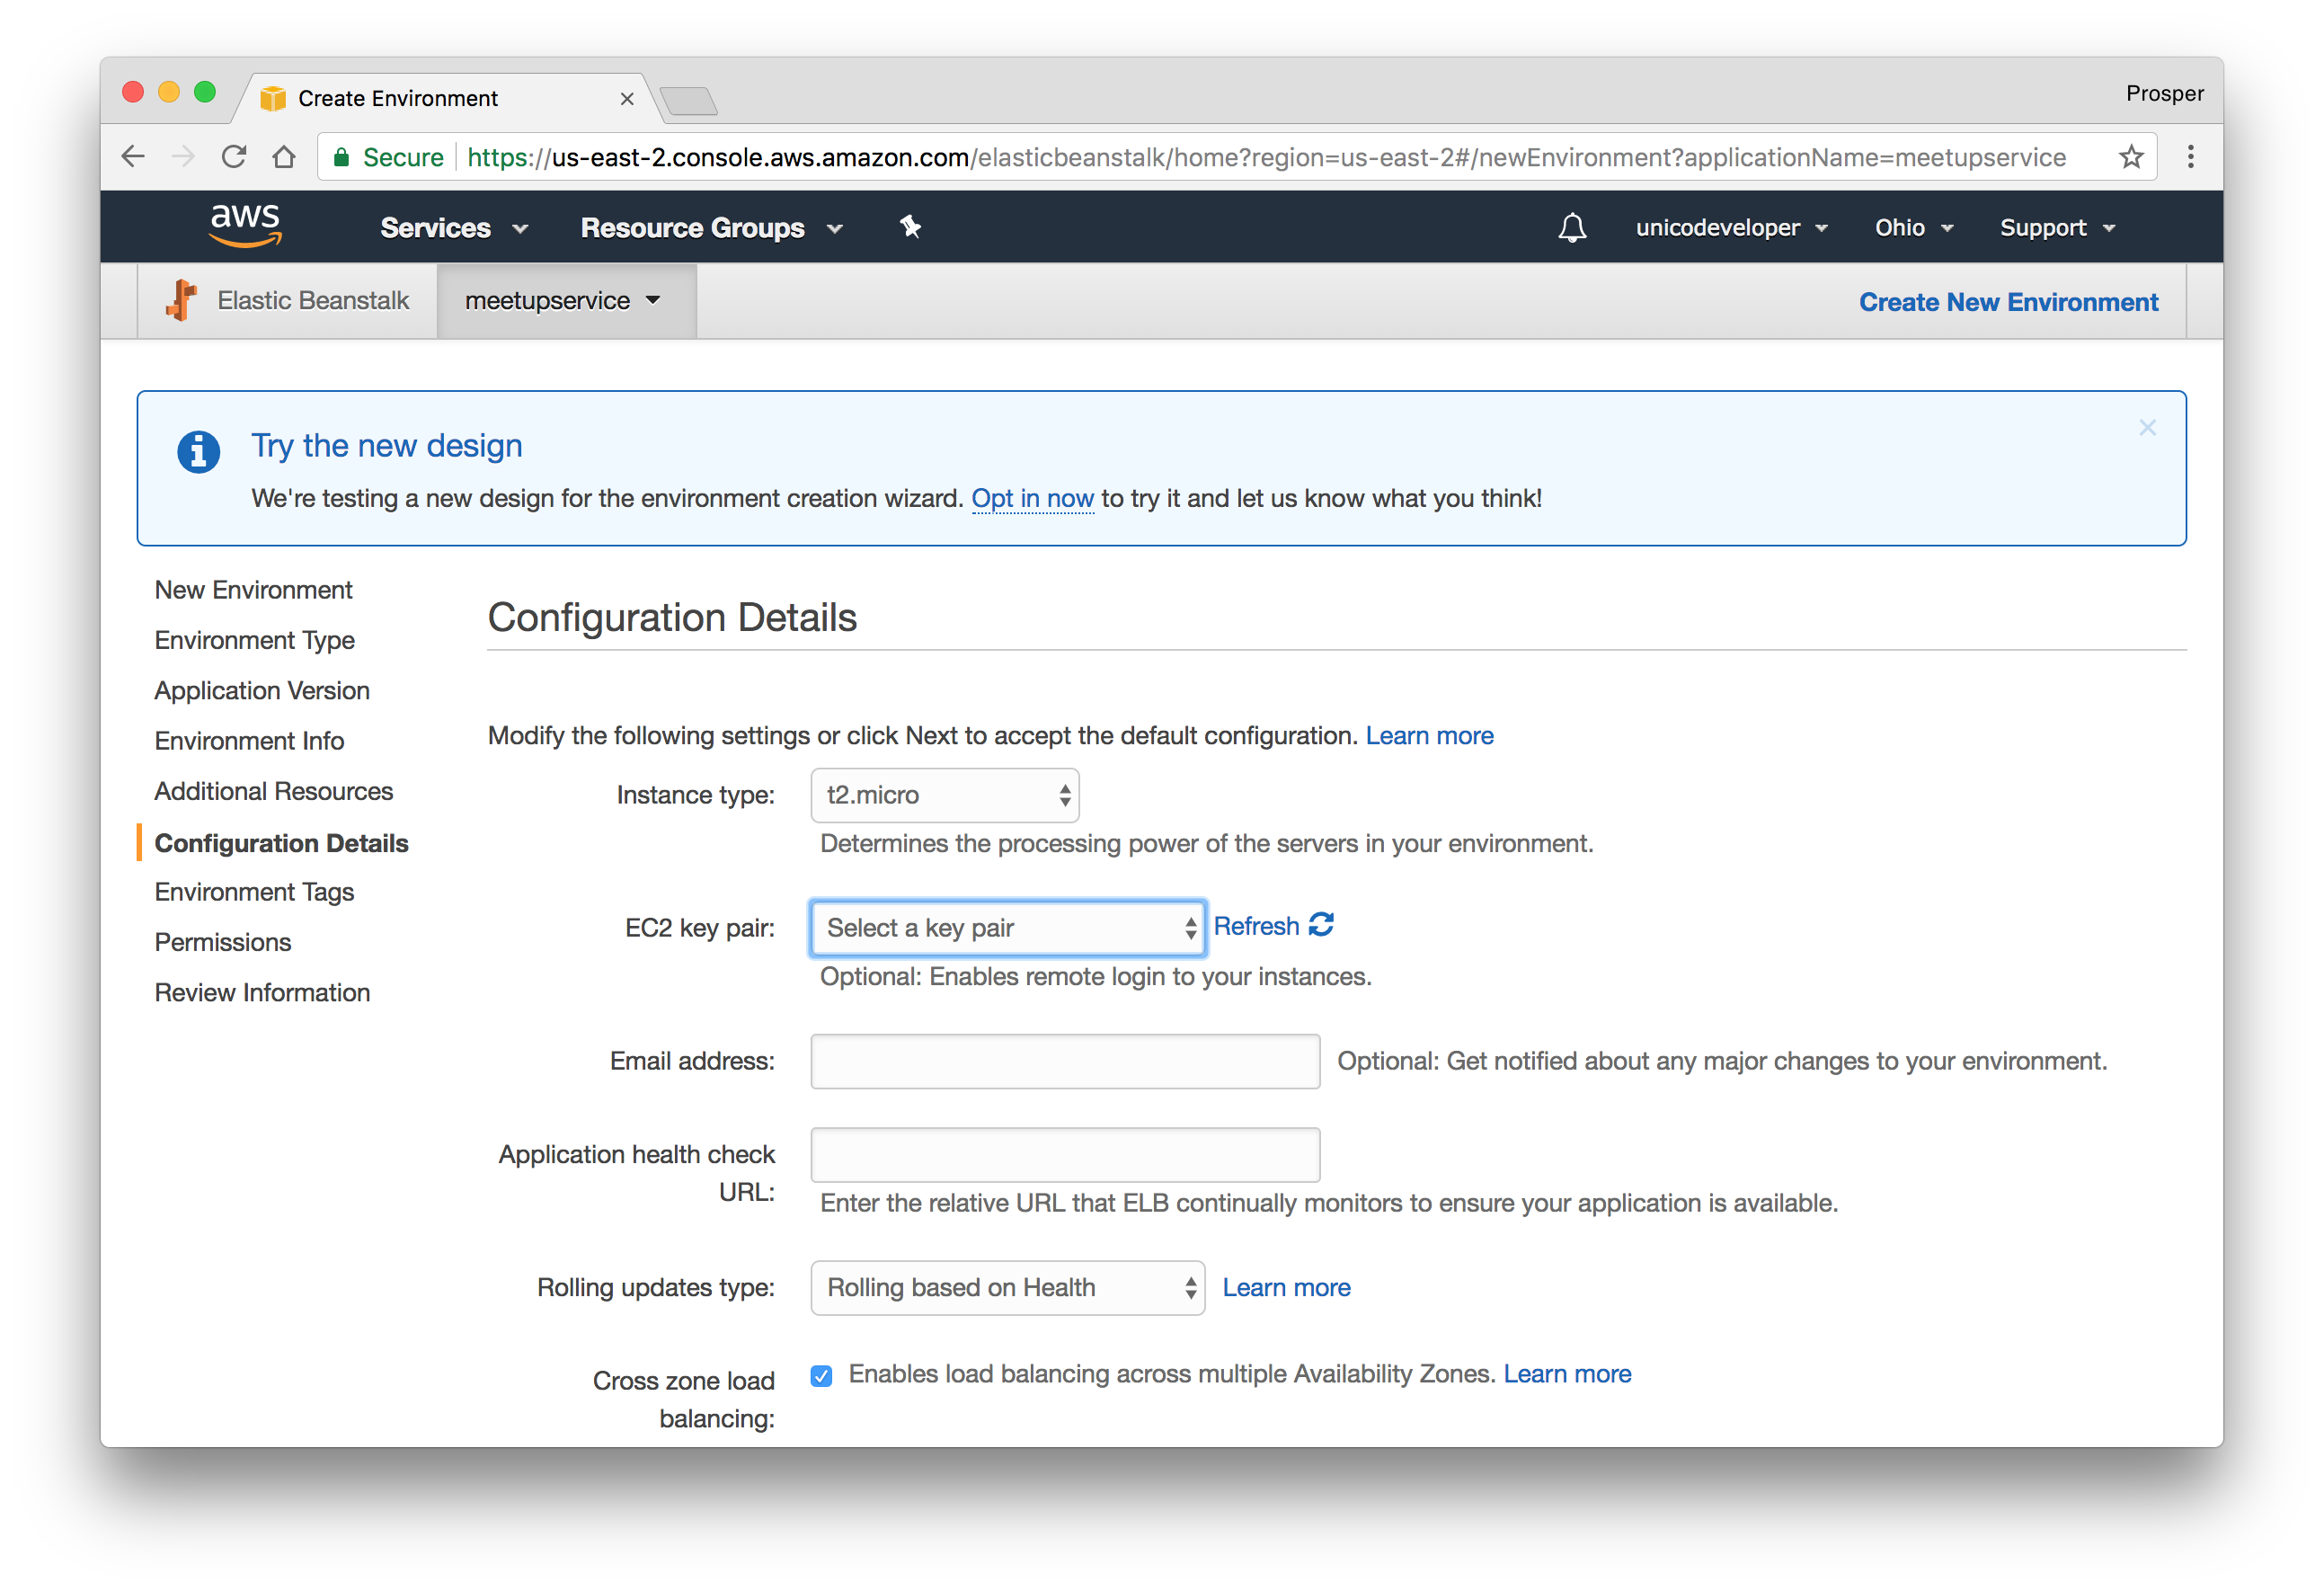
- The next page allows us to configure a Database Instance. Now our app already uses a remote MongoDB instance, so we can skip it.
- This step allows us to modify our configuration details. The default one is okay for our app.
- The next step requires that we add any environment variables. Our app does not require one, so we'll skip this step.
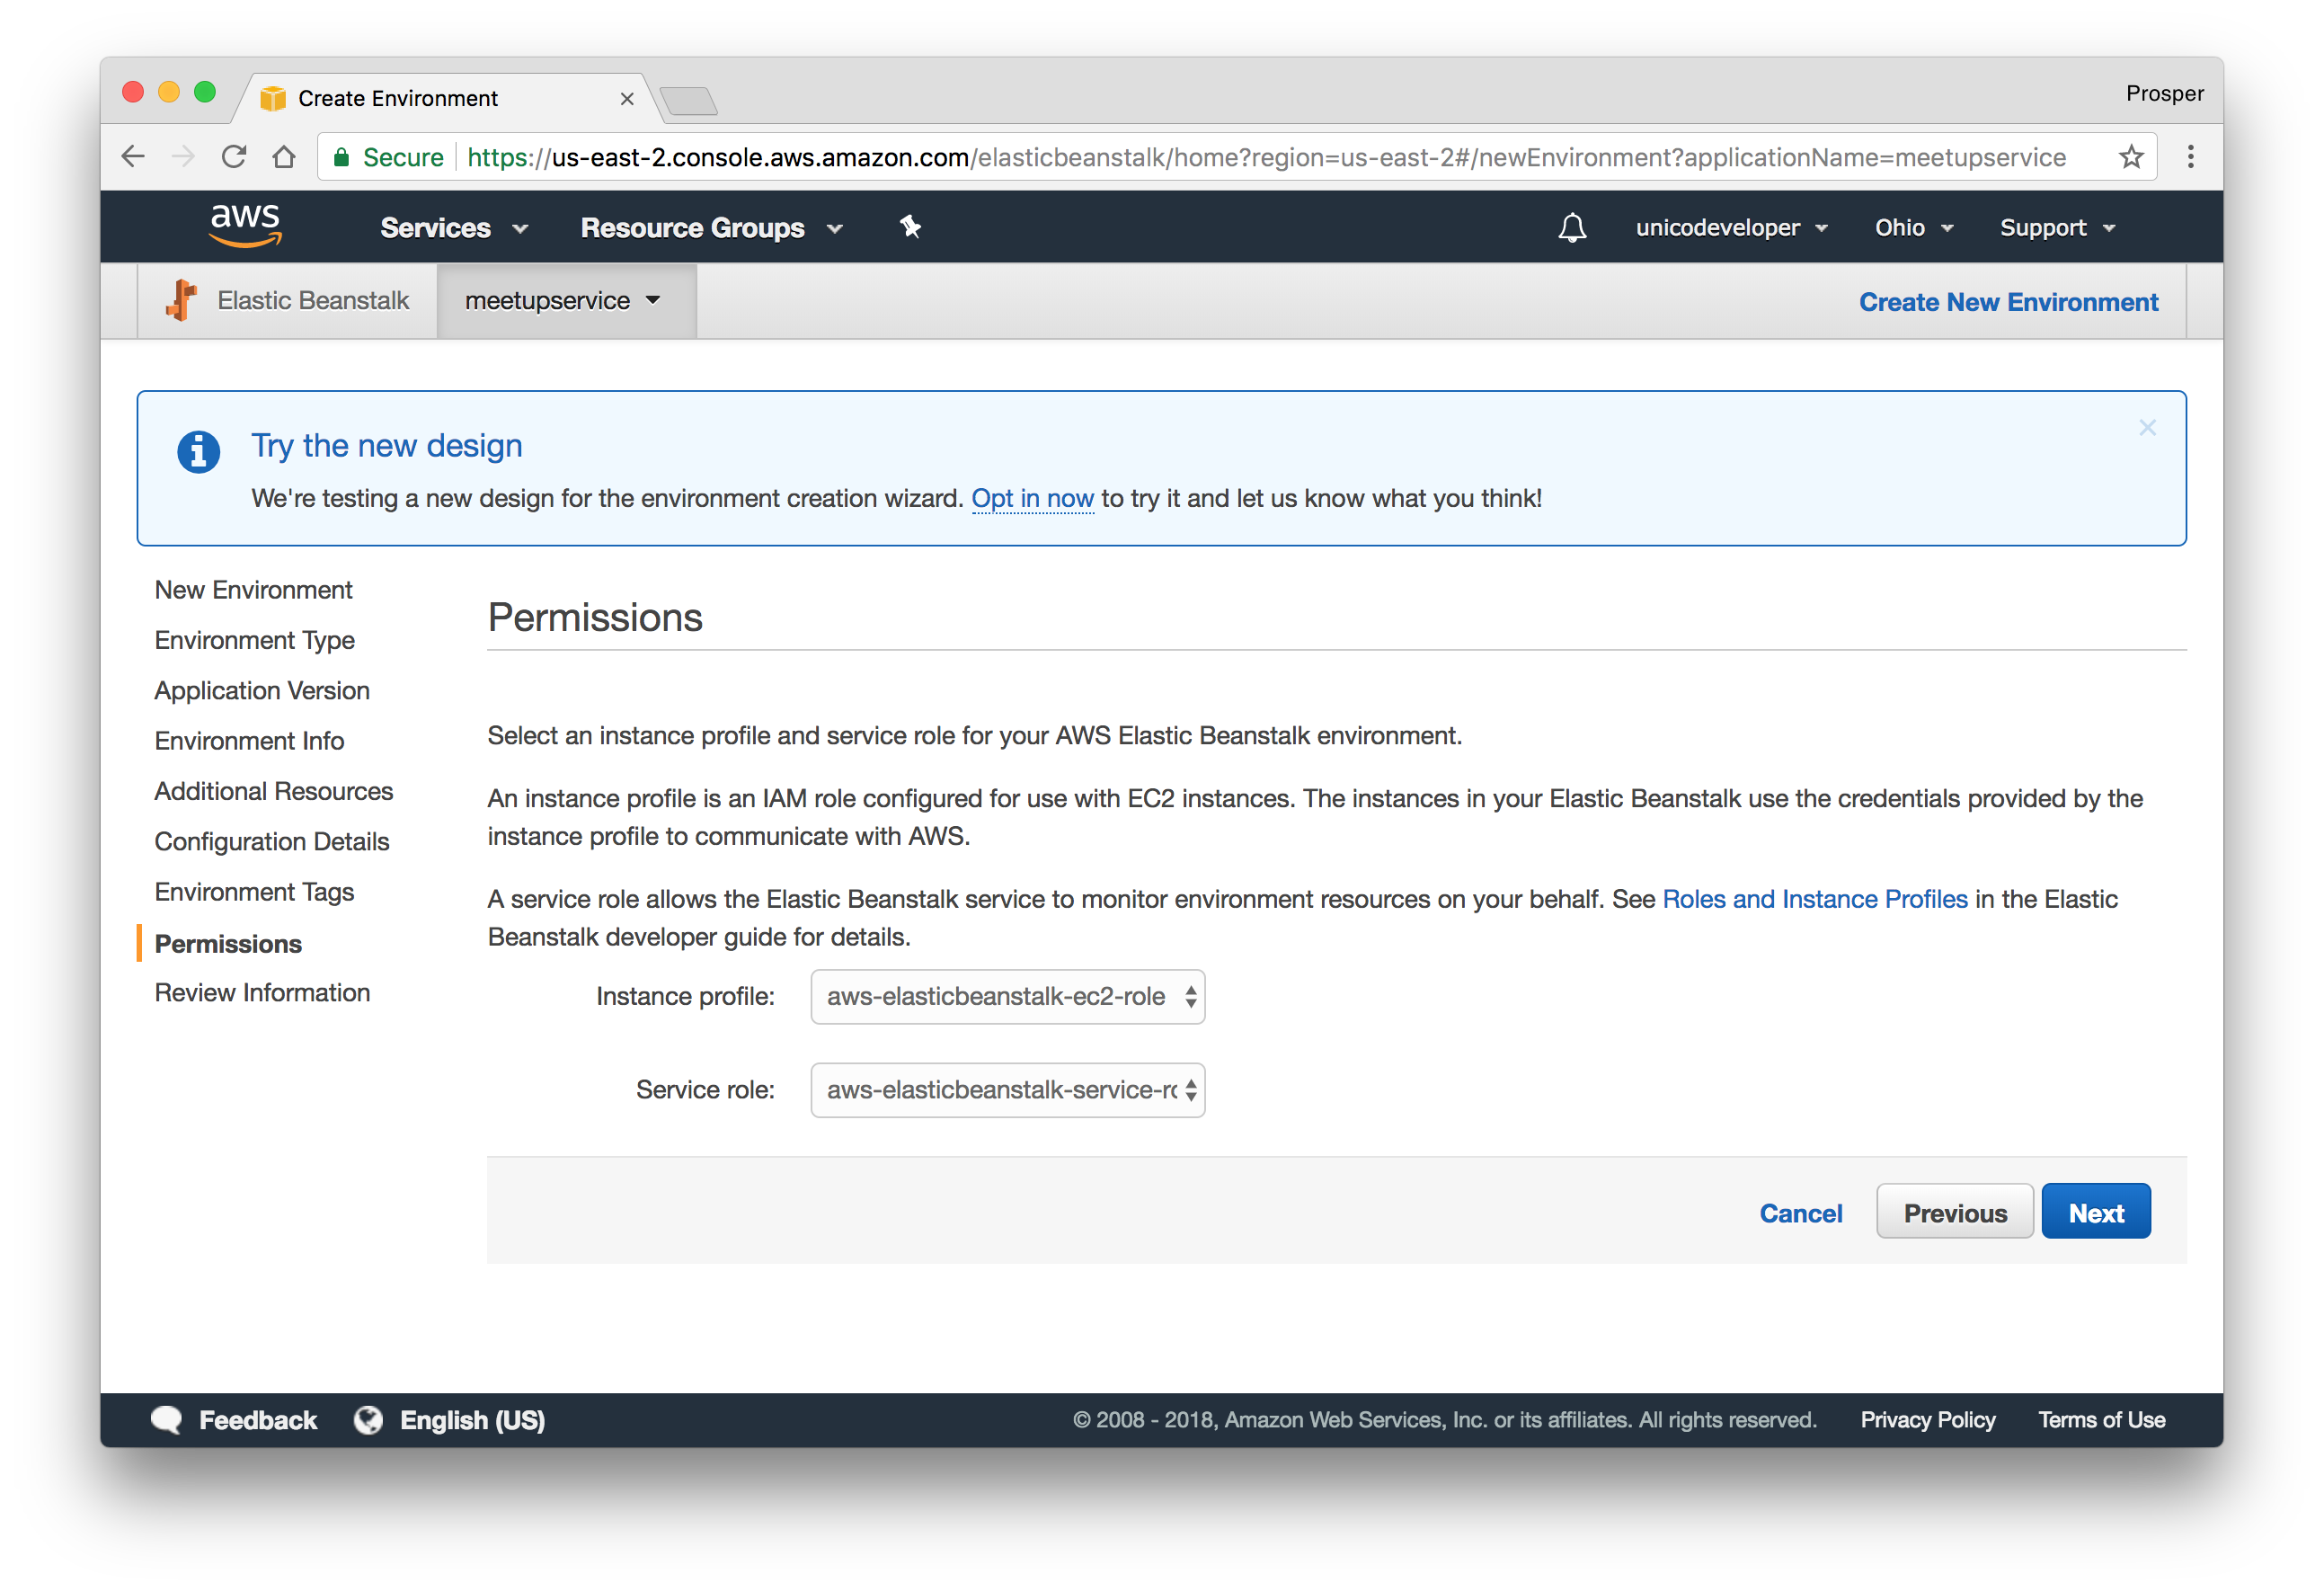
- Add Permission like so:
- Review the information before launching.
- Launch.
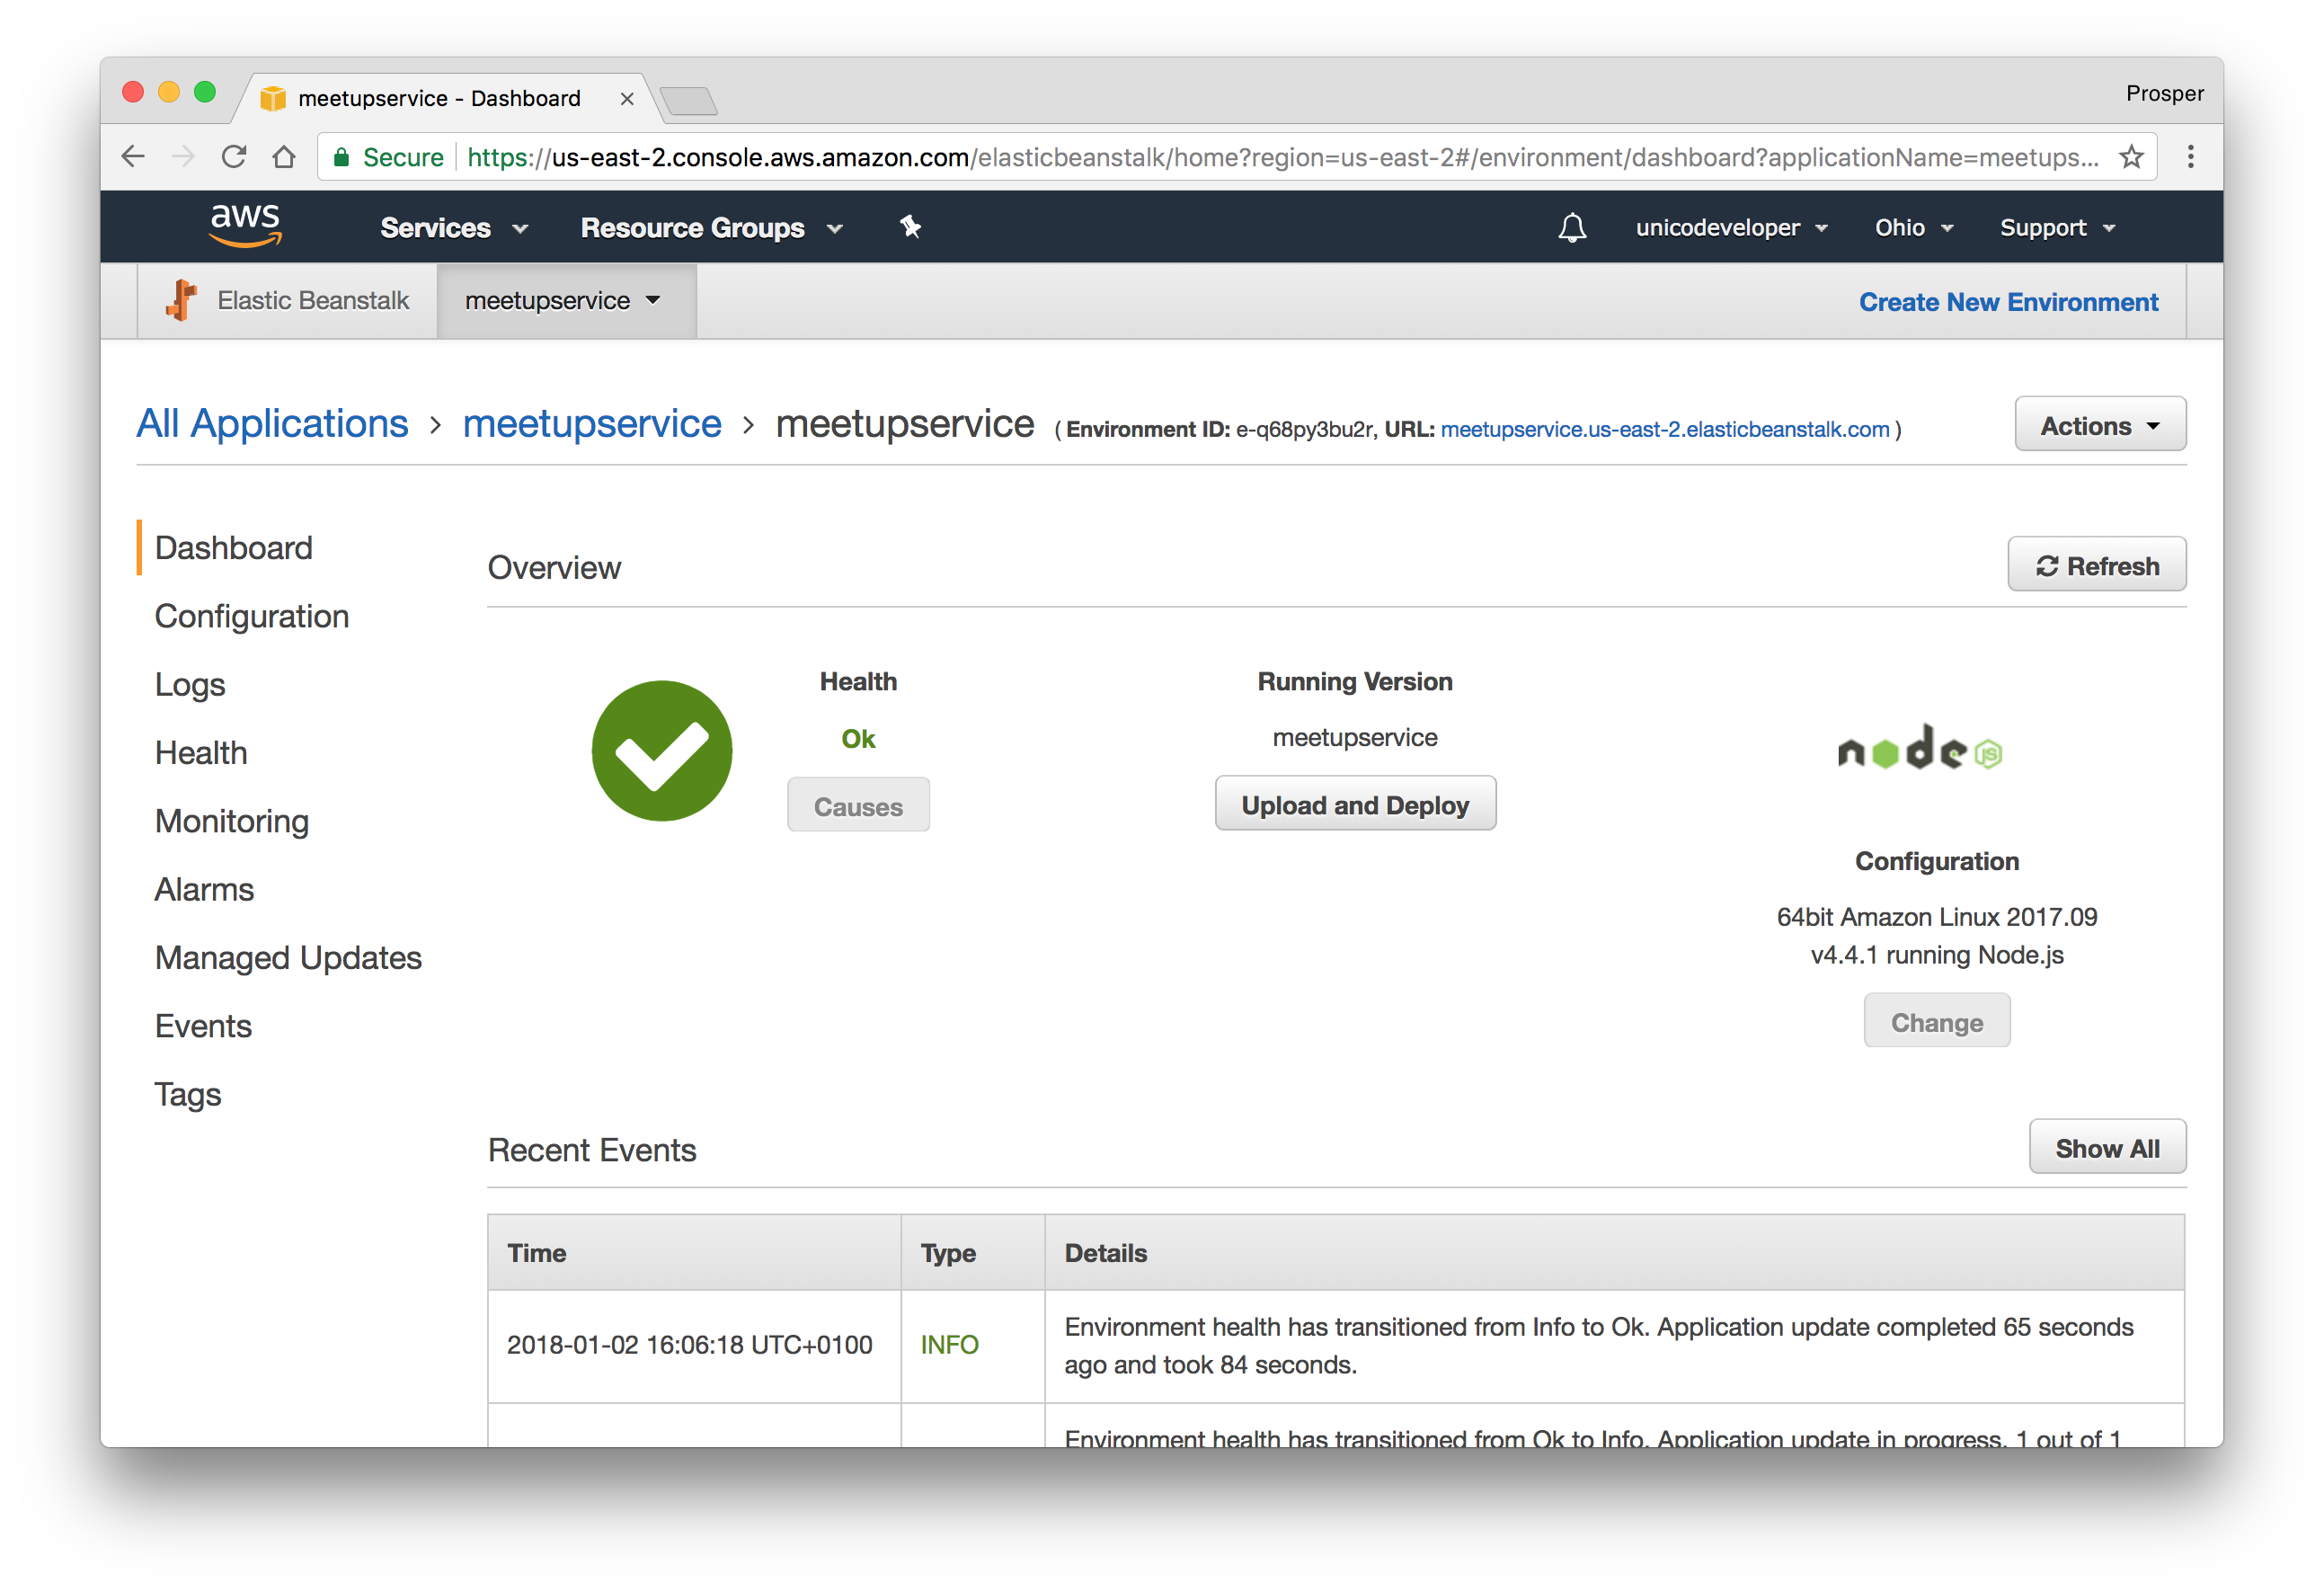
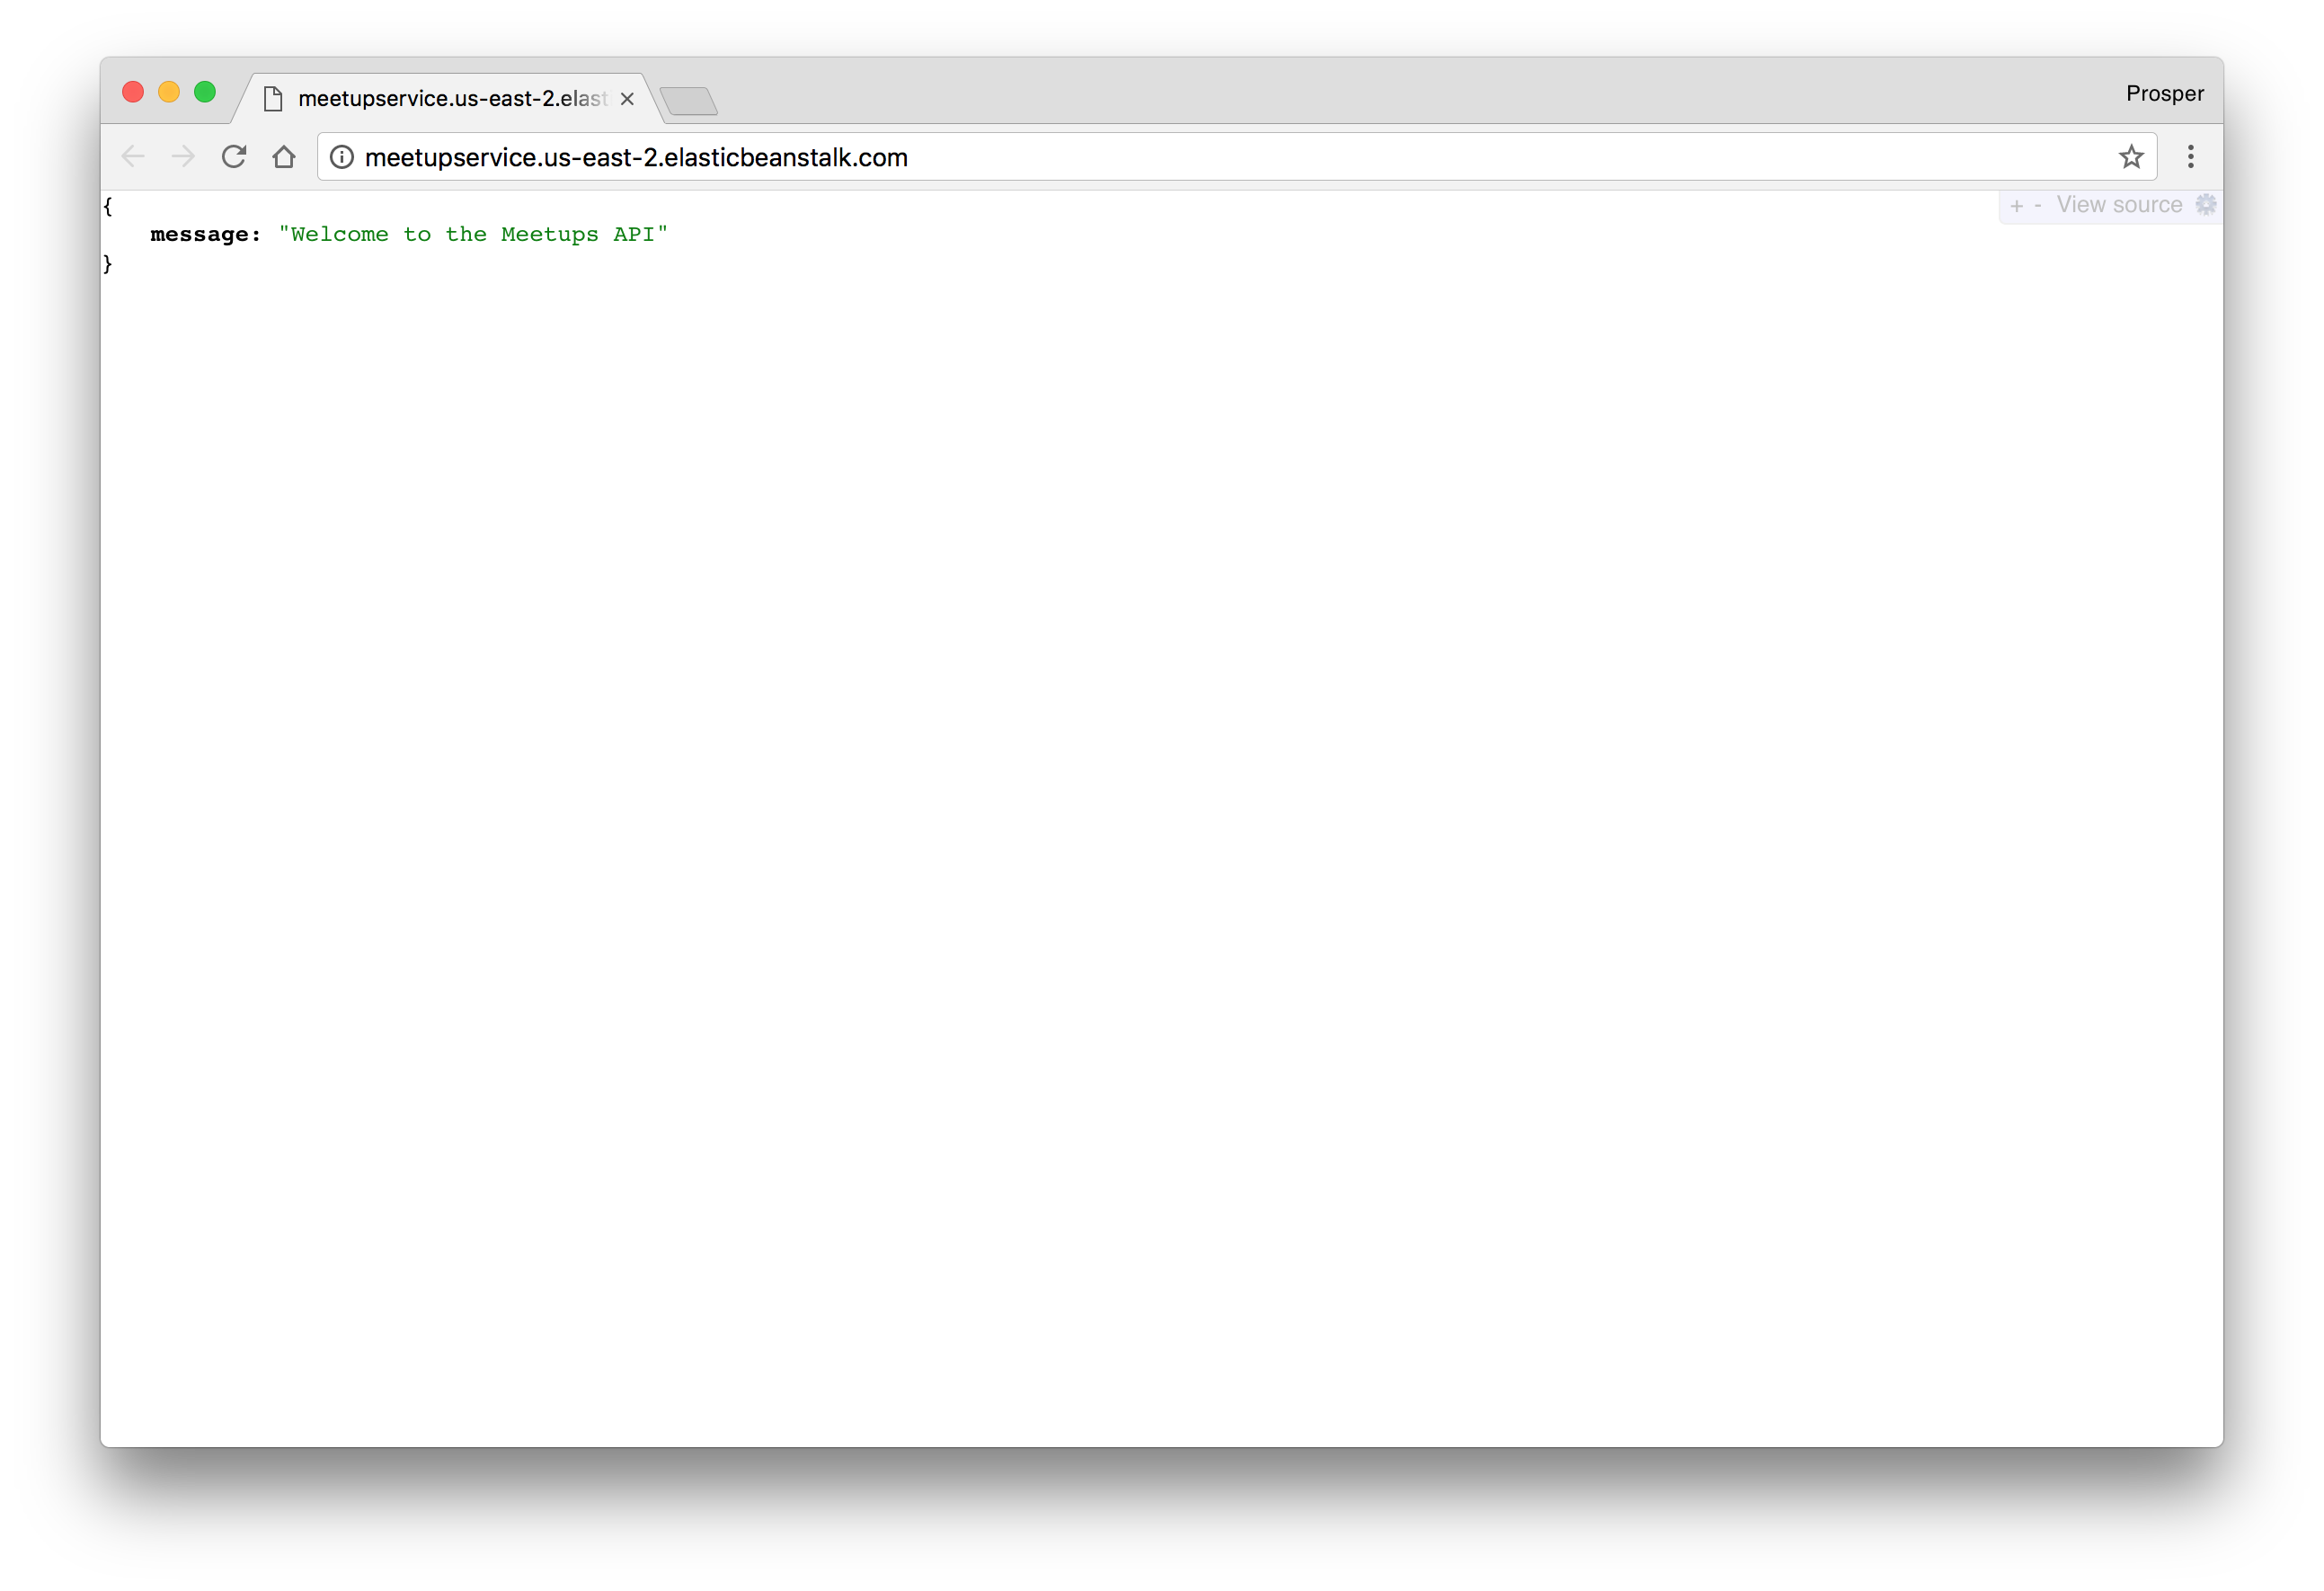
_Live Backend Service_
### Caching and Cron Jobs
For caching, Amazon Web Services offers [ElastiCache](https://aws.amazon.com/elasticache). It is a web service that makes it easy to deploy, operate, and scale an in-memory data store or cache in the cloud. Amazon ElastiCache supports two open-source in-memory engines:
- [Redis](https://aws.amazon.com/elasticache/redis).
- Memcached.
Amazon ElastiCache automatically detects and replaces failed nodes, reducing the overhead associated with self-managed infrastructures and provides a resilient system that mitigates the risk of overloaded databases, which slow website and application load times. Through integration with [Amazon CloudWatch](https://aws.amazon.com/cloudwatch), Amazon ElastiCache provides enhanced visibility into key performance metrics associated with your Redis or Memcached nodes.
Companies like [Airbnb](https://www.airbnb.com), [Healthguru](http://www.healthguru.com), [PlaceIQ](http://www.placeiq.com) and [Tokyo Data Network](http://www.tdn.co.jp) use ElastiCache for caching at multiple layers spanning HTML fragments, results of expensive DB queries, ephemeral session data and search results.
You can set up a cron job on Elastic Beanstalk. Learn how to run cron jobs on [Amazon Web Services(AWS) Elastic Beanstalk](https://medium.com/@joelennon/running-cron-jobs-on-amazon-web-services-aws-elastic-beanstalk-a41d91d1c571).
We have worked on a lot of database and code deployments. It's time for you to take a break!
## Conclusion
There is no way we can cover all the different options available for deploying database and JavaScript backend/API applications or services. Here, we have covered deploying databases and Node.js backends to the cloud.
In the next post, we'll connect everything together by covering the deployment of JavaScript Single Page Applications and static websites. Stay tuned!