---
title: "Java Microservices with Spring Boot and Spring Cloud"
description: "This tutorial shows you how to build a microservices architecture with Spring Boot and Spring Cloud."
authors:
- name: "Matt Raible"
url: "https://auth0.com/blog/authors/matt-raible/"
date: "Dec 13, 2023"
category: "Developers,Tutorial,Java"
tags: ["java", "spring-boot", "microservices", "spring-cloud", "spring-cloud-config", "jhipster"]
url: "https://auth0.com/blog/java-spring-boot-microservices/"
---
# Java Microservices with Spring Boot and Spring Cloud
Adopting a microservices architecture provides unique opportunities to add failover and resiliency to your systems so your components can gracefully handle load spikes and errors. Microservices make change less expensive, too. They can also be a good idea when you have a large team working on a single product. You can break up your project into components that can function independently. Once components can operate independently, they can be built, tested, and deployed separately. This gives an organization and its teams the agility to develop and deploy quickly.
Java is an excellent language with a vast open source ecosystem for developing a microservice architecture. In fact, some of the biggest names in our industry use Java and contribute to its ecosystem. Have you ever heard of Netflix, Amazon, or Google? What about eBay, Twitter, and LinkedIn? Yes, web-scale companies handling incredible traffic are doing it with Java.
Implementing a microservices architecture in Java isn't for everyone. For that matter, implementing microservices, in general, isn't often needed. Most companies do it to scale their people, not their systems. Even Martin Fowler's original blog post on [Microservices](https://martinfowler.com/articles/microservices.html) recommends against it:
> One reasonable argument we've heard is that you shouldn't start with a microservices architecture. Instead begin with a monolith, keep it modular, and split it into microservices once the monolith becomes a problem.
The Java ecosystem has some well-established patterns for developing microservice architectures. If you're familiar with Spring, you'll feel right at home developing with Spring Boot and Spring Cloud. Since that's one of the quickest ways to get started, I figured I'd walk you through a quick example.
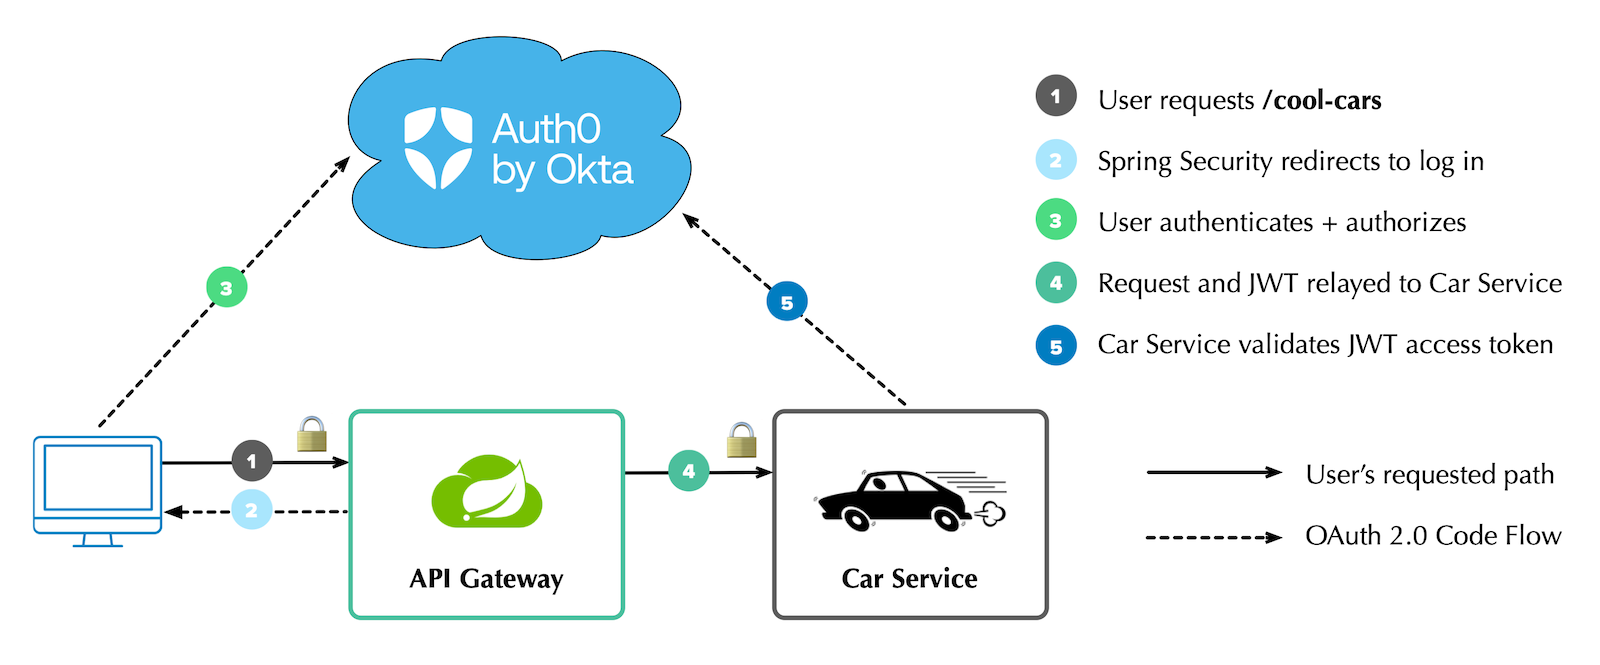
This example contains a microservice with a REST API that returns a list of cool cars. It uses Netflix Eureka for service discovery, WebClient for remote communication, and Spring Cloud Gateway to route requests to the microservice. It integrates Spring Security and OAuth 2.0, so only authenticated users can access the API gateway and microservice. It also uses Resilience4j to add fault tolerance to the gateway.
Here is a diagram showing the overall infrastructure:
## Create Java Microservices with Spring Boot and Spring Cloud
I like to show developers how to build everything from scratch. Today, I'm going to take a different approach. First, I'll show you how to get the completed example working. Then, I'll explain how I created everything and the trials and tribulations I encountered along the way.
You can start by cloning the [@oktadev/auth0-java-microservices-examples](https://github.com/oktadev/auth0-java-microservices-examples) repository.
```shell
git clone https://github.com/oktadev/auth0-java-microservices-examples
```
There are two directories in this repository that pertain to this tutorial:
* **spring-boot-gateway-webflux**: a Spring Boot microservice architecture with Spring Cloud Gateway and Spring WebFlux.
* **spring-boot-gateway-mvc**: a Spring Boot microservice architecture with Spring Cloud Gateway and Spring MVC.
Each directory contains three projects:
* **discovery-service**: a Netflix Eureka server used for service discovery.
* **car-service**: a simple Car Service that uses Spring Data REST to serve up a REST API of cars.
* **api-gateway**: an API gateway with a `/cool-cars` endpoint that talks to the car service and filters out cars that aren't cool (in my opinion, of course).
The configuration for the WebFlux and MVC implementations is the same, so choose one and follow along.
You can also watch [a demo of the WebFlux example](https://youtu.be/m-lhymNdPBc) in the screencast below.
### Run a Secure Spring Boot Microservice Architecture
To run the example, you must [install the Auth0 CLI](https://github.com/auth0/auth0-cli#installation) and create an Auth0 account. If you don't have an Auth0 account, sign up for free. I recommend using [SDKMAN!](https://sdkman.io) to install Java 17+ and [HTTPie](https://httpie.io/download) for making HTTP requests.
First, start the discovery service:
```shell
cd discovery-service
./gradlew bootRun
```
Before you can start the API gateway project, you'll need to configure the API gateway to use your Auth0 account.
Open a terminal and run `auth0 login` to configure the Auth0 CLI to get an API key for your tenant. Then, run `auth0 apps create` to register an OpenID Connect (OIDC) app with the appropriate URLs:
```shell
auth0 apps create \
--name "Kick-Ass Cars" \
--description "Microservices for Cool Cars" \
--type regular \
--callbacks http://localhost:8080/login/oauth2/code/okta \
--logout-urls http://localhost:8080 \
--reveal-secrets
```
Copy `api-gateway/.env.example` to `.env` and edit it to contain the values from the command above.
```dotenv
OKTA_OAUTH2_ISSUER=https:///
OKTA_OAUTH2_CLIENT_ID=
OKTA_OAUTH2_CLIENT_SECRET=
OKTA_OAUTH2_AUDIENCE=https:///api/v2/
```
At startup, these properties will be read using [spring-dotenv](https://github.com/paulschwarz/spring-dotenv).
Run `./gradlew bootRun` to start the API gateway, or use your IDE to run it.
Copy `car-service/.env.example` to `.env` and update its values.
```dotenv
OKTA_OAUTH2_ISSUER=https:///
OKTA_OAUTH2_AUDIENCE=https:///api/v2/
```
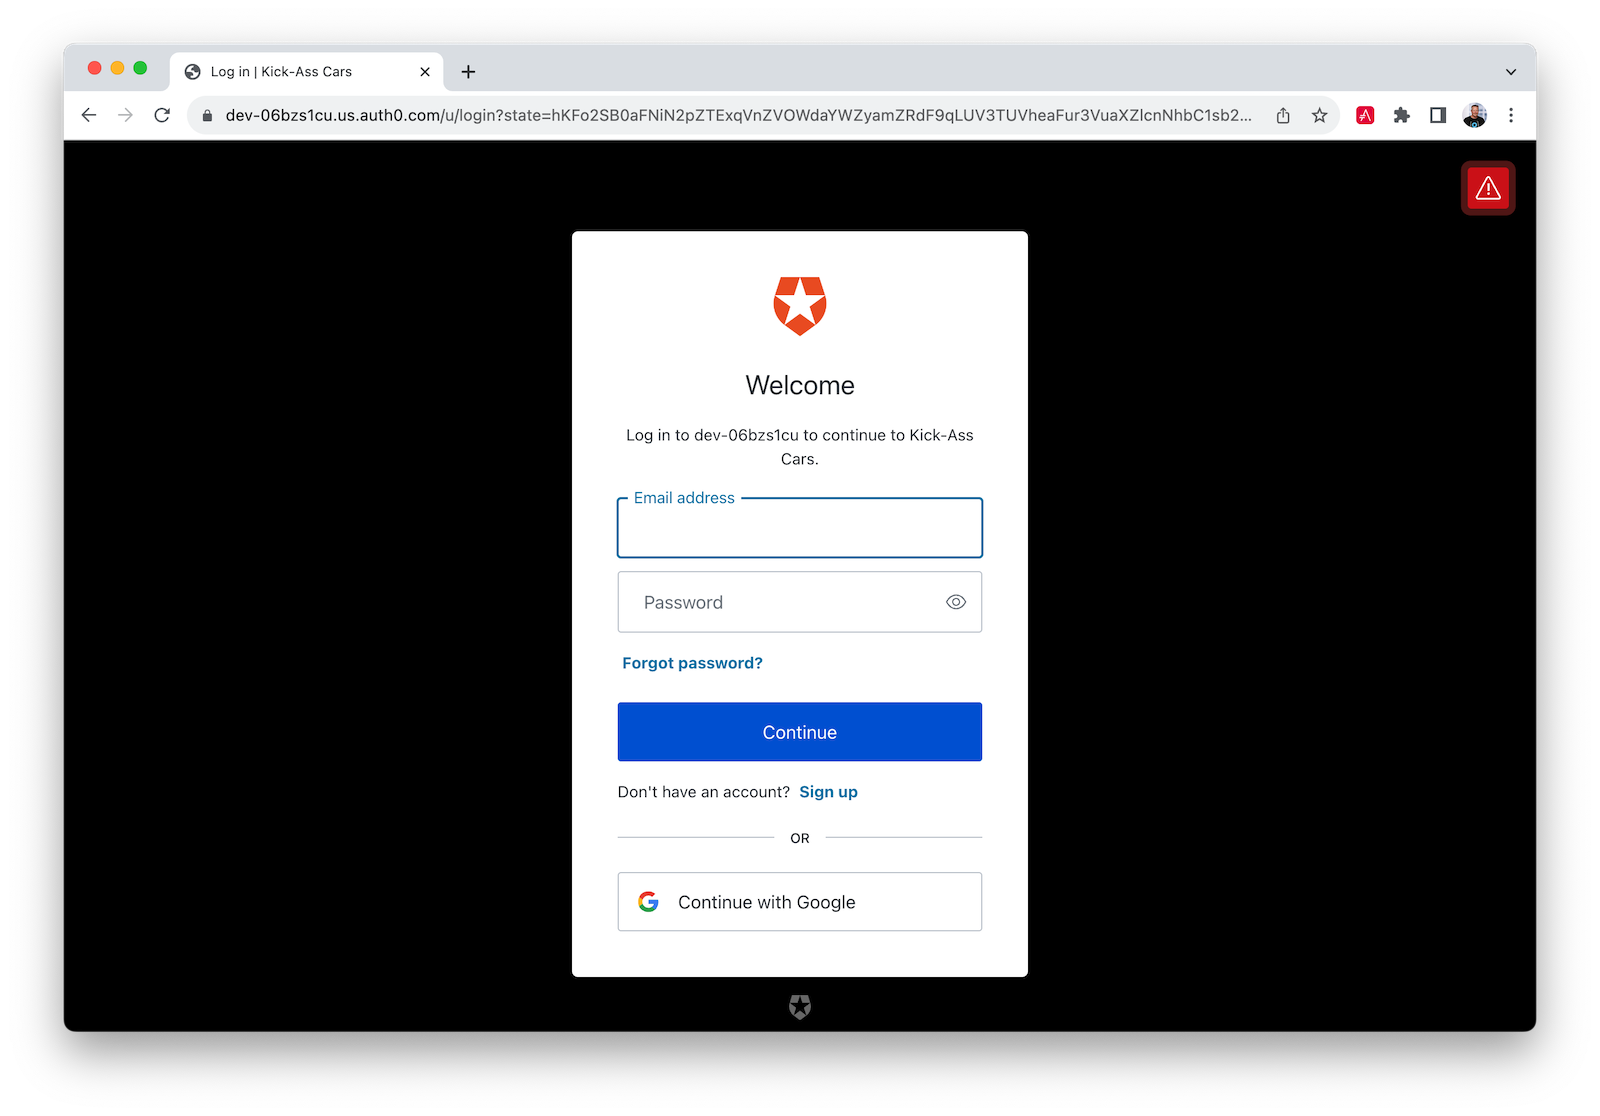
Start it with `./gradlew bootRun` and open `http://localhost:8080` in your favorite browser. You'll be redirected to Auth0 to log in:
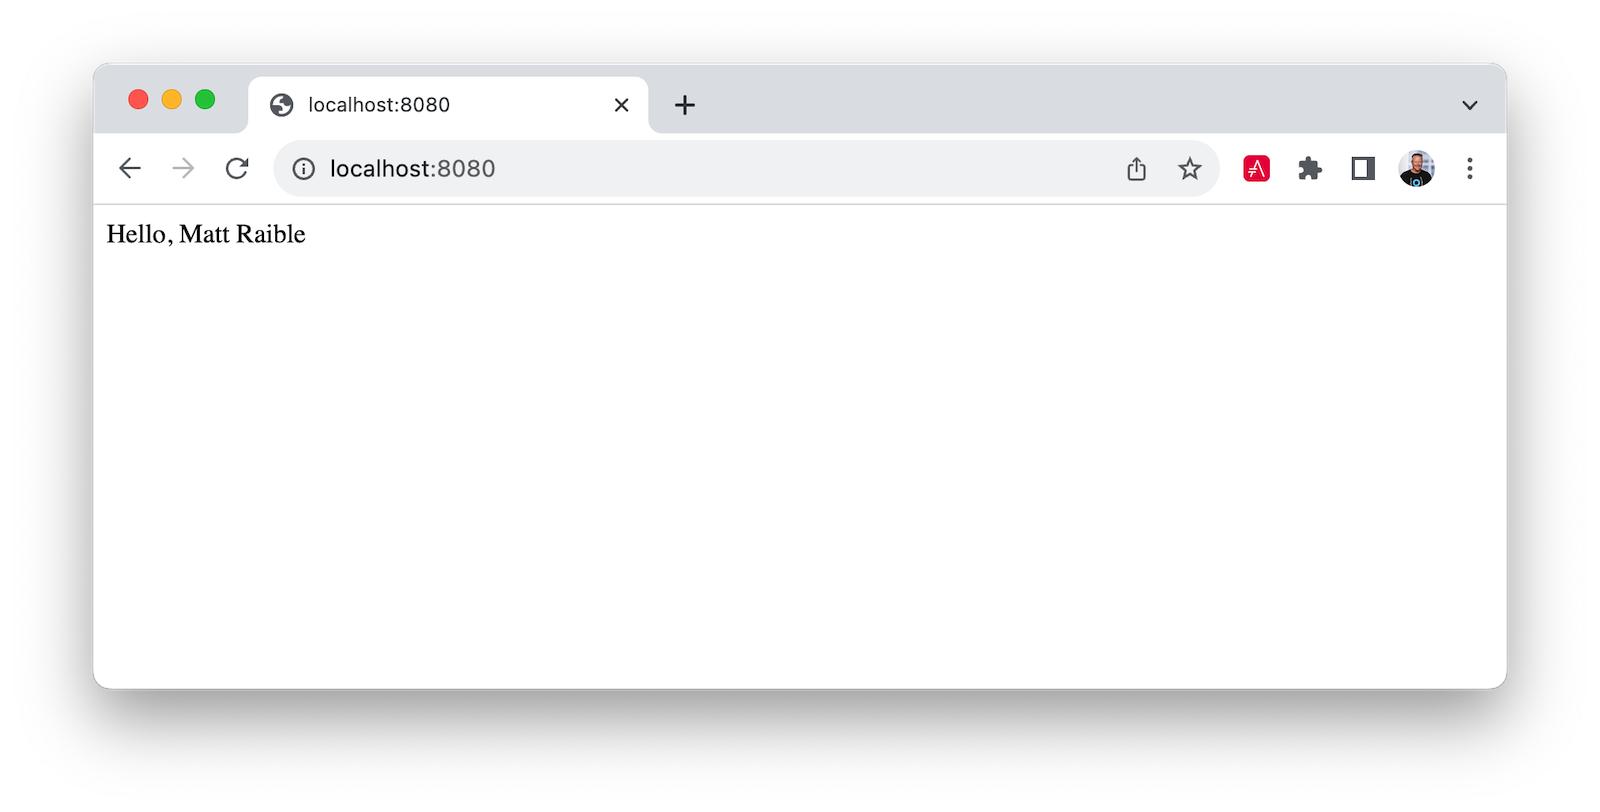
After authenticating, you'll see your name in lights! ✨
You can navigate to the following URLs in your browser for different results:
- `http://localhost:8080/print-token`: prints access token to the terminal
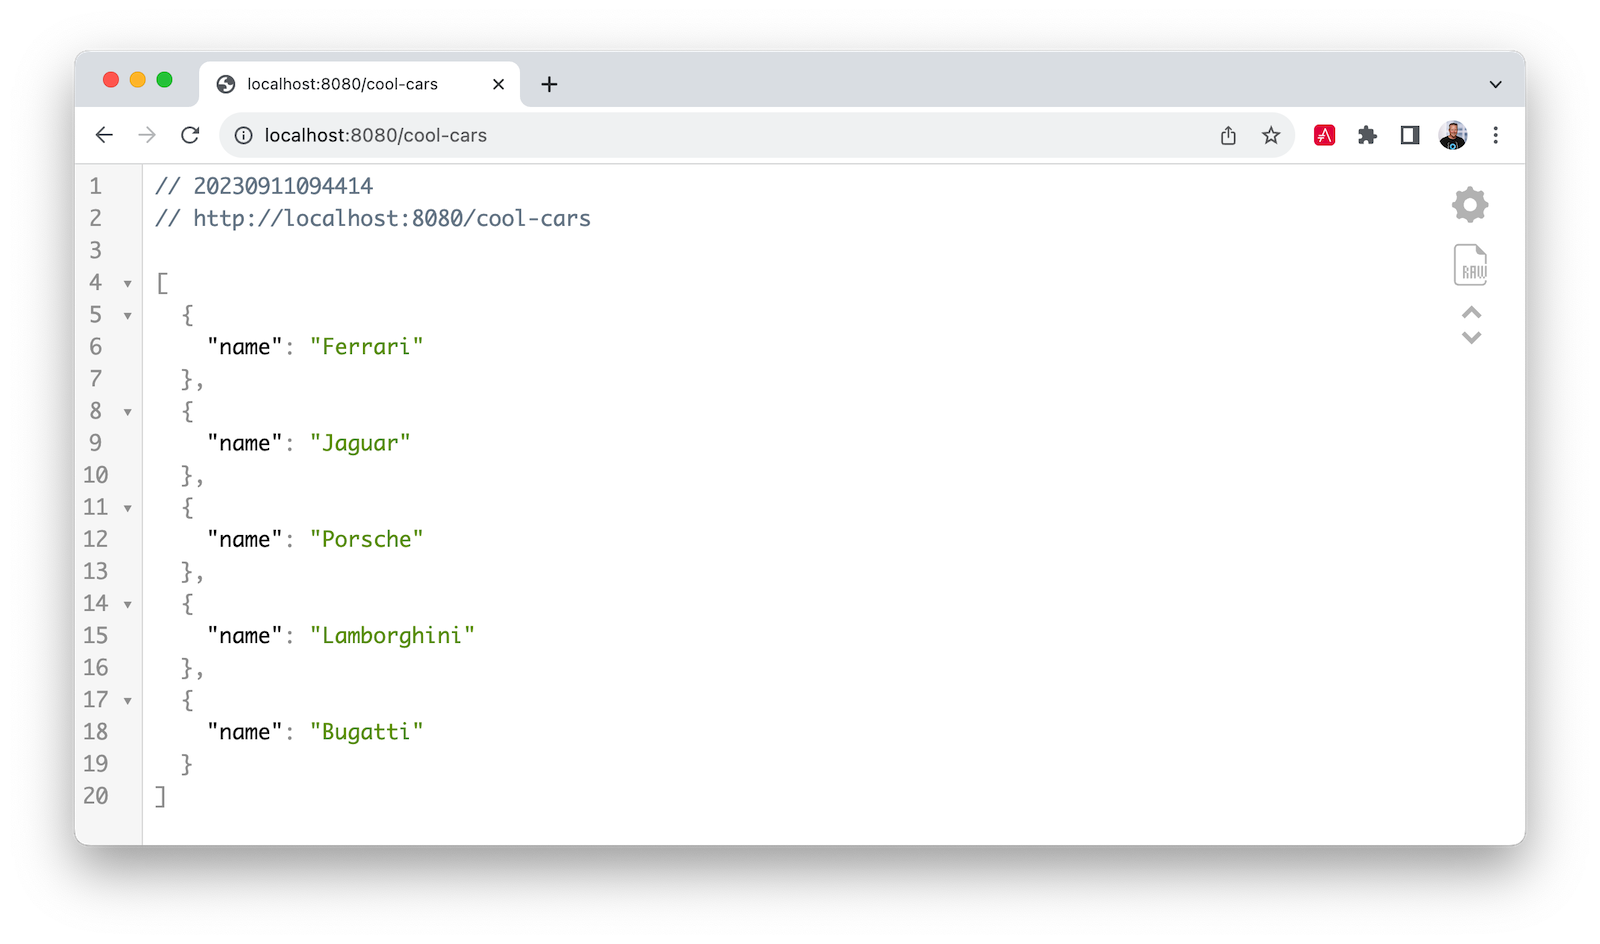
- `http://localhost:8080/cool-cars`: returns a list of cool cars
- `http://localhost:8080/home`: proxies request to the car service and prints JWT claims in this application's terminal
You can see the access token's contents by copying/pasting it into [jwt.io](https://jwt.io). You can also access the car service directly using it.
```shell
TOKEN=
http :8090/cars Authorization:"Bearer $TOKEN"
```

Pretty cool, eh? 😎
## My Developer Story with Spring Boot and Spring Cloud
A few years ago, I created an [example similar to this one](http://developer.okta.com/blog/2019/05/22/java-microservices-spring-boot-spring-cloud) with Spring Boot 2.2. It used Feign for remote connectivity, Zuul for routing, Hystrix for failover, and Spring Security for OAuth. The September 2023 version of Spring Cloud has [Spring Cloud OpenFeign](https://spring.io/projects/spring-cloud-openfeign) for remote connectivity, [Spring Cloud Gateway](https://spring.io/projects/spring-cloud-gateway) for routing, and [Resilience4j](https://resilience4j.readme.io/) for fault tolerance.
Okta also now has an [Okta Spring Boot starter](https://github.com/okta/okta-spring-boot). I didn't use it in my first experiment, but I'm a big fan of it after the last few years! It dramatically simplifies configuration and makes securing your apps with OAuth 2.0 and OIDC easy. It's a thin wrapper around Spring Security's resource server, OAuth client, and OIDC features. Not only that, but it works with Okta Workforce Identity, Okta Customer Identity (aka Auth0), and even Keycloak.
I created all of these applications using [start.spring.io](https://start.spring.io)'s REST API and [HTTPie](https://httpie.org).
```shell
https start.spring.io/starter.tgz bootVersion==3.2.0 \
artifactId==discovery-service name==eureka-service \
dependencies==cloud-eureka-server baseDir==discovery-service | tar -xzvf -
https start.spring.io/starter.tgz bootVersion==3.2.0 \
artifactId==car-service name==car-service baseDir==car-service \
dependencies==actuator,cloud-eureka,data-jpa,data-rest,postgresql,web,validation,devtools,docker-compose,okta | tar -xzvf -
https start.spring.io/starter.tgz bootVersion==3.2.0 \
artifactId==api-gateway name==api-gateway baseDir==api-gateway \
dependencies==cloud-eureka,cloud-feign,data-rest,web,okta | tar -xzvf -
```
You might notice the `api-gateway` project doesn't have `cloud-gateway` as a dependency. That's because I started without it and didn't add it until I needed to proxy requests by path.
In the code listings below, all `package` and `import` statements have been removed for brevity. You can find the complete source code in the [auth0-java-microservices-examples](https://github.com/oktadev/auth0-java-microservices-examples) repository.
## Service Discovery with Netflix Eureka
The `discovery-service` is configured the same as you would most Eureka servers. It has an `@EnableEurekaServer` annotation on its main class and properties that set its port and turn off discovery.
```properties
server.port=8761
eureka.client.register-with-eureka=false
eureka.client.fetch-registry=false
```
The `car-service` and `api-gateway` projects are configured similarly. Both have a unique name defined, and `car-service` is configured to run on port `8090` so it doesn't conflict with `8080`:
```properties
# car-service/src/main/resources/application.properties
server.port=8090
spring.application.name=car-service
```
```properties
# api-gateway/src/main/resources/application.properties
spring.application.name=api-gateway
```
`@EnableDiscoveryClient` annotates the main class in both car service and API gateway.
## Build a Java Microservice with Spring Data REST
The `car-service` provides a REST API that lets you CRUD (Create, Read, Update, and Delete) cars. It creates a default set of cars when the application loads using an `ApplicationRunner` bean:
```java
// car-service/src/main/java/com/example/carservice/CarServiceApplication.java
@EnableDiscoveryClient
@SpringBootApplication
public class CarServiceApplication {
public static void main(String[] args) {
SpringApplication.run(CarServiceApplication.class, args);
}
@Bean
ApplicationRunner init(CarRepository repository) {
repository.deleteAll();
return args -> {
Stream.of("Ferrari", "Jaguar", "Porsche", "Lamborghini", "Bugatti",
"AMC Gremlin", "Triumph Stag", "Ford Pinto", "Yugo GV").forEach(name -> {
repository.save(new Car(name));
});
repository.findAll().forEach(System.out::println);
};
}
}
```
The `CarRepository` interface makes persisting and fetching cars from the database easy:
```java
// car-service/src/main/java/com/example/carservice/data/CarRepository.java
@RepositoryRestResource
public interface CarRepository extends JpaRepository {
}
```
The `Car` class is a simple JPA entity with an `id` and `name` property. Spring Boot will see PostgreSQL on its classpath and autoconfigure connectivity. A `compose.yaml` file exists in the root directory to start a PostgreSQL instance using Docker Compose:
```yaml
services:
postgres:
image: 'postgres:latest'
environment:
- 'POSTGRES_DB=mydatabase'
- 'POSTGRES_PASSWORD=secret'
- 'POSTGRES_USER=myuser'
ports:
- '5432'
```
Spring Boot added [Docker Compose support](https://spring.io/blog/2023/06/21/docker-compose-support-in-spring-boot-3-1) in version 3.1. This means that if you add the following dependency to your `build.gradle`, it'll look for a `compose.yaml` (or `docker-compose.yaml`) file in the root directory and start it when you run `./gradlew bootRun`:
```groovy
developmentOnly 'org.springframework.boot:spring-boot-docker-compose'
```
Finally, the `application.properties` has a setting to create the database automatically:
```properties
spring.jpa.hibernate.ddl-auto=update
```
## Connect to Java Microservices with Spring Cloud OpenFeign
Next, I configured OpenFeign in the `api-gateway` project to connect to the car service and its `/cars` endpoint. Then, I mapped a `Car` record to the JSON that's returned. I exposed it as a `/cool-cars` endpoint:
```java
// api-gateway/src/main/java/com/example/apigateway/ApiGatewayApplication.java
@EnableFeignClients
@EnableDiscoveryClient
@SpringBootApplication
public class ApiGatewayApplication {
public static void main(String[] args) {
SpringApplication.run(ApiGatewayApplication.class, args);
}
}
record Car(String name) {
}
@FeignClient("car-service")
interface CarClient {
@GetMapping("/cars")
CollectionModel readCars();
}
@RestController
class CoolCarController {
private final CarClient carClient;
public CoolCarController(CarClient carClient) {
this.carClient = carClient;
}
@GetMapping("/cool-cars")
public Collection coolCars() {
return carClient.readCars()
.getContent()
.stream()
.filter(this::isCool)
.collect(Collectors.toList());
}
private boolean isCool(Car car) {
return !car.name().equals("AMC Gremlin") &&
!car.name().equals("Triumph Stag") &&
!car.name().equals("Ford Pinto") &&
!car.name().equals("Yugo GV");
}
}
```
This worked great, but I still wanted to proxy `/home` to the downstream car service.
## Add Routing with Spring Cloud Gateway
When I first wrote this tutorial with Spring Boot 3.1 and Spring Cloud 2022.0.4, Spring Cloud Gateway only had a WebFlux API. Since Spring Cloud 2023.0.0, it has a Spring MVC API too! This means you can use it with Spring MVC or Spring WebFlux.
### Proxy Requests by Path with Spring MVC
I added `spring-cloud-starter-gateway-mvc` as a dependency to the `api-gateway` project and added the following to a new `api-gateway/src/main/resources/application.yml` file:
```yaml
spring:
cloud:
gateway:
discovery:
locator:
enabled: true
mvc:
routes:
- id: car-service
uri: lb://car-service
predicates:
- Path=/home/**
```
With this configuration, I could access the car service directly at `http://localhost:8090/cars` and through the gateway at `http://localhost:8080/cool-cars`.
To add failover with Spring Cloud Circuit Breaker, I added it as a dependency:
```groovy
implementation 'org.springframework.cloud:spring-cloud-starter-circuitbreaker-resilience4j'
```
Then, I enabled it in `application.properties`:
```properties
spring.cloud.openfeign.circuitbreaker.enabled=true
```
I updated the `CarClient` interface in `ApiGatewayApplication` to have a fallback that returns an empty list of cars if the car service is unavailable.
```java
@FeignClient(name = "car-service", fallback = Fallback.class)
interface CarClient {
@GetMapping("/cars")
CollectionModel readCars();
}
@Component
class Fallback implements CarClient {
@Override
public CollectionModel readCars() {
return CollectionModel.empty();
}
}
```
### Proxy Requests by Path with WebFlux
Getting everything to work with Spring MVC and Spring Cloud Gateway didn't take long. Using Spring WebFlux required a bit more work.
I immediately discovered that adding `spring-cloud-starter-gateway` as a dependency caused issues. First, I had Spring MVC in my classpath, and Spring Cloud Gateway uses WebFlux. WebFlux recommends using WebClient over Feign. I decided to switch to WebClient.
I had to remove the following dependencies from my original `api-gateway` project:
```groovy
implementation 'org.springframework.boot:spring-boot-starter-data-rest'
implementation 'org.springframework.boot:spring-boot-starter-web'
implementation 'org.springframework.cloud:spring-cloud-starter-openfeign'
```
And add Spring Cloud Gateway with Resilience4j dependencies:
```groovy
implementation 'org.springframework.cloud:spring-cloud-starter-circuitbreaker-reactor-resilience4j'
implementation 'org.springframework.cloud:spring-cloud-starter-gateway'
```
Then, I moved `CoolCarController` to its own class and re-implemented it with WebClient:
```java
// api-gateway/src/main/java/com/example/apigateway/web/CoolCarController.java
@RestController
class CoolCarController {
Logger log = LoggerFactory.getLogger(CoolCarController.class);
private final WebClient.Builder webClientBuilder;
private final ReactiveCircuitBreaker circuitBreaker;
public CoolCarController(WebClient.Builder webClientBuilder,
ReactiveCircuitBreakerFactory circuitBreakerFactory) {
this.webClientBuilder = webClientBuilder;
this.circuitBreaker = circuitBreakerFactory.create("circuit-breaker");
}
record Car(String name) {
}
@GetMapping("/cool-cars")
public Flux coolCars() {
return circuitBreaker.run(
webClientBuilder.build()
.get().uri("http://car-service/cars")
.retrieve().bodyToFlux(Car.class)
.filter(this::isCool),
throwable -> {
log.warn("Error making request to car service", throwable);
return Flux.empty();
});
}
private boolean isCool(Car car) {
return !car.name().equals("AMC Gremlin") &&
!car.name().equals("Triumph Stag") &&
!car.name().equals("Ford Pinto") &&
!car.name().equals("Yugo GV");
}
}
```
In order to inject the `WebClient.Builder`, I had to create a `WebClientConfiguration` class:
```java
// api-gateway/src/main/java/com/example/apigateway/config/WebClientConfiguration.java
@Configuration
public class WebClientConfiguration {
@Bean
@LoadBalanced
public WebClient.Builder webClientBuilder() {
return WebClient.builder();
}
}
```
In the `car-service` project, I had to switch from using Spring Data REST to handling it with a `@RestController` and `@GetMapping` annotation. I removed the `@RepositoryRestResource` annotation from `CarRepository` and added a `CarController` class:
```java
// car-service/src/main/java/com/example/carservice/web/CarController.java
@RestController
class CarController {
private final CarRepository repository;
public CarController(CarRepository repository) {
this.repository = repository;
}
@GetMapping("/cars")
public List getCars() {
return repository.findAll();
}
}
```
> **NOTE**: I did try to use Spring HATEOAS but [ran into an issue](https://github.com/okta/okta-spring-boot/issues/607) when using it with the Okta Spring Boot starter.
To proxy `/home` to the downstream microservice, I added a `api-gateway/src/main/resources/application.yml` file to configure Spring Cloud Gateway to enable service discovery and specify routes:
```yaml
spring:
cloud:
gateway:
discovery:
locator:
enabled: true
routes:
- id: car-service
uri: lb://car-service
predicates:
- Path=/home/**
```
At this point, I could access the car service directly at `http://localhost:8090/cars` and through the gateway at `http://localhost:8080/cool-cars`.
## Secure Spring Boot Microservices with OAuth 2.0 and OIDC
To configure the Okta Spring Boot starter, there are a few properties in the `api-gateway` project's `application.properties` file:
```properties
okta.oauth2.issuer=${OKTA_OAUTH2_ISSUER}
okta.oauth2.client-id=${OKTA_OAUTH2_CLIENT_ID}
okta.oauth2.client-secret=${OKTA_OAUTH2_CLIENT_SECRET}
okta.oauth2.audience=${OKTA_OAUTH2_AUDIENCE}
```
The `car-service` is configured as an OAuth resource server and has the following properties in its `application.properties` file:
```properties
okta.oauth2.issuer=${OKTA_OAUTH2_ISSUER}
okta.oauth2.audience=${OKTA_OAUTH2_AUDIENCE}
```
The variables are read from the `.env` file in each project's root directory.
### Fetch an Access Token as a JWT
When I first got things working, I was able to log in to the gateway, but when I tried to connect to the downstream microservice, it said the JWT was invalid. For this reason, I added a `/print-token` endpoint to the gateway that prints the access token to the console.
> **NOTE**: The code in this section is for the WebFlux version. The MVC version is in the [next section](#Spring-Cloud-Gateway-MVC-and-OAuth-2-0).
```java
// api-gateway/src/main/java/com/example/apigateway/web/HomeController.java
@RestController
class HomeController {
@GetMapping("/")
public String howdy(@AuthenticationPrincipal OidcUser user) {
return "Hello, " + user.getFullName();
}
@GetMapping("/print-token")
public String printAccessToken(@RegisteredOAuth2AuthorizedClient("okta")
OAuth2AuthorizedClient authorizedClient) {
var accessToken = authorizedClient.getAccessToken();
System.out.println("Access Token Value: " + accessToken.getTokenValue());
System.out.println("Token Type: " + accessToken.getTokenType().getValue());
System.out.println("Expires At: " + accessToken.getExpiresAt());
return "Access token printed";
}
}
```
Using jwt.io, I verified that it wasn't a valid JWT. I thought about trying to implement Spring Security's [opaque token support](http://developer.okta.com/blog/2020/08/07/spring-boot-remote-vs-local-tokens), but discovered Auth0 [doesn't have an `/instropection` endpoint](https://community.auth0.com/t/introspection-endpoint-for-opaque-tokens-or-more-flexible-rules-to-get-clear-jwt-access-token/63866). This makes it impossible to use opaque tokens with Auth0.
The good news is I figured out a workaround! If you pass a valid `audience` parameter to Auth0, you'll get a JWT for the access token. I logged an [issue to improve the Okta Spring Boot starter](https://github.com/okta/okta-spring-boot/issues/596) and added a `SecurityConfiguration` class to solve the problem in the meantime.
```java
// api-gateway/src/main/java/com/example/apigateway/config/SecurityConfiguration.java
@Configuration
public class SecurityConfiguration {
@Value("${okta.oauth2.audience:}")
private String audience;
private final ReactiveClientRegistrationRepository clientRegistrationRepository;
public SecurityConfiguration(ReactiveClientRegistrationRepository clientRegistrationRepository) {
this.clientRegistrationRepository = clientRegistrationRepository;
}
@Bean
public SecurityWebFilterChain filterChain(ServerHttpSecurity http) throws Exception {
http
.authorizeExchange(authz -> authz
.anyExchange().authenticated()
)
.oauth2Login(oauth2 -> oauth2
.authorizationRequestResolver(
authorizationRequestResolver(this.clientRegistrationRepository)
)
);
return http.build();
}
private ServerOAuth2AuthorizationRequestResolver authorizationRequestResolver(
ReactiveClientRegistrationRepository clientRegistrationRepository) {
var authorizationRequestResolver =
new DefaultServerOAuth2AuthorizationRequestResolver(clientRegistrationRepository);
authorizationRequestResolver.setAuthorizationRequestCustomizer(
authorizationRequestCustomizer());
return authorizationRequestResolver;
}
private Consumer authorizationRequestCustomizer() {
return customizer -> customizer
.additionalParameters(params -> params.put("audience", audience));
}
}
```
To make Spring Cloud Gateway pass the access token downstream, I added `TokenRelay` to its default filters in `application.yml`:
```yaml
spring:
cloud:
gateway:
discovery:
locator:
enabled: true
default-filters:
- TokenRelay
routes: ...
```
I updated the `WebClientConfiguration` class to configure `WebClient` to include the access token with its requests:
```java
// api-gateway/src/main/java/com/example/apigateway/config/WebClientConfiguration.java
@Configuration
public class WebClientConfiguration {
@Bean
@LoadBalanced
public WebClient.Builder webClientBuilder(ReactiveClientRegistrationRepository clientRegistrations,
ServerOAuth2AuthorizedClientRepository authorizedClients) {
var oauth = new ServerOAuth2AuthorizedClientExchangeFilterFunction(clientRegistrations, authorizedClients);
oauth.setDefaultClientRegistrationId("okta");
return WebClient
.builder()
.filter(oauth);
}
}
```
### Spring Cloud Gateway MVC and OAuth 2.0
To get the Spring Cloud Gateway MVC example working with OAuth 2.0, I had to add a `SecurityConfiguration` class to pass an `audience` parameter to Auth0:
```java
// api-gateway/src/main/java/com/example/apigateway/config/SecurityConfiguration.java
@Configuration
public class SecurityConfiguration {
@Value("${okta.oauth2.audience:}")
private String audience;
private final ClientRegistrationRepository clientRegistrationRepository;
public SecurityConfiguration(ClientRegistrationRepository clientRegistrationRepository) {
this.clientRegistrationRepository = clientRegistrationRepository;
}
@Bean
public SecurityFilterChain filterChain(HttpSecurity http) throws Exception {
http
.authorizeHttpRequests(authorize -> authorize
.anyRequest().authenticated()
)
.oauth2Login(oauth2 -> oauth2
.authorizationEndpoint(authorization -> authorization
.authorizationRequestResolver(
authorizationRequestResolver(this.clientRegistrationRepository)
)
)
);
return http.build();
}
private OAuth2AuthorizationRequestResolver authorizationRequestResolver(
ClientRegistrationRepository clientRegistrationRepository) {
DefaultOAuth2AuthorizationRequestResolver authorizationRequestResolver =
new DefaultOAuth2AuthorizationRequestResolver(
clientRegistrationRepository, "/oauth2/authorization");
authorizationRequestResolver.setAuthorizationRequestCustomizer(
authorizationRequestCustomizer());
return authorizationRequestResolver;
}
private Consumer authorizationRequestCustomizer() {
return customizer -> customizer
.additionalParameters(params -> params.put("audience", audience));
}
}
```
Spring Cloud Gateway MVC 2023.0.0 [doesn't allow you to configure a `TokenRelay` filter in YAML](https://github.com/spring-cloud/spring-cloud-gateway/issues/3176), so I added a `RouterFunction` bean to add it.
```java
// api-gateway/src/main/java/com/example/apigateway/ApiGatewayApplication.java
public class ApiGatewayApplication {
@Bean
public RouterFunction gatewayRouterFunctionsLoadBalancer() {
return route("car-service")
.route(path("/home/**"), http())
.filter(lb("car-service"))
.filter(tokenRelay())
.build();
}
public static void main(String[] args) {
SpringApplication.run(ApiGatewayApplication.class, args);
}
}
```
Thanks for the help with this code, [Spencer Gibb](https://twitter.com/spencerbgibb)! 🙌
The updated `application.yml` file looks as follows after removing its `mvc` configuration.
```yaml
spring:
cloud:
gateway:
discovery:
locator:
enabled: true
```
The last thing I needed to configure was OAuth integration for OpenFeign. I added the following properties to `application.properties`:
```properties
spring.cloud.openfeign.oauth2.enabled=true
spring.cloud.openfeign.oauth2.clientRegistrationId=okta
```
I removed the `spring.cloud.openfeign.circuitbreaker.enabled` property because I could not get it to work with Spring MVC. If you know how to make it work, please let me know in the comments!
## Spring Boot Microservices and Refresh Tokens
In my previous Spring Boot 2.2 example, I couldn't get refresh tokens to work. I was able to get them to work this time! I changed the default scopes in `api-gateway` to request a refresh token using the `offline_access` scope:
```dotenv
# .env
OKTA_OAUTH2_AUDIENCE=https://fast-expiring-api
OKTA_OAUTH2_SCOPES=openid,profile,email,offline_access
```
And added a property to `application.properties` to read it:
```properties
# src/main/resources/application.properties
okta.oauth2.scopes=${OKTA_OAUTH2_SCOPES}
```
Then, I created an API in Auth0 called `fast-expiring-api` and set it to expire in 30 seconds:
```shell
auth0 apis create --name fast-expiring --identifier https://fast-expiring-api \
--token-lifetime 30 --offline-access --no-input
```
If you do the same, you can restart the API gateway and go to `http://localhost:8080/print-token` to see your access token. You can copy the expired time to [timestamp-converter.com](https://www.timestamp-converter.com/) to see when it expires in your local timezone. Wait 30 seconds and refresh the page. You'll see a request for a new token and an updated `Expires At` timestamp in your terminal.
## The Okta Spring Boot starter and Keycloak
If you find yourself in a situation where you don't have an internet connection, it can be handy to run Keycloak locally in a Docker container. Since the Okta Spring Boot starter is a thin wrapper around Spring Security, it works with Keycloak, too.
In my experience, Spring Security's OAuth support works with any OAuth 2.0-compliant server. The Okta Spring Boot starter does validate the issuer to ensure it's an Okta URL, so you must use Spring Security's properties instead of the `okta.oauth2.*` properties when using Keycloak.
An easy way to get a pre-configured Keycloak instance is to use [JHipster](https://www.jhipster.tech)'s `jhipster-sample-app-oauth2` application. It gets updated with every JHipster release. You can clone it with the following command:
```shell
git clone https://github.com/jhipster/jhipster-sample-app-oauth2.git --depth=1
cd jhipster-sample-app-oauth2
```
Then, start its Keycloak instance:
```shell
docker compose -f src/main/docker/keycloak.yml up -d
```
You can configure the `api-gateway` to use Keycloak by removing the `okta.oauth2.*` properties and using Spring Security's in `application.properties`:
```properties
spring.security.oauth2.client.provider.okta.issuer-uri=http://localhost:9080/realms/jhipster
spring.security.oauth2.client.registration.okta.client-id=web_app
spring.security.oauth2.client.registration.okta.client-secret=web_app
spring.security.oauth2.client.registration.okta.scope=openid,profile,email,offline_access
```
The `car-service` requires similar changes in its `application.properties` file:
```properties
spring.security.oauth2.resourceserver.jwt.issuer-uri=http://localhost:9080/realms/jhipster
spring.security.oauth2.resourceserver.jwt.audiences=account
```
Restart both apps, open `http://localhost:8080`, and you'll be able to log in with Keycloak:
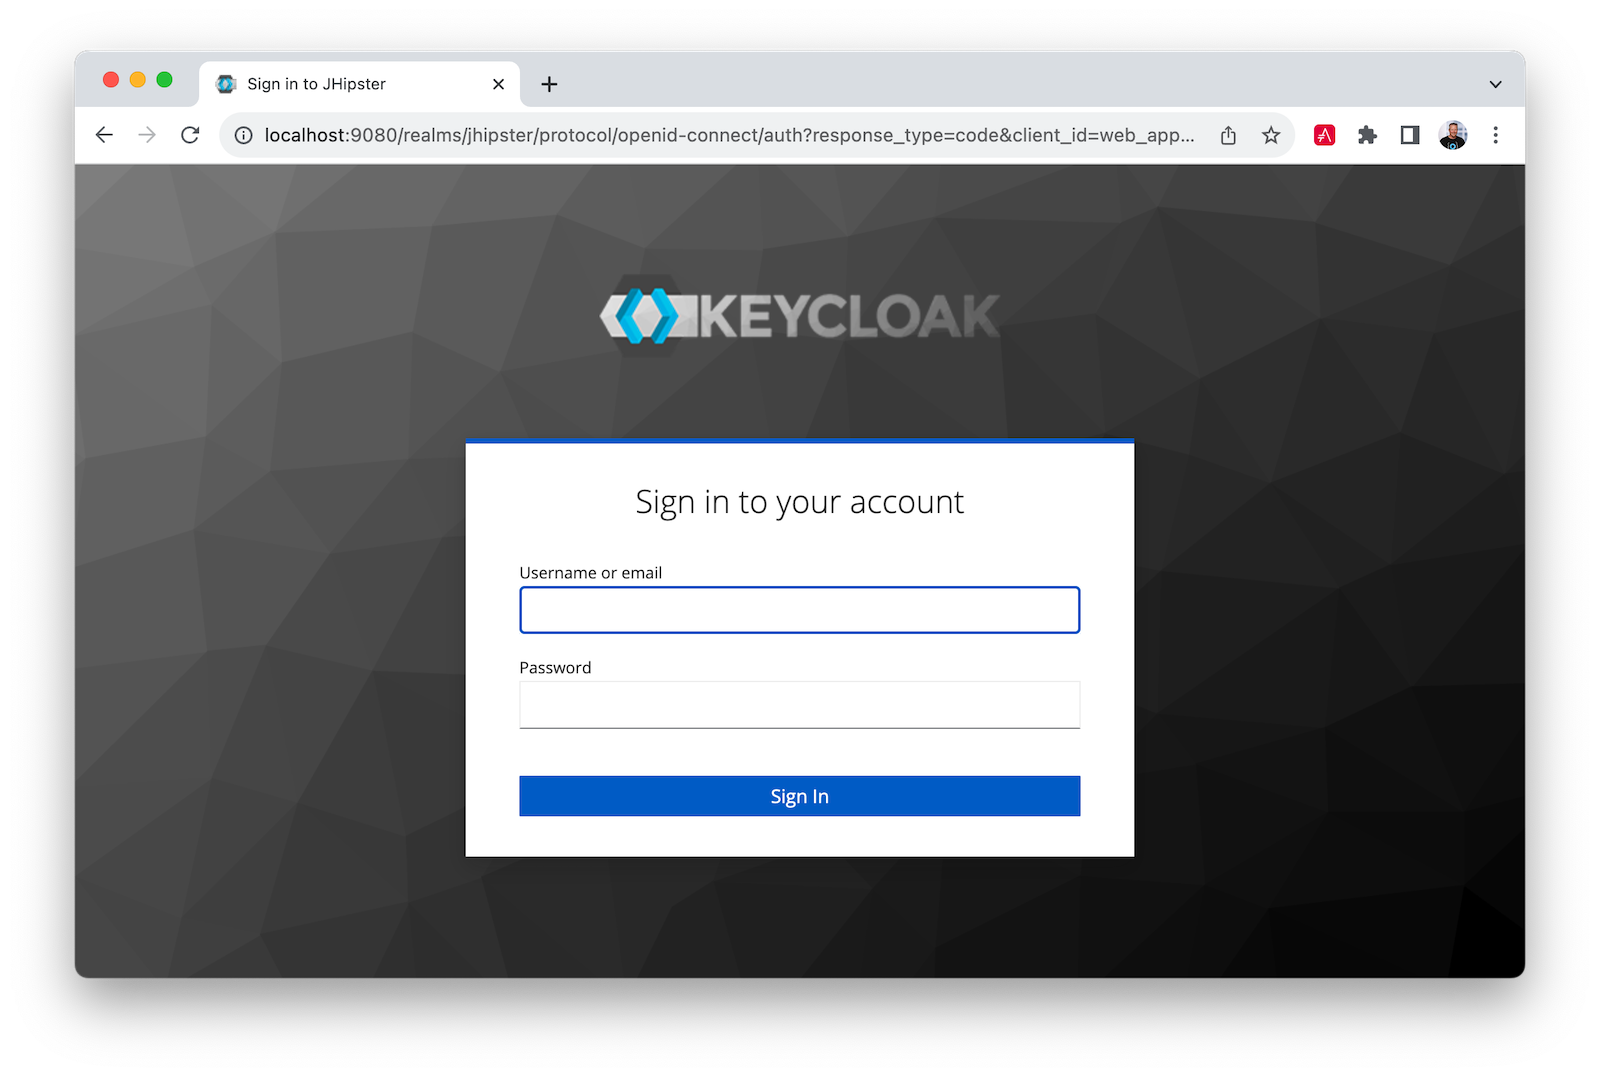
Use `admin`/`admin` for credentials, and you can access `http://localhost:8080/cool-cars` as you did before:
## Stay secure with Spring Boot and Spring Cloud!
I hope you liked this tour of how to build Java microservice architectures with Spring Boot and Spring Cloud. You learned how to build everything with minimal code and then configure it to be secure with Spring Security, OAuth 2.0, OIDC, and Auth0 by Okta.
You can find all the code shown in this tutorial on GitHub in the [@oktadev/auth0-java-microservices-examples repository](https://github.com/oktadev/auth0-java-microservices-examples). The OpenFeign example with Spring MVC is in the `spring-boot-gateway-mvc` directory. The Spring Cloud Gateway with WebFlux is in `spring-boot-gateway-webflux`. The Keycloak example is in the `keycloak` branch.
If you liked this post, you might enjoy these related posts:
- [Deploy Secure Spring Boot Microservices on Amazon EKS Using Terraform and Kubernetes](https://auth0.com/blog/terraform-eks-java-microservices/)
- [Get started with Spring Boot and Auth0](https://auth0.com/blog/get-started-with-okta-spring-boot-starter/)
- [Build a Beautiful CRUD App with Spring Boot and Angular](https://auth0.com/blog/spring-boot-angular-crud/)
- [Get Started with Jetty, Java, and OAuth](https://auth0.com/blog/java-jetty-oauth/)
We've also published some new labs about securing Spring Boot in our Developer Center. They're great if you like to learn by doing!
- [Authorization in Spring Boot](https://developer.auth0.com/resources/labs/authorization/spring-resource-server)
- [Authentication in Spring Boot](https://developer.auth0.com/resources/labs/authentication/spring)
- [Role Based Access Control in Spring Boot](https://developer.auth0.com/resources/labs/authorization/rbac-in-spring-boot)
- [Build and Secure Spring Boot Microservices](https://developer.auth0.com/resources/labs/authorization/securing-spring-boot-microservices)
Please follow us [on Twitter @oktadev](https://twitter.com/oktadev) and subscribe to [our YouTube channel](https://www.youtube.com/oktadev) for more Spring Boot and microservices knowledge.
You can also sign up for our [developer newsletter](https://a0.to/nl-signup/java) to stay updated on everything Identity and Security.