


We are big fans of startups focusing on delivering great experiences through their platforms. Resend is an email platform that emphasizes developer experience (DX), offers open-source tools for email development, and contributes to the developer community. Notably, we updated our default email templates using Resend's React Email component system to build our own design system for generating and modernizing emails.
Today, we are announcing Resend as a new email provider option in the Auth0 platform. You can now integrate your Auth0 tenant with Resend for email delivery in a matter of minutes. This post will walk you through every option in setting up Resend with Auth0, from a quick configuration to a fully custom Actions-based setup along with setting up React Email templates.
Prerequisites
Before you start, you will need two things set up on the Resend side:
Domain verification: Add your sending domain in the Resend dashboard and configure the DNS records they provide (Resend offers SPF, DKIM, and DMARC protocols). This helps ensure your Auth0 emails arrive authenticated and aren’t flagged as spam. If you are already using a custom domain for Auth0 emails, you will want this to match.
An API key: Generate one from the Resend dashboard under API Keys. For the SMTP path, this key doubles as your SMTP password. For the Actions path, you will store it as a secret in the Auth0 Actions editor. Either way, scope it appropriately with full access if you are using the SDK, send-only if you are just doing SMTP relay.
Configuring Resend as an Email Provider
Option 1: Basic Configuration
Configuring Resend as an email provider is the fastest path. If you just need email delivery and logging without changing any code, the basic configuration takes a couple of minutes.
Dashboard configuration
Head to your Auth0 Dashboard, then navigate to Branding > Email Provider. Toggle on Use my own email provider and select Resend.
Fill in the Resend credentials:
- API Key
Your Resend API key
Set your From address to match the domain you verified in Resend.
Once saved, hit Send Test Email. You should see a test email arrive within seconds, and you should also see it appear in your Resend dashboard with full delivery telemetry. If it doesn’t arrive, check Auth0 Logs for SMTP errors. Common issues are port blocking (avoid port 25) and DNS propagation delays on newly verified domains.
That’s it. Every Auth0 email like verification, password reset, passwordless codes, and blocked account notices will now route through Resend. You get their deliverability infrastructure, logging, and analytics, with a quick configuration.
Option 2: Using Auth0 Actions with the Resend SDK
Basic configuration is great for simplicity. But if you want full programmatic control with custom retry logic, conditional routing, per-organization sender addresses, or dynamic content, you can also set up an Auth0 action.
Writing the Action
In the Auth0 Dashboard, go to Actions > Library, click Create Action and choose Custom. Once you’ve entered a name, pick any trigger (the example below will show a Post Login action) and hit Create.
On the left icons panel, click Dependencies and in the panel to its right click Add Dependency.
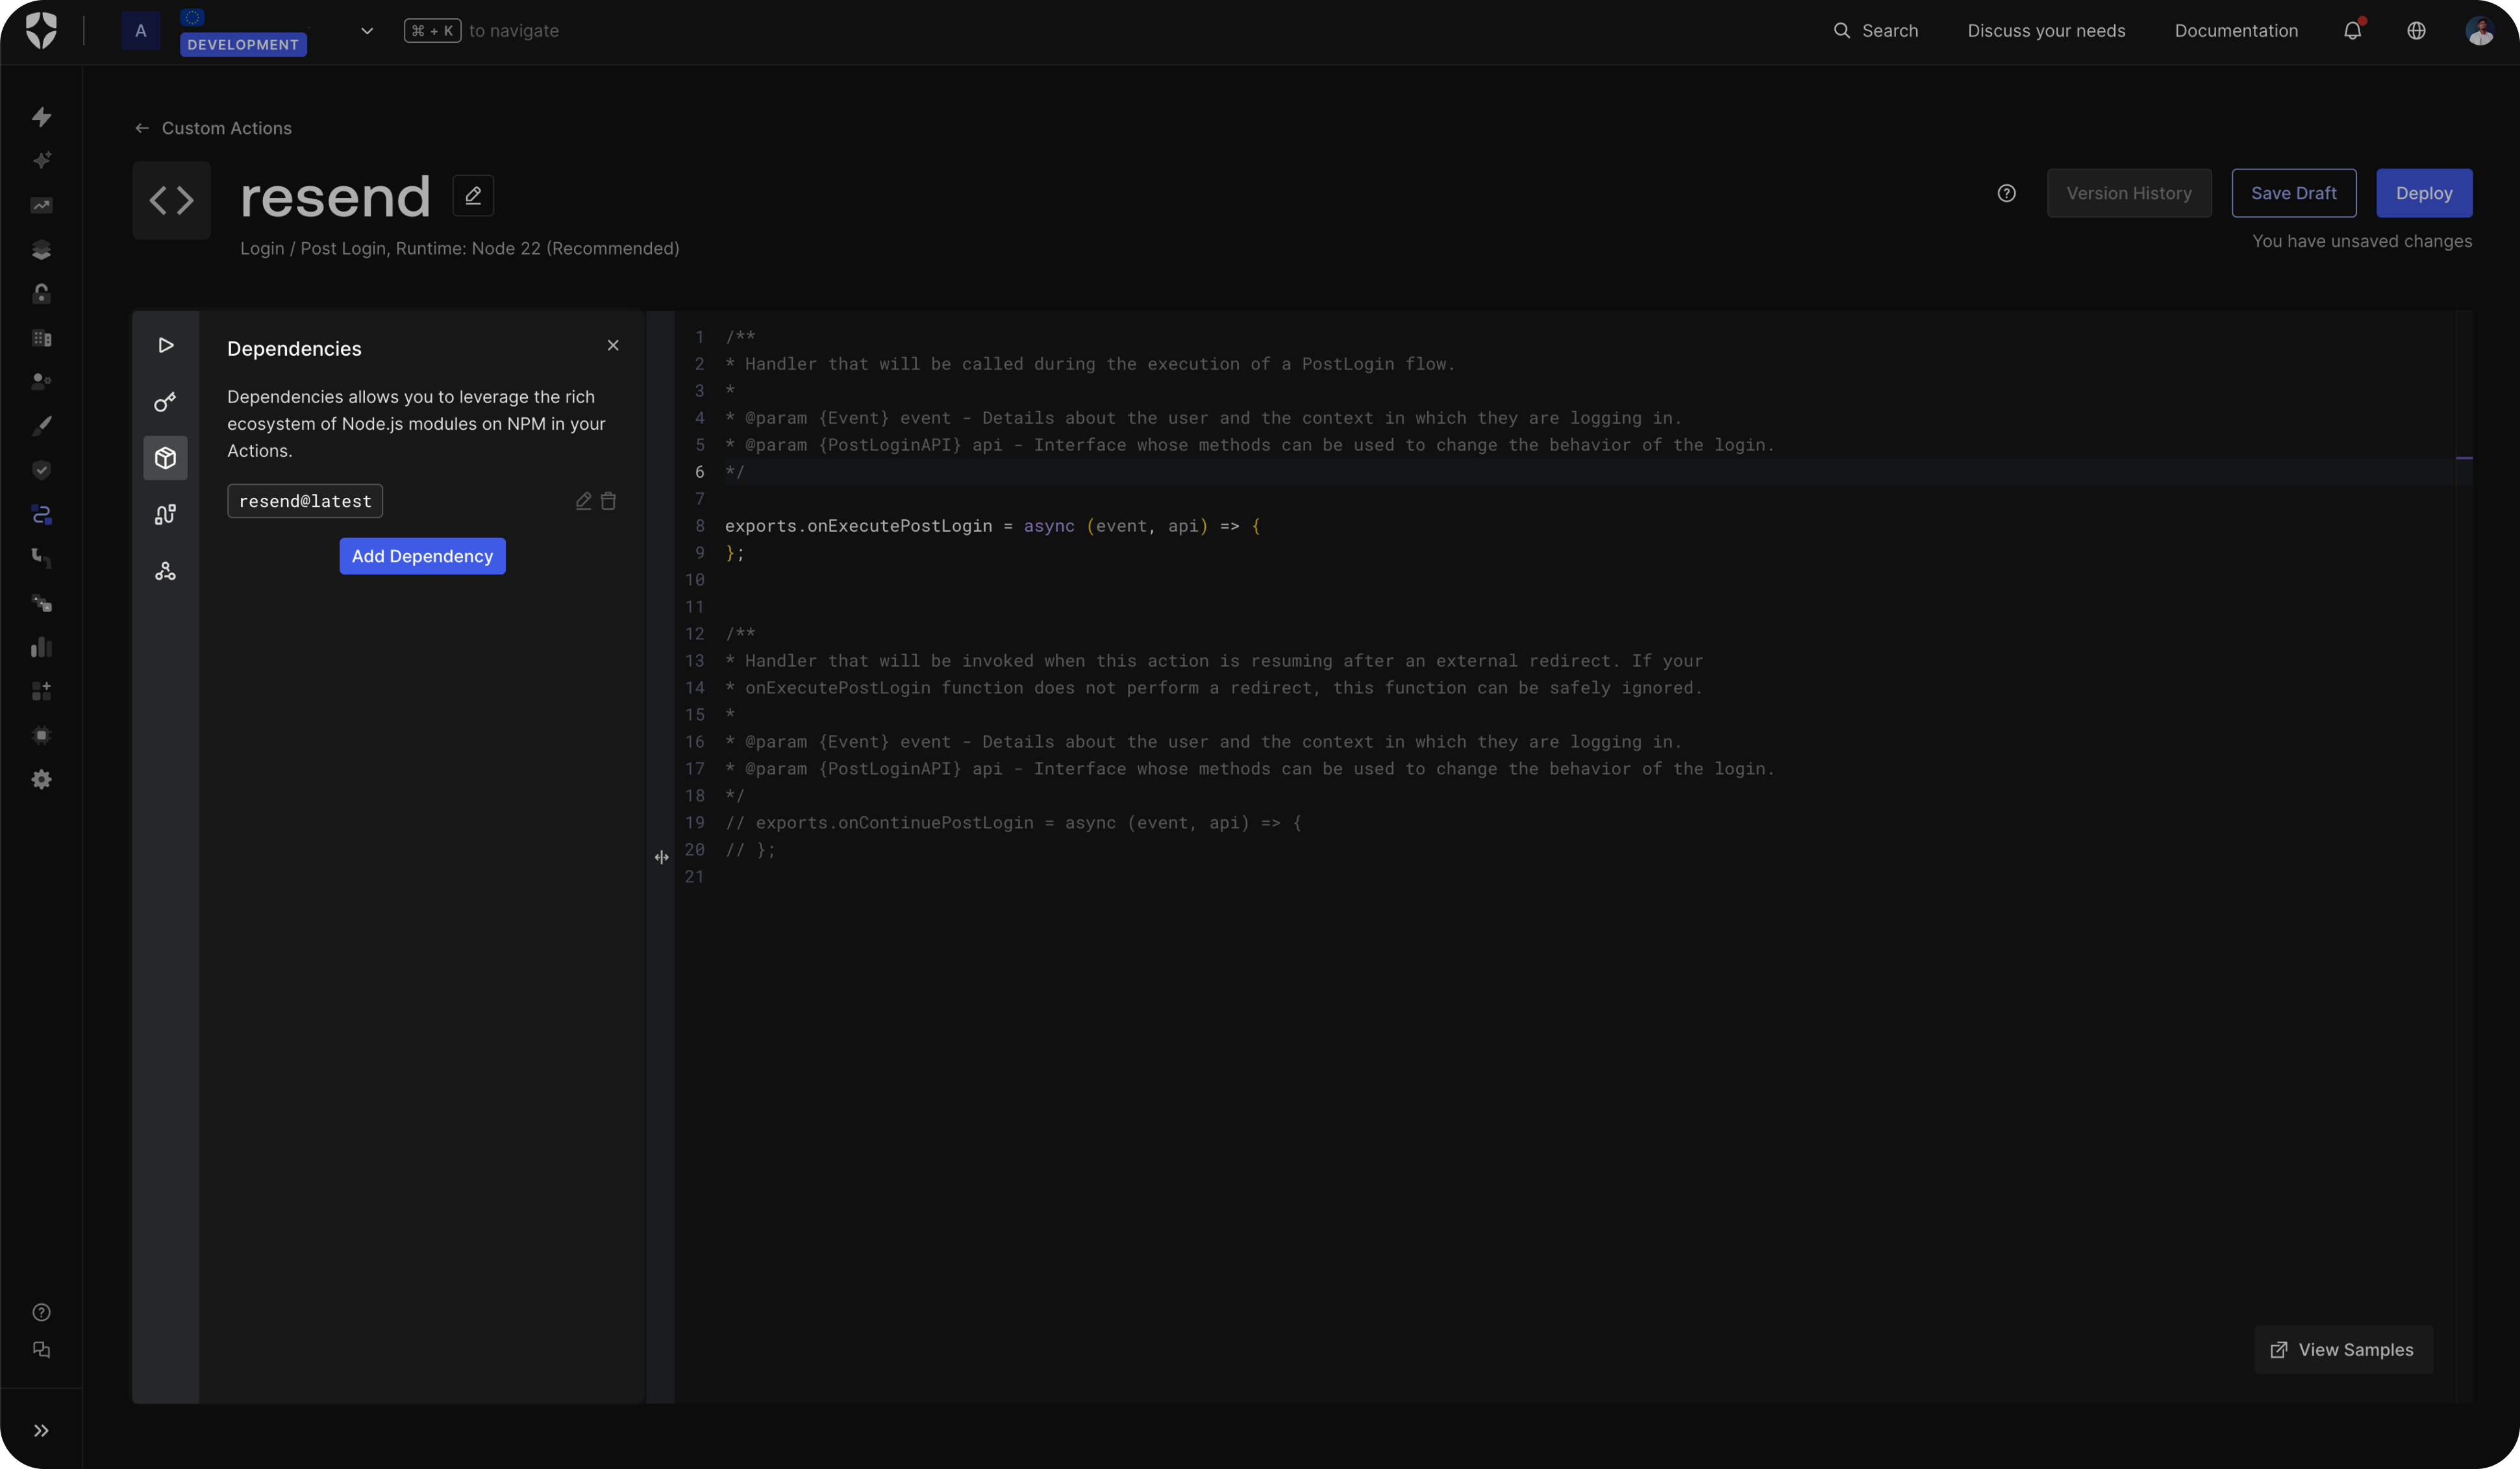
This should open a new dialog, where you can type in resend and click Add.
On the same left icons panel as before, you can click Secrets and add your Resend API key as RESEND_API_KEY.
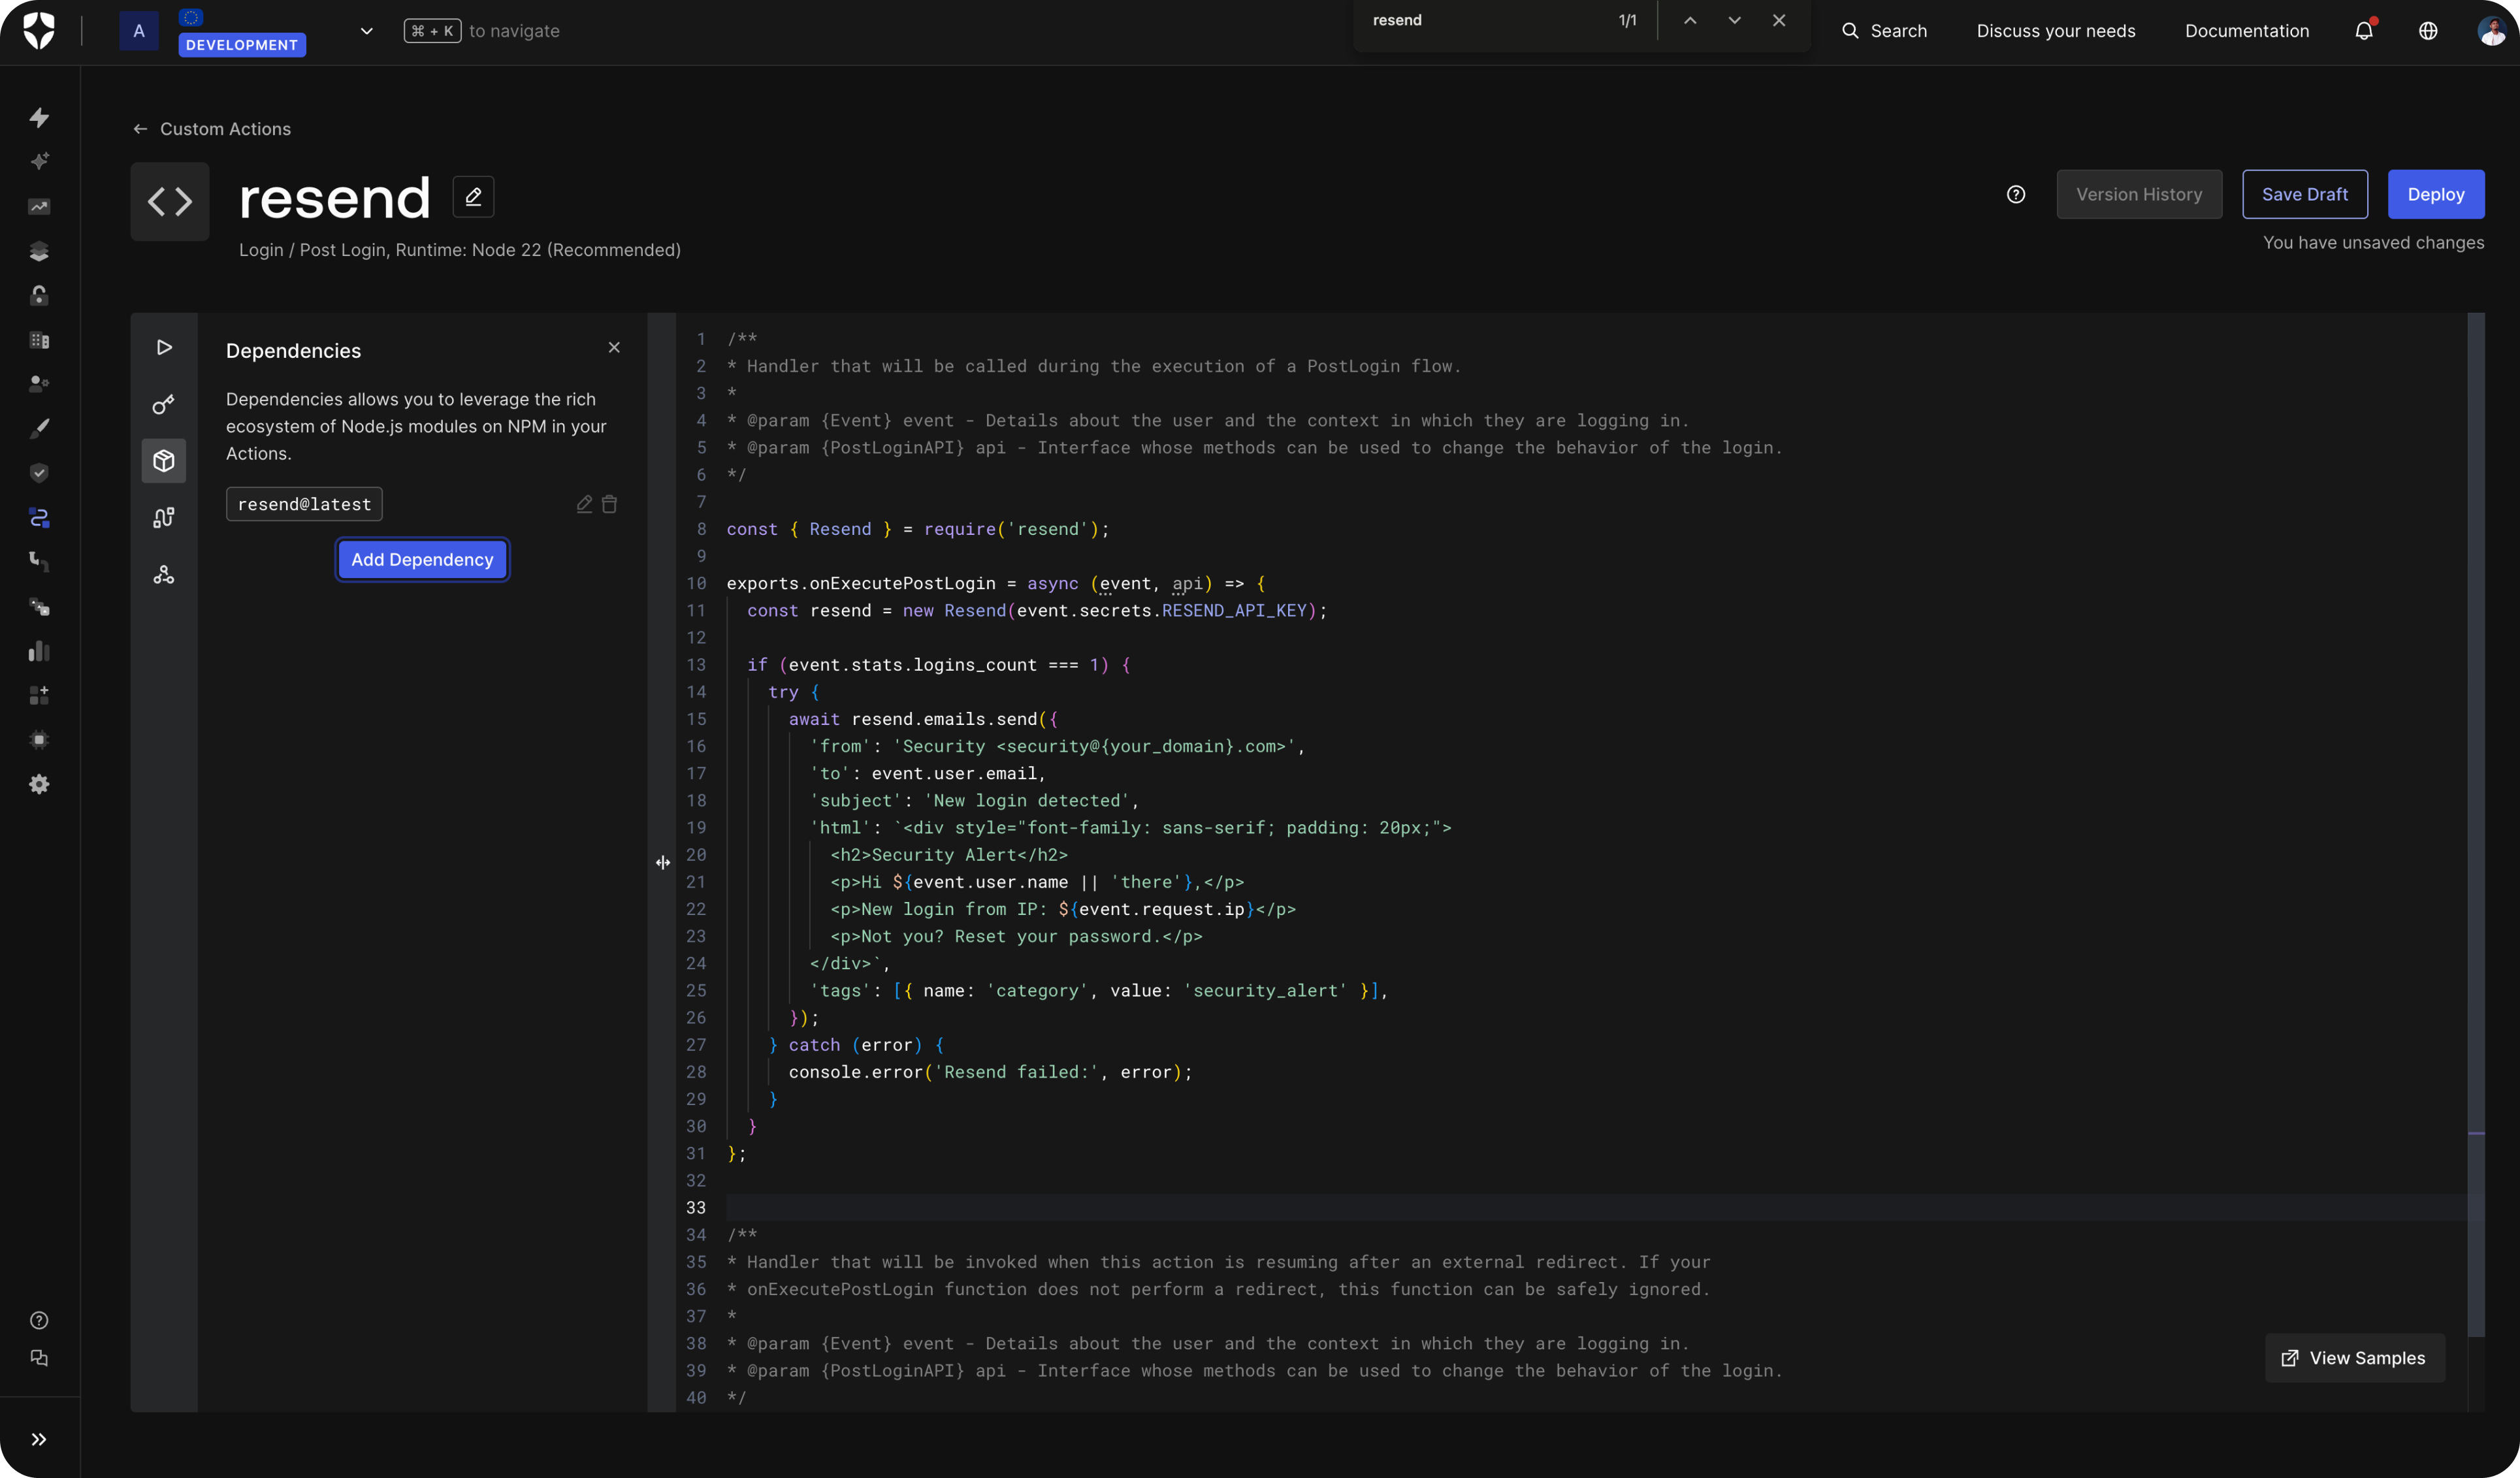
The code editor gives you a function signature with two arguments: event (user context and transaction metadata) and api (API level options available through actions). Here is a working example using everything you set up:
const { Resend } = require('resend');

exports.onExecutePostLogin = async (event, api) => {
     const resend = new Resend(event.secrets.RESEND_API_KEY);

     if (event.stats.logins_count === 1) {
     try {
           await resend.emails.send({
                 from: 'Security <security@{your_domain}.com>',
                 to: event.user.email,
                 subject: 'New login detected',
                 html: `
                       <div style="font-family: sans-serif; padding: 20px;">
                       <h2>Security Alert</h2>
                       <p>Hi ${event.user.name || 'there'},</p>
                       <p>New login from IP: ${event.request.ip}</p>
                       <p>Not you? Reset your password.</p>
                       </div>
                 `,
                 tags: [{ name: 'category', value: 'security_alert' }],
            });
     } catch (error) {
           console.error('Resend failed:', error);
     }
}};
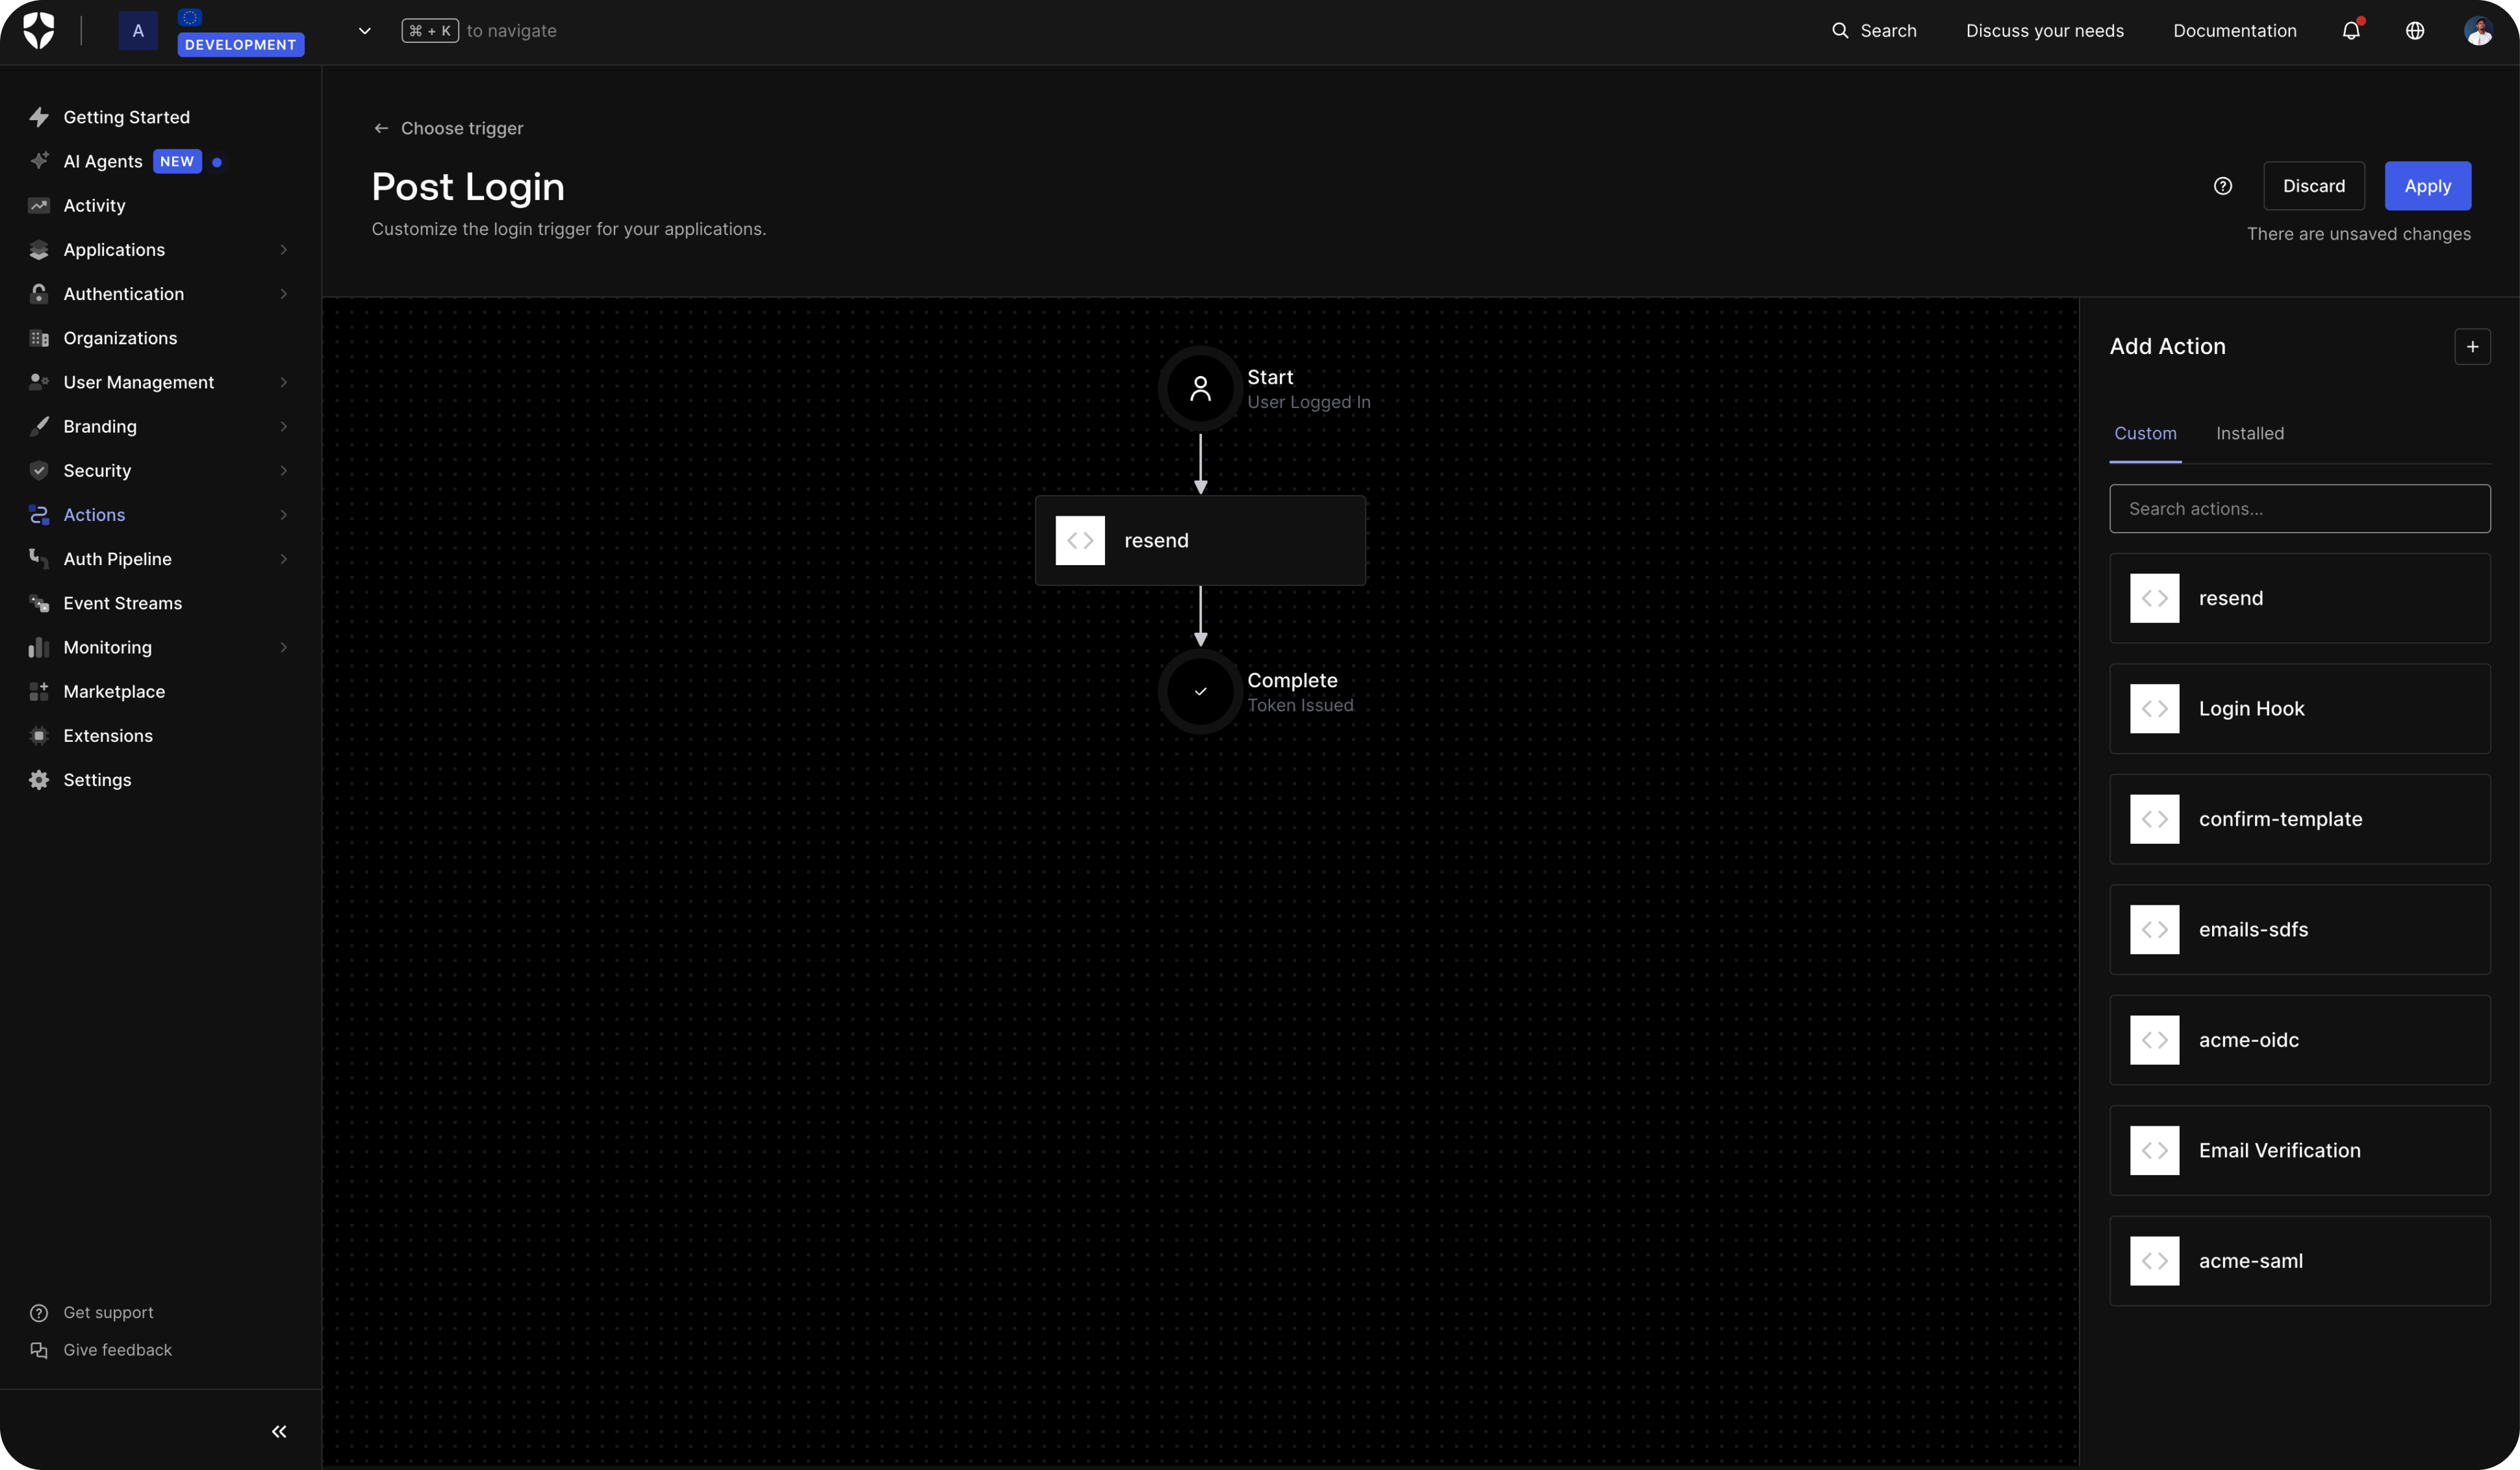
Once successfully saved, you need to navigate to Actions > Triggers. Select the Post Login trigger, drag the custom action into the flow and click Deploy. Any time a user logs in now, they will receive the email New login detected email.
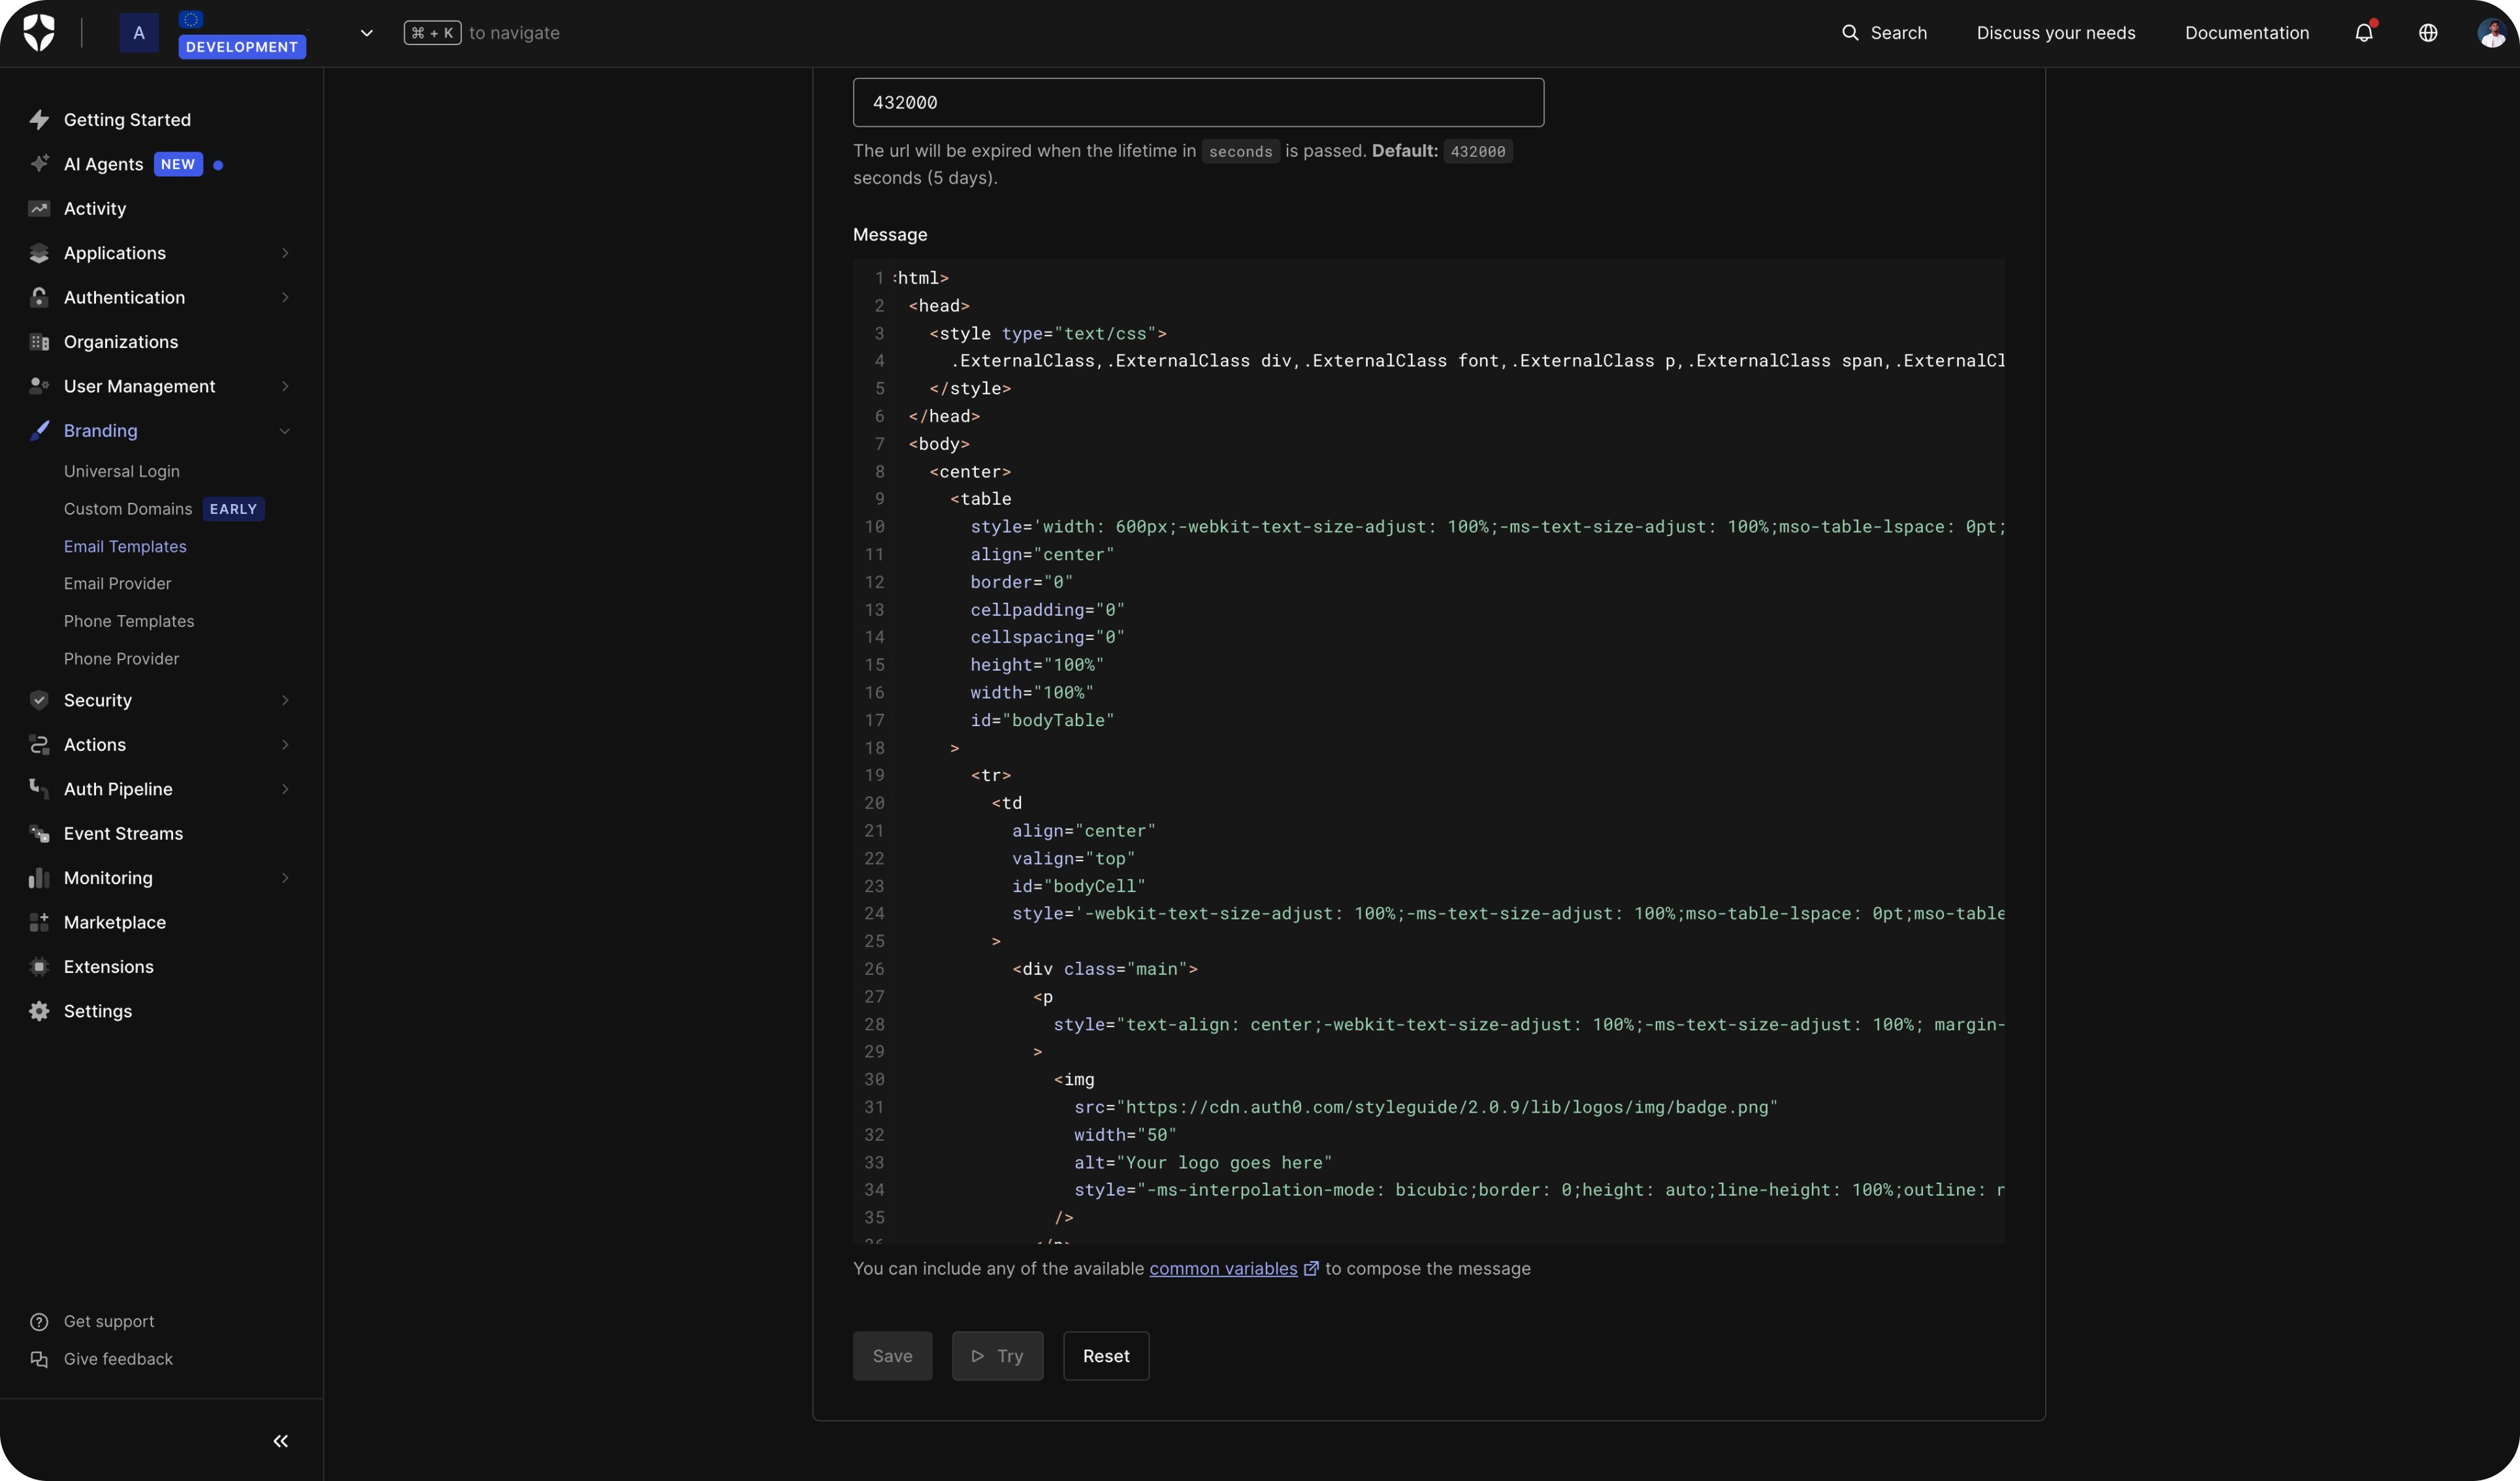
Customizing Email Templates with Liquid and Resend’s React Email
Auth0's email templates use Liquid syntax for dynamic variables like {{ user.email }}, {{ url }}, and {{ application.name }}. You can edit these templates directly in the Auth0 Dashboard under Branding > Email Templates. The Liquid variables are injected at render time, so your provider (Resend, in this case) receives fully rendered HTML with all the dynamic values already substituted.
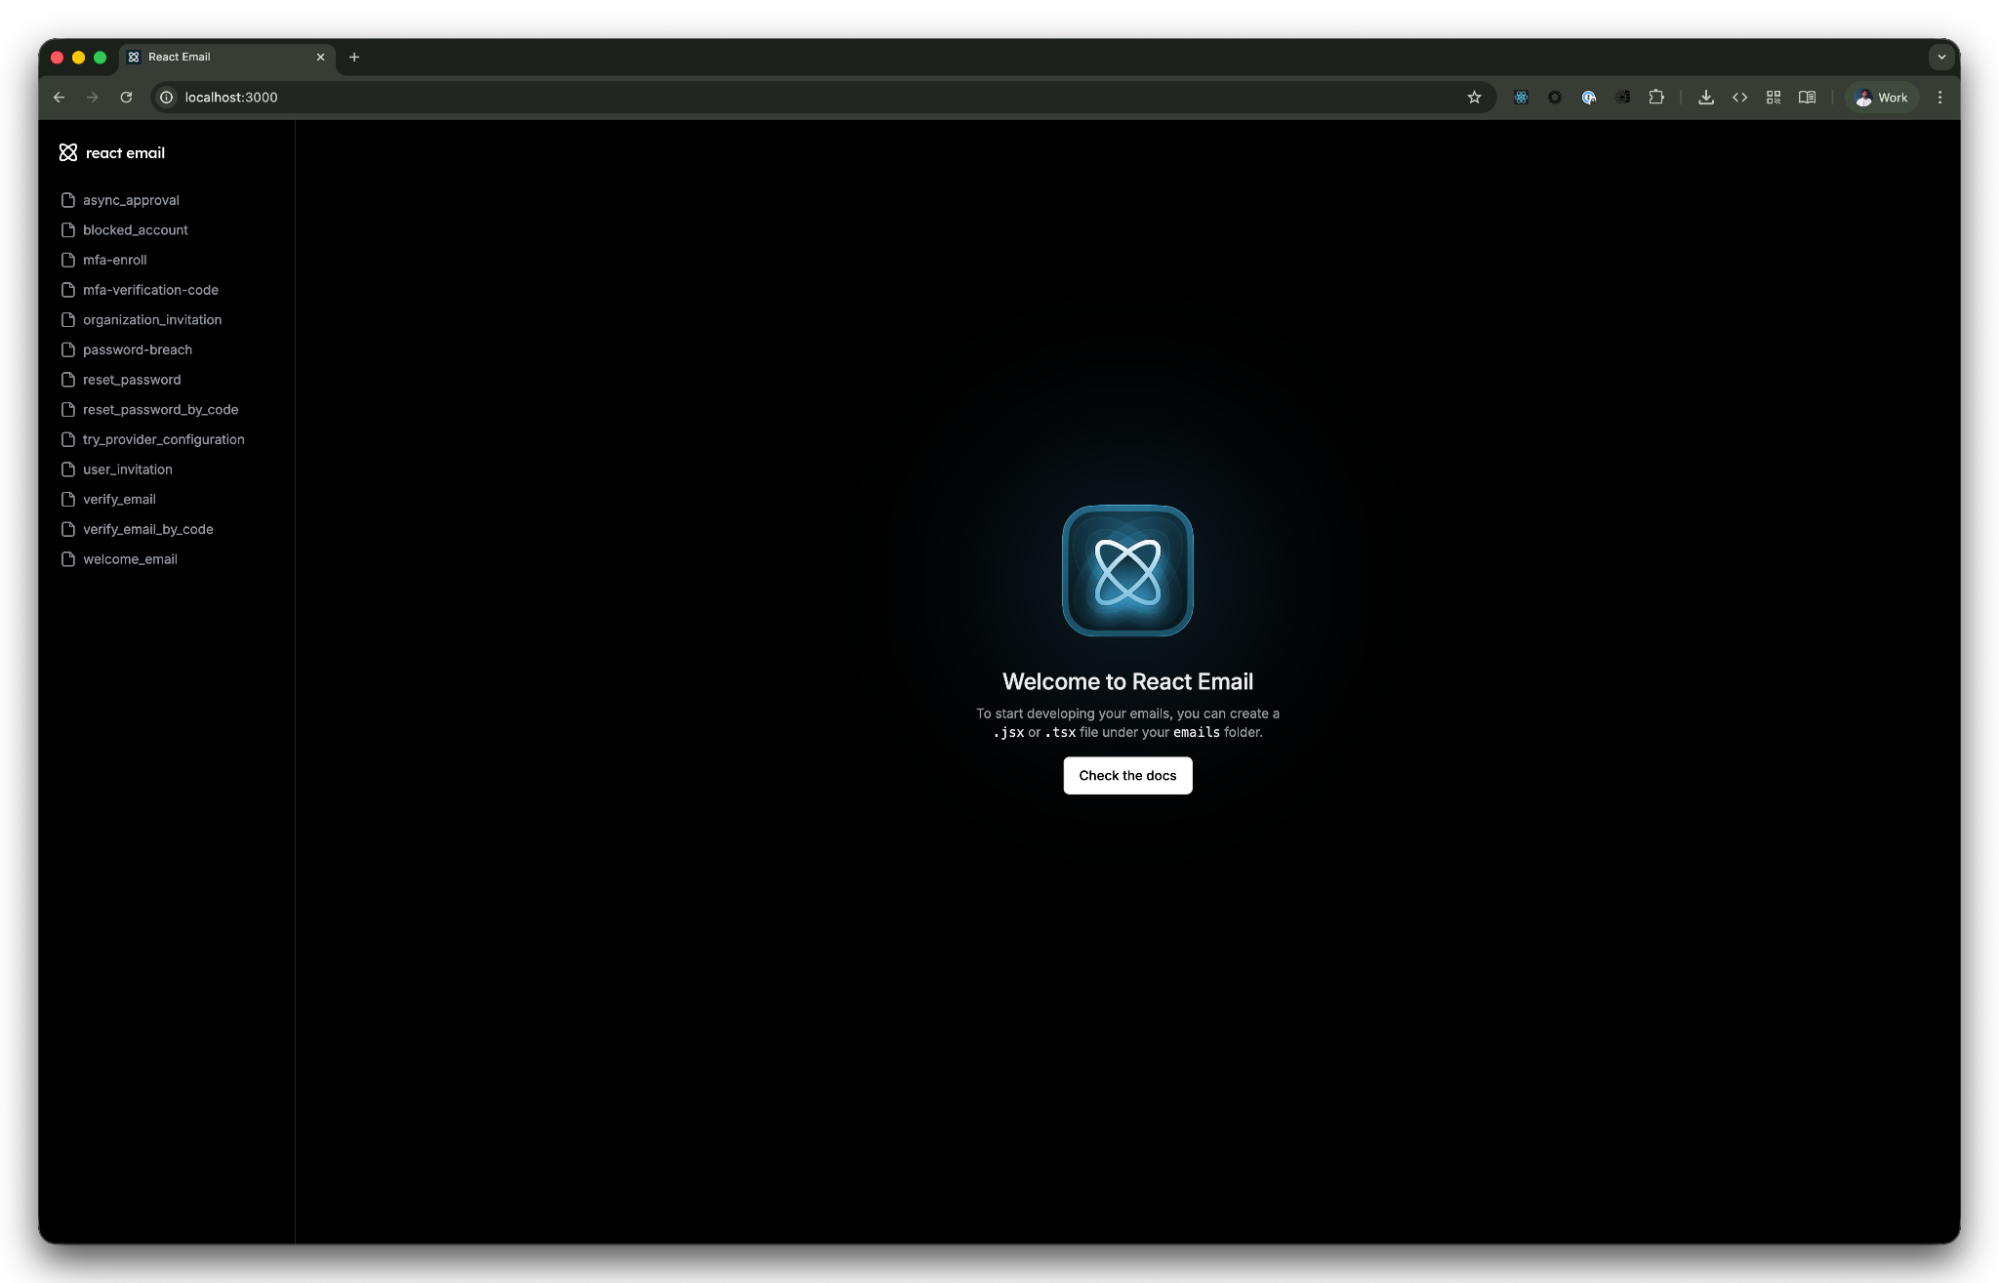
For teams using React-based design systems or needing to create and preview email templates quickly, React Email is an option worth considering.
Why React Email?
React Email is an unstyled component library for building emails. Building responsive email templates by hand typically involves deeply nested tables, inline styles, conditional comments for Outlook, and cross-client rendering inconsistencies. React Email aims to abstract away these concerns.
You author templates as React components using primitives provided by the package: <Html>, <Head>, <Body>, <Container>, <Section> and more. The library handles cross-client rendering, while you get component composition, props, conditional logic, and optional Tailwind support. To get started, you can run the following command:
npx create-email@latest
To launch a local preview environment for testing templates across simulated clients, you’ll need to run:
npm run dev
This allows you to iterate on email templates using a workflow similar to standard React component development, rather than editing raw HTML directly.
The React Email Auth0 Liquid workflow
Here is the workflow for using React Email templates with Auth0:
- Author your template in JSX: Build the layout, styling, and structure using React Email components. Use placeholder text where Auth0's Liquid variables will go.
- Render to HTML: Use
@react-email/renderto compile your React components down to static HTML. This outputs an email template with table-based layouts and inline styles generated automatically. - Inject Liquid variables: Replace your placeholder content with Auth0's Liquid syntax, for example
{{ url }}for the action URL,{{ user.email }}for the recipient,{{ application.name }}for the application name. - Paste into Auth0: Copy the compiled HTML (now with Liquid variables) into the appropriate template in Auth0 Dashboard > Branding > Email Templates.
This approach produces a cross-client-compatible email template that uses Auth0's variable system.
Handling variables: Bridging JSX and Liquid
One consideration is managing the boundary between React's JSX rendering and Auth0's Liquid template syntax. When you render a React Email component to HTML, text content gets HTML-encoded, which means Liquid syntax placed directly in JSX may get escaped.
By defining your Liquid variables as string constants, you can pass them into your components as props or interpolated values. The constants act as drop-in replacements within string expressions.
// utils/variables.ts
export const VARIABLES = {
      url: '{{ url }}',
      home_url: '{{ home_url }}',
      support_url: '{{ support_url }}',
      user: {
            email: '{{ user.email }}',
      },
      application: {
            name: '{{ application.name }}',
      },
};
Then reference them in your email templates:
import { VARIABLES } from '../utils/variables';

export const VerificationEmail = () => (
      <EmailWrapper>
             <Text>Hi {VARIABLES.user.email},</Text>
             <Text>Click below to verify your account for
      {VARIABLES.application.name}.</Text>
            <Button href={VARIABLES.url}>Verify Email</Button>
      </EmailWrapper>
);
React Email's render() function outputs the string constants as-is, so no post-processing step is needed.
Testing and Debugging the Resend Integration
This setup provides visibility from both sides of the email delivery process.
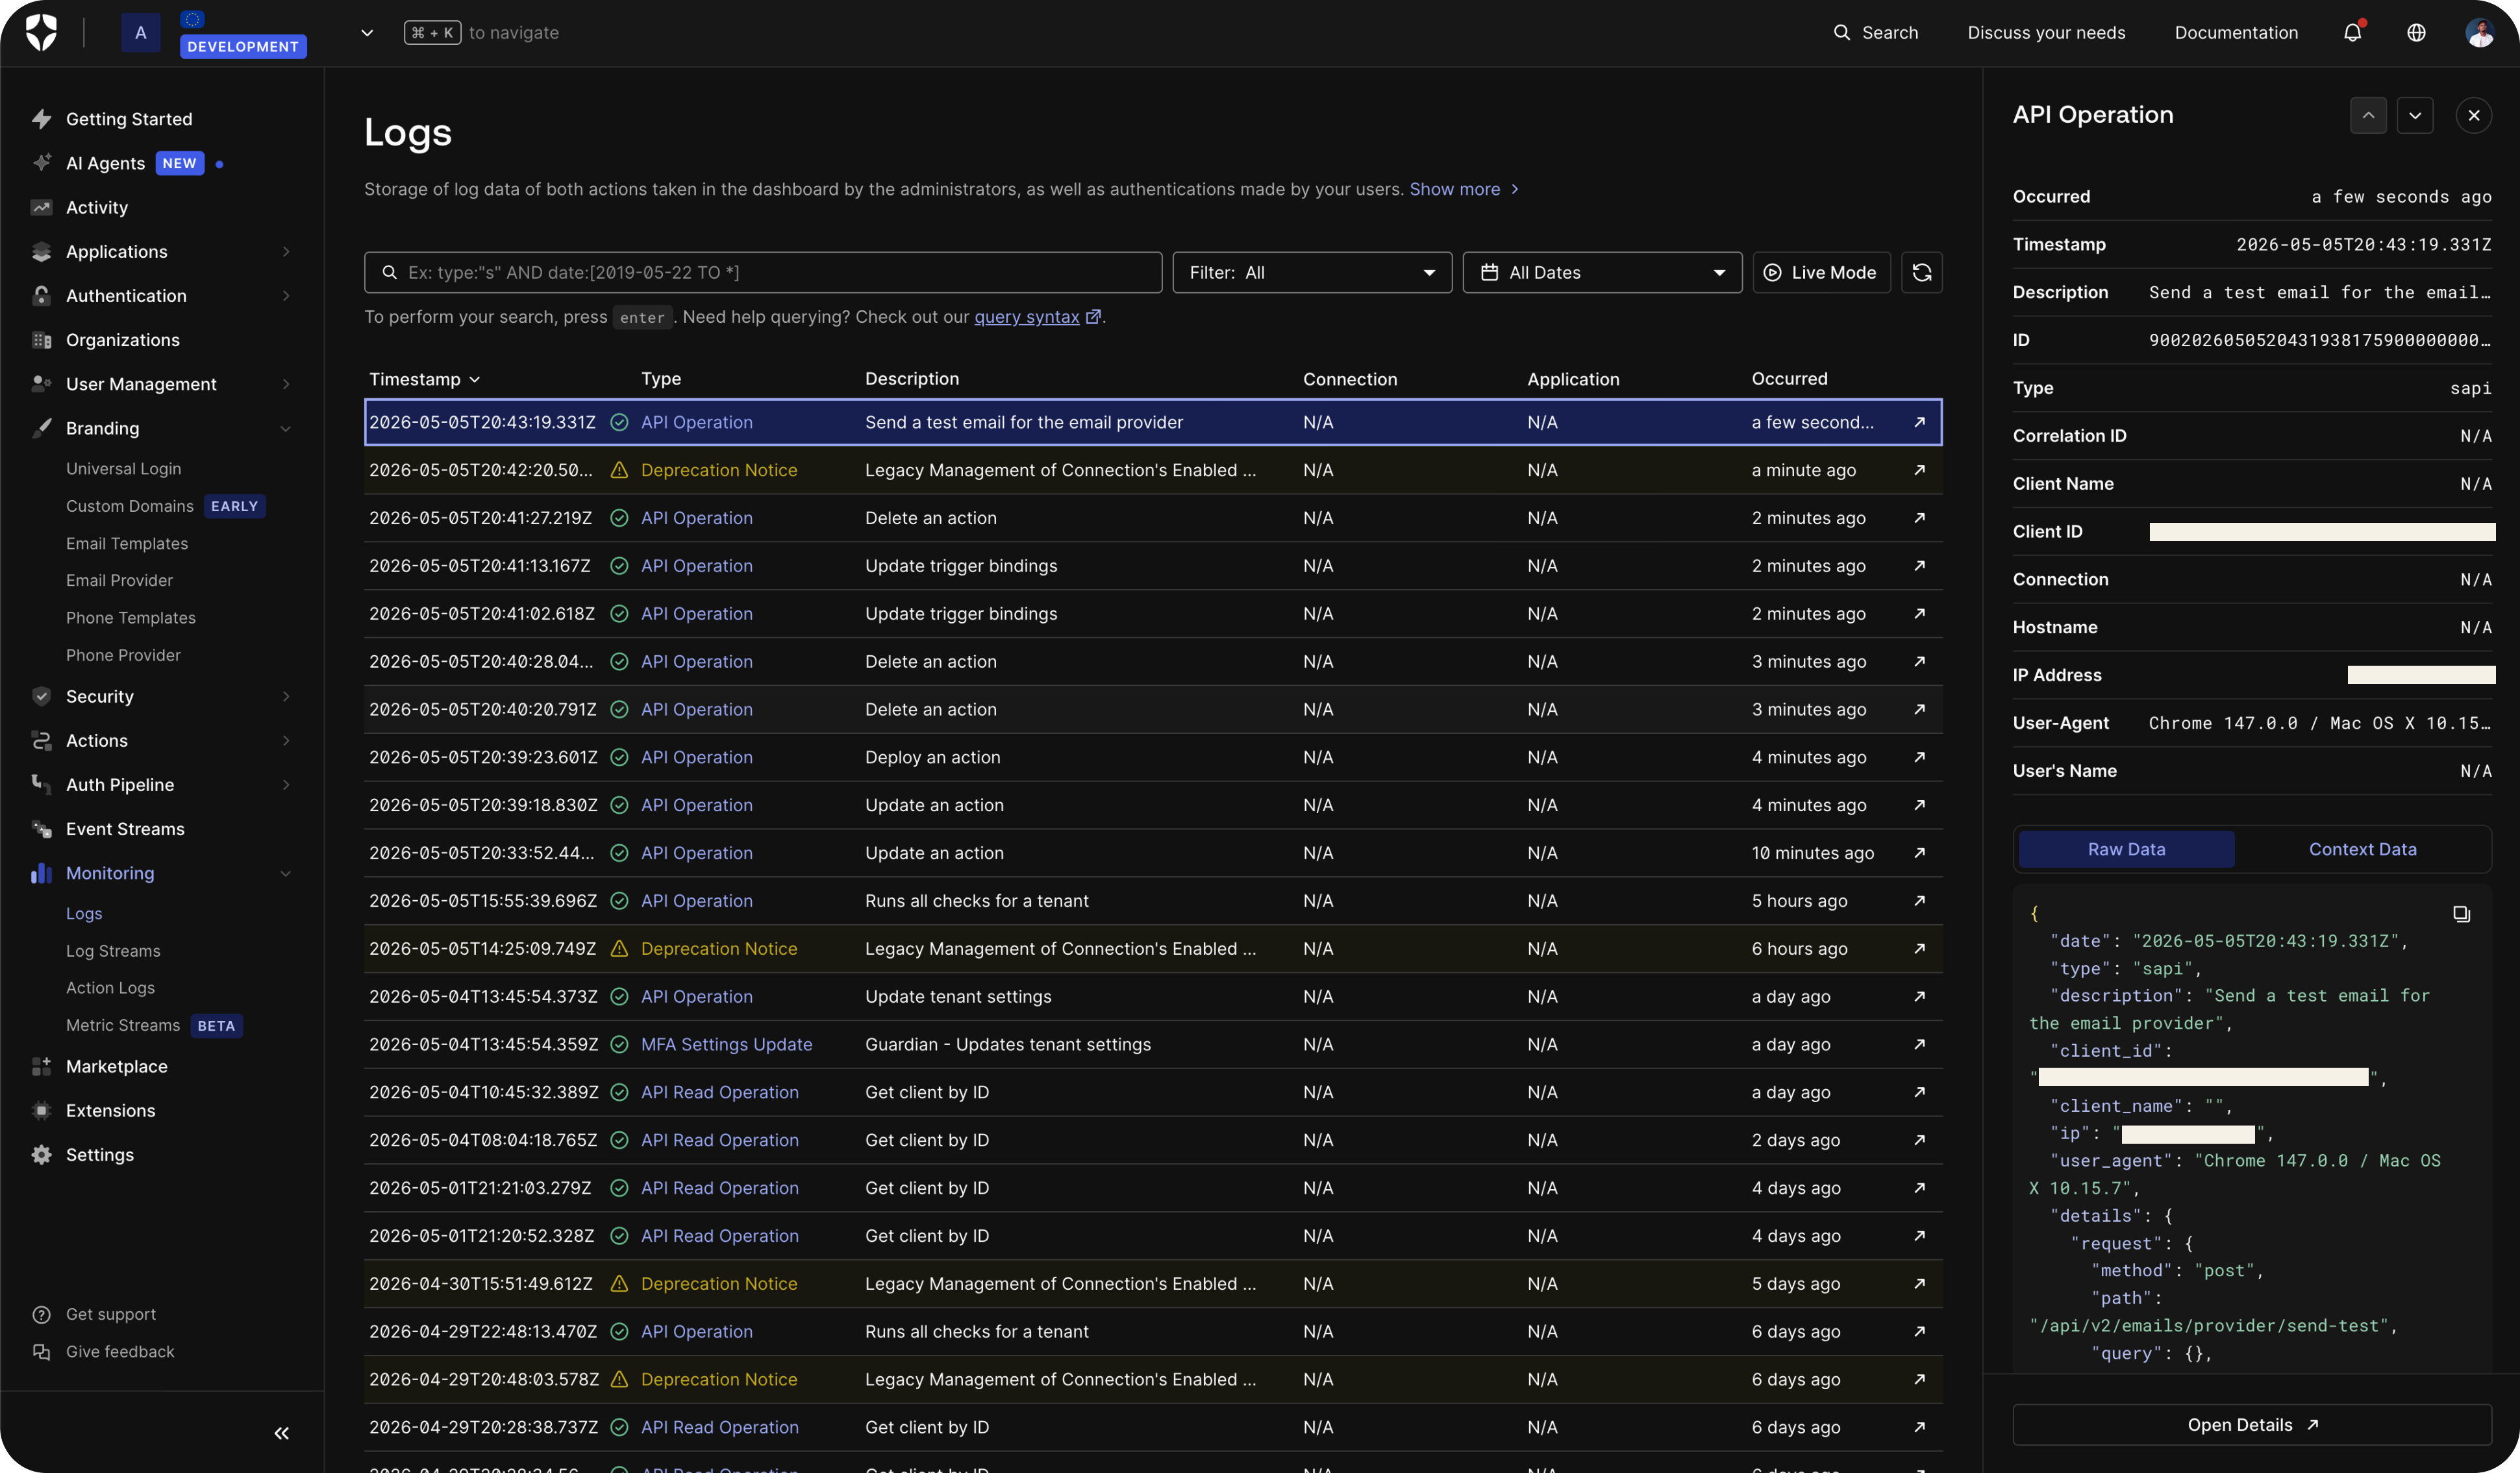
Auth0 Logs (Dashboard > Monitoring > Logs) display email events including successes, failures, and Resend integration-specific errors. You can filter by Success Send Email and Failed Send Email event types. If you're using Actions, console.log output also appears in the real-time logs.
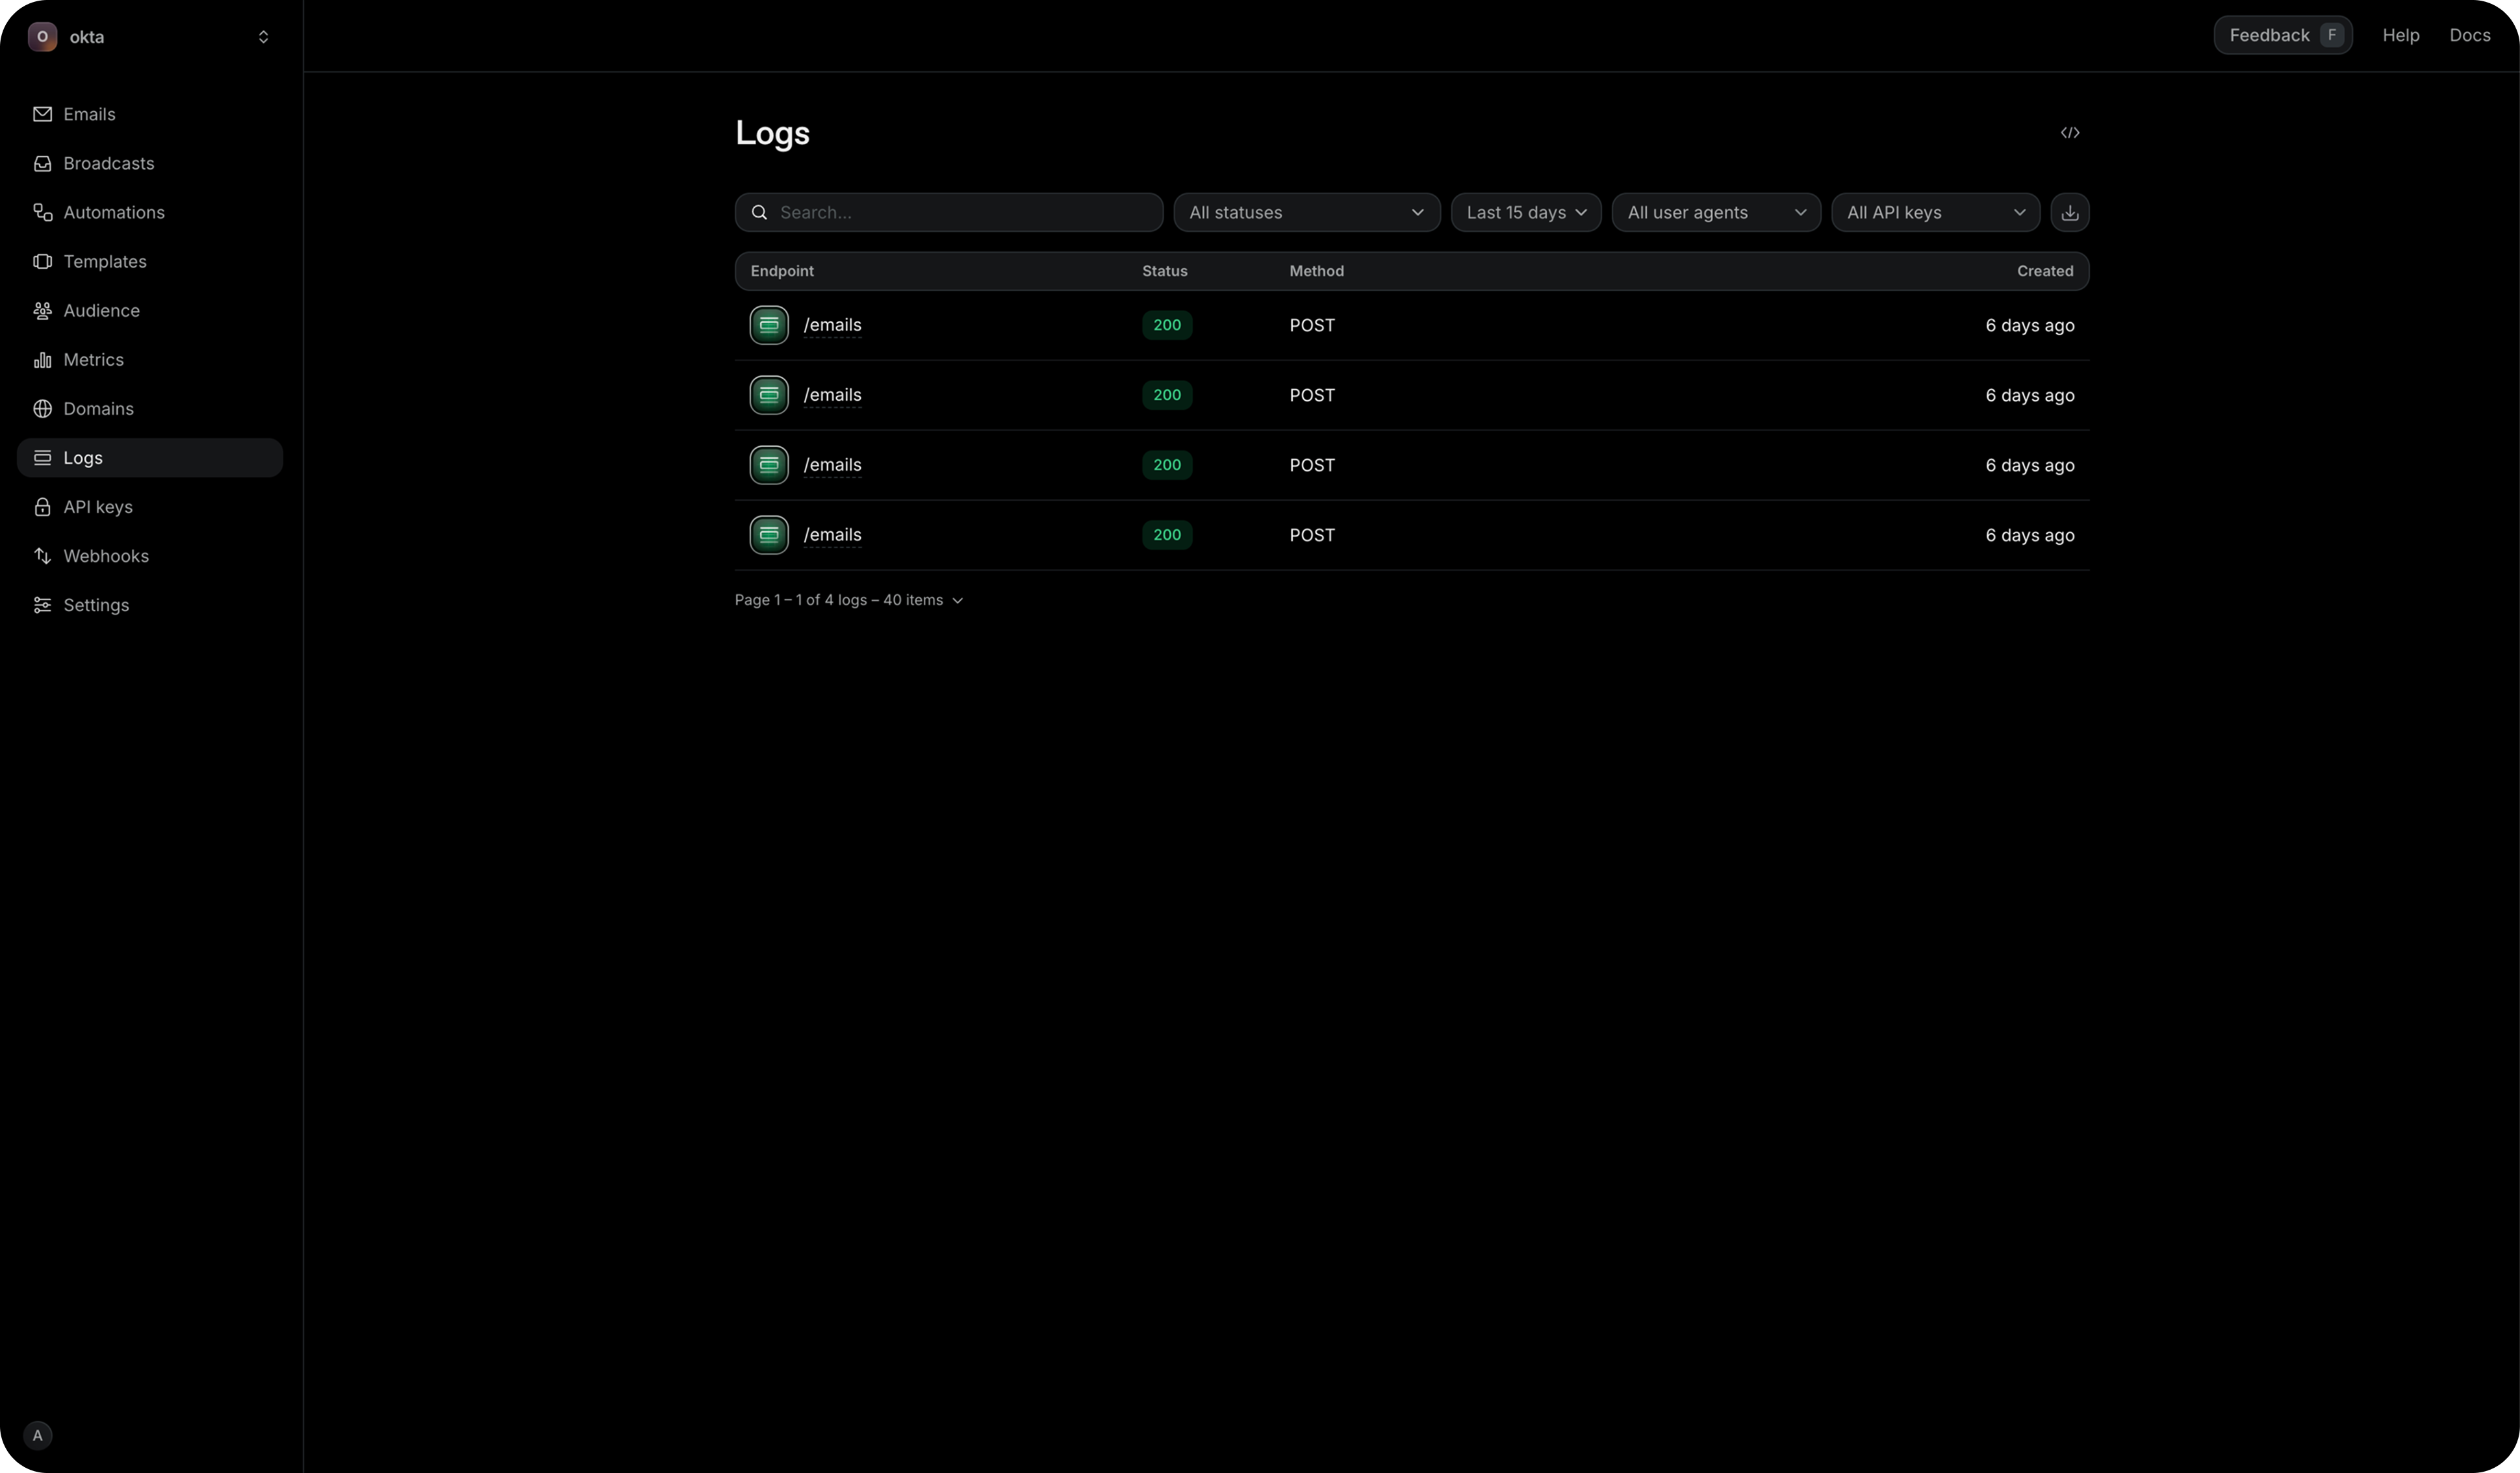
Resend's dashboard provides delivery-side logs showing whether an email was accepted, delivered, opened, clicked, or bounced. You can also inspect the rendered HTML of each sent email, which is useful for debugging template issues.
Together, this provides end-to-end observability for transactional emails sent from your Auth0 tenant covering whether an email was sent, delivered, and rendered correctly.
Wrapping up
To review any additional steps, check the official documentation for the Resend email provider and customizing email templates.
Transactional emails related to identity such as verification, password resets, MFA codes are often the first interaction a new user has with your product, and a critical recovery path for locked-out users.
Whether you use the default configuration or build a custom action and use React Email for your templates, this integration should get you set up for email delivery.
After you try this out, leave us a comment in this Auth0 community forum post, as we would love to hear any feedback.