---
title: "New Features for Developing AngularJS Applications - Part 2: Build An App"
description: "Learn how to develop applications in AngularJS using a component-based architecture."
authors:
- name: "Prosper Otemuyiwa"
url: "https://auth0.com/blog/authors/prosper-otemuyiwa/"
date: "Apr 26, 2018"
category: "Developers,Deep Dive,AngularJS"
tags: ["angularjs", "javascript", "authentication", "web-app", "auth0", "components"]
url: "https://auth0.com/blog/developing-angularjs-apps-part-2/"
---
# New Features for Developing AngularJS Applications - Part 2: Build An App
---
**TL;DR:** In this article, you'll develop a simple application in AngularJS 1.5. This application will show you how to use some of the features discussed in [Part 1 of this tutorial](https://auth0.com/blog/new-features-for-developing-angularjs-applications-part-1/) to build component-based AngularJS applications. If you want to skip the tutorial and dive straight into the code, the [repo](https://github.com/auth0-blog/speakerhang) is publicly available.
---
Before AngularJS 1.5, developers relied solely on directives to be able to build reusable components in their applications. Currently, AngularJS 1.5+ offers the ability to use the `.component()` method to build isolated and reusable components like `React` and `Angular` applications.
## Introducing SpeakerHang
I admire several developers in the community, and one of them is [Nadia Odunayo](http://twitter.com/nodunayo). She's a Ruby developer and regular conference speaker. She built a pretty popular side project called [Speakerline](http://speakerline.io). Speakerline is an open source project to help demystify the tech conference CFP process for new speakers. The project is built in Rails.
**SpeakerHang**, the project we'll build in this tutorial is largely inspired by **Speakerline**. It's a simpler version. **SpeakerHang** displays a list of conference speakers, their details and allows you to add a speaker.
Worthy of note here is that there is no database or external REST API. The speakers are added to an array. The crux of this guide is to teach you how to build a component-based AngularJS application easily.
## Visualizing SpeakerHang
The best way to build apps is to visualize how the end product will look. Let's think about SpeakerHang in components. Check out the visualization below:
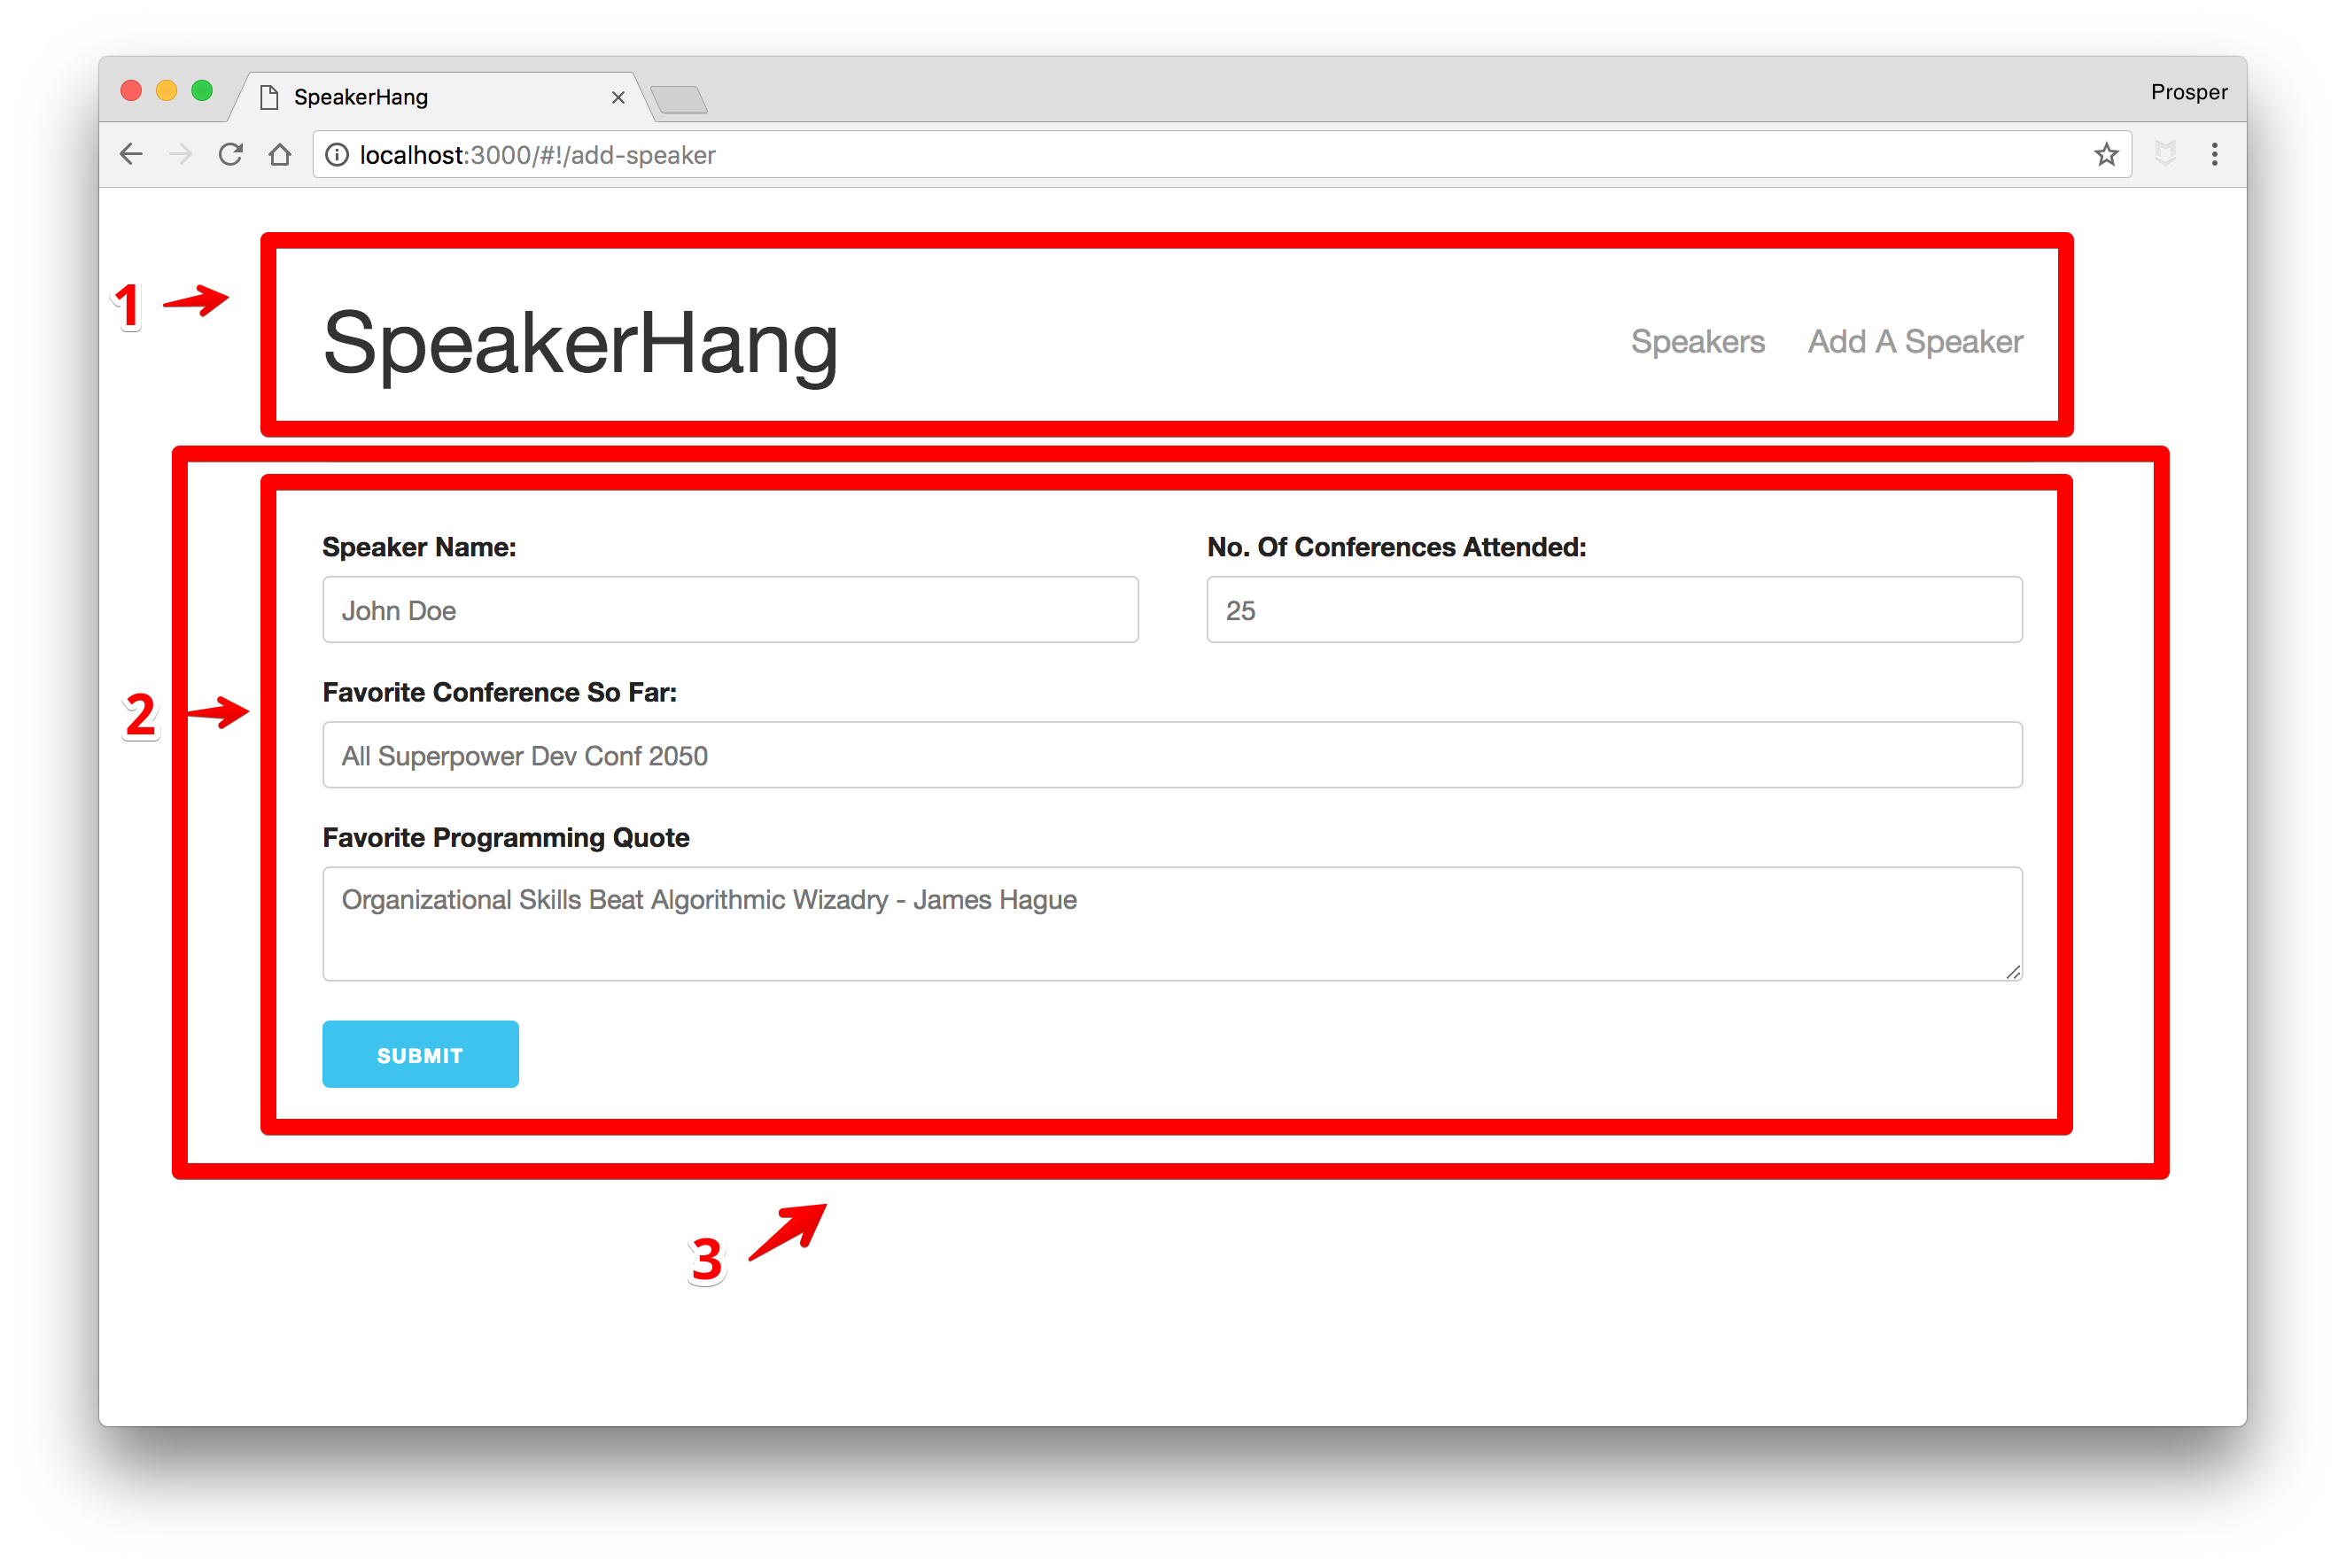
_SpeakerHang - Component Visualization_
_SpeakerHang - Component Visualization_
From the diagram above, our visualization produced four components.
* First component for navigation.
* Second component for **Add Speaker** form.
* Third component for **Add Speaker** container.
* Fourth component for a list of speakers.
**NOTE:** You can break up your app into as many components as you want, but be careful not to complicate the process.
## Build SpeakerHang
I have a [starter pack](https://github.com/unicodeveloper/angularjs-starter) already configured for building AngularJS 1.5+ apps. The starter pack ships with webpack, Sass compilation, autoreload, ES6 transpiling, component generation, [Angularjs UI-Router](https://github.com/angular-ui/ui-router), and test files generator. It's a forked and enhanced version of [NG6-Starter](https://github.com/gebidesign/NG6-starter-sass).
Clone the AngularJS starter pack, `cd` into the directory and run `npm install` to install all the dependencies.
Run `gulp serve` to start the app.
Your app should look like the diagram below:
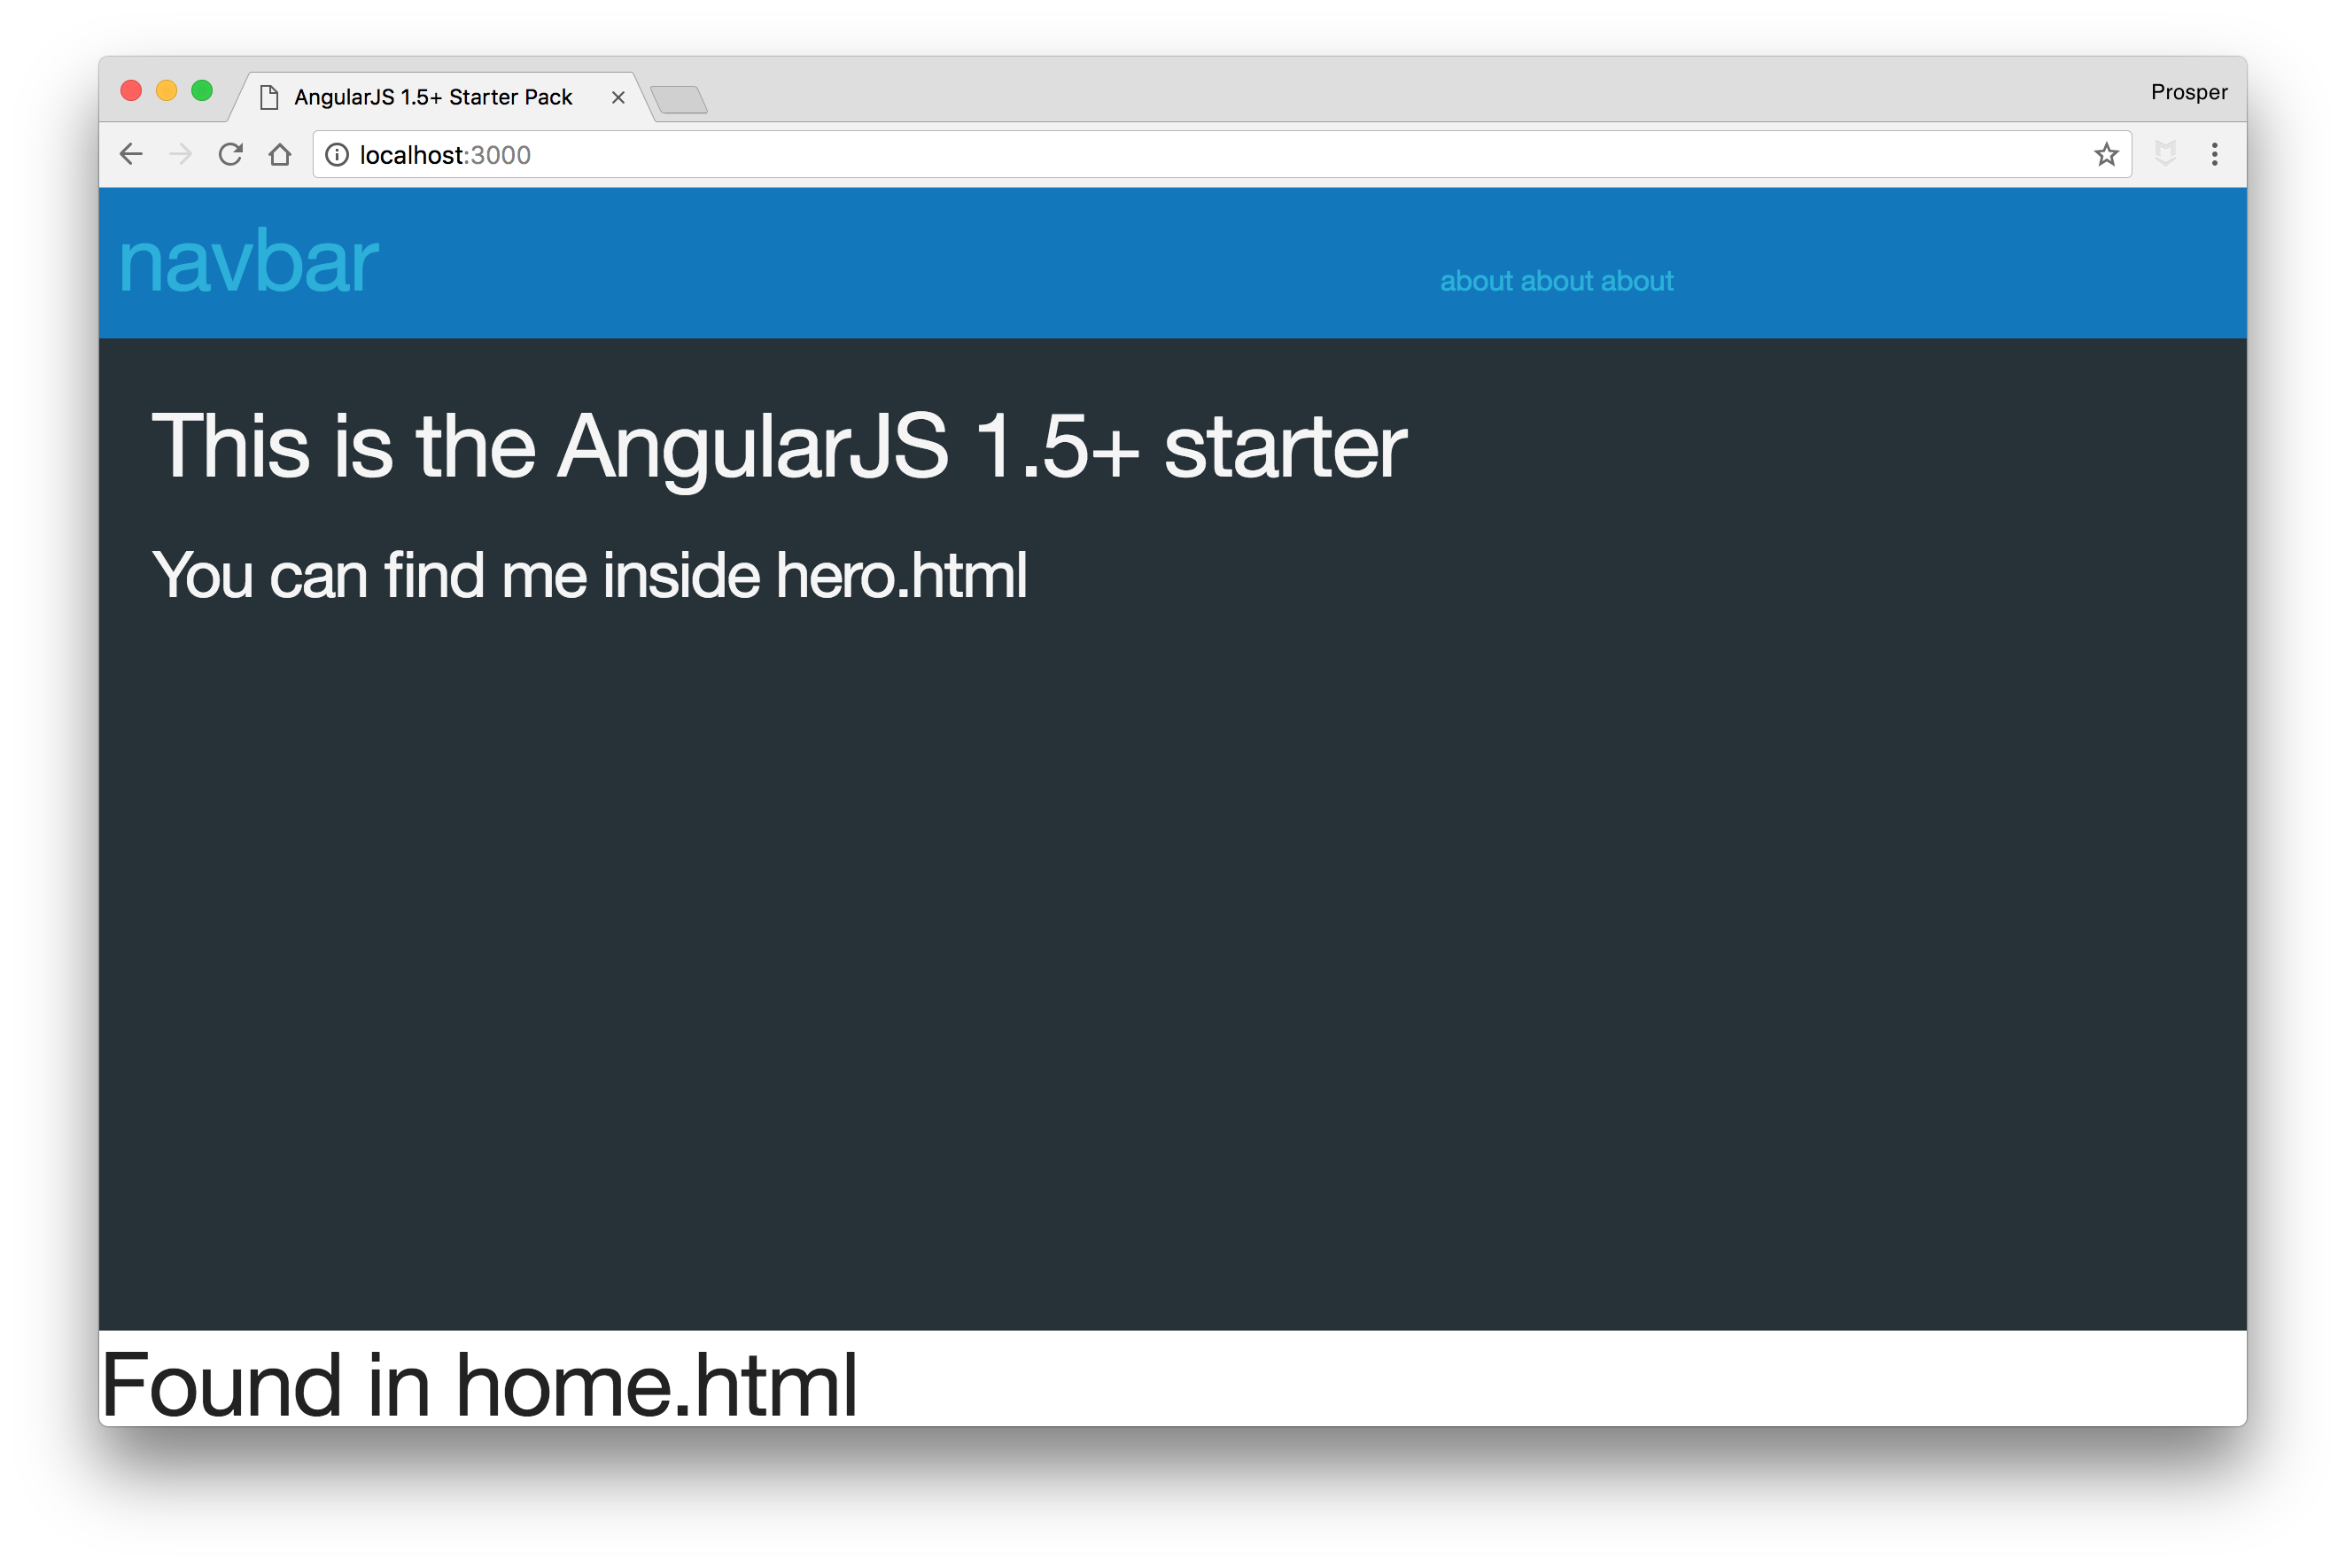
_AngularJS Starter Pack Index_
Before proceeding, I'll like you to delete the following:
* The `app/common` directory.
* This line in `app/app.js`: `import Common from './common/common';`
* Remove `Common` from the required dependencies in `angular.module` in `app.js`.
* The `about`, `home` components folder and `components.js` file in `app/components` directory.
* This line in `app/app.js`: `import Components from './components/components';`
* Remove `Components` from the required dependencies in `angular.module` in `app.js`.
Now, your app should show a blank page. If there are no errors, then you are on track.
### Set Up Routes
We'll make use of the efficient [UI-Router](https://ui-router.github.io/ng1/). Open up `app.js` and replace the content with the code below:
```js
import angular from 'angular';
import uiRouter from '@uirouter/angularjs';
import AppComponent from './app.component';
import 'normalize.css';
import 'skeleton.css/skeleton.css';
import './app.scss';
angular.module('app', [
uiRouter
])
.config(($locationProvider, $stateProvider, $urlRouterProvider) => {
"ngInject";
$stateProvider
.state('app', {
url: '/app',
abstract: true,
template: ''
})
.state('home', {
url: '/home',
template: '
The Home of Speakers in the Developer Community
'
});
// Default page for the router
$urlRouterProvider.otherwise('/home');
})
.component('app', AppComponent);
```
In the code above, we defined the `home` and `app` state. We also configured the default page for the app. The default page that will be rendered when a user visits the app is the `/home` route which renders the template.
**Note:** The template can be a component or simply a string.
Your app should render like this below:
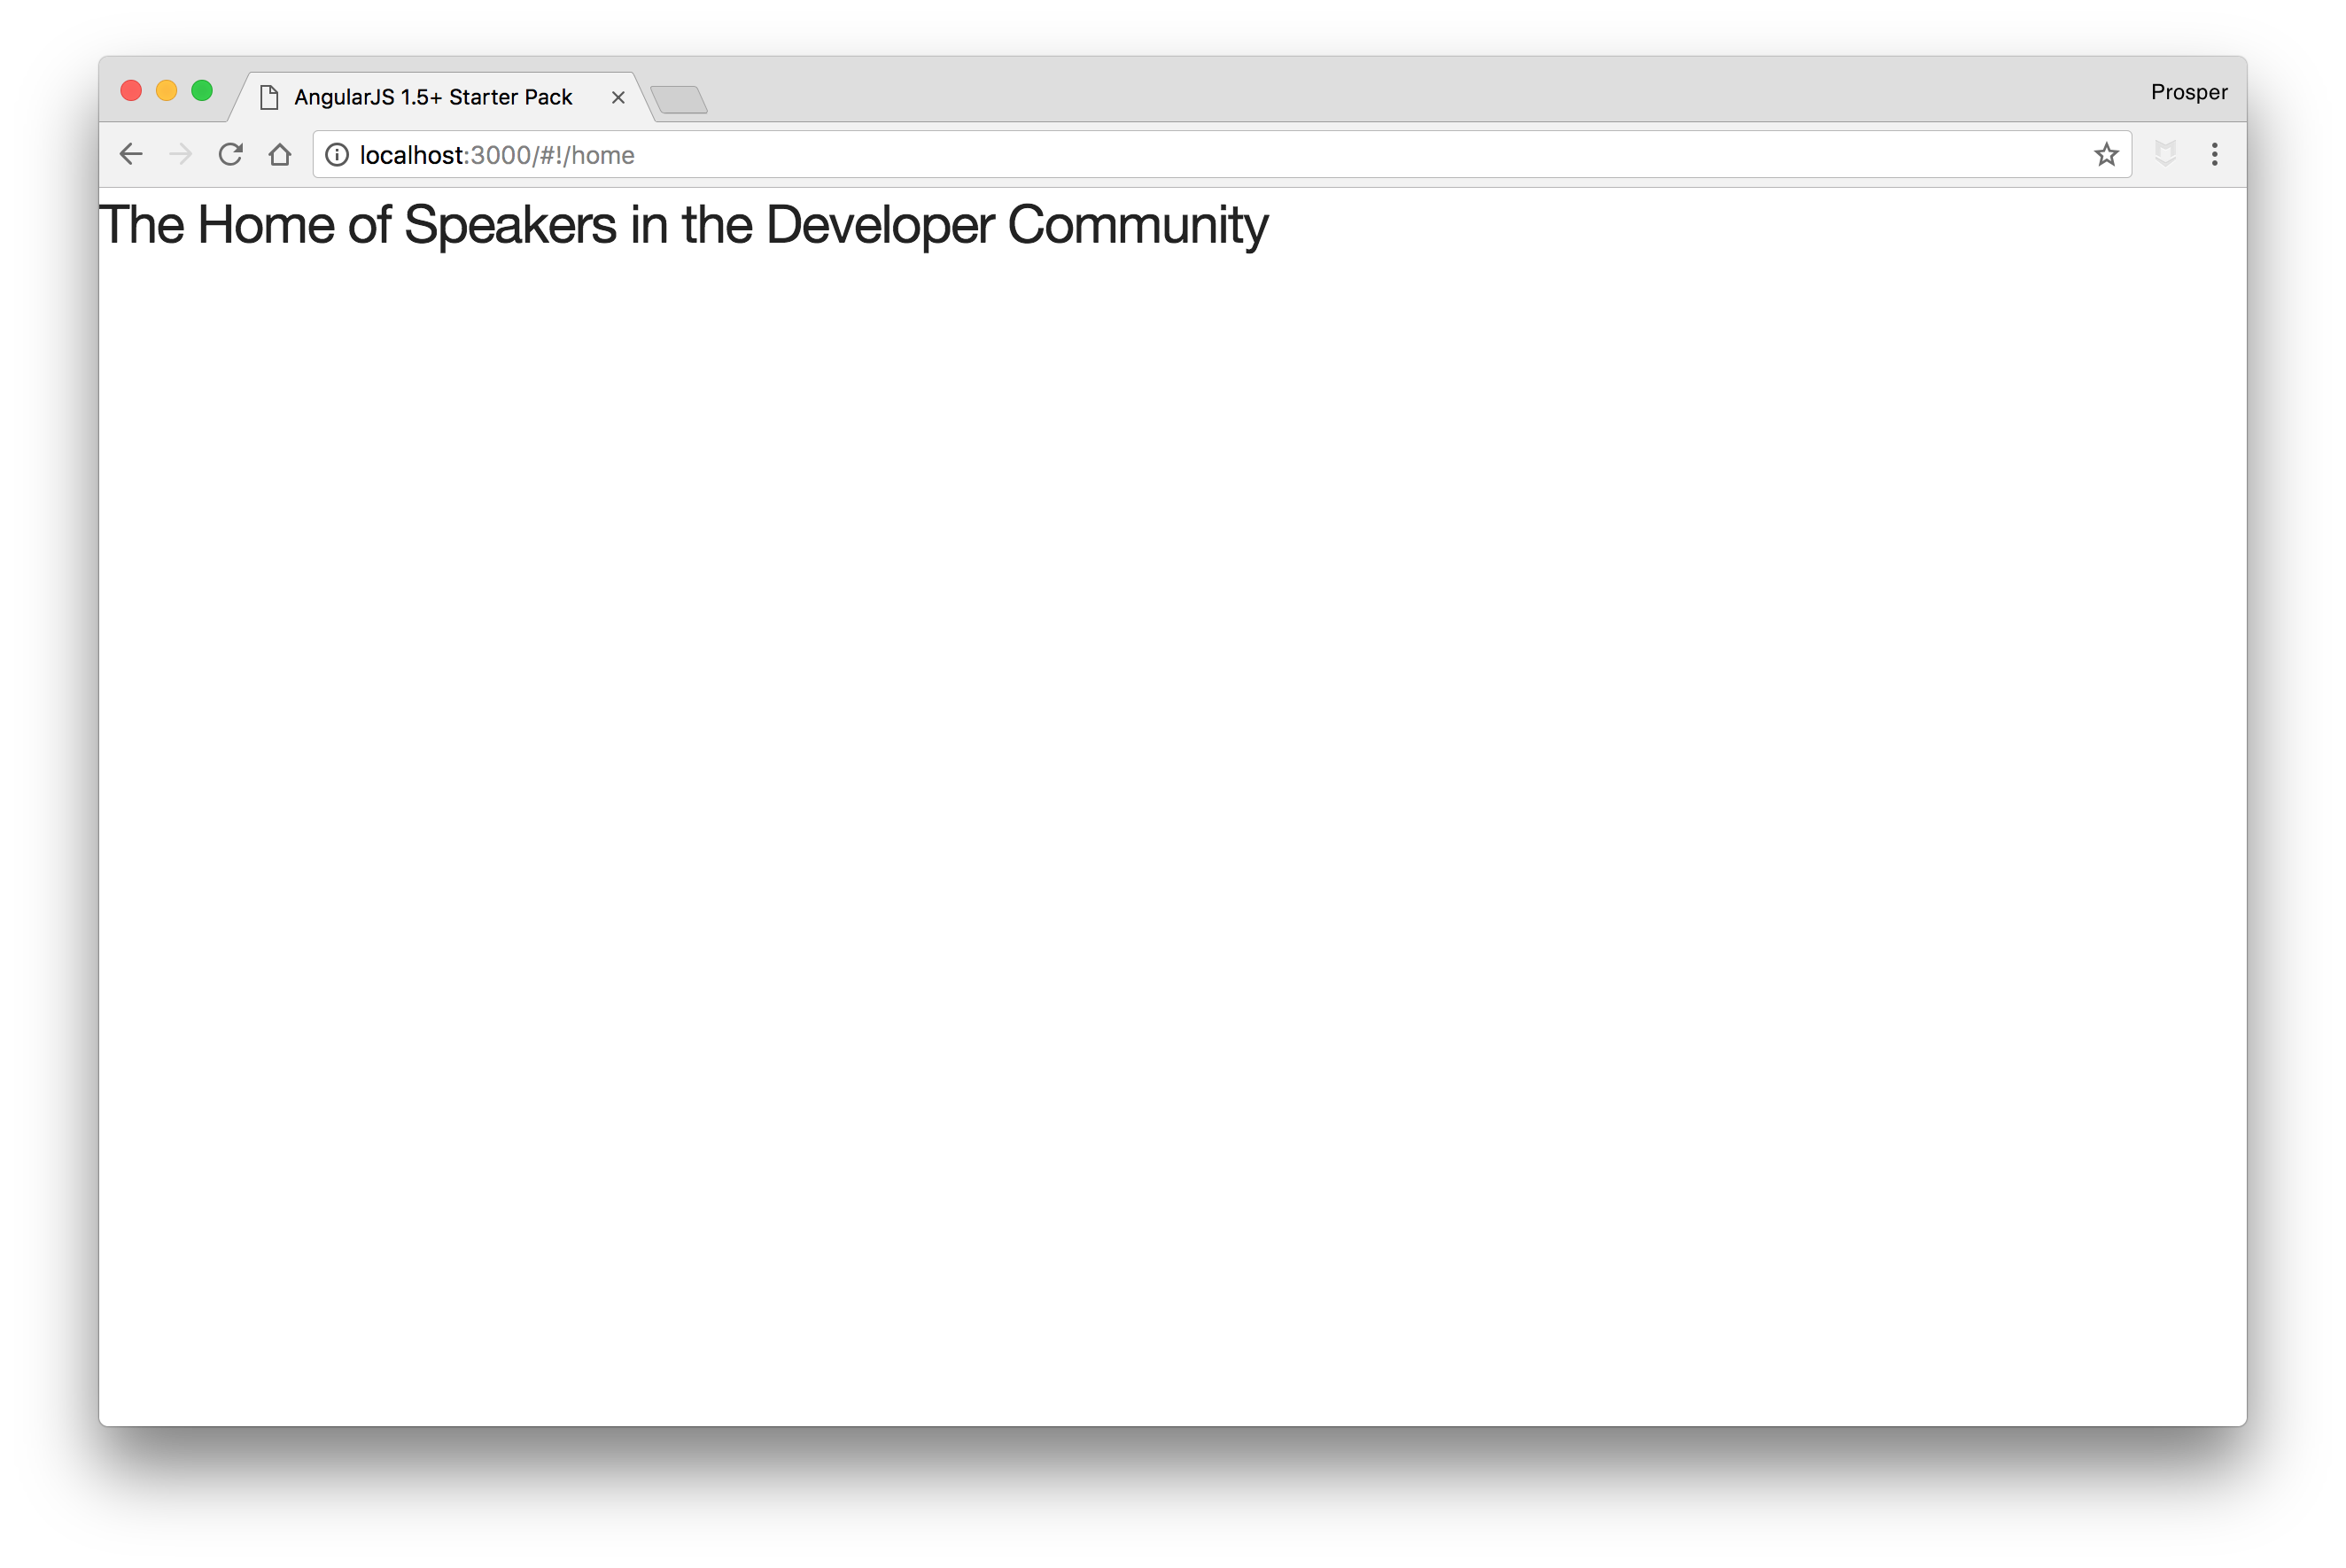
_SpeakerHang - Home Index_
### Craft Components - NavBar
It's time to build our components. Earlier, we visualized the SpeakerHang app and came up with four components.
* _NavBar_ component
* _Add Speaker_ container component
* _Speaker form_ component
* _Speaker list_ component
Let's start with the navbar component.
Run the following command in your terminal to generate a component:
```bash
gulp component --name navbar
```
This command will generate a new component, `navbar`, inside the `components` folder with the following files:
* _navar.component.js_ - The navbar component itself
* _navbar.html_ - The navbar template
* _navbar.scss_ - The style for the navbar template
* _navbar.js_ - The navbar module that ties everything together
* _navbar.controller.js_ - The navbar controller that defines the business logic
* _navbar.spec.js_ - The navbar test file
The first step is to add meat to the navbar template. Replace the content with this:
``` html
```
Next, head over to `app.js` to import the navbar component.
_app/app.js_
```js
...
import NavBarComponent from './components/navbar/navbar';
...
angular.module('app', [
uiRouter,
NavBarComponent
])
.config(.....)
.component('app', AppComponent);
```
We have imported the navbar component and registered it with our app's module. However, we need to take one more step to make sure it reflects on the page.
Call the `navbar` component in `app/app.html`.
_app/app.html_
``` html
```
Your app should show the navbar now. Awesome!!!
### Speaker List Component
Let's create the speaker list component. Run the component creation command in the terminal like so:
```bash
gulp component --name speakerlist
```
Now, we have the `speakerlist` components folder. Take a brief pause here.
The speaker list component should list all the speakers on the platform. The question now is, *Where are the speakers?*, *Where will that data come from?*
In a production app, the data will be made available to our app from an API. In the absence of an API, we'll simply make use of an array and use a service.
Let's create the speaker service. Create a new folder, `services`, inside the `app` directory. And create a `speakerservice.js` file inside the `services` folder.
Add code to the file like so:
_services/speakerservice.js_
```js
function SpeakerService() {
"ngInject";
const speakers = [
{
id: 99,
name: "Prosper Otemuyiwa",
favConf: "Ruby Conf 2016",
noOfConf: 13,
favProgrammingQuote: "A C program is like a fast dance on a newly waxed dance floor by people carrying razors."
},
{
id: 100,
name: "Funsho Okubanjo",
favConf: "Laracon 2016",
noOfConf: 7,
favProgrammingQuote: "Don’t worry if it doesn’t work right. If everything did, you’d be out of a job."
},
{
id: 101,
name: "Chilezie Unachukwu",
favConf: "ReactRally 2017",
noOfConf: 19,
favProgrammingQuote: "Good design adds value faster than it adds cost"
},
{
id: 102,
name: "Damilola Adekoya",
favConf: "Codefest Russia 2012",
noOfConf: 25,
favProgrammingQuote: "Talk is cheap. Show me the code."
},
];
return {
// Will retrieve our speakers list for displaying
getAllSpeakers() {
return speakers;
},
// Creating a Speaker entry based on user input.
addASpeaker(speaker) {
const {name, favConf, noOfConf, favProgrammingQuote } = speaker;
const newSpeaker = { name, favConf, noOfConf, favProgrammingQuote };
speakers.push(tempSpeaker);
}
}
}
export default SpeakerService;
```
In the service above, we have a factory with two functions, `getAllSpeakers` responsible for returning a list of speakers and `addASpeaker`, responsible for adding a speaker.
Now, let's get back to the `speakerlist` component. Open up `app/components/speakerlist/speakerlist.component.js` file.
In the `speakerlistComponent` object, we have `bindings`, `template`, `controller`, and `restrict`.
```js
...
let speakerlistComponent = {
restrict: 'E',
bindings: {},
template,
controller
};
...
```
* `restrict` - This means the component should be restricted to an element.
* `bindings` - This helps specify the binding option whether it's a one-way or two-way data binding. It's represented by a symbol. E.g `<` represents a one-way data binding.
* `template` - This is where we specify the view for the component.
* `controller` - This is where we specify the controller which holds the logic for the component. By default, it ships with `$ctrl` as an alias that can be used in the view to invoke controller methods.
* `controllerAs`- This allows developers to specify their alias, e.g `vm` as commonly used in a lot of apps.
Update the `speakerlistComponent` object to have a `controllerAs` key and value like so:
```js
...
let speakerlistComponent = {
restrict: 'E',
bindings: {},
template,
controller,
controllerAs: 'vm'
};
...
```
Open up `app/components/speakerlist/speakerlist.controller.js` and modify it like so:
```js
class SpeakerlistController {
constructor(SpeakerService) {
"ngInject";
// This will keep the service instance across our class
this.SpeakerService = SpeakerService;
this.speakers = [];
}
// This method will be called each time the component will be initialised,
// In our case, it will be called for every page route change.
$onInit() {
this.speakers = this.SpeakerService.getAllSpeakers();
}
}
export default SpeakerlistController;
```
In the code above, we injected the `SpeakerService` into the controller and assigned it to an instance variable.
The `$onInit()` lifecycle hook was invoked to initialize the speakers' array with the list of speakers from the speaker service. The `$onInit()` hook is good for a controller's initialization code.
Update the speaker view, `speakerlist.html`, to have the necessary code to display the list of speakers.
_speakerlist.html_
``` html
```
Now, we need to import the speaker list component in the `app.js` file and define a route for `/speakers`.
Open up `app/app.js`, import the `speakerlist` component and define the `/speakers` route.
```js
...
import SpeakerListComponent from './components/speakerlist/speakerlist';
...
angular.module('app', [
uiRouter,
NavBarComponent,
SpeakerListComponent
])
.config(...
...
// Speaker page to contain list of speakers
.state('speakers', {
url: '/speakers',
template: ''
})
...
)
.component('app', AppComponent);
```
There is one more step before we can see the list of speakers on the page. Open up `app/app.js` and import the speaker service.
```js
...
import SpeakerService from './services/SpeakerService';
...
```
Now, call the `.factory` method on the angular module and reference the speaker service like so:
_app/app.js_
```js
...
angular.module('app', [
uiRouter,
NavBarComponent,
SpeakerListComponent,
AddSpeakerComponent,
])
.config(...) => {
...
})
.component('app', AppComponent)
.factory('SpeakerService', SpeakerService);
```
**Note:** Make sure it is `speakerList`, not `speakerlist` in `.component('speakerList', speakerlistComponent)` section of the `app/components/speakerlist/speakerlist.js` file.
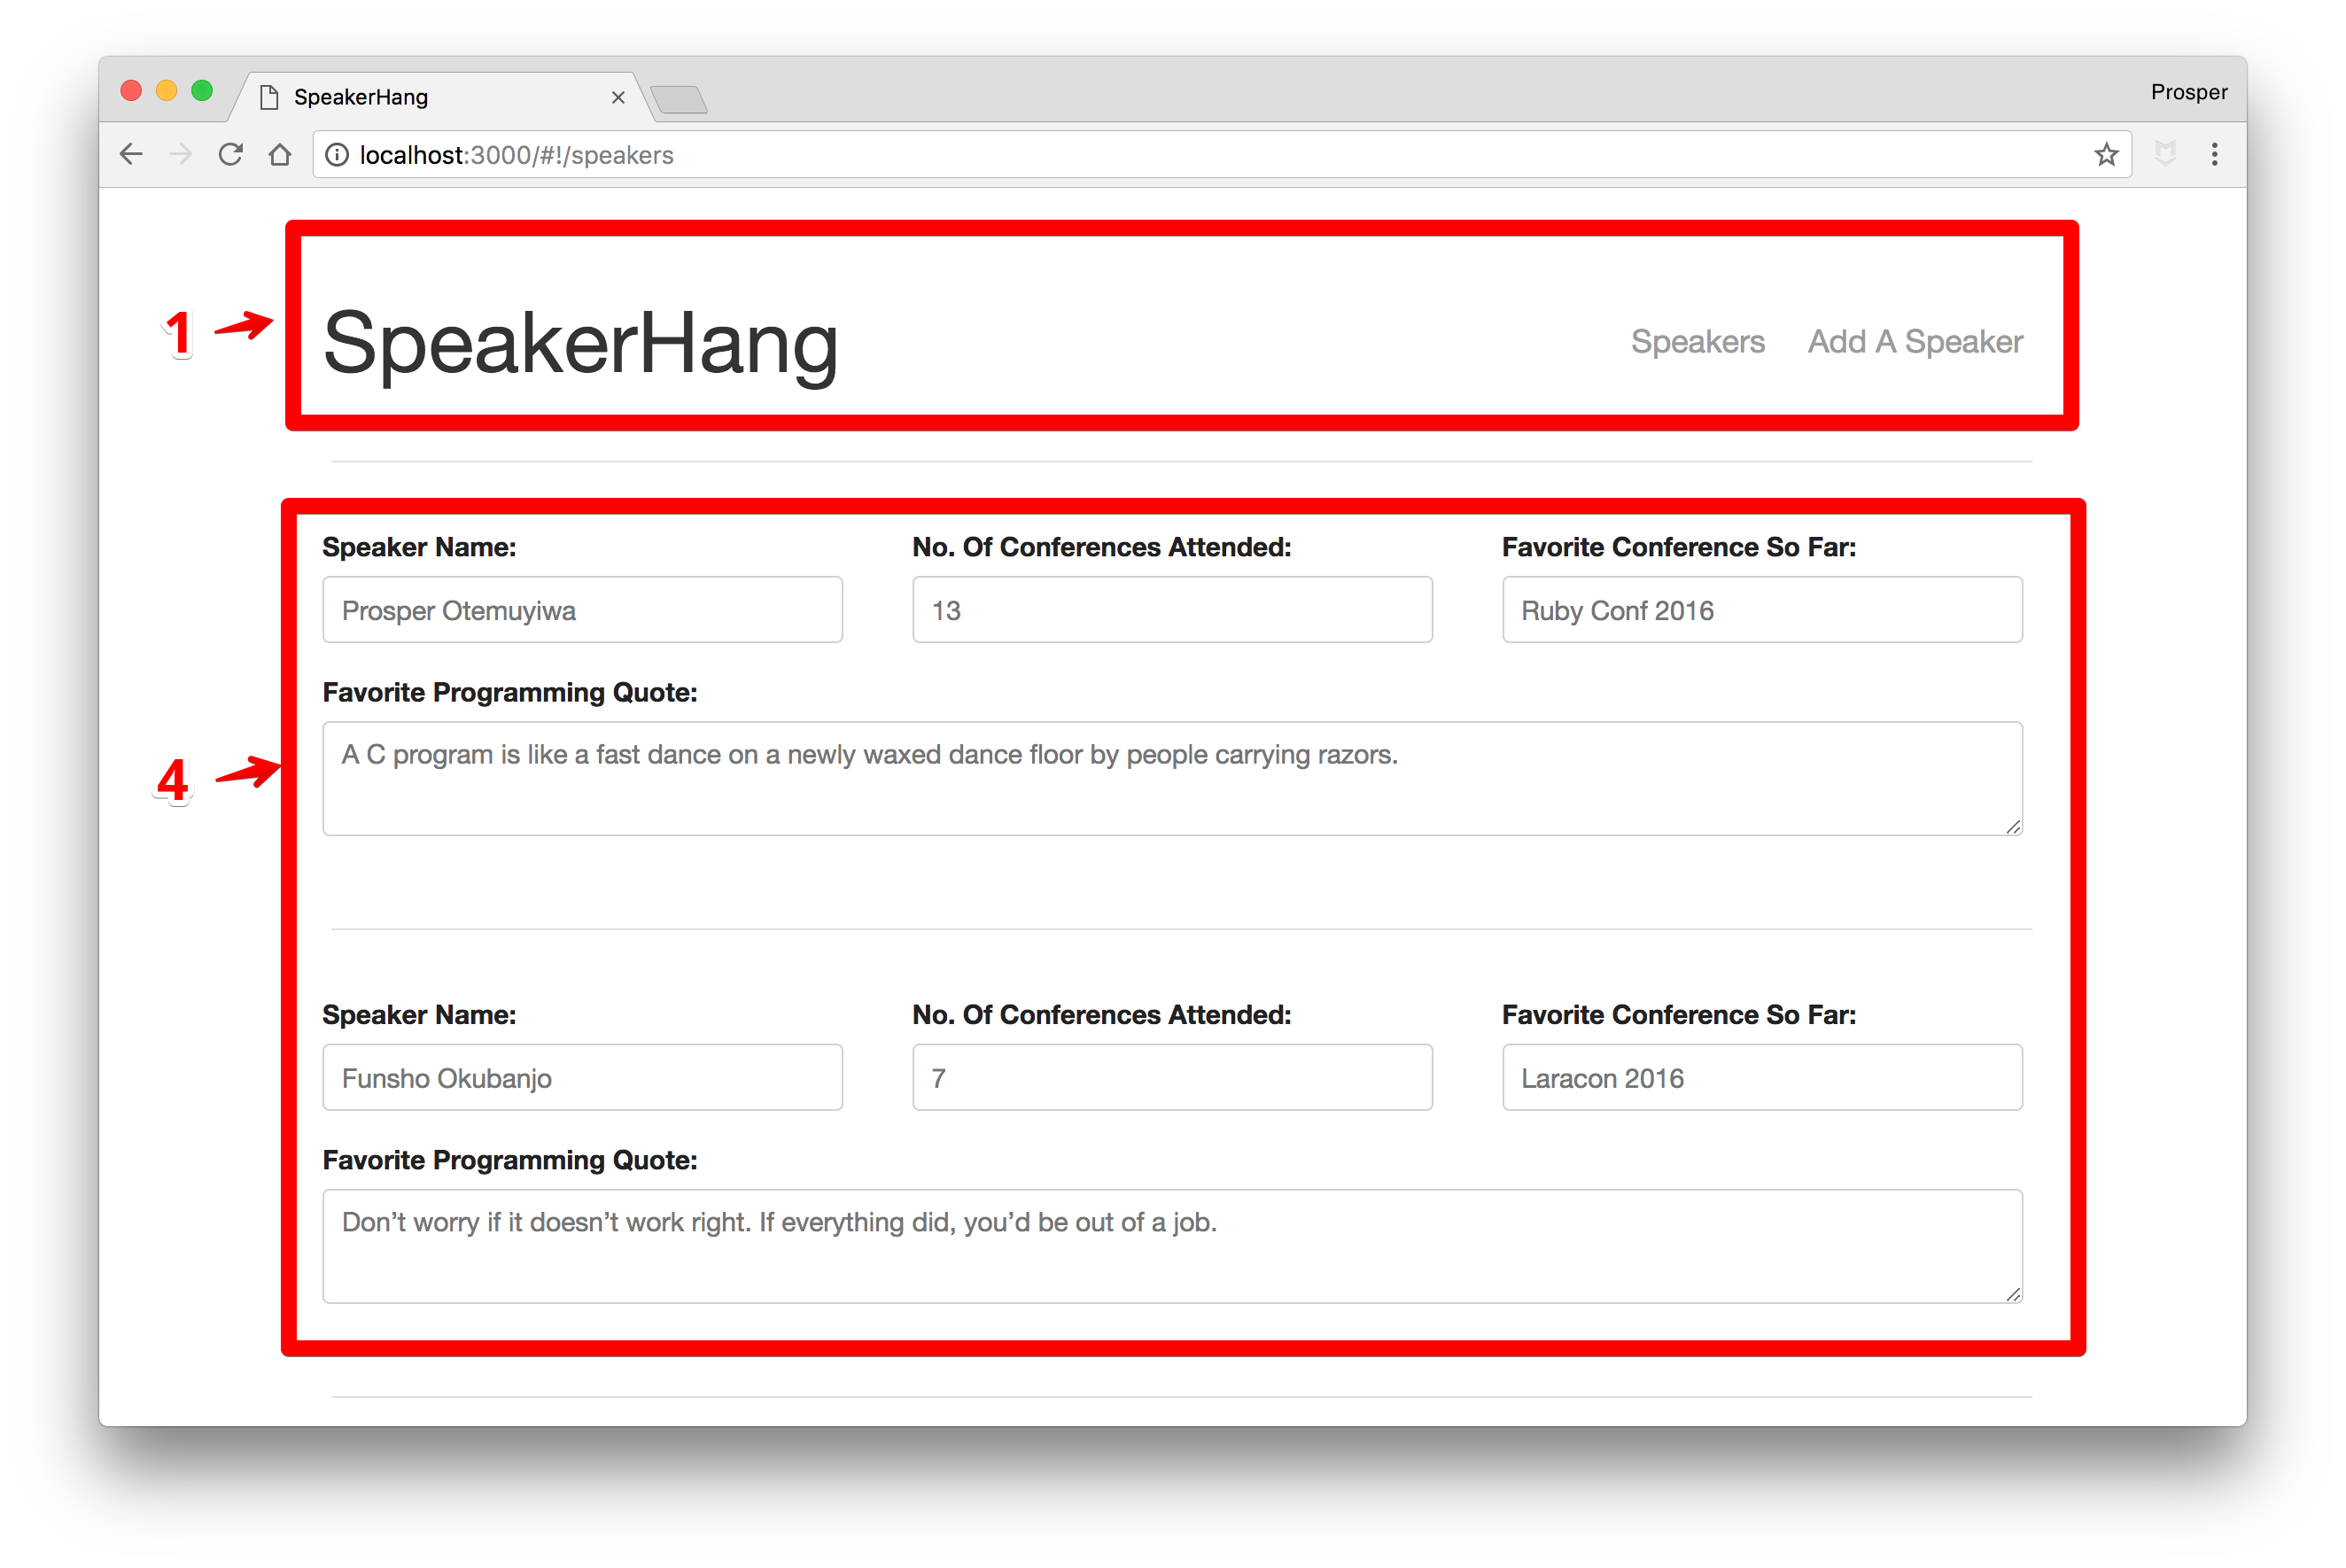
Your app should look like this now:
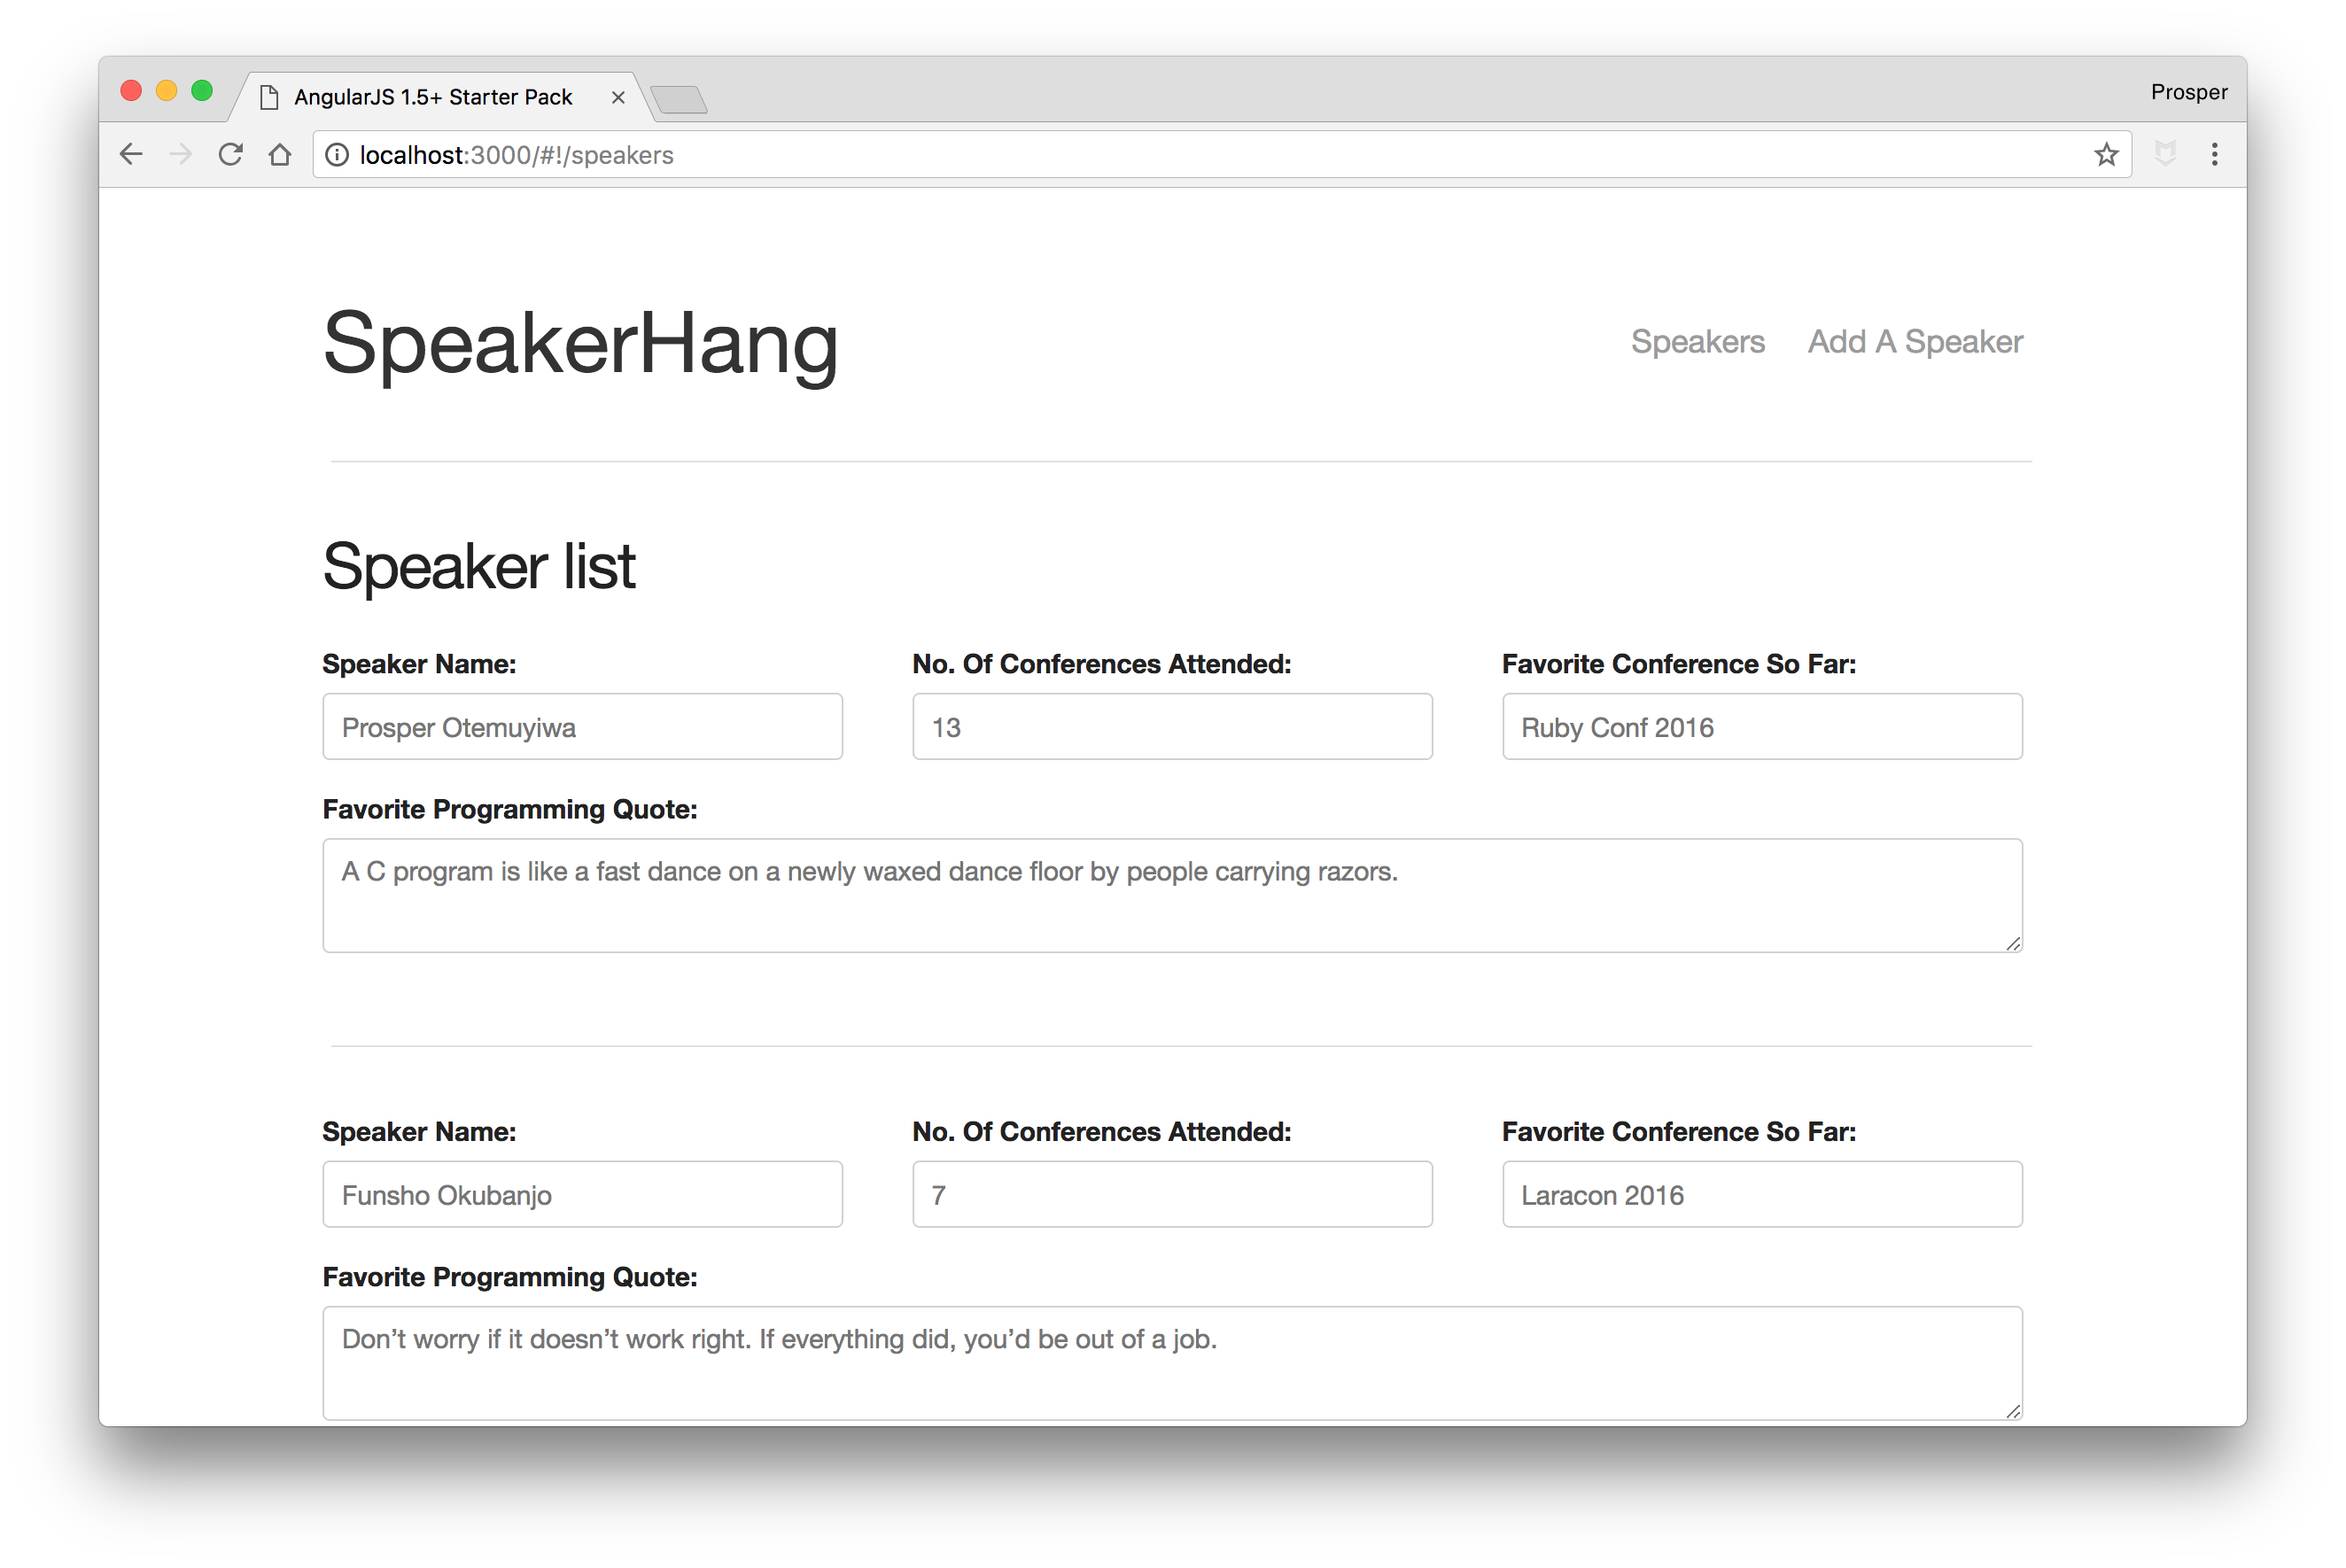
_SpeakerHang - List of speakers_
### Add Speaker Component
Let's create the add speaker component. Run the component creation command in the terminal like so:
```bash
gulp component --name addspeaker
```
The `addspeaker` component is the container for the forthcoming `speakerform` component.
Head over to `app/app.js` and import the `addspeaker` component. We'll also add the route for `/add-speaker`.
```js
...
import AddSpeakerComponent from './components/addspeaker/addspeaker';
...
angular.module('app', [
uiRouter,
NavBarComponent,
SpeakerListComponent,
AddSpeakerComponent,
])
.config(($locationProvider, $stateProvider, $urlRouterProvider) => {
...
//Create route for our goat listings creator
.state('addspeaker', {
url: '/add-speaker',
template: ''
});
// Default page for the router
$urlRouterProvider.otherwise('/home');
})
.component('app', AppComponent)
.factory('SpeakerService', SpeakerService);
```
Click on the `Add A Speaker` link on the navbar. You'll be directed to the `/addspeaker` route. Right now, it's empty but everything is working perfectly.
**Note:** We need to add a speaker form to the template of the `addspeaker` component. We'll come back to it once we are done with creating the speaker form component.
### Speaker Form Component
Let's create the speaker form component. Run the component creation command in the terminal like so:
```bash
gulp component --name speakerform
```
Open up `app/components/speakerform/speakerform.html` and add the form code to it like so:
``` html
```
In the code above, we have the `addSpeaker()` function that will be invoked when the form is submitted. The data of each input type will be submitted to the `speaker` object, made possible via `ng-model`.
Let's add the controller code to `app/components/speakerform/speakerform.component.js` file.
_speakerform.component.js_
```js
class SpeakerformController {
constructor($state, SpeakerService) {
"ngInject";
this.$state = $state;
this.SpeakerService = SpeakerService;
this.speaker = {};
}
// will handle the form submission,
// validates the required field and then adds the goat to the service.
// once added, we'll be directed to the next page.
addSpeaker() {
if(!this.speaker.name) return alert('Speaker Name is Required');
if(!this.speaker.noOfConf) return alert('No. Of Conferences Attended is required');
if(!this.speaker.favConf) return alert('Favorite Conference So Far is required');
if(!this.speaker.favProgrammingQuote) return alert('Favorite Programming Quote is required');
this.SpeakerService.addASpeaker(this.speaker);
// reset the form
this.speaker = {};
// go to home page, to see our entry
this.$state.go('speakers');
}
}
export default SpeakerformController;
```
In the code above, we injected the `state` and `SpeakerService` into the controller. The `addSpeaker()` function collects the values of the form and sends them to the `addSpeaker` function.
Quickly add the `controllerAs` key with the value of `vm` to the `speakerform` component.
_app/components/speakerform/speakerform.component.js_
```js
import template from './speakerform.html';
import controller from './speakerform.controller';
import './speakerform.scss';
let speakerformComponent = {
restrict: 'E',
bindings: {},
template,
controller,
controllerAs: 'vm'
};
export default speakerformComponent;
```
Now, go ahead and import the `speakerform` component in `addspeaker.js` like so:
```js
import angular from 'angular';
import addspeakerComponent from './addspeaker.component';
import speakerForm from '../speakerform/speakerform';
let addspeakerModule = angular.module('addspeaker', [
speakerForm
])
.component('addSpeaker', addspeakerComponent)
.name;
export default addspeakerModule;
```
**Note:** Make sure it is `speakerForm`, not `speakerform` in `.component('speakerForm', speakerformComponent)` section of the `app/components/speakerform/speakerform.js` file.
One more thing, remember the `app/components/addspeaker/addspeaker.html` file? It's time to add the `` component to it.
_app/components/addspeaker/addspeaker.html_
``` html
```
Try to add a speaker now. The speaker form works and it adds a new speaker to the list of speakers. Yaay!!!
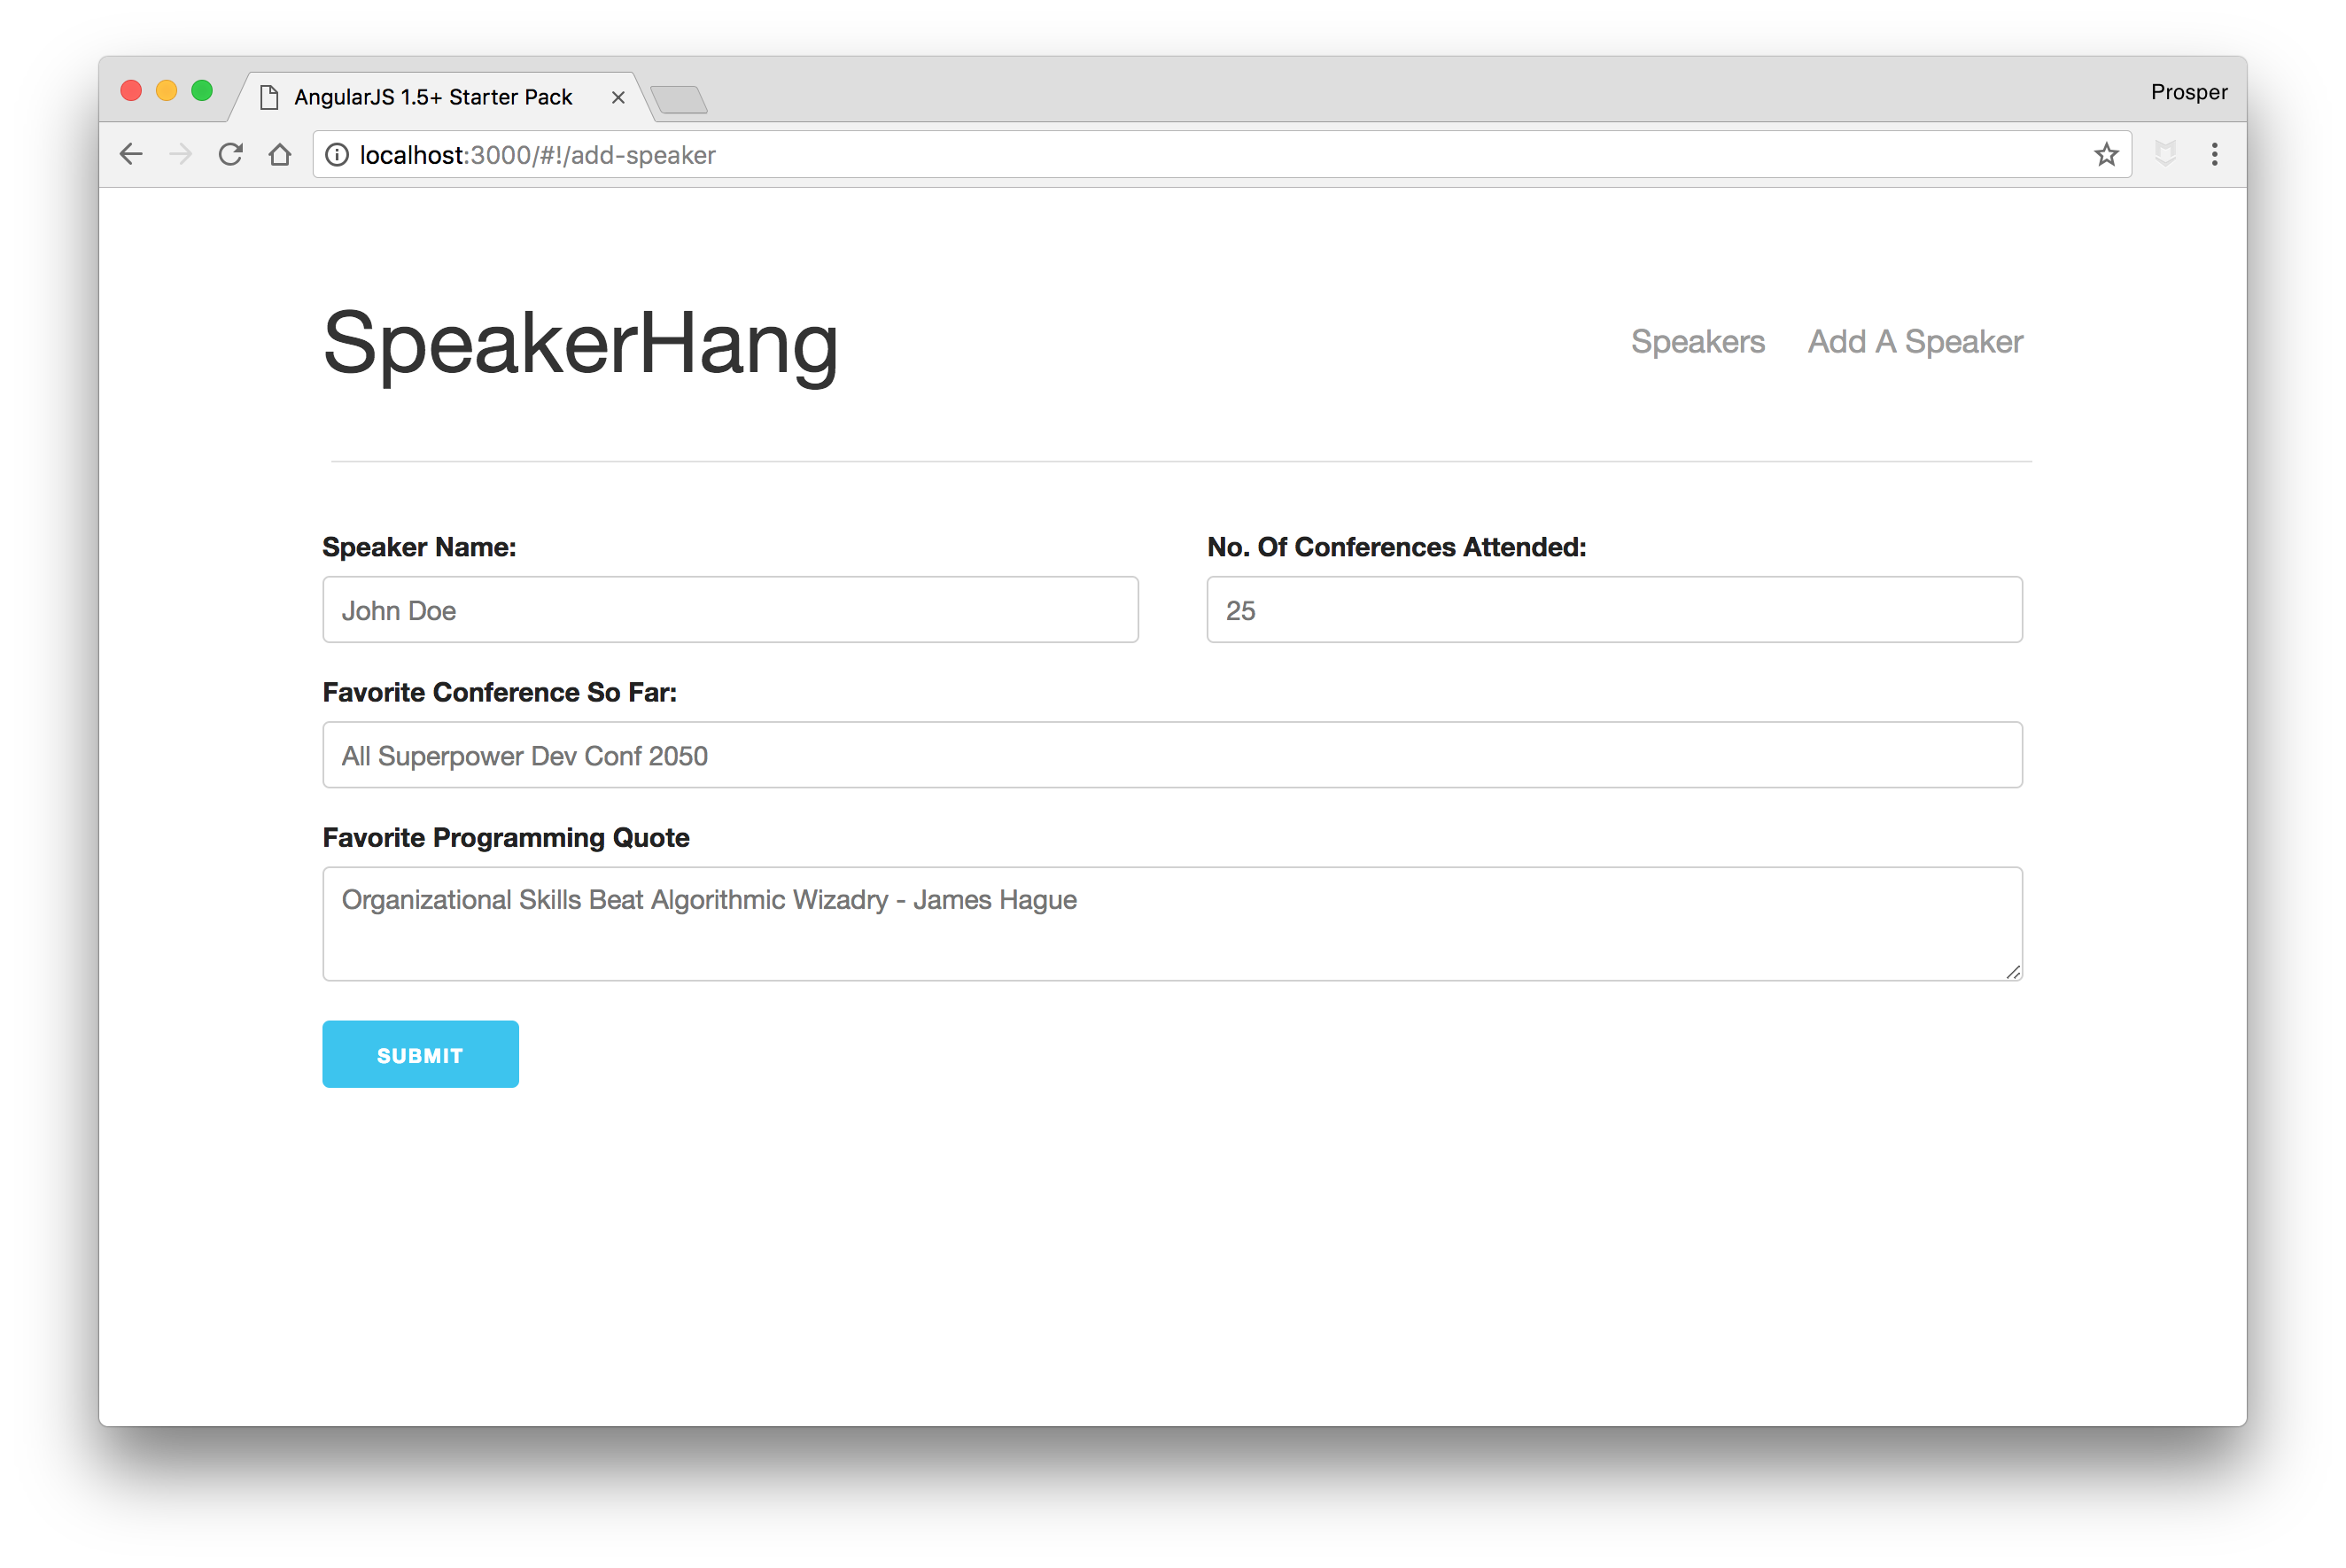
_SpeakerHang - Add Speaker_
## Adding Authentication to Your AngularJS App
## Conclusion
**AngularJS 1.5+** provides a component-based architecture to build apps similar to React and Angular. In this tutorial, you've learned how to build and secure an app using the `.component` method and the new APIs included in the framework.
In addition, Auth0 can help secure your **AngularJS** apps with more than just username-password authentication. It provides features like [multifactor auth](https://auth0.com/docs/multifactor-authentication), [anomaly detection](https://auth0.com/docs/anomaly-detection), [enterprise federation](https://auth0.com/docs/identityproviders), [single sign on (SSO)](https://auth0.com/docs/sso), and more. Sign up today so you can focus on building features unique to your app.
> Auth0 provides simple and easy to use [interfaces to help administrators manage user identities](https://auth0.com/user-management) including password resets, as well as creating, provisioning, blocking and deleting users.