**TL;DR:** Laravel is a great PHP framework. Currently, it is the most starred PHP project on [Github](https://github.com) and a lot of companies and people all over the world use it to build amazing applications. In this tutorial, I'll show you how easy it is to build a web application with Laravel and add authentication to it without breaking a sweat. Check out the [repo](https://github.com/auth0-blog/laravel-got) to get the code.
---
**Laravel** is a free, open-source PHP framework designed for building web applications with an expressive and elegant syntax. **Laravel** has a high level of abstraction which shields the common developer from complex inner workings. **Laravel** saves you time and effort because it ships with a lot of features out of the box. These amazing features include:
* Database Migrations
* Eloquent ORM
* Authorization and Policies
* Scheduler
* Queuing
**Laravel** makes good use of already written and well-tested components from the PHP community. It is one of the few frameworks that comes with development environments such as [Homestead](https://laravel.com/docs/5.8/homestead) and [Valet](https://laravel.com/docs/5.8/valet). The [documentation](https://laravel.com/docs) is very detailed and there is a large community based around Laravel. Some of the notable communities are [laracasts.com](https://laracasts.com/discuss), [larajobs.com](https://larajobs.com/), [laravel-news.com](https://laravel-news.com/), [laravelpodcast.com](http://www.laravelpodcast.com/) and [larachat.co](https://larachat.co/).
We'll be building a simple character listing app with **Laravel 5.8**. Our app will simply list **10 Game of Thrones characters** and their real names. Once we add authentication to the app, all logged-in users will have the privilege of knowing these celebrity characters personally.
## Let's Get Started
Laravel utilizes [Composer](http://getcomposer.org/) to manage its dependencies. So, before using Laravel, make sure you have Composer installed on your machine. We can install Laravel by issuing the Composer `create-project` command in your terminal like so: `composer create-project --prefer-dist laravel/laravel GOT` or using the `laravel` installer.
It's faster to spin up a new app using the `laravel` command like so: `laravel new GOT`. Check out the Laravel [docs](https://laravel.com/docs/5.8#installing-laravel) to learn how to set up the Laravel installer.
If you used the `laravel` installer command to create a new app, then you have to run `composer install` immediately after the previous command to install all the dependencies.
Now run the following in your terminal to launch your application:
```bash
php artisan serve
```
## Explore Directory Structure
Laravel applications follow the **Model-View-Controller** design pattern.
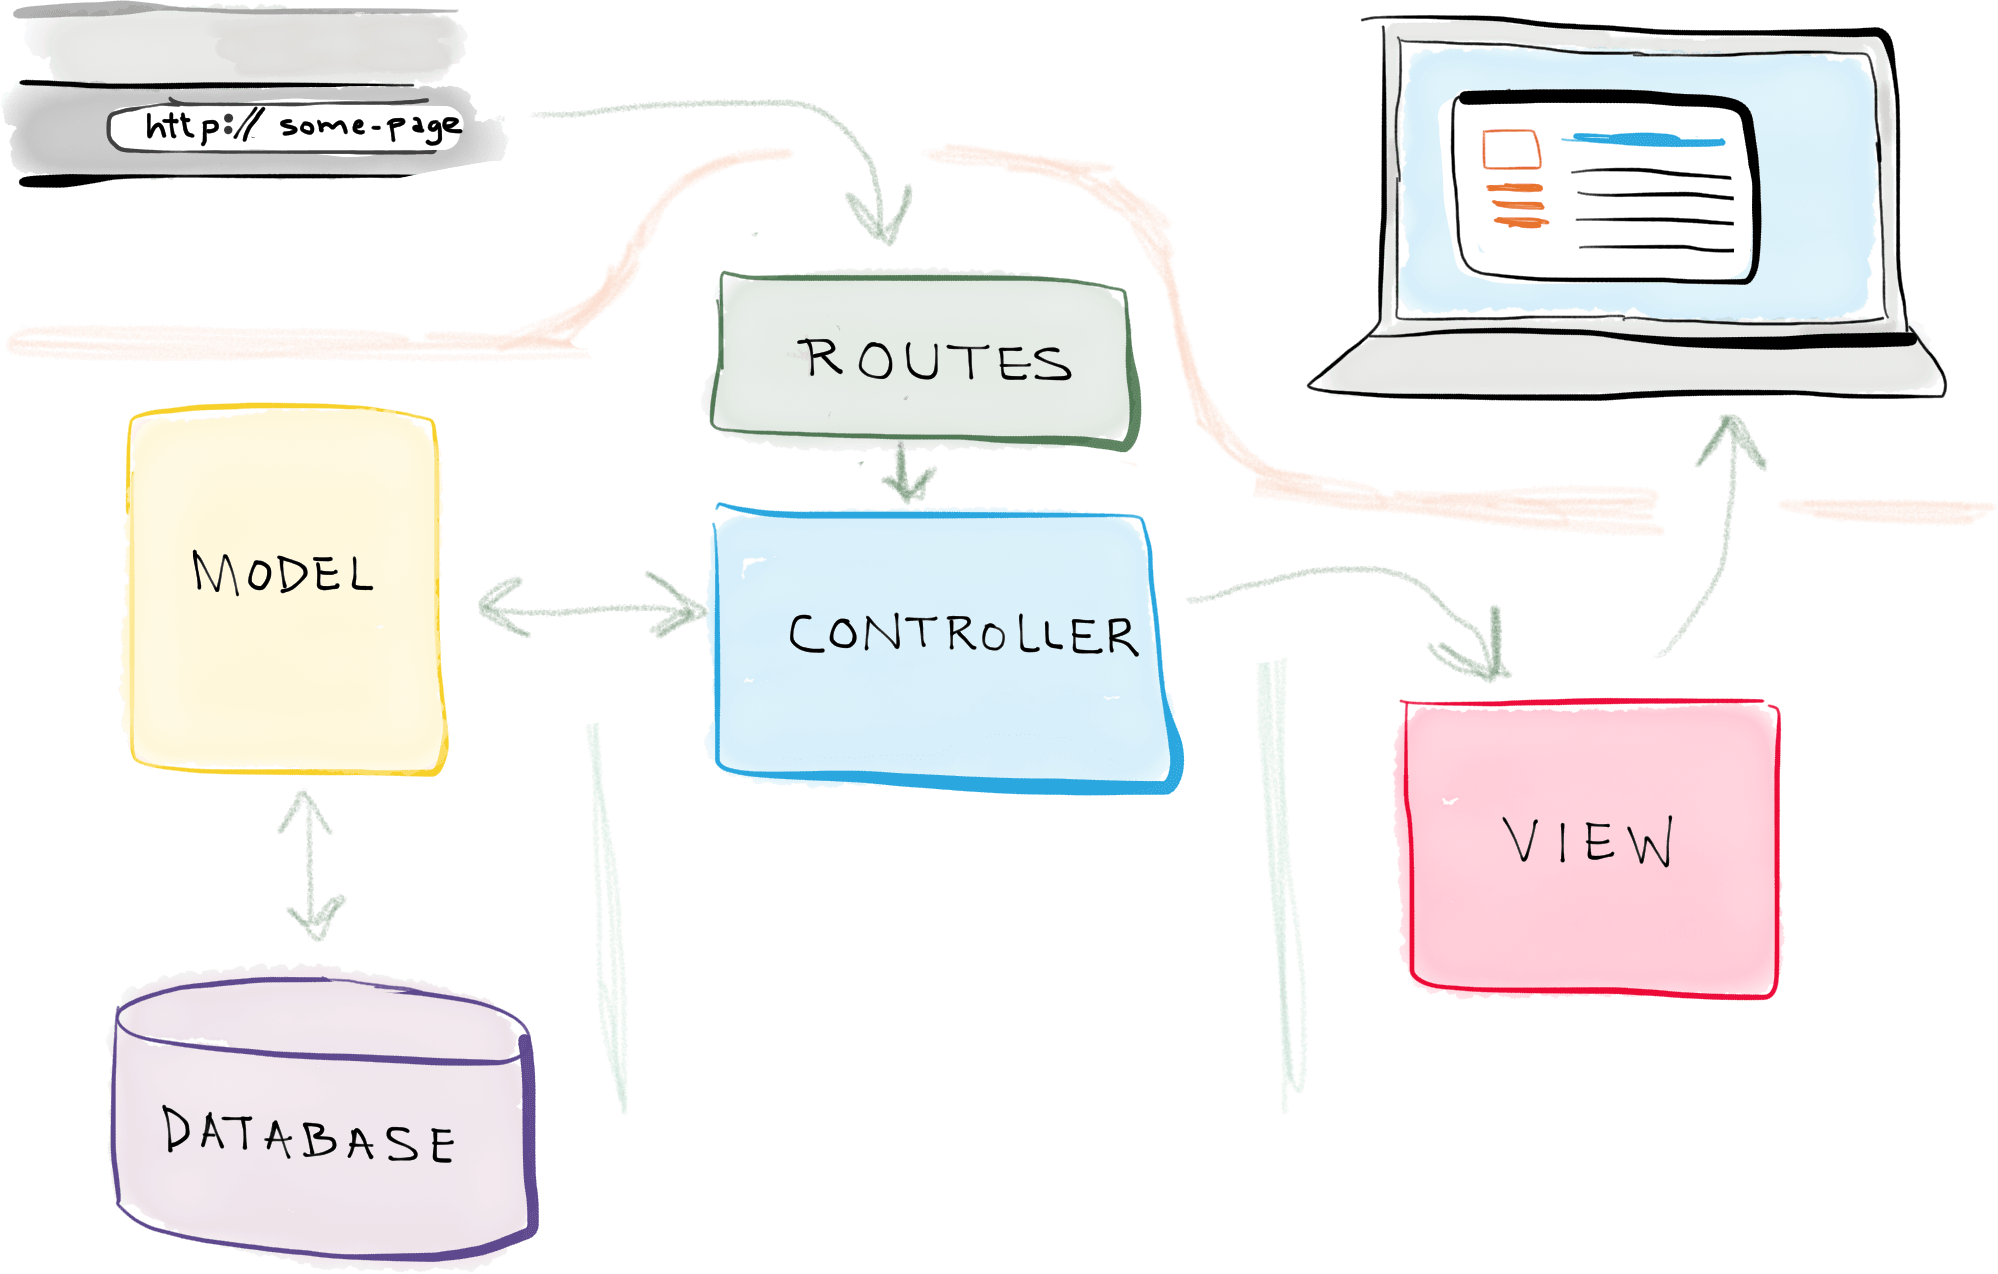
*(Source: [Self Taught Coders](https://selftaughtcoders.com))*
In a nutshell,
* **Models** query your database and return the necessary data.
* **Views** are pages that render data
* **Controllers** handle user requests, retrieve data from the models, and pass them to the views.
Read more about [MVC](http://www.tomdalling.com/blog/software-design/model-view-controller-explained/) here.
The app directory is the **meat** of your Laravel application. It houses the following directories:
* `Console` - Contains all your Artisan commands
* `Http` - Contains all your controllers, middleware, requests, and routes file
* `Providers` - Contains all your application service providers. You can read more about [Service Providers](https://laravel.com/docs/5.8/providers) here
* `Events` - Contains all your event classes
* `Exceptions` - Contains your application exception handler and custom exception classes
* `Jobs` - Contains all the jobs queued by your application
* `Listeners` - Contains all the handler classes for your events
* `Policies` - Contains the authorization policy classes for your application. Policies are used to determine if a user can perform a given action against a resource.
The other directories namely:
* `boostrap` contains your framework autoloading files and generated cache files
* `config` contains your app's configuration files
* `database` contains your database migrations and seeds
* `public` contains your assets (images, JavaScript, css, etc.)
* `resources` contains your views and localization files
* `storage` contains all your compiled Blade templates, file caches, and logs
* `tests` contains all your tests
* `vendor` contains your app dependencies
## Setting Up The Controller
Open up your terminal and in the project root directory, run the command below to create a `ListController`.
```bash
php artisan make:controller ListController
```
Open up `app/Http/Controllers/ListController.php` and configure it like so:
```php
'Emilia Clarke',
'Jon Snow' => 'Kit Harington',
'Arya Stark' => 'Maisie Williams',
'Melisandre' => 'Carice van Houten',
'Khal Drogo' => 'Jason Momoa',
'Tyrion Lannister' => 'Peter Dinklage',
'Ramsay Bolton' => 'Iwan Rheon',
'Petyr Baelish' => 'Aidan Gillen',
'Brienne of Tarth' => 'Gwendoline Christie',
'Lord Varys' => 'Conleth Hill'
];
return view('welcome')->withCharacters($characters);
}
}
```
`view('welcome')->withCharacters($characters)` indicates that we are passing the `$characters` array to a view called `welcome.blade.php`. We'll create that view later in this post.
## Setting Up The Model
Laravel models are stored by default in the root of the `app` directory. The `User` model ships with the Laravel framework. Only the `User` model is needed in this application so we won't create any additional models. However, if you want to create more models, you can simply run the command below like so:
```bash
php artisan make:model
```
where `` represents the name of the model you want to create.
## Setting Up The Routes
Open up `routes/web.php` and configure it like so:
```php
/*
|--------------------------------------------------------------------------
| Application Routes
|--------------------------------------------------------------------------
|
| Here is where you can register all of the routes for an application.
| It's a breeze. Simply tell Laravel the URIs it should respond to
| and give it the controller to call when that URI is requested.
|
*/
Route::get('/', 'ListController@show');
```
Once a request hits the `/` route, it invokes the `show` method of the `ListController` and renders the returned value in the `welcome` view. We'll configure the `welcome` view later in this post.
## Setting Up Authentication
We're going to be using Auth0 for authentication. Setting up the built-in authentication with Laravel is pretty **straightforward, but limited**. With Auth0, you'll have access to an easy-to-use dashboard, the ability to integrate social identity providers, two-factor authentication, passwordless login, and more. And luckily, it's just as easy to integrate with your Laravel application! Let's check it out.
If you don't already have an account, go ahead and sign up for a free Auth0 account here.
After you've signed up, head to the dashboard and click on "Applications". Click on "Create Application" and name the application "Laravel App" or anything you'd like. Then click on "Regular Web Application" and press create.
Next, you need to add the valid callback URLs and logout URLs in the dashboard.
Click on "Applications" and select the application you just created (or the default one). Next, click on "Settings".
Update these values as follows:
* Allowed callback URLs: `http://localhost:8000/auth0/callback`
* Logout URLs: `http://localhost:8000`
Next, go back to your terminal and install the [Auth0 PHP plugin](https://github.com/auth0/auth0-PHP) and [Auth0 Laravel plugin](https://github.com/auth0/laravel-auth0):
```bash
composer require auth0/login:"~5.0"
```
Now open the `config/app.php` file and add the Auth0 login service provider to the list of providers:
```php
// ...
'providers' => [
// ...
Auth0\Login\LoginServiceProvider::class,
];
```
Then scroll down to the `aliases` array and add the Auth0 facade:
```php
// ...
'aliases' => [
// ...
'Auth0' => Auth0\Login\Facade\Auth0::class,
];
```
Next, open `app/Providers/AppServiceProvider.php` and add the following under `register()`:
```php
// ...
class AppServiceProvider extends ServiceProvider
{
// ...
public function register()
{
$this->app->bind(
\Auth0\Login\Contract\Auth0UserRepository::class,
\Auth0\Login\Repository\Auth0UserRepository::class
);
}
}
```
You need to publish the plugin configuration. In your terminal, run:
```bash
php artisan vendor:publish
```
When it asks which file you'd like to publish, select `Auth0\Login\LoginServiceProvider`.
This will create the `config/laravel-auth0.php` file. Open this up now and you'll see it's using some Auth0 variables. These are sensitive, so you need to add them to the `.env` file.
Open up `.env` and add:
```
AUTH0_DOMAIN=your-auth0-domain.auth0.com
AUTH0_CLIENT_ID=your-client-id
AUTH0_CLIENT_SECRET=your-client-secret
```
To fill in these values, head back to [your Auth0 dashboard](https://manage.auth0.com/dashboard/), select your application, and click on "Settings".
While you have `.env` open, double-check that `APP_URL` matches your dev URL exactly, **including the port**. It should say `APP_URL=http://localhost:8000`. If not, update that now.
The last configuration step is to switch out the Laravel user driver to use Auth0.
Open up `config/auth.php`, scroll down to `providers`, and paste in:
```php
'providers' => [
'users' => [
'driver' => 'auth0',
],
],
```
Now that you have the Auth0 plugin configured, you just need to integrate it into the application.
### Integrating Auth0
Open up `routes/web.php` and add these authentication routes:
```php
Route::get( '/auth0/callback', '\Auth0\Login\Auth0Controller@callback' )->name( 'auth0-callback' );
Route::get( '/login', 'Auth\Auth0IndexController@login' )->name( 'login' );
Route::get( '/logout', 'Auth\Auth0IndexController@logout' )->name( 'logout' )->middleware('auth');
```
These routes will handle the login, logout, and redirect to Auth0 during login. Now you need to create that `Auth0IndexController`.
In your terminal, run:
```bash
php artisan make:controller Auth/Auth0IndexController
```
Open up `app/Http/Controllers/Auth/Auth0IndexController.php` and replace it with:
```php
'openid profile email',
];
return \App::make('auth0')->login(null, null, $authorize_params);
}
/**
* Log out of Auth0
*
* @return mixed
*/
public function logout()
{
\Auth::logout();
$logoutUrl = sprintf(
'https://%s/v2/logout?client_id=%s&returnTo=%s',
env('AUTH0_DOMAIN'),
env('AUTH0_CLIENT_ID'),
env('APP_URL'));
return \Redirect::intended($logoutUrl);
}
}
```
The scopes being requested in the `login()` function are: `openid`, `profile`, and `email`.
There is also a `logout()` function that will clear all session data to log the user out.
Now it's time to wire up the buttons so that users can sign in and out.
Open up your `welcome.blade.php` and configure it like so:
``` html
Laravel
```
Here, we are looping through the `$characters` array data passed from the `ListController` for appropriate rendering in the `welcome` view.
`Auth::user()` — You can check if a user is authenticated or not via this method from the `Auth` Facade. It returns true if a user is logged-in and false if a user is not. Check [here](https://laravel.com/docs/5.8/facades) for more about how Facades work in Laravel.
`Auth::guest()` — This does the opposite of `Auth::user()`. It returns true if a user is not logged in and false if a user is logged in. Check [here](https://laravel.com/api/5.8/Illuminate/Auth/Guard.html) to see all the methods you can call on the `Auth` Facade.
Now that we have all the routes and views setup, your application should look like this:
_Landing Page_

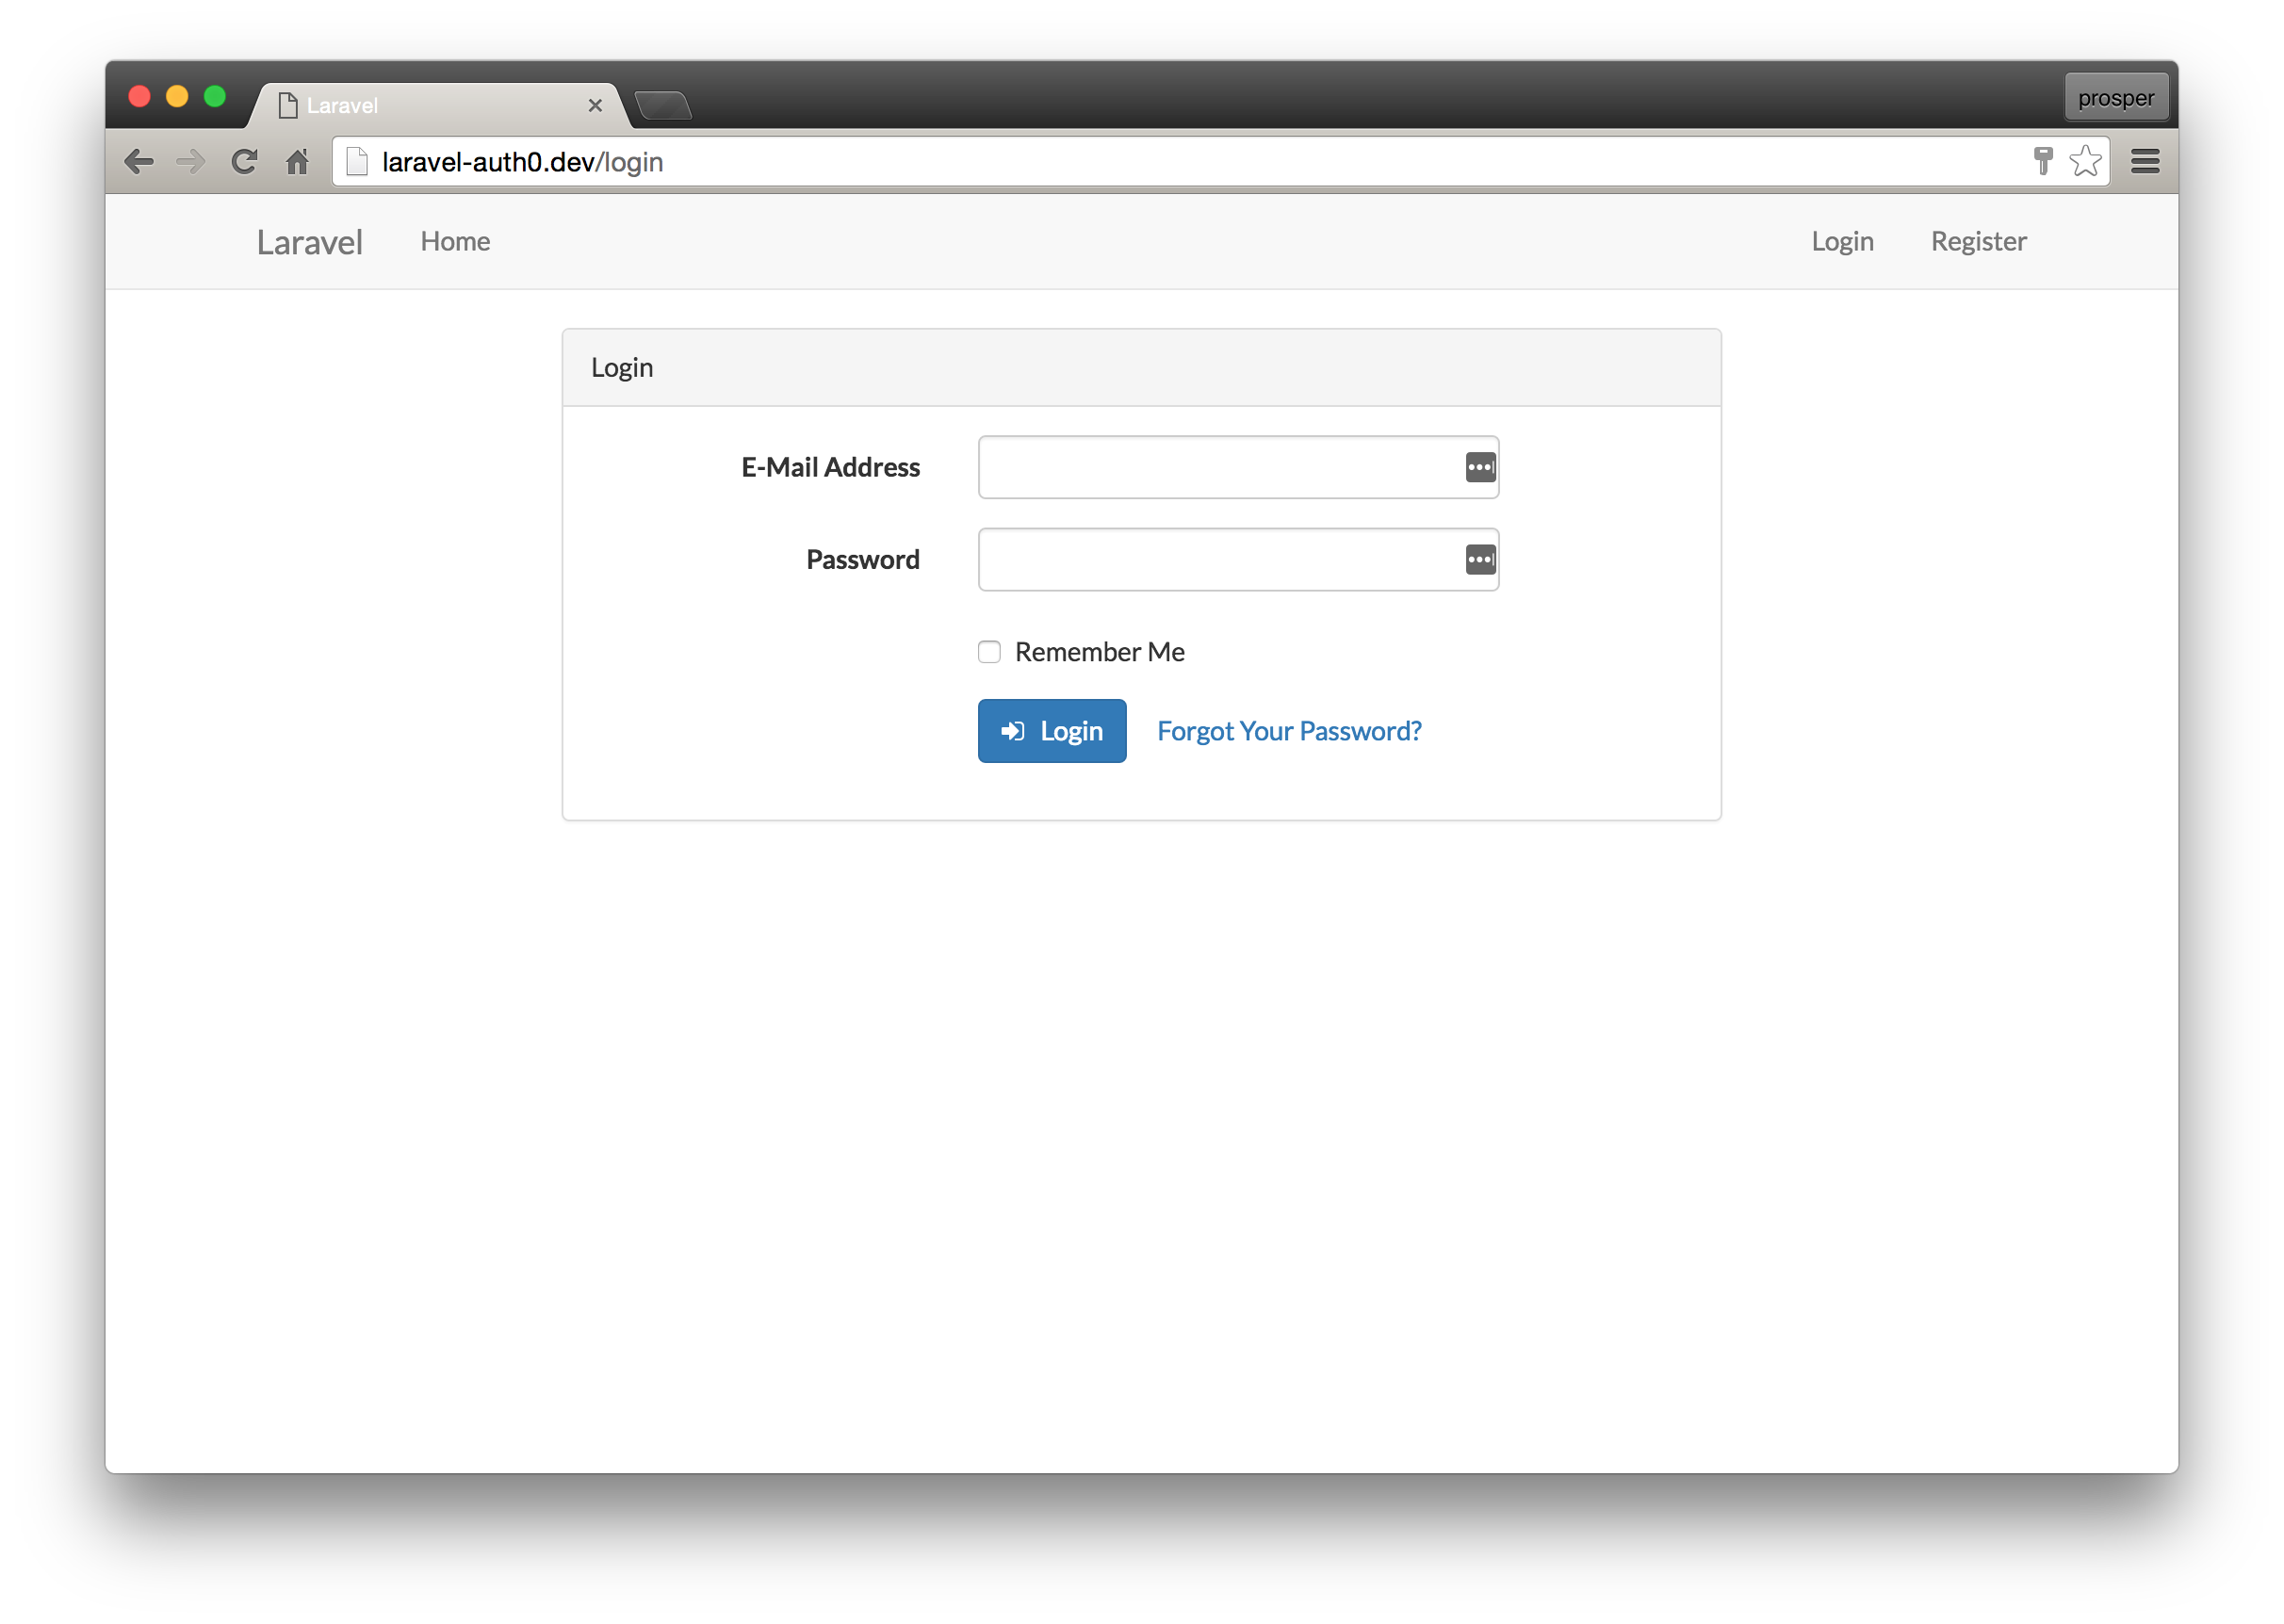
If you were to implement authentication on your own, you might have a login and register page like this:
_Login Page_
_Register Page_
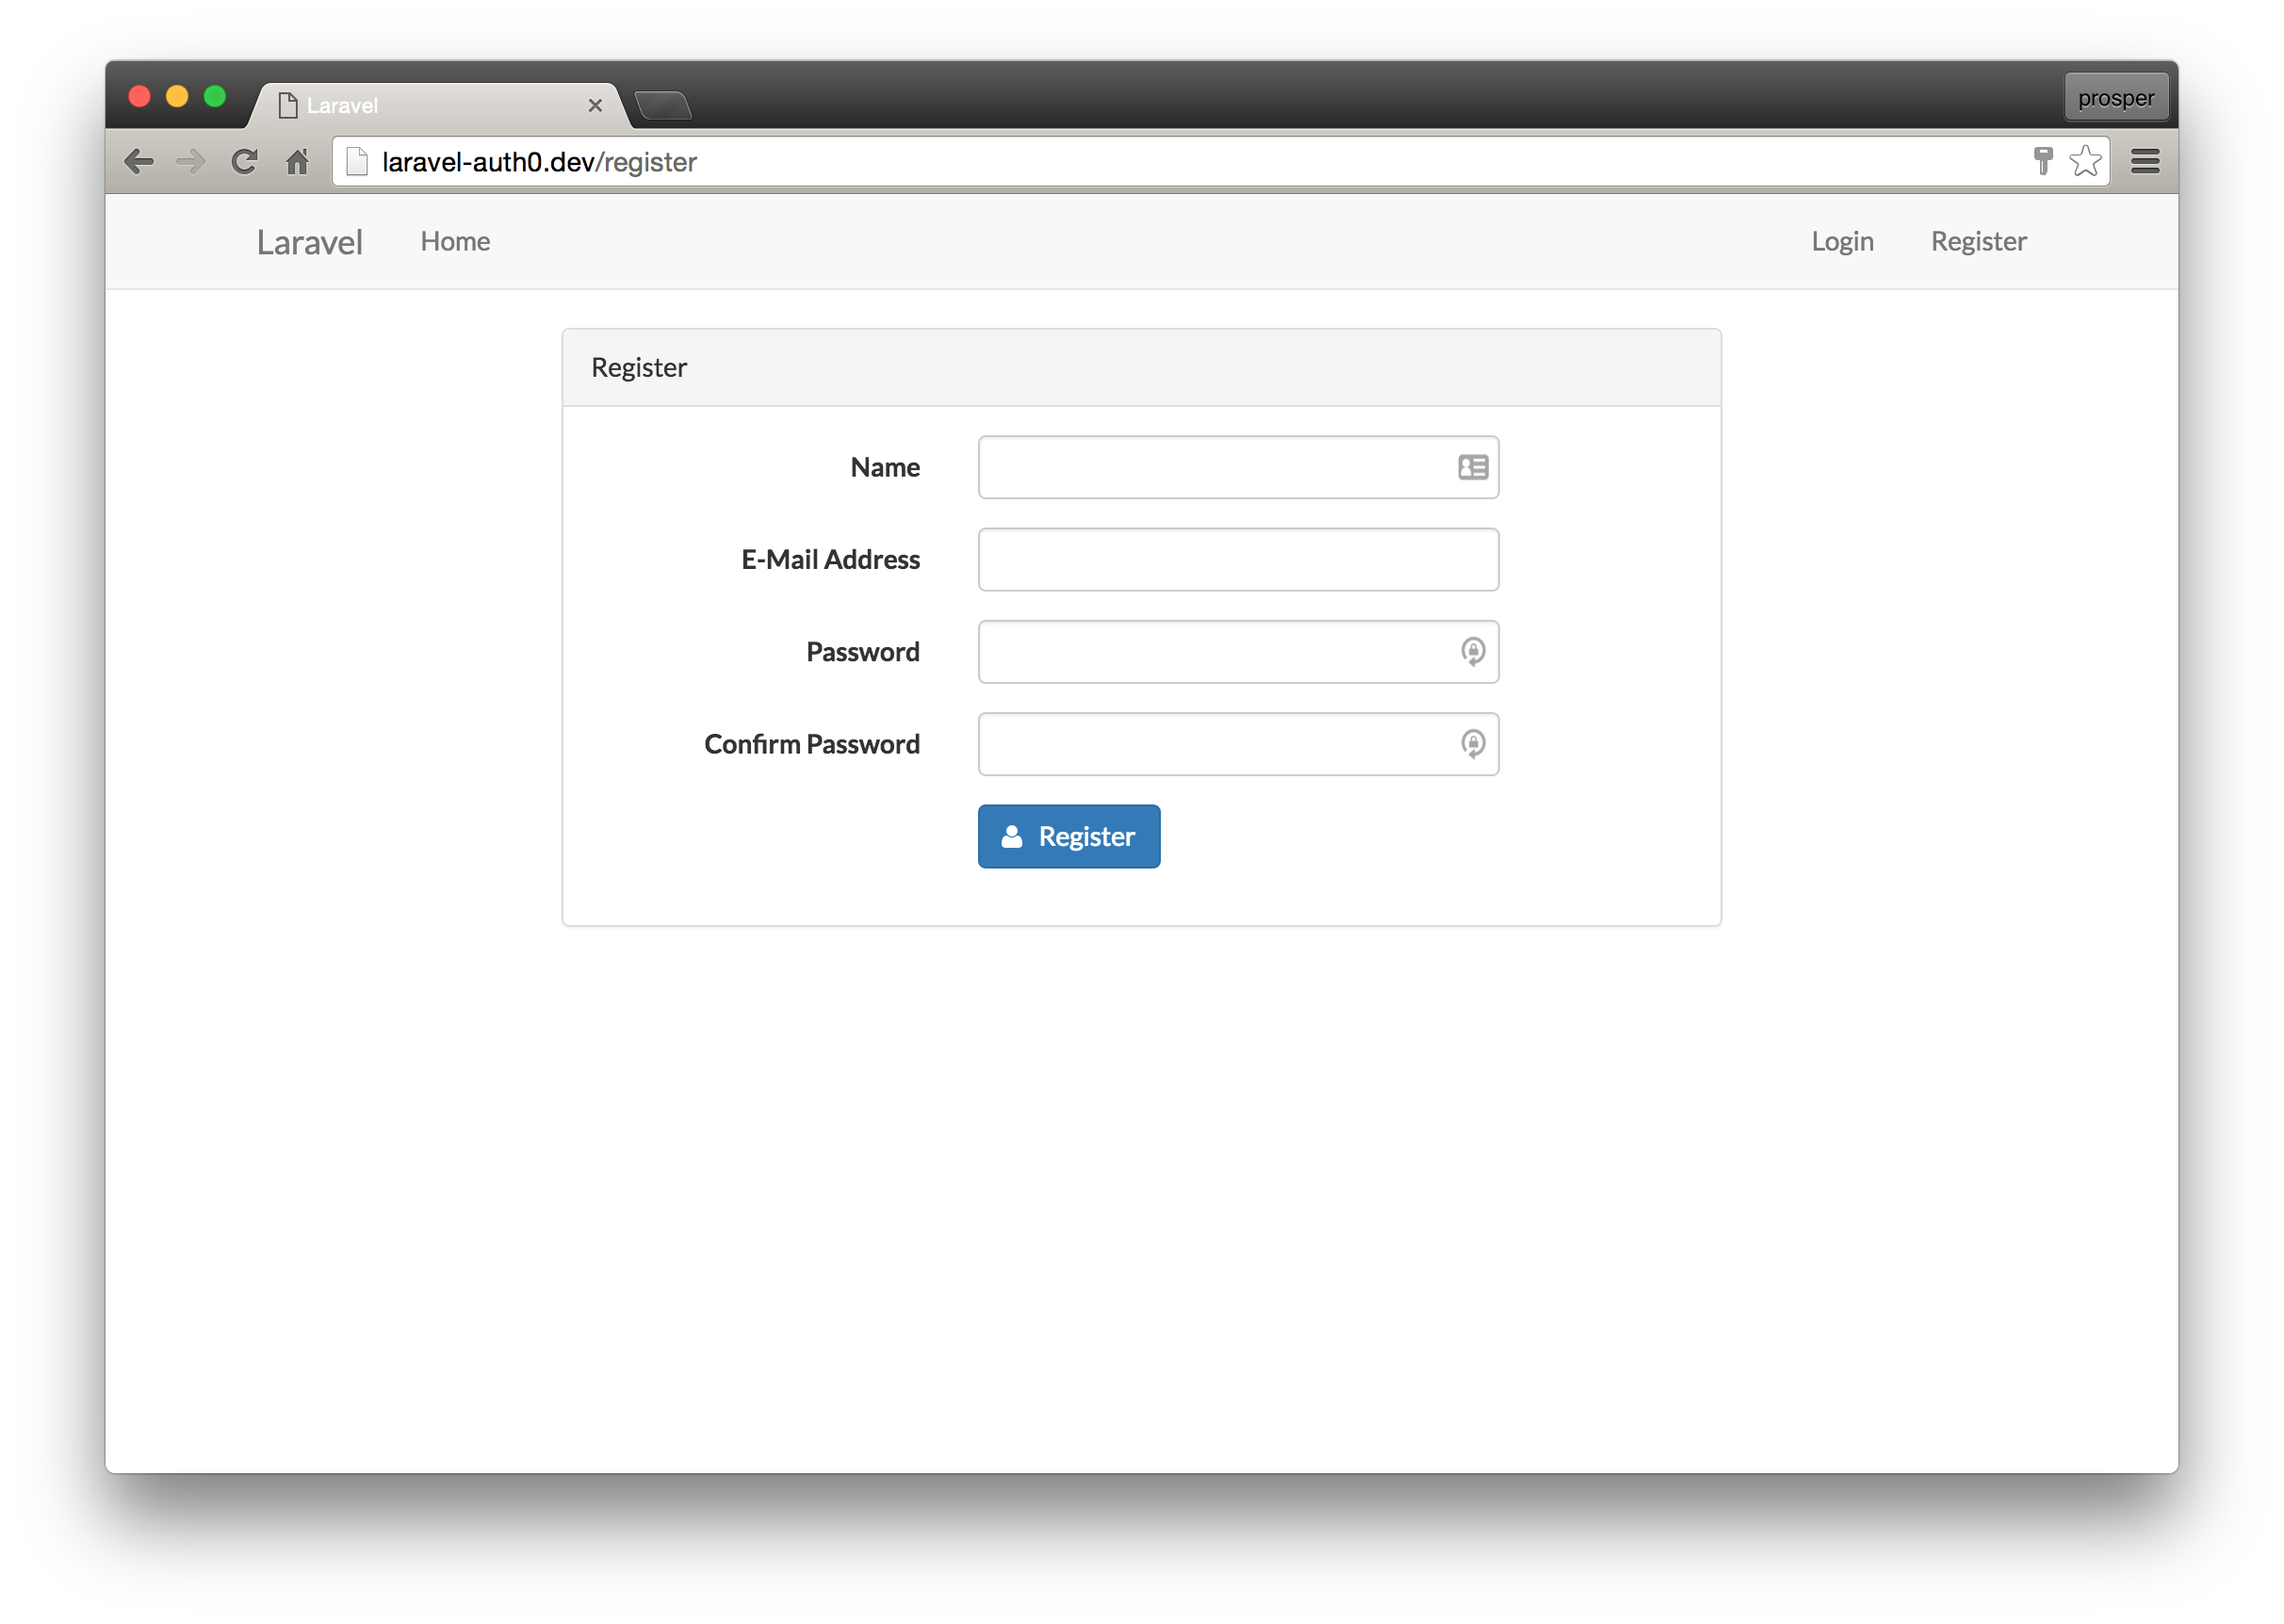
Because we're using Auth0 for authentication, our application will redirect users to the Auth0 login page, so you don't have to create these on your own!
## Using the Auth Middleware
Middlewares provide a convenient mechanism for filtering HTTP requests entering your application. For example, **Laravel** includes a middleware that verifies the user of your application is authenticated. If the user is not authenticated, the middleware will redirect the user to the login screen. However, if the user is authenticated, the middleware will allow the request to proceed further. The `app/Http/Middleware` directory contains several middleware.
Let's check out how the `auth` middleware works.
Add a new route to your `routes/web.php` file like so:
```php
Route::get('/got', [
'middleware' => ['auth'],
'uses' => function () {
echo "You are allowed to view this page!";
}]);
```
If you're still logged in, head to [http://localhost:8000/got](http://localhost:8000/got) and you should get the message "You are allowed to view this page!". Now, log out, then try to access that route and you will be redirected back to Auth0 to sign in.
The Laravel `auth` middleware intercepted the request, checked if the user was logged-in, discovered that the user was not logged-in, then redirected the user back to the `login` route, which sent them to Auth0.
## Wrapping Up
Well done! You have just built your first app with Laravel. Laravel is an awesome framework to work with. It focuses on simplicity, clarity and getting work done. As we saw in this tutorial, you can easily activate the built-in authentication to your Laravel applications. If you find yourself needing more, you can also integrate Auth0 just as easily.
Please, let me know if you have any questions or observations in the comment section. 😊