---
title: "Build a Website with Node.js and Express"
description: "Learn how to use Express and Pug to build a website in Node.js"
authors:
- name: "Dan Arias"
url: "https://auth0.com/blog/authors/dan-arias/"
date: "Oct 7, 2021"
category: "Developers,Tutorial,Node"
tags: ["node", "express", "pug", "server-side-rendering", "server-side", "ssr", "web-app", "css", "node-js"]
url: "https://auth0.com/blog/create-a-simple-and-stylish-node-express-app/"
---
# Build a Website with Node.js and Express
In this tutorial, you'll learn how to build a simple and clean **Node.js** server-side rendered application using the **Express** framework and **Pug** templates styled with **CSS**.

**As a bonus**, you'll learn how to streamline your Node.js development workflow by using `nodemon` to restart the server and `browser-sync` to reload the browser whenever relevant source files change.
> Look for the 🛠️️ emoji if you'd like to skim through the content while focusing on the build steps.
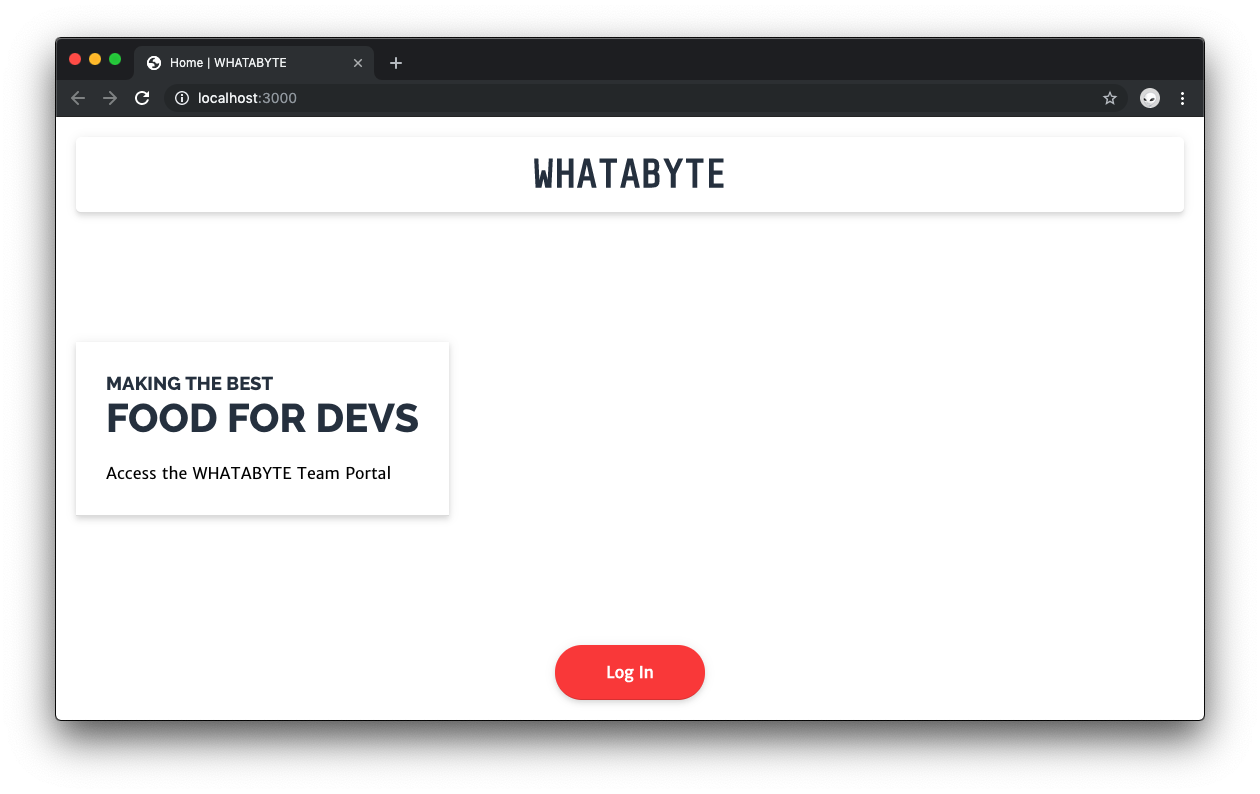
## What You Will Build
You'll build a login portal for a restaurant named WHATABYTE using server-side rendering (SSR):

We tested this tutorial using Node.js `v12.16.0` and npm `v6.13.4`. If you need to install Node.js and npm, use any of the [official Node.js installers](https://nodejs.org/en/download/) provided for your operating system.
## Bootstrap a Node.js Project
🛠️ Create a project directory named `whatabyte-portal` anywhere in your system and make it your current directory:
``` bash
mkdir whatabyte-portal
cd whatabyte-portal
```
🛠️ Execute the following command within the `whatabyte-portal` directory to initialize your Node.js project with default settings:
``` bash
npm init -y
```
🛠️ Then, create the entry point of the application, a file named `index.js`:
``` bash
touch index.js
```
### Create an npm script to run the application
You'll use [`nodemon`](https://www.npmjs.com/package/nodemon) to monitor your project source code and automatically restart your Node.js server whenever it changes.
🛠️ As such, install `nodemon` as a development dependency:
``` bash
npm i -D nodemon
```
> The command above is the equivalent of running `npm install --save-dev nodemon`.
🛠️ Create a `dev` script command in your `package.json` file to run `nodemon` and delete the `test` script:
``` json
{
"name": "whatabyte-portal",
"version": "1.0.0",
"description": "",
"main": "index.js",
"scripts": {
"dev": "nodemon ./index.js"
},
"keywords": [],
"author": "",
"license": "ISC",
"devDependencies": {
"nodemon": "^2.0.4"
}
}
```
`nodemon` gets as an argument the entry point of an application and executes it.
> Testing Node.js applications is out of the scope of this tutorial. However, it's important to implement testing to create robust, production-ready web apps.
You now have the basic structure of a Node.js application.
### Bonus: Prepare for Git Version Control
🛠️ Create a [`.gitignore`](https://www.atlassian.com/git/tutorials/saving-changes/gitignore) file under the project directory to avoid committing unnecessary or sensitive files. Populate that file with the [content of this Gist](https://gist.github.com/dan-auth0/2fb996dc8080eaae0900100bf1c3fa26) or feel free to use [gitignore.io](https://www.toptal.com/developers/gitignore) to create your own custom `.gitignore` file.
## Set Up Express with Node.js
🛠️ To use the Express framework in your application, install it as a project dependency:
``` bash
npm i express
```
🛠️ Open `index.js` and populate it with the following template that defines the core structure of an Express application:
``` javascript
// index.js
/**
* Required External Modules
*/
/**
* App Variables
*/
/**
* App Configuration
*/
/**
* Routes Definitions
*/
/**
* Server Activation
*/
```
🛠️ Now, under the `Required External Modules` section, import the `express` and `path` packages:
``` javascript
// index.js
/**
* Required External Modules
*/
const express = require("express");
const path = require("path");
```
The [`path`](https://nodejs.org/api/path.html#path_path) module provides you with utilities for working with file and directory paths. You'll use it later to create cross-platform file paths to access view templates and static assets, such as stylesheets and images.
🛠️ Next, under the `App Variables` section, add the following:
``` javascript
// index.js
/**
* App Variables
*/
const app = express();
const port = process.env.PORT || "8000";
```
Here, you execute the default function exported by the `express` module to create an instance of an Express application, which you then store in `app`. You also define the port the server will use to listen for requests: its value is `process.env.PORT`, if available, or `8000` by default.
🛠️ Under the `Routes Definitions` section, create a simple route handler for the HTTP `GET /` request that replies with a string.
``` javascript
// index.js
/**
* Routes Definitions
*/
app.get("/", (req, res) => {
res.status(200).send("WHATABYTE: Food For Devs");
});
```
> Refer to [_Express Basic Routing_](https://expressjs.com/en/starter/basic-routing.html) for more details.
🛠️ Finally, under the `Server Activation` section, start a server listening for incoming requests on `port` and to display a message to confirm it's listening:
``` javascript
/**
* Server Activation
*/
app.listen(port, () => {
console.log(`Listening to requests on http://localhost:${port}`);
});
```
### Run an Express application
🛠️ Execute `dev` to test the script and run the app:
``` bash
npm run dev
```
🛠️ Visit [`http://localhost:8000/`](http://localhost:8000/) to see the app in action. The browser should display the string "WHATABYTE: Food For Devs" on a plain page.
## Use the Pug Template Engine with Express
Modern web apps are data-driven and need views that can display data dynamically. While you can create good-looking views using static HTML templates, you can't [hydrate them with data from the server](https://stackoverflow.com/a/20787106).
Instead, you use [template engines like Pug](https://pugjs.org/api/getting-started.html) to create dynamic views that can render UI elements conditionally and that you can hydrate with values from the server. What makes Pug stand out from other offerings is its concise syntax and its support for template inheritance to compose pages easily.
🛠️ To use Pug, start by installing the `pug` package using another terminal window:
``` bash
npm i pug
```
To optimize page composition through templates, you'll use [template inheritance](https://pugjs.org/language/inheritance.html) to extend a core layout template that encapsulates the top-level HTML structure of a page.
🛠️ As such, create a directory named `views` under the project directory to store all of your templates.
``` bash
mkdir views
```
Under this new directory, create a `layout.pug` file:
``` bash
touch views/layout.pug
```
Populate `views/layout.pug` with the following content:
``` pug
block variables
doctype html
html
head
meta(charset="utf-8")
link(rel="shortcut icon", href="/favicon.ico")
meta(name="viewport", content="width=device-width, initial-scale=1, shrink-to-fit=no")
meta(name="theme-color", content="#000000")
title #{title} | WHATABYTE
body
div#root
block layout-content
```
Notice that this template uses the `title` variable to render the document title of a page. This variable value will be passed from the server to the template by route handlers defined in the API, also known as _controllers_.
🛠️ Next, create an `index.pug` file under the same directory:
``` bash
touch views/index.pug
```
Add the following content to `views/index.pug`:
``` pug
extends layout
block layout-content
div.View
h1.Banner WHATABYTE
div.Message
div.Title
h3 Making the Best
h1 Food For Devs
span.Details Access the WHATABYTE Team Portal
div.NavButtons
a(href="/user")
div.NavButton Just dive in!
```
With these two templates, you are using the `block` and `extends` artifacts to implement template inheritance. Within a template like `layout.pug`, you can define content injection points through a named `block`. Another template, such as `index.pug`, can then inject content into that template by first extending it and then defining the content of the named block.
Pug templates don't use HTML tags. Instead, they simply use the names of HTML elements and whitespace to define their structure. **You establish parent-child relationships between elements using indentation**.
You can define element [attributes](https://pugjs.org/language/attributes.html), such as `charset`, by placing the **attribute key and value** next to the element name and enclosing it in parentheses, resembling the structure of a function call:
``` pug
meta(charset="utf-8")
```
The content of an element can go next to the element name in the same line or **indented below**:
``` pug
h1.Banner WHATABYTE
div.Message
div.Title
h3 Making the Best
h1 Food For Devs
```
> Visit [_Getting Started_](https://pugjs.org/api/getting-started.html) for a complete overview of how Pug works.
To connect the templates with the controllers, you need to configure Express to use Pug as the view template engine.
🛠️ Open `index.js` and add the following under the `App Configuration` section:
``` javascript
// index.js
/**
* App Configuration
*/
app.set("views", path.join(__dirname, "views"));
app.set("view engine", "pug");
```
Here, you use [`app.set(name, value)`](https://expressjs.com/en/api.html#app.set) to assign a setting name to a value. Some setting names are reserved by Express to configure the behavior of the app, such as `views` and `views engine`.
The `views` setting tells Express what directory it should use as the source of view template files. In this case, you set the `views` directory as the source using the [`path.join()`](https://nodejs.org/api/path.html#path_path_join_paths) method, which creates a cross-platform file path.
The `view engine` setting tells Express what template engine to use, which in this case, is `pug`.
### Render Pug views as client responses
🛠️ Next, you'll refactor the `GET /` controller to make it render `index.pug` as the client response. Under the `Routes Definitions` section, update your route handler as follows:
``` javascript
// index.js
/**
* Routes Definitions
*/
app.get("/", (req, res) => {
res.render("index", { title: "Home" });
});
```
The first argument of [`res.render(view)`](https://expressjs.com/en/api.html#res.render) is a string representing the file path of a template, relative to the templates source directory, `views`. It renders the file and sends the rendered HTML as a string to the client. The extension for the template file defaults to `.pug` as Pug is the default view engine.
Its second argument is optional and represents an object that the controller passes to the template. The properties of this object become local variables in the template. Therefore, `{ title: "Home" }` defines a local `title` variable in `index.pug`. However, `index.pug` doesn't use `title` locally; instead, the template it extends,`layout.pug`, uses it.
> Refer to [_Using template engines with Express_](https://expressjs.com/en/guide/using-template-engines.html) for more details.
🛠️ Refresh the browser to see the new page rendered on the screen.
When you make any changes in the `index.pug` template, you can refresh the browser to see the changes. However, manually refreshing the browser to see updates slows down your development process. To overcome that, you'll use **Browsersync**.
## Add Live Reload to Express Using Browsersync
You can emulate the live reload behavior of front-end frameworks such as React and Angular in Express templates using Browsersync. When a CSS rule or the return value of a function is changed, the browser refreshes automatically.
🛠️ Start by installing Browsersync as follows:
``` bash
npm i -D browser-sync
```
🛠️ Working with Browsersync is easy. Execute the following command to create a configuration file with default options:
``` bash
browser-sync init
```
`browser-sync init` creates a `bs-config.js` file under your project directory, which contains a large number of default settings. You only need a small subset of those options to use Browsersync to reload your web pages when you change your project's code.
🛠️ Replace the content of `bs-config.js` with the following:
``` javascript
module.exports = {
proxy: "localhost:8000",
files: ["**/*.css", "**/*.pug", "**/*.js"],
ignore: ["node_modules"],
reloadDelay: 10,
ui: false,
notify: false,
port: 3000,
};
```
**What are these Browsersync configuration options doing?**
``` bash
proxy: "localhost:8000"
```
Proxy the Node/Express app served on `localhost:8000` as Browsersync only creates a static server for basic HTML/JS/CSS websites. You still need to run the server with `nodemon` separately.
``` bash
files: ["**/*.css", "**/*.pug", "**/*.js"]
```
Using [glob patterns](), specify the file paths to watch. You'll watch CSS, Pug, and JavaScript files.
``` bash
ignore: ["node_modules"]
```
Specify the patterns that file watchers need to ignore. You want to ignore `node_modules` to let Browsersync run fast.
``` bash
reloadDelay: 10
```
Time in milliseconds to delay the reload event following file changes to prevent Nodemon and Browsersync from overlapping, which can cause erratic behavior.
``` bash
ui: false
```
Don't start the Browsersync user interface, a page where you can control the behavior of Browsersync.
``` bash
notify: false
```
Disable a distracting message notifying you that Browsersync is connected to the browser.
``` bash
port: 3000
```
Use a specific port to host the site.
Check the ["Browsersync options"](https://www.browsersync.io/docs/options/) document to learn more details about all the configuration options that Browsersync offers you to optimize your development workflow.
🛠️ Next, create an npm script that configures and runs Browsersync to serve your web pages. Open and update `package.json` with the following `ui` npm script:
``` json
{
"name": "whatabyte-portal",
"version": "1.0.0",
"description": "",
"main": "index.js",
"scripts": {
"dev": "nodemon ./index.js",
"ui": "browser-sync start --config bs-config.js"
},
"keywords": [],
"author": "",
"license": "ISC",
"devDependencies": {...},
"dependencies": {...}
}
```
🛠️ To serve the user interface of your Express app, run the following command in a separate terminal window:
``` bash
npm run ui
```
The terminal will output information about the local and external locations serving the static site:
``` bash
[Browsersync] Proxying: http://localhost:8000
[Browsersync] Access URLs:
-------------------------------
Local: http://localhost:3000
External: http://:3000
-------------------------------
[Browsersync] Watching files...
```
🛠️ Browsersync automatically opens a new window presenting your interface. If it didn't, open [`http://localhost:3000/`](http://localhost:3000/). Make any change on the `index.pug` file, save it, and watch how the site served on port `3000` updates itself.
## Serve Static Assets with Express
To integrate stylesheets and images into the application, you need to configure Express to access and serve static files from a project directory — a process similar to configuring the render engine.
🛠️ For your application, create a directory named `public` under the project directory to serve this purpose:
``` bash
mkdir public
```
You'll use [`express.static()`](https://expressjs.com/en/4x/api.html#express.static), a built-in middleware function that specifies the directory path from which to serve static assets.
🛠️ Head back to `index.js` and update the `App Configuration` section as follows:
``` javascript
// index.js
/**
* App Configuration
*/
app.set("views", path.join(__dirname, "views"));
app.set("view engine", "pug");
app.use(express.static(path.join(__dirname, "public")));
```
To mount the `express.static()` middleware function, you use [`app.use()`](https://expressjs.com/en/api.html#app.use). You can now put inside the `public` directory any CSS or image files that your application needs to use.
### Style Express templates using CSS
🛠️ Inside the `public` directory, create a `style.css` file:
``` bash
touch public/style.css
```
🛠️ Populate the content of `public/style.css` as follows:
``` css
/* public/style.css */
body {
background: aqua;
}
```
🛠️ Save your changes. To use this stylesheet, you need to link to it from a template file. Update `layout.pug` as follows:
``` pug
block variables
doctype html
html
head
meta(charset="utf-8")
link(rel="shortcut icon", href="/favicon.ico")
meta(name="viewport", content="width=device-width, initial-scale=1, shrink-to-fit=no")
meta(name="theme-color", content="#000000")
title #{title} | WHATABYTE
link(rel="stylesheet" href="/style.css")
body
div#root
block layout-content
```
🛠️ Save your changes again. Observe how Browersync reloads the browser and the background color of the home page changes. This is the foundation of styling a Pug template in Express using CSS. You can add as many other rules and stylesheets as you desire.
🛠️ The Pug templates you created have CSS classes in their markup to define their layout and presentation. Replace the content of `style.css` with the following to make use of those classes:
**Click here** to see the content of `style.css`.
``` css
@import url("https://fonts.googleapis.com/css?family=Raleway:800|Merriweather+Sans|Share+Tech+Mono");
:root {
--ui-shadow: 0 2px 4px -1px rgba(0, 0, 0, 0.06),
0 4px 5px 0 rgba(0, 0, 0, 0.06), 0 1px 10px 0 rgba(0, 0, 0, 0.08);
fill: rgba(0, 0, 0, 0.54);
--ui-shadow-border: 1px solid rgba(0, 0, 0, 0.14);
}
* {
box-sizing: border-box;
}
html,
body,
#root {
height: 100%;
width: 100%;
}
body {
margin: 0;
padding: 0;
font-family: -apple-system, BlinkMacSystemFont, "Segoe UI", "Roboto", "Oxygen",
"Ubuntu", "Cantarell", "Fira Sans", "Droid Sans", "Helvetica Neue",
sans-serif;
-webkit-font-smoothing: antialiased;
-moz-osx-font-smoothing: grayscale;
-webkit-tap-highlight-color: rgba(255, 255, 255, 0);
}
h1,
h2,
h3 {
font-family: "Raleway", sans-serif;
text-transform: uppercase;
padding: 0;
margin: 0;
color: #2a3747;
}
h1 {
font-size: 40px;
}
a {
color: inherit;
text-decoration: none;
cursor: pointer;
user-select: none;
}
#root {
display: flex;
flex-direction: column;
}
.View {
flex: 1;
display: flex;
flex-direction: column;
justify-content: space-between;
align-items: flex-start;
height: 100%;
width: 100%;
padding: 20px;
background-size: cover;
font-family: "Merriweather Sans", sans-serif;
}
.Banner {
display: flex;
flex-direction: column;
justify-content: center;
align-items: center;
width: 100%;
border-radius: 5px;
overflow: hidden;
background: white;
padding: 15px;
font-family: "Share Tech Mono", monospace;
border-bottom: var(--ui-shadow-border);
box-shadow: var(--ui-shadow);
}
.Message {
background: white;
padding: 30px;
border-bottom: var(--ui-shadow-border);
box-shadow: var(--ui-shadow);
}
.Message > .Title {
padding-bottom: 20px;
}
.Message > .Details {
display: flex;
flex-direction: column;
line-height: 1.5em;
}
.NavButtons {
display: flex;
width: 100%;
justify-content: space-around;
align-items: center;
padding: 0 20px;
}
.NavButton {
display: flex;
justify-content: center;
align-items: center;
height: 55px;
width: 150px;
background: #fa4141;
border-radius: 30px;
font-size: 16px;
font-weight: bold;
color: white;
text-transform: capitalize;
border-bottom: var(--ui-shadow-border);
box-shadow: var(--ui-shadow);
}
```
The new stylesheet uses [CSS variables](https://developer.mozilla.org/en-US/docs/Web/CSS/var) using the `var()` function to [keep your code DRY](https://en.wikipedia.org/wiki/Don%27t_repeat_yourself). [Internet Explorer doesn't support CSS variables currently](https://developer.mozilla.org/en-US/docs/Web/CSS/var#Browser_compatibility), but Edge supports them!
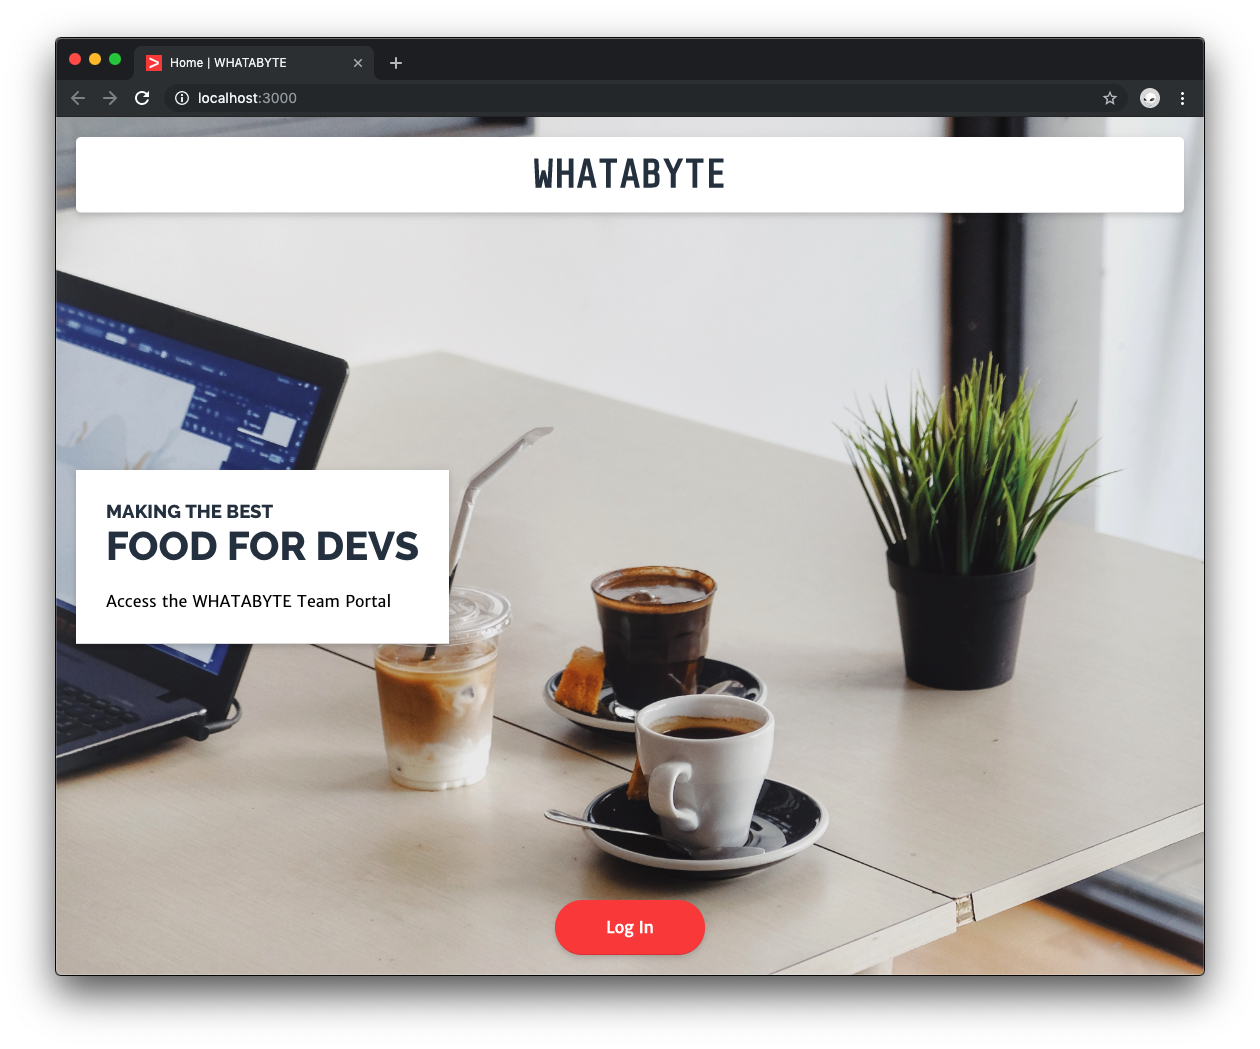
With this new stylesheet applied, the index page looks much nicer:
### Add images to an Express app
You can place image files within the `public` directory and then reference their relative path from any element where you want to use them. Use an image as the background of the `div.View` container in `index.pug`.
🛠️ To start, right-click on the following image and save it as `food.jpg` inside the `public` directory.

[Photo by Caesar Aldhela on Unsplash](https://unsplash.com/photos/IJS2q_V7-fQ)
🛠️ Next, open `public/style.css` and append to the file a `.WelcomeView` class as follows:
``` css
.WelcomeView {
background: url("food.jpg") left bottom;
background-size: cover;
}
```
🛠️ Then, open `views/index.pug` and append this new class to the `div.View` container. It should now look like this:
``` pug
extends layout
block layout-content
div.View.WelcomeView
h1.Banner WHATABYTE
div.Message
div.Title
h3 Making the Best
h1 Food For Devs
span.Details Access the WHATABYTE Team Portal
div.NavButtons
a(href="/user")
div.NavButton Just dive in!
```
> Don't forget that indentation is critical for proper template structure with Pug. Indenting creates a child HTML element.
Based on the configuration of this Express app, the `url` value of the `background` property references the image using a file path relative to the `public` directory. You also specify the image position, `left bottom`, and its presentation, `cover`, which prevents stretching.
You should now have this snazzy image as the background of the index page.
🛠️ Next, save this [icon](https://cdn.auth0.com/blog/create-a-simple-and-stylish-node-express-app/favicon.ico) file as `favicon.ico` under the `public` directory to get a logo in the browser tab. Hard reload your browser to see this particular change.
## Create More Views with Pug and Express
🛠️ For practice, create a user profile page. Under the `views` directory, create a Pug template file named `user.pug`.
``` bash
touch views/user.pug
```
Populate this new template with the following:
``` pug
extends layout
block layout-content
div.View.UserView
h1.Banner Howdy, #{userProfile.nickname}!
div.Message
div.Title
h3 Making Us the Best
h1 Teammate Profile
pre.Details=JSON.stringify(userProfile, null, 2)
div.NavButtons
a(href="/logout")
div.NavButton Log out
```
🛠️ The local `userProfile` variable will be provided to this view by the controller that renders it. To create that controller, open `index.js` and update the `Routes Definitions` section as follows:
``` javascript
// index.js
/**
* Routes Definitions
*/
app.get("/", (req, res) => { ... });
app.get("/user", (req, res) => {
res.render("user", { title: "Profile", userProfile: { nickname: "Auth0" } });
});
```
Once again, you use the second parameter of `res.render()` to pass data from the controller to the template. In this case, you are passing mock user information to the user profile template.
🛠️ Use the `UserView` class defined in the user template to style it. Open `public/style.css` and append the following rule:
``` css
.UserView {
background: url("https://cdn.auth0.com/blog/whatabyte-portal/patio.jpeg") left
bottom;
background-size: cover;
}
```
🛠️ As an alternative to referencing images within the `public` directory, you can use the URL of a hosted image. Visit [`http://localhost:3000/user`](http://localhost:3000/user) and see the user view rendered with a background image and filled with mock user data.
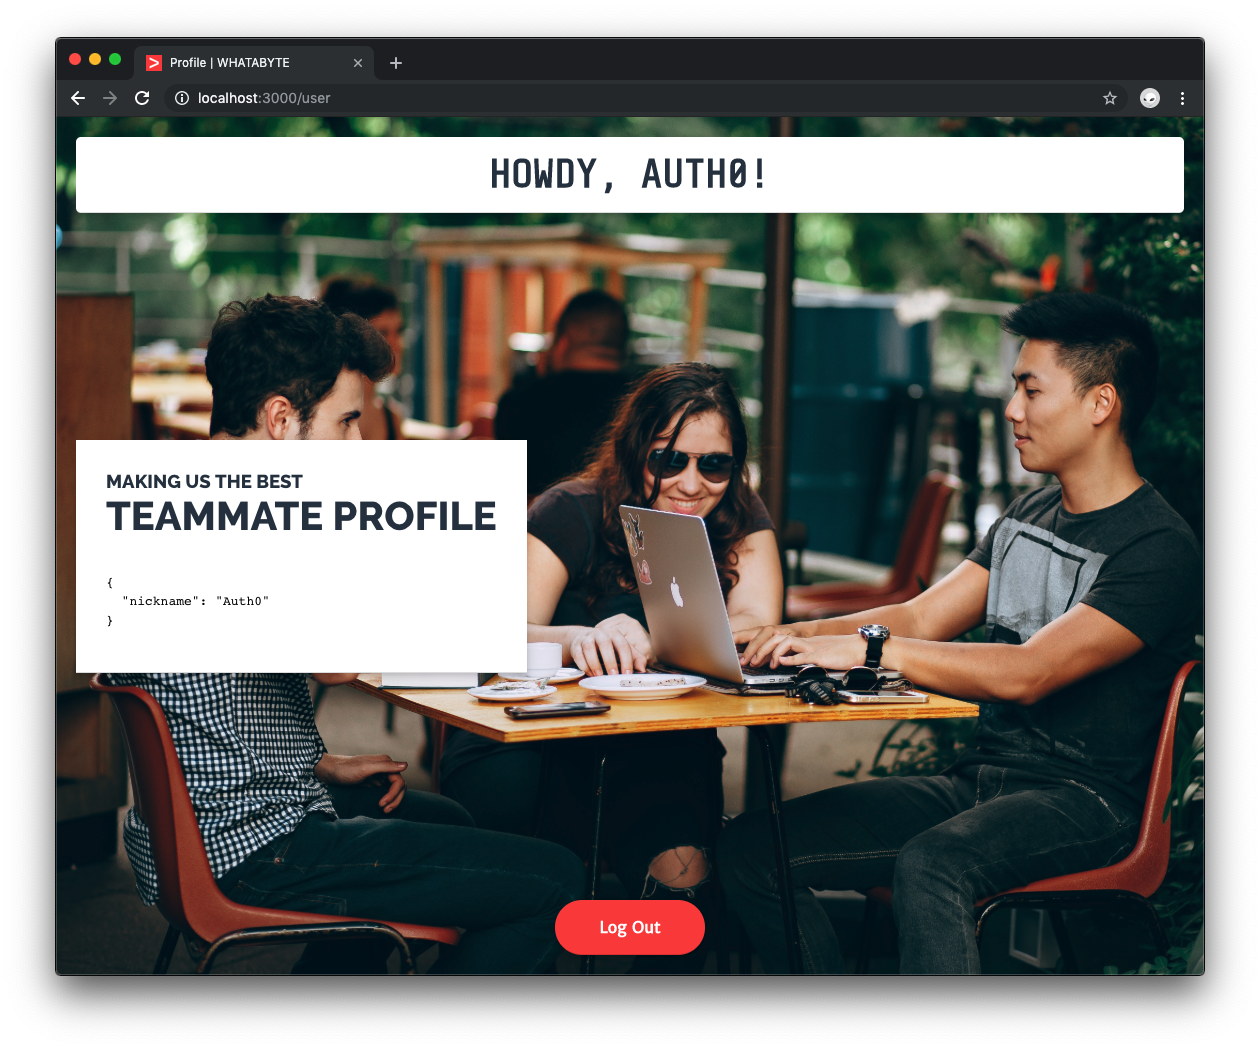
> Photo by [Helena Lopes](https://unsplash.com/@wildlittlethingsphoto) on [Unsplash](https://unsplash.com/).
## Recap
You used Node.js, Express, Pug, and CSS to create a web application that renders a stylish user interface with dynamic data by communicating with an API. You are also serving static assets from the server hosting the API.
As a next step, you can learn how to add authentication to Express using Passport.js and Auth0. Securing Node.js applications with Auth0 is easy and brings a lot of great features to the table.
After you sign up for a free Auth0 account, you only need to write a few lines of code to get a solid [identity management solution](https://auth0.com/user-management) with support for [single sign-on](https://auth0.com/docs/sso/single-sign-on), [social identity providers (like Facebook, GitHub, Twitter, etc.)](https://auth0.com/docs/identityproviders), and [enterprise identity providers (like Active Directory, LDAP, SAML, custom, etc.)](https://auth0.com/enterprise).
Sounds exciting? ⚡️