---
title: "Building Real-Time Web Applications using wolkenkit"
description: "Learn to build real-time web applications using wolkenkit and how to add authentication to them."
authors:
  - name: "Golo Roden"
    url: "https://auth0.com/blog/authors/golo-roden/"
date: "Feb 1, 2018"
category: "Developers,Tutorial,Node"
tags: ["real-time", "node.js", "wolkenkit", "cqrs", "event-sourcing"]
url: "https://auth0.com/blog/building-real-time-web-applications-using-wolkenkit/"
---

# Building Real-Time Web Applications using wolkenkit


**TL;DR:** This article will show you how to build real-time web applications using [wolkenkit](https://www.wolkenkit.io/), a **CQRS** and **event-sourcing** framework for **JavaScript** and **Node.js**, that perfectly matches **DDD**. See the [repository](https://github.com/thenativeweb/wolkenkit-chat-auth0) for the sample code.

---

**wolkenkit** is an [open-source framework](https://github.com/thenativeweb/wolkenkit) for JavaScript and Node.js that empowers you to develop backends and APIs, focusing on what's really important: solving actual real-world problems. You model the domain, and wolkenkit automatically provides everything else you need: A real-time HTTPS and web-socket API, JWT-based authentication, authorization, persistence with time-traveling, …

**wolkenkit** is developed by [the native web](https://www.thenativeweb.io/), a company that offers highly professional consulting, training and development services for JavaScript, Node.js, and related technologies. For details on wolkenkit have a look at its [documentation](https://docs.wolkenkit.io/), browse questions on [StackOverflow](http://stackoverflow.com/questions/tagged/wolkenkit) or join the [wolkenkit Slack team](http://slackin.wolkenkit.io/).

---

Software development is not an end in itself. Instead, software gets written to solve actual real-world problems. Unfortunately, this regularly fails. One of the most significant reasons for this is not technology, but poor communication in interdisciplinary teams. Domain experts, developers, and designers have never learned to talk and listen to each other.

## Introducing domain-driven design

Fortunately, there are ways to fix this. One of them is **DDD** (*domain-driven design*), a software development approach that focuses on modeling business processes. Modeling usually takes place in [interdisciplinary teams](https://www.thenativeweb.io/blog/2017-12-18-15-57-working-in-interdisciplinary-teams/), so that domain experts, developers, and designers can communicate with each other at an early stage and develop a common understanding of the area of subject.

At the same time, they develop a common language, the so-called [ubiquitous language](https://www.thenativeweb.io/blog/2017-11-01-11-13-ddd-and-co-part-2-semantics-over-crud/). This considerably simplifies communication in the later stages of development. Although the terms of this language depend on the domain modeled, it follows certain rules.

For example, there are [*commands*](https://www.thenativeweb.io/blog/2017-11-16-09-46-ddd-and-co-part-3-commands-and-events/) which represent the wishes of users and are always formulated as imperative. *Events*, on the other hand, are the facts created by the application as a reaction to the commands. Once created, they can not be undone anymore, and are therefore in the past tense. The common logic of commands and events is encapsulated in so-called [*aggregates*](https://www.thenativeweb.io/blog/2017-11-20-10-02-ddd-and-co-part-4-aggregates/).

In contrast to [CRUD](https://www.thenativeweb.io/blog/2017-10-25-09-46-ddd-and-co-part-1-whats-wrong-with-crud/), DDD does not focus on the data of the application, but on its processes. Steve Yegge described why this is important in his famous blog post ["Execution in the Kingdom of Nouns"](http://steve-yegge.blogspot.de/2006/03/execution-in-kingdom-of-nouns.html).

## DDD + event sourcing …

Since domain-driven design is not concerned with technology, it does not give any hints on how to build an application. However, there are two concepts that complement DDD very well, that *are* about technology: **Event sourcing** and **CQRS** (*Command Query Responsibility Segregation*).

In the past few years, these three concepts have only been known to a few developers. This is currently changing, as they are becoming more understood and more widespread. So, what are they about?

[Event sourcing](https://www.thenativeweb.io/blog/2017-11-27-15-17-ddd-and-co-part-5-event-sourcing/) is a special way of storing data. In contrast to classic relational databases, it does not store the current state of the application, but the individual changes that have led to it over time. The important thing is that you can only add new entries to the list of changes. The `UPDATE` and `DELETE` statements must not be executed because they irrevocably destroy historical data. Over time you will get a continuously growing chronological list of changes.

To determine the current state of the application you can **replay** this list. Additionally, you can also restore yesterday's state, or the state of a week or a month ago, or the state of any other time in the past. You can also compare data over time – all without having to maintain dedicated tables. En passant, you do also get an audit log and an easy way to implement an undo/redo mechanism.

## … + CQRS

[CQRS](https://www.thenativeweb.io/blog/2017-12-14-14-17-ddd-and-co-part-7-cqrs/) is also a technical concept: the architectural pattern suggests dividing an application into a write and a read side that you need to synchronize regularly. The advantage is that you can optimize both sides to match your specific needs—such as ensuring integrity and consistency when writing, and efficiently querying data when reading.

CQRS leaves open how you carry out the separation. For example, you can do this using two APIs that access different databases in the background. However, you can also use only one API with a single database and perform the separation only on the basis of database schemas.

However, regardless of the actual implementation, CQRS always entails [eventual consistency](https://www.thenativeweb.io/blog/2018-01-11-16-23-ddd-and-co-part-8-eventual-consistency/) due to the necessary synchronization. This means that the writing and reading sides are not necessarily consistent at the same time, but only with a slight temporal offset. This is not a problem for most applications, but you should be aware of the effects. Gregor Hohpe described this very well in his article ["Your Coffee Shop Doesn't Use Two-Phase Commit"](http://www.enterpriseintegrationpatterns.com/docs/IEEE_Software_Design_2PC.pdf).

## Connecting DDD, event sourcing, and CQRS

DDD, event sourcing, and CQRS are actually independent of each other. You can use each of the three concepts independently without ever having to consider the use of the other two.

Nevertheless, there is a connecting element between DDD, event sourcing, and CQRS, which is why the three concepts can be combined excellently in practice. We are talking about the **events**. In domain-driven design, they act as the functional and semantic basis for modeling. In event sourcing, as the name already suggests, these events are the changes being saved. And in CQRS, these events are used to synchronize the write and read side.

The following graphic illustrates the relationship between DDD, event sourcing and CQRS using the data flow of an application:

![Events connect DDD, event sourcing and CQRS](https://images.ctfassets.net/23aumh6u8s0i/2lafOtTqJiFQNNqrgaGI1Y/7a35c3594d5a5c11897e522f83c2e5bd/architecture)

(Source: [Architecture documentation of wolkenkit](https://docs.wolkenkit.io/1.2.0/getting-started/understanding-wolkenkit/architecture/))

In the **write model**—the writing side of the application—you can use DDD to process incoming commands and transform them into events. You then store these events using event sourcing in a special event database, the so-called **event store**. Afterwards, according to CQRS, these events are transferred to the **read model**. There, you interpret the events and update the **lists** to be read according to your requirements.

In this way, the three concepts come together like the pieces of a puzzle that form a single picture. As a result, you get an application development approach that is close to the business, offers excellent analytical capabilities, and is highly scalable. Thanks to the use of DDD, an interdisciplinary team was involved right from the start, which is why you will be able to develop better software in less time.

## Modelling your domain

As described, events are changes that have taken place in the domain. If you want to develop an application based on events and make use of them, you must first think about which events are contained in the respective domain. So, before implementing any code, you need to start modeling.

As an example, you will develop a simple instant messaging service in the style of [Slack](https://slack.com/), but reduced to the essential functions. The most significant limitation is that the application will only support a single channel, which you can use to **send** and **like** messages. Furthermore, you will use [Auth0](https://auth0.com/) to authenticate the users.

The core of the application is, of course, about sending messages. Therefore, it is obvious to introduce a `sent` event, which is raised whenever a message is sent by a user. It also makes sense to implement a `liked` event to point out that a message was rated positively. You can raise these events with two corresponding [commands](https://www.thenativeweb.io/blog/2017-11-16-09-46-ddd-and-co-part-3-commands-and-events/): `send` and `like`.

According to DDD, the common logic is located in an [aggregate](https://www.thenativeweb.io/blog/2017-11-20-10-02-ddd-and-co-part-4-aggregates/). Since the commands and events refer to a single message, it is obvious to call the aggregate `message`. All of this is about communicating with each other, hence it makes sense to introduce a context called `communication` and to assign the aggregate to this context. The previously defined terminology (which forms the [ubiquitous language](https://www.thenativeweb.io/blog/2017-11-01-11-13-ddd-and-co-part-2-semantics-over-crud/)) is only valid within the linguistic boundaries of this context.

The very same application may have other contexts that deal with other aspects, such as user administration or billing. There the terms `message`, `sent`, and `liked` could occur as well—but their semantics would be different. Finally, all the contexts together form the domain, which in this example you can call `chat`. Now the model looks like this:

```
chat
  communication
    message
      send => sent
      like => liked
```

## Thinking about security

When thinking about security, you have to think about authentication and authorization with respect to three aspects, due to the CQRS and the event-based architecture:

- Who is allowed to **send commands**, such as `send` and `like`?
- Who is allowed to **receive events**, such as `sent` and `liked`?
- Who is allowed to **run queries**, such as listing any previously sent messages?

For the first iteration, it makes sense to allow everything to everyone, even to anonymous users. This makes it easier to initially test and debug the application. For further iterations, you might decide that only authenticated users are allowed to communicate.

This means that you won't enable identity management for the first iteration. Instead, you will do this once the base of your application is up and running.

## Turning your model into code

To implement your model and turn it into code, you first have to create the directory structure for the application. Please note that the following the commands are meant to be run using *Bash* on macOS or on Linux. If you use another shell or another operating system, you might need to adjust the commands.

First, create the application directory and, since you are going to start with the backend, a `server` directory within it. Conveniently, this can be done with a single command:

```shell
$ mkdir -p chat/server
```

According to CQRS, the application has a write and a read side. So, create directories for the application's write model as well as for its read model. Furthermore, you must create a directory called `flows`. Although you won't need it within this article, it has to be there for wolkenkit to work correctly (it is meant for defining long-running workflows):

```shell
$ mkdir -p chat/server/writeModel
$ mkdir -p chat/server/readModel
$ mkdir -p chat/server/flows
```

The write side will be the home of the previously modeled domain. Therefore, create a directory with the name of the context, i.e. `communication`:

```shell
$ mkdir -p chat/server/writeModel/communication
```

Now add the file `message.js` for the aggregate to the directory. Initialize the file with the following structure:

```javascript
'use strict';

const initialState = {};
const commands = {};
const events = {};

module.exports = { initialState, commands, events };
```

The `initialState` contains the initial state of the aggregate. Since a message initially does not contain any text and has not yet been liked, set the following values:

```javascript
const initialState = {
  text: undefined,
  likes: 0
};
```

Next, you need to implement two functions that handle the `sent` and `liked` events when they are raised. Since events represent changes, the handlers must change the state of the aggregate. For that, use the function `setState` on the `message` aggregate:

```javascript
const events = {
  sent (message, event) {
    message.setState({
      text: event.data.text
    });
  },

  liked (message, event) {
    message.setState({
      likes: event.data.likes
    });
  }
};
```

Next, you need to implement the commands `send` and `like`. The command functions validate their parameters and then decide which events to raise. This is done using the `events.publish` function on the `message` aggregate. In addition, you need to mark the appropriate command as successfully handled or failed by calling either `mark.asDone` or `mark.asRejected`:

```javascript
const commands = {
  send (message, command, mark) {
    if (!command.data.text) {
      return mark.asRejected('Text is missing.');
    }

    message.events.publish ('sent', {
      text: command.data.text
    });
    mark.asDone();
  },

  like (message, command, mark) {
    message.events.publish('liked', {
      likes: message.state.likes + 1
    });
    mark.asDone();
  }
};
```

Although the first iteration will skip authentication, you must explicitly make the commands and events accessible. Otherwise, nobody is able to send commands and receive events. So, extend the `initialState` as follows:

```javascript
const initialState = {
  text: undefined,
  likes: 0,

  isAuthorized: {
    commands: {
      send: { forPublic: true },
      like: { forPublic: true }
    },
    events: {
      sent: { forPublic: true },
      liked: { forPublic: true }
    }
  }
};
```

That's it for the write side. Of course, many aspects such as an HTTPS and WebSocket API or persistence are still missing for an executable application. However, all these missing aspects are technical and not related to the specific domain.

## Preparing the read side

Since the UI shall display a list of all messages, the read side of the application must have the corresponding data ready. This requires an interpretation of the domain events: the interpretation must add a new entry to the list for a `sent` event, and it must update an existing entry for a `liked` event.

To do this, first create a directory called `lists` within the read model:

```shell
$ mkdir -p chat/server/readModel/lists
```

Then add the file `messages.js` to the directory and initialize it with the following code:

```javascript
'use strict';

const fields = {};
const when = {};

module.exports = { fields, when };
```

As fields, the list must contain not only the text of each message and the number of likes but also the time when a message was sent. Since the time will serve as a sort criterion later, you should index it:

```javascript
const fields = {
  timestamp: { initialState: 0, fastLookup: true },
  text: { initialState: '' },
  likes: { initialState: 0 }
};
```

Next, you have to update the list when an event is raised:

```javascript
const when = {
  'communication.message.sent' (messages, event, mark) {
    messages.add({
      text: event.data.text,
      timestamp: event.metadata.timestamp
    });
    mark.asDone();
  },

  'communication.message.liked' (messages, event, mark) {
    messages.update({
      where: { id: event.aggregate.id },
      set: {
        likes: event.data.likes
      }
    });
    mark.asDone();
  }
};
```

From a domain point of view, everything is now implemented that is needed for the read side of the application.

In fact, it's *all* done with that! You have already built the *entire* application including event sourcing and CQRS, simply by having defined a file structure and having written the code for your domain! But what about the technical aspects?

## Introducing wolkenkit

This is where [wolkenkit](https://www.wolkenkit.io) comes into play: it is an [open-source framework](https://github.com/thenativeweb/wolkenkit) for JavaScript and Node.js that uses event sourcing and CQRS, and that perfectly matches domain-driven design.

<include src="TweetQuote" quoteText="wolkenkit is an open-source framework for JavaScript and Node.js that uses event sourcing and CQRS, and that perfectly matches domain-driven design (DDD)."/>

Once you have modeled and built your domain, wolkenkit automatically provides everything else you need: a real-time HTTPS and web-socket API, JWT-based authentication, authorization, persistence, …

In other words, this means that you don't have to do *anything* for the technical aspects. Furthermore, it helps to keep your code clean, since you don't have to mix domain code and technical code.

Before you can start the application, you must first install the [wolkenkit CLI](https://www.npmjs.com/package/wolkenkit). This is done using **NPM**:

```shell
$ npm install -g wolkenkit
```

You must also install **Docker** locally. For installation instructions, refer to the [wolkenkit documentation](https://docs.wolkenkit.io/) for [macOS](https://docs.wolkenkit.io/1.2.0/getting-started/installing-wolkenkit/installing-on-macos/), [Linux](https://docs.wolkenkit.io/1.2.0/getting-started/installing-wolkenkit/installing-on-linux/) and [Windows](https://docs.wolkenkit.io/1.2.0/getting-started/installing-wolkenkit/installing-on-windows/). Last but not least, add a `package.json` file to your application, and define a `wolkenkit` specific section:

```json
{
  "name": "chat",
  "version": "1.0.0",
  "wolkenkit": {
    "application": "chat",
    "runtime": {
      "version": "1.2.0"
    },
    "environments": {
      "default": {
        "api": {
          "address": {
            "host": "local.wolkenkit.io",
            "port": 3000
          },
          "allowAccessFrom": "*"
        },
        "node": {
          "environment": "development"
        }
      }
    }
  }
}
```

What may catch your eye is the domain name `local.wolkenkit.io`. The public DNS of this domain is configured to point to `127.0.0.1`, so essentially it is the same as `localhost`. The reason for using this domain is that wolkenkit contains a perfectly valid SSL certificate for it, so HTTPS works out of the box (and this is not possible with `localhost` since you can't get an official SSL certificate for it).

As soon as all prerequisites are met, you can [start the application](https://docs.wolkenkit.io/1.2.0/reference/using-the-cli/controlling-the-lifecycle/). It is assumed that ports `3000` to `3004` are available on your machine. If this is not the case, you have to set the port in `package.json` to another base, such as `4000`.

When starting an application for the very first time, the wolkenkit CLI has to download various Docker images, so things may take a few minutes. Any subsequent starts will take place within a few seconds:

```shell
$ wolkenkit start
```

As a result, although it does not yet *look* sensational, you now have a running backend that can be accessed via HTTPS and WebSockets, and that takes care of persisting data according to event sourcing.

## Adding a client

What is still missing for a complete application is a client for your backend. As wolkenkit only cares about the `server` directory, you are free to add additional directories at your will. So, first create a `client` directory:

```shell
$ mkdir -p chat/client
```

To keep things simple, you will not use a UI library such as React or Angular. Instead, you will write the code to access the UI on your own. Fortunately, this can be done with just a few lines.

First, you have to create the `index.html` file, which acts as the entry point for your application. Initialize it using the following code:

```html

<!doctype html>
<html>
  <head>
    <meta charset="utf-8">

    <title>Chat</title>

    <link rel="stylesheet" href="/index.css" />
  </head>

  <body>
  </body>
</html>

```

Please note that the code already contains a link to a CSS file that does not yet exist. You will add it in a minute. Before you do this, add the list of messages and the form to send new messages. For that, insert the following lines inside of the `<body>` element:

``` html  

<div class="screen">
  <ul class="messages"></ul>
  <form class="send-message-form">
    <input class="new-message" type="text" placeholder="Enter a message" />
    <button type="submit">Send message</button>
  </form>
</div>

```

Next, add the missing file `index.css`. The content is quite simple, and basically only defines a flex layout and sets up some rough styling. Unfortunately, the style definitions are a bit lengthy anyway. To avoid having to download the file, just copy and paste the following lines, and you are done:

```css
body, input, button {
  font-family: Arial, sans-serif;
  font-size: 18px;
}

.screen {
  position: absolute;
  top: 0px;
  right: 0px;
  bottom: 0px;
  left: 0px;
  display: flex;
  flex-direction: column;
}

.screen > * {
  padding: 20px;
}

.messages {
  flex: 1 1 100%;
  margin: 0px;
  overflow: scroll;
}

.messages .message {
  list-style-type: none;
  border-bottom: 1px solid #e8e8e8;
  line-height: 1.8;
  padding: 12px 0 20px 0;
}

.messages .message:first-child {
  padding-top: 0;
}

.messages .message:last-child {
  padding-bottom: 0;
  border-bottom: none;
}

.messages .message .label-author {
  font-weight: 700;
}

.messages .message .likes {
  display: inline-block;
  padding: 0px 6px;
  font-size: 14px;
  border: 1px solid #cacaca;
  border-radius: 2px;
}

.messages .message .likes > * {
  pointer-events: none;
}

.messages .message .likes:hover {
  background: #eee;
  cursor: pointer;
}

.send-message-form {
  display: flex;
  flex: 0 0 auto;
  background: #404040;
}

.send-message-form input {
  flex: 1 1 100%;
  margin-right: 20px;
  padding: 6px 8px;
}

.send-message-form button {
  flex: 0 0 auto;
  border: none;
  color: #fff;
  padding: 8px 10px;
  border-radius: 2px;
  background: #29abe2;
  cursor: pointer;
}
```

The final piece you need to prepare is a custom `render` function that takes care of redrawing the UI whenever a new message was sent or a message was liked. For convenience, you can store the function inside of a `view` object that also contains references to a few UI elements. So, add a file `view.js` and insert the following code:

```javascript
(function () {
  'use strict';

  const view = {
    messages: document.querySelector('.messages'),
    newMessage: document.querySelector('.new-message'),
    sendMessageForm: document.querySelector('.send-message-form'),

    render (messages) {
      const html = messages.map(message =>
        `<li class="message">
          <div class="label">${message.text}</div>
          <div class="likes" data-message-id="${message.id}">
            <span class="button">👍</span>
            <span class="count">${message.likes || 0}</span>
          </div>
        </li>`
      ).join('');

      view.messages.innerHTML = html;
    }
  };

  window.view = view;
})();
```

Now you have all the basic parts ready and you can add the actual application logic to the client. First, you need to fetch the [wolkenkit client SDK](https://www.npmjs.com/package/wolkenkit-client). To do so, you would usually use **NPM**, as such:

```shell
$ cd chat/client
$ npm install wolkenkit-client@1.2.0
```

Then, you would use a bundler such as **webpack**. However, to keep things simple you will not do this, but load the client SDK manually using a `<script>` tag. So, add the following two lines to the end of file `index.html`, just before the closing `</body>` tag:

``` html  

<script src="https://cdn.rawgit.com/thenativeweb/wolkenkit-client-js/78ea5aa7/dist/wolkenkit-client.browser.min.js"></script>
<script type="text/javascript" src="/view.js"></script>

```

Finally, create another JavaScript file called `index.js`. This file will contain the actual application code. To run it, add another line to `index.html`. Ensure that `index.js` is only loaded *after* the wolkenkit client SDK:

``` html  

<script type="text/javascript" src="/index.js"></script>

```

So, the end of your `index.html` file should now look like this:

```html

<html>
  <body>
    <!-- ... -->
  </head>

  <body>
    <!-- ... -->

    <script src="https://cdn.rawgit.com/thenativeweb/wolkenkit-client-js/78ea5aa7/dist/wolkenkit-client.browser.min.js"></script>
    <script type="text/javascript" src="/view.js"></script>
    <script type="text/javascript" src="/index.js"></script>
  </body>
</html>

```

In the file `index.js` you will now use the client SDK to connect to the already running wolkenkit backend. Normally, you would use the `require` function to load the `wolkenkit-client` module, but since you loaded the SDK manually, access the global `wolkenkit` object instead.

This object provides a `connect` function which takes the host and the port of the backend and returns a promise. Please note that if earlier you had selected a different port, you need to adjust the code according to your changes.

Once the promise resolves, a reference to the backend is returned. Otherwise, you get an error, which you can simply print to the console:

```javascript
(function () {
  'use strict';

  wolkenkit.connect({ host: 'local.wolkenkit.io', port: 3000 }).
    then(chat => {
      // ...
    }).
    catch(err => {
      console.error(err);
    });
})();
```

Now, when the user enters a message to the form and clicks the submit button, you need to create a new `message` instance and run the `send` command on it. You can do this with the following code:

```javascript
chat.communication.message().send({ text: 'Hello world' });
```

As you can see the client SDK mirrors the structure of the domain that you had defined for the backend. Additionally, you can get notified whether delivering the command to the backend succeeded or not. If the command was successfully delivered, you need to clear the form and re-focus the text input field. So, add the following code to your file `index.js`:

```javascript
view.sendMessageForm.addEventListener('submit', event => {
  event.preventDefault();

  chat.communication.message().send({ text: view.newMessage.value }).
    failed(err => {
      console.error(err);
    }).
    delivered(() => {
      view.newMessage.value = '';
      view.newMessage.focus();
    });
});
```

The code to handle a click on a message's `like` button is similar. To avoid having to add an individual event handler per message, use event bubbling. This means that there is only a single click handler for the entire list of messages, and you have to filter out any irrelevant clicks. Additionally, you need to get the ID of the message that was liked, and send this message ID along with the command:

```javascript
view.messages.addEventListener('click', event => {
  if (!event.target.classList.contains('likes')) {
    return;
  }

  const messageId = event.target.getAttribute('data-message-id');

  chat.communication.message(messageId).like().
    failed(err => {
      console.error(err);
    });
});
```

Finally, you need to read the `messages` list and update it whenever a new message was sent or a message was liked. For that, use the `readAndObserve` function which automatically provides live updates.

As you need to update the UI once reading has started and whenever an update happened, use your previously defined custom `render` function as callback. Furthermore, limit the amount of messages to `50` and sort them by their timestamp in descending order:

```javascript
chat.lists.messages.readAndObserve({
  orderBy: { timestamp: 'descending' },
  take: 50
}).
  failed(err => {
    console.error(err);
  }).
  started(view.render).
  updated(view.render);
```

Last but not least, you should initially focus the text input field so that the user is immediately able to send messages:

```javascript
view.newMessage.focus();
```

## Running the client

To run the client you need an HTTP server. The easiest way to get started is to use the NPM module [`http-server`](https://www.npmjs.com/package/http-server), which lets you serve any directory as a website. Switch to the client directory and use NPM's **npx** tool to run the server without having to install it first:

```shell
$ cd chat/client
$ npx http-server
```

Typically, the server uses port `8080`, but if that port is taken on your system, it will fallback to another one. So watch the server's output carefully. Alternatively, use the `-o` flag to make the server open your browser with the correct address automatically:

```shell
$ npx http-server -o
```

As a result, you can now send and like messages. The list of messages gets updated in real-time, and this even works across multiple browsers. The following image shows what the chat currently looks like:

![Running the chat](https://images.ctfassets.net/23aumh6u8s0i/43GEBroeq5t6qXmaiOYyPa/08e4fd2f8a77f0fab4b62ce1f3b6afd4/chat)

As you have seen, the wolkenkit client SDK allows you to focus on the domain of your application. Again, you didn't have to think about technical aspects, such as how the commands get delivered to the server or how live updating works in detail.

## Preparing authentication

What is still missing is the handling of authentication and authorization of your users. To avoid having to worry about these things in every application, you can outsource this to a trusted third party, the so-called **identity provider**. Its primary job is to identify your users and to issue tokens for them, similar to a passport.

Then, your users need to send this token with every request, so your backend can verify the validity of the token and identify the user based on the data stored in the token, or the **claims**. Since your application relies on an external service for handling identity, it becomes the **relying party**.

To avoid tampering with the tokens, they need to be cryptographically signed. Fortunately, there is a standard for issuing and handling these tokens. It is called [JWT (*JSON Web Token*)](https://jwt.io/) and uses a JSON-based format for implementing the tokens. The way how applications exchange these tokens is also described in a standard, called [OpenID Connect](http://openid.net/connect/).

Since your users send their tokens with every request, you do not need to use cookies and sessions anymore. Instead, this works perfectly well with stateless services, which is one of the main reasons why JWT and OpenID Connect gained a lot of popularity in the past few years.

This is where [Auth0](https://auth0.com/) comes into play, because Auth0 is **identity management as a service**. This way you can make use of JWT and OpenID Connect without the need to setup all the identity infrastructure by yourself. If you don't have an account yet, now is a good time to <a href="https://auth0.com/signup" data-amp-replace="CLIENT_ID" data-amp-addparams="anonId=CLIENT_ID(cid-scope-cookie-fallback-name)">sign up for a free Auth0 account</a>.

In your account, you need to create a new application first. For that, log in and go to the [dashboard](https://manage.auth0.com/). Then, click the *New Application* button in the upper right corner to create a new application:

![Use the Auth0 dashboard to create a new application](https://images.ctfassets.net/23aumh6u8s0i/34av93WRSFOxuDgCR7Rb7z/b5d999595b0cc9d2a8fd978f304adeaf/auth0-dashboard)

Now enter a name for the application, such as `chat`, and select *Single Page Web Applications* as the type. Confirming your input takes you to the quick start page of your newly created application. Open the *Settings* tab:

![Open the settings tab of the newly created application](https://images.ctfassets.net/23aumh6u8s0i/6ijEZhsx7SfQEJwbwl9d6F/50f24f9a85553499070479189ea9fbe6/auth0-client-settings)

Make a note of the following data, as you will need them later for configuring the application:

- The client ID, e.g. `vKtdmXvF8YfBJrYc856pA3OXOIEY0sZO`.
- The domain, e.g. `wolkenkit.auth0.com`.

Scroll down to *Allowed Callback URLs* and set it to `http://localhost:8080`. If the HTTP server of your client is running on a different port, adjust the URL as needed. Scroll down even further and click the *Save Changes* button.

Next, click *Show Advanced Settings* (this is directly above the *Save Changes* button). In the *OAuth* tab, make sure that `RS256` is selected as signature algorithm. Disable the *OIDC Conformant* setting, and save your changes.

Now, still in the *Advanced Settings* section, open the *Certificates* tab, click the *Download Certificate* button to download the certificate in `.pem` format (the button is right above the *Save Changes* button), and then **save the application**. With the client ID, the domain, and the certificate you have everything you need to setup authentication for your wolkenkit application.

However, before you can do this, you need to configure which strategies your users can use to authenticate themselves. Therefore, open the client's *Connections* tab. By default, Auth0 uses a database to store your users' credentials. Also, the social `google-oauth2` strategy is enabled by default, which allows your users to authenticate using their Google account:

![Use the connections tab to configure the authentication strategies](https://images.ctfassets.net/23aumh6u8s0i/7iUpr82v6n9MYF6LsAE0zS/0bd357c0895e76412cb6584a4eb82eba/auth0-connections)

Next, click the *Connections* section in the left navigation, and select *Database* to configure the database strategy. Select the *Username-Password-Authentication* entry to get to its settings. Enable the *Requires Username* setting. This way you can make sure that your users always have a username.

## Configuring authentication in the backend

In order for the backend to be able to validate the tokens created using JWT, it must know the Auth0 certificate. Therefore, create a new directory to store the certificate there:

```shell
$ mkdir -p chat/server/keys/auth0
```

Copy the previously downloaded certificate into this directory and name the file `certificate.pem`.

You must also register the certificate in the file `package.json`. To do this, add the new section `identityProvider` to the `default` environment and enter the path to the certificate there. In this case, the root path is the directory in which the file `package.json` is located. You must also enter the address of your Auth0 account as the identity provider's name. Your `package.json` should now look like this:

```json
{
  "name": "chat",
  "version": "1.0.0",
  "wolkenkit": {
    "application": "chat",
    "runtime": {
      "version": "1.2.0"
    },
    "environments": {
      "default": {
        "api": {
          "address": {
            "host": "local.wolkenkit.io",
            "port": 3000
          },
          "allowAccessFrom": "*"
        },
        "identityProvider": {
          "name": "https://wolkenkit.auth0.com/",
          "certificate": "/server/keys/auth0"
        },
        "node": {
          "environment": "development"
        }
      }
    }
  }
}
```

Next, you must change the authorization for commands and events so that only authenticated users can send and receive them. Open the file `message.js` which contains the aggregate and replace the entries `forPublic` in the `isAuthorized` section with `forAuthenticated`:

```javascript
const initialState = {
  // ...

  isAuthorized: {
    commands: {
      send: { forAuthenticated: true },
      like: { forAuthenticated: true }
    },
    events: {
      sent: { forAuthenticated: true },
      liked: { forAuthenticated: true }
    }
  }
};
```

Omitting `forPublic` automatically sets these properties to `false`. If you want to be more explicit, you can keep them and set their values to `false` manually.

Since each message should now have an author, the aggregate's initial state, the `send` command, and the `sent` event must also be modified. The changes to the initial state are simple, as you only need to add an `author` field:

```javascript
const initialState = {
  author: undefined,
  text: undefined,
  likes: 0,

  isAuthorized: {
    // ...
  }
};
```

The changes to the `sent` event are also done easily. All you need to do is to set the `author` field to the value provided by the event:

```javascript
const events = {
  sent (message, event) {
    message.setState({
      author: event.data.author,
      text: event.data.text
    });
  },

  // ...
};
```

Next, you need to update the `send` command. It must take care of getting the name of the user who sent the command. To access the user and the token, there is the `user` property on the `command` object. So fetch the `nickname` from the token, and set its value as `author` for the `sent` event:

```javascript
const commands = {
  send (message, command, mark) {
    if (!command.data.text) {
      return mark.asRejected('Text is missing.');
    }

    message.events.publish('sent', {
      author: command.user.token.nickname,
      text: command.data.text
    });

    mark.asDone();
  },

  // ...
};
```

Of course, you need to update the `messages` list as well. Therefore, open the file `messages.js`, which contains the definition for the list, and add an `author` field here, too:

```javascript
const fields = {
  timestamp: { initialState: 0, fastLookup: true },
  author: { initialState: '' },
  text: { initialState: '' },
  likes: { initialState: 0 }
};
```

Additionally, you  need to extend the handler function for the `sent` event, so that it takes the `author` field into account:

```javascript
const when = {
  'communication.message.sent' (messages, event, mark) {
    messages.add({
      author: event.data.author,
      text: event.data.text,
      timestamp: event.metadata.timestamp
    });
    mark.asDone();
  },

  // ...
};
```

Finally, you must restart the backend to make your changes effective. Any of the previously created data will be deleted. However, in this case, this is desirable, as the data model has changed:

```shell
$ wolkenkit restart
```

## Updating the client

If you now try to access the backend with the client, this will no longer work because every request is rejected as unauthenticated. Therefore, the next step is to update the client. Fortunately, the changes are very small.

First of all, you need to extend the `render` function so that it also displays the name of the user who sent a message. Since the messages are loaded in the same way as before, all you have to do is add a new `<span>` element that displays the name:

```javascript
render (messages) {
  const html = messages.map(message =>
    `<li class="message">
      <div class="label">
        <span class="label-author">${message.author}:</span>
        ${message.text}
      </div>
      <div class="likes" data-message-id="${message.id}">
        <span class="button">👍</span>
        <span class="count">${message.likes || 0}</span>
      </div>
    </li>`
  ).join('');

  view.messages.innerHTML = html;
}
```

In the `index.js` file, you need to expand the connection setup so that OpenID Connect is configured as the authentication strategy. There you will need to set the `/authorize` endpoint of your account, **specify the client ID**, and make some other settings:

```javascript
wolkenkit.connect({
  host: 'local.wolkenkit.io',
  port: 3000,
  authentication: new wolkenkit.authentication.OpenIdConnect({
    identityProviderUrl: 'https://wolkenkit.auth0.com/authorize',
    clientId: 'vKtdmXvF8YfBJrYc856pA3OXOIEY0sZO',
    scope: 'profile',
    strictMode: false
  })
}).
  then(chat => {
    // ...
  }).
  catch(err => {
    // ...
  });
```

Once the connection has been established, you must now check whether the user is already logged in. If not, call the `login` function:

```javascript
wolkenkit.connect({
  // ...
}).
  then(chat => {
    if (!chat.auth.isLoggedIn()) {
      return chat.auth.login();
    }

    // ...
  }).
  catch(err => {
    // ...
  });
```

That's it. Now the wolkenkit client SDK knows that it should use OpenID Connect for authenticating users. When you call the `login` function you are redirected to Auth0, where your users can register or log in – either using the Auth0 database or using their Google account.

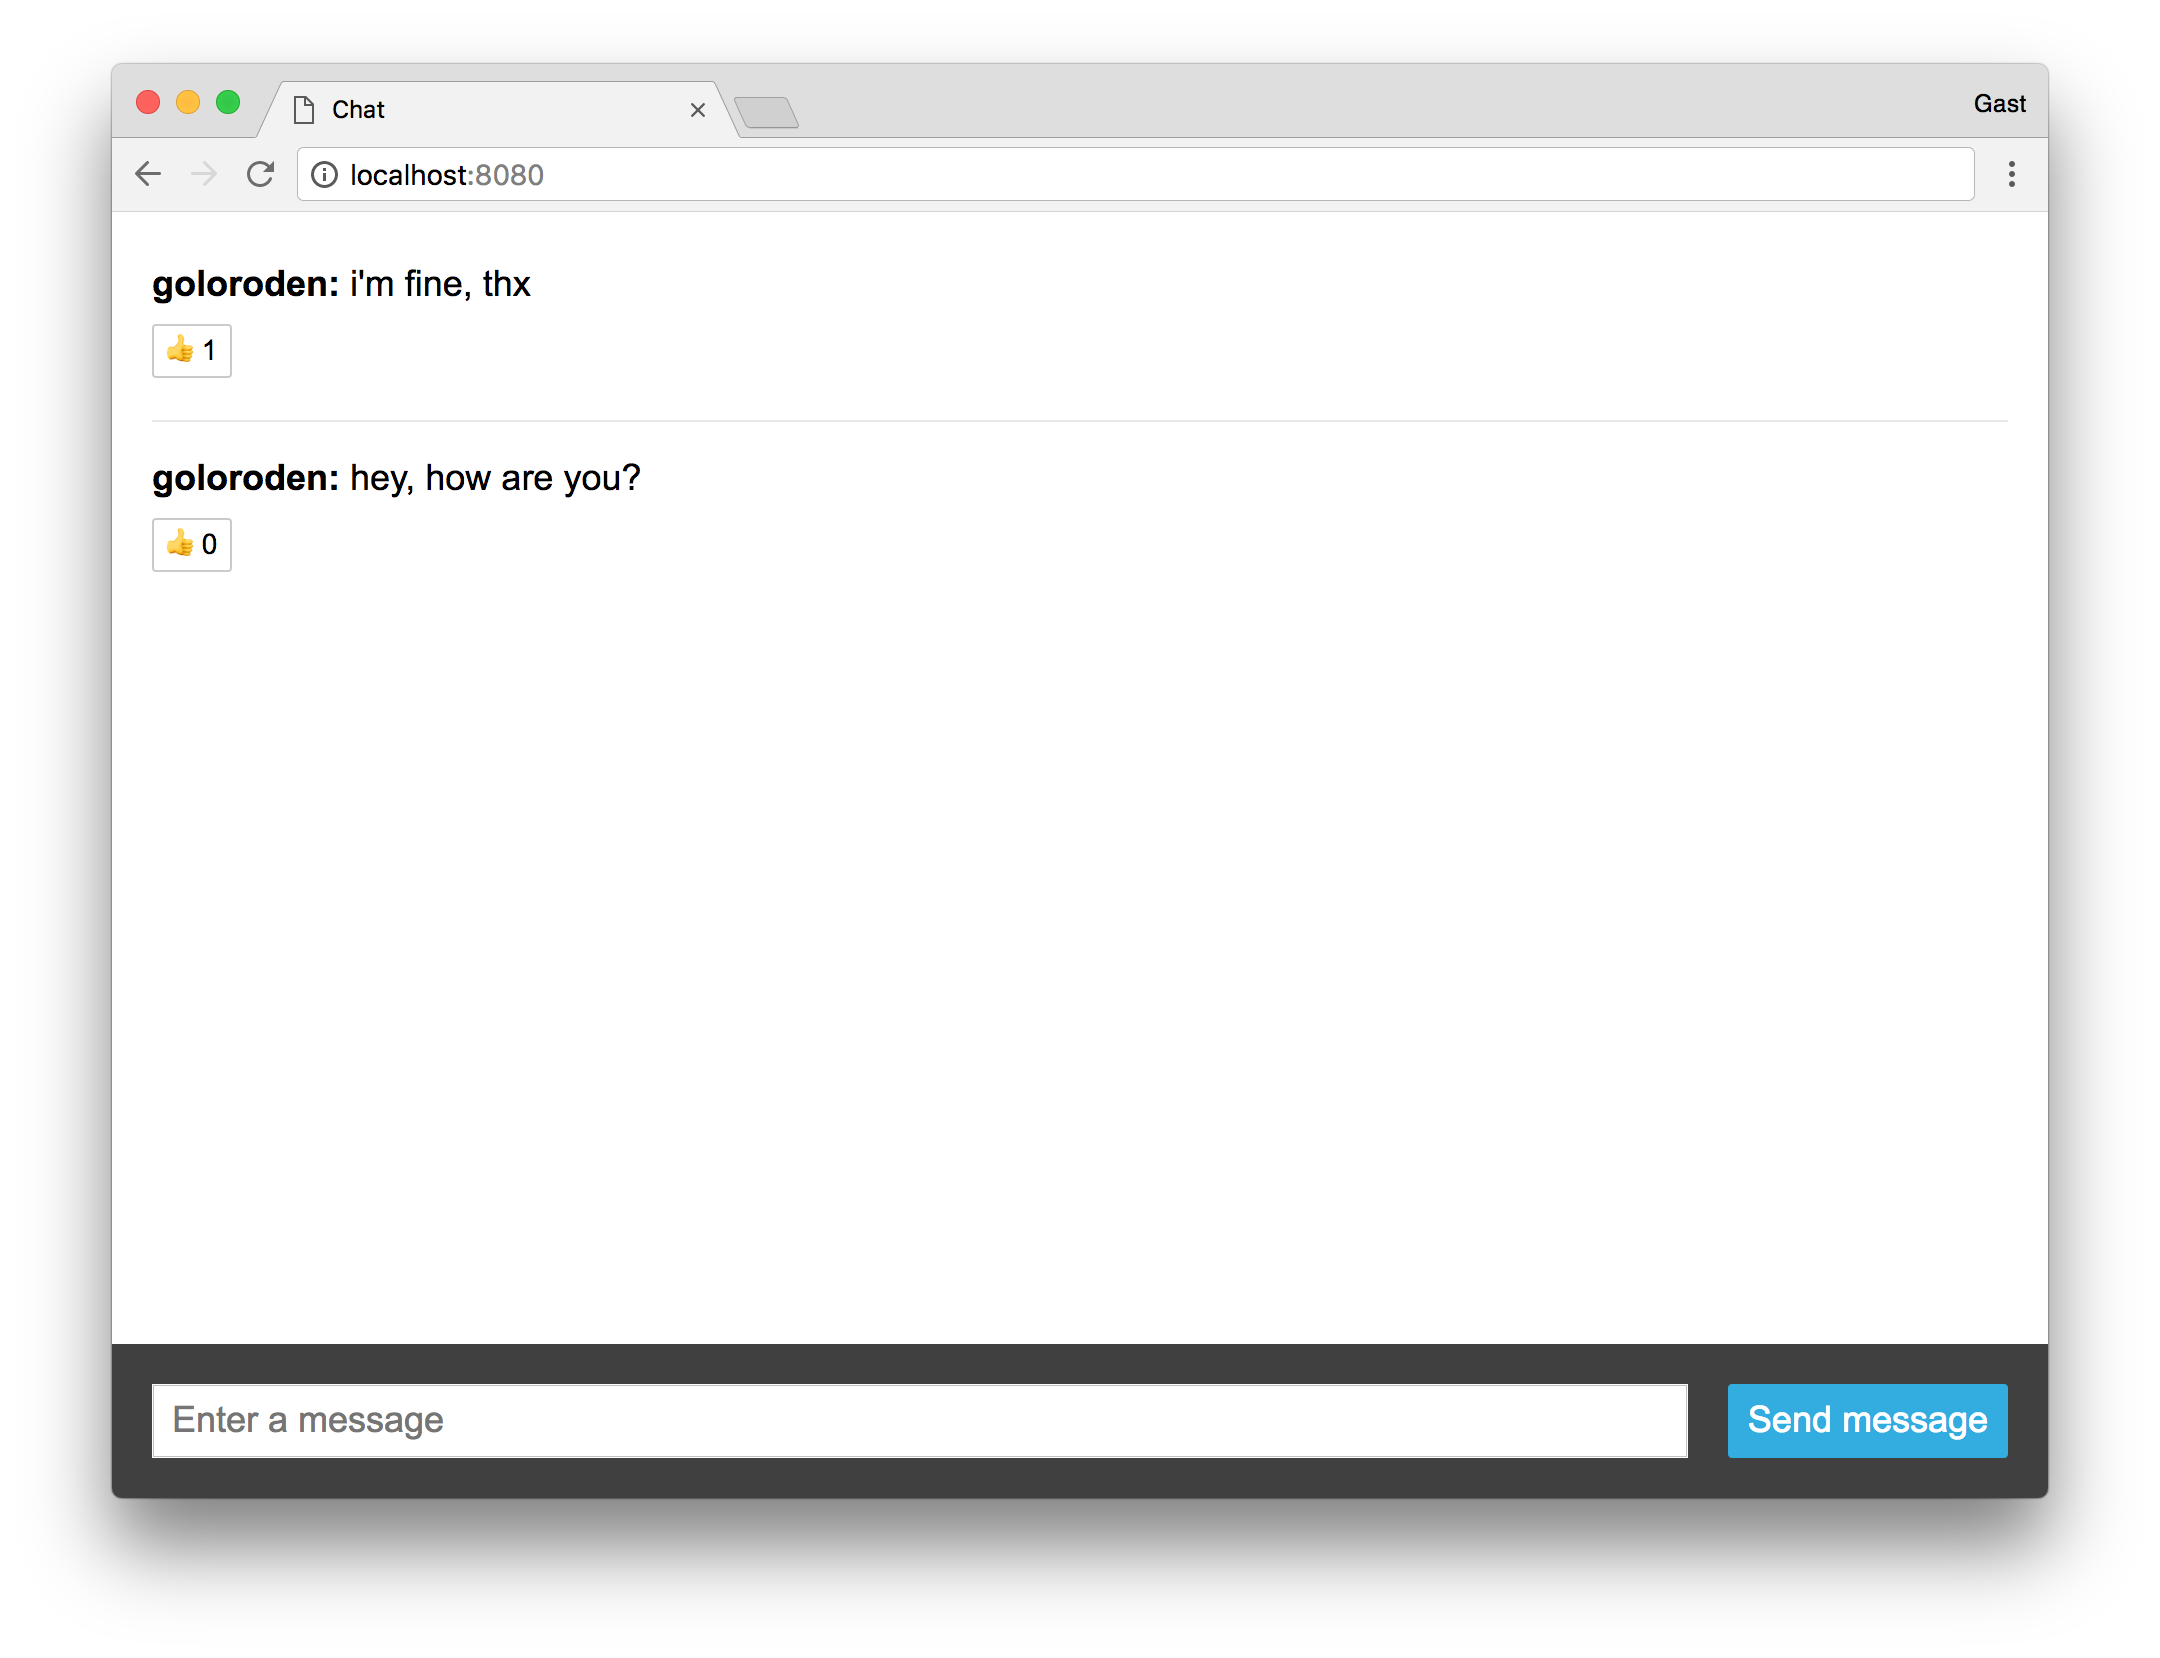
Once you have reloaded the client in your browser and logged in, you can now use the chat as before, but this time with authentication:

![Running the chat with authentication](https://images.ctfassets.net/23aumh6u8s0i/dKCIensZ5gvK7muNTaI0i/7e347e33043e8ac5ddca722196d1ed21/screenshot)

## Conclusion

Congratulations, you have learned how to build a real-time web application using wolkenkit and how to add authentication using Auth0!

Of course, there is much more that you can do with wolkenkit, but now you have a good idea of what software development feels like when using domain-driven design, event sourcing, and CQRS as the base. To dive deeper, have a look at the [wolkenkit documentation](https://docs.wolkenkit.io/), browse questions on [StackOverflow](http://stackoverflow.com/questions/tagged/wolkenkit), or join the [wolkenkit Slack team](http://slackin.wolkenkit.io/).

Also, Auth0 has way more to offer. Besides a credentials database and integration into Google, Auth0 offers many more ways for [social and enterprise integration](https://auth0.com/docs/identityproviders). Auth0 supports [multifactor authentication](https://auth0.com/multifactor-authentication) as well as [breached password detection](https://auth0.com/breached-passwords) and [anomaly detection](https://auth0.com/docs/anomaly-detection). If you haven't done it yet, <a href="https://auth0.com/signup" data-amp-replace="CLIENT_ID" data-amp-addparams="anonId=CLIENT_ID(cid-scope-cookie-fallback-name)">sign up for your free Auth0 account now</a>.

<include src="TweetQuote" quoteText="Auth0 is identity management as a service. Learn how to build real-time web applications using wolkenkit and how to add authentication to them."/>

If you have any questions, comments or ideas, feel free to leave a note in the comment section below. Have a nice day!
