---
title: "Building and Securing Koa and Angular 2 with JWT"
description: "Single Page Applications (SPAs) can benefit greatly from JWT secured backends. Here we will see how to secure an Angular 2 app, backed by Koa, with JWTs."
authors:
- name: "Bruno Krebs"
url: "https://auth0.com/blog/authors/bruno-krebs/"
date: "Jan 19, 2017"
category: "Developers,Tutorial,Angular"
tags: ["angular2", "jwt", "koa", "node", "javascript"]
url: "https://auth0.com/blog/building-and-securing-a-koa-and-angular2-app-with-jwt/"
---
# Building and Securing Koa and Angular 2 with JWT
**TL;DR**
[Koa](http://koajs.com/) is a web framework for Node.JS that is based on [async functions, a new ES7 feature](https://jakearchibald.com/2014/es7-async-functions/), providing a simpler and more concise API. In this article, we will build a grocery list application, with an [Angular 2](https://angular.io/) front-end, that communicates with a Koa based backend. Our application will take advantage of [JWT tokens](https://jwt.io/) to secure these communications. The full implementation is [provided on this repo at GitHub](https://github.com/auth0-blog/grocery-list/tree/jwt).
## Overview
For our application, we will use [TypeScript](https://www.typescriptlang.org/), a programming language that extends JavaScript with type checking, for developing both our backend and frontend. Angular 2 already advises us to use TypeScript when writing applications with their framework. But, besides the advantage of using the same language on both ends, TypeScript enables developers to become more productive by using tools that help them to avoid mistakes, like passing the wrong type to a method, and also by making refactoring much easier.
Since we want our application to secure ours users' data, we will use JWT tokens to authorize certain requests. A JWT—which stands for JSON Web Token and is pronounced as "jot"—is a token that provides credibility on an end to end communication. JWTs are getting widely adopted, and they take place as an alternative to the, rather old, cookie based approach. The biggest advantage of JWTs is that they can hold sensitive data, in a readable format, and be trustworthy while getting sent over the network.
Koa is web framework, just like [Express](http://expressjs.com/), that is developed by many of the same people that built Express—by the way, here is a [nice tutorial on how to secure an Angular 2 app backed by Express](https://auth0.com/blog/angular-2-authentication/). Unofficially known as Express' successor, Koa uses `async` functions to improve readability and robustness of applications. Writing middlewares to handle users requests become very easy and clear with Koa's approach, as we will see on our own grocery list application.
## Our Application - Grocery List
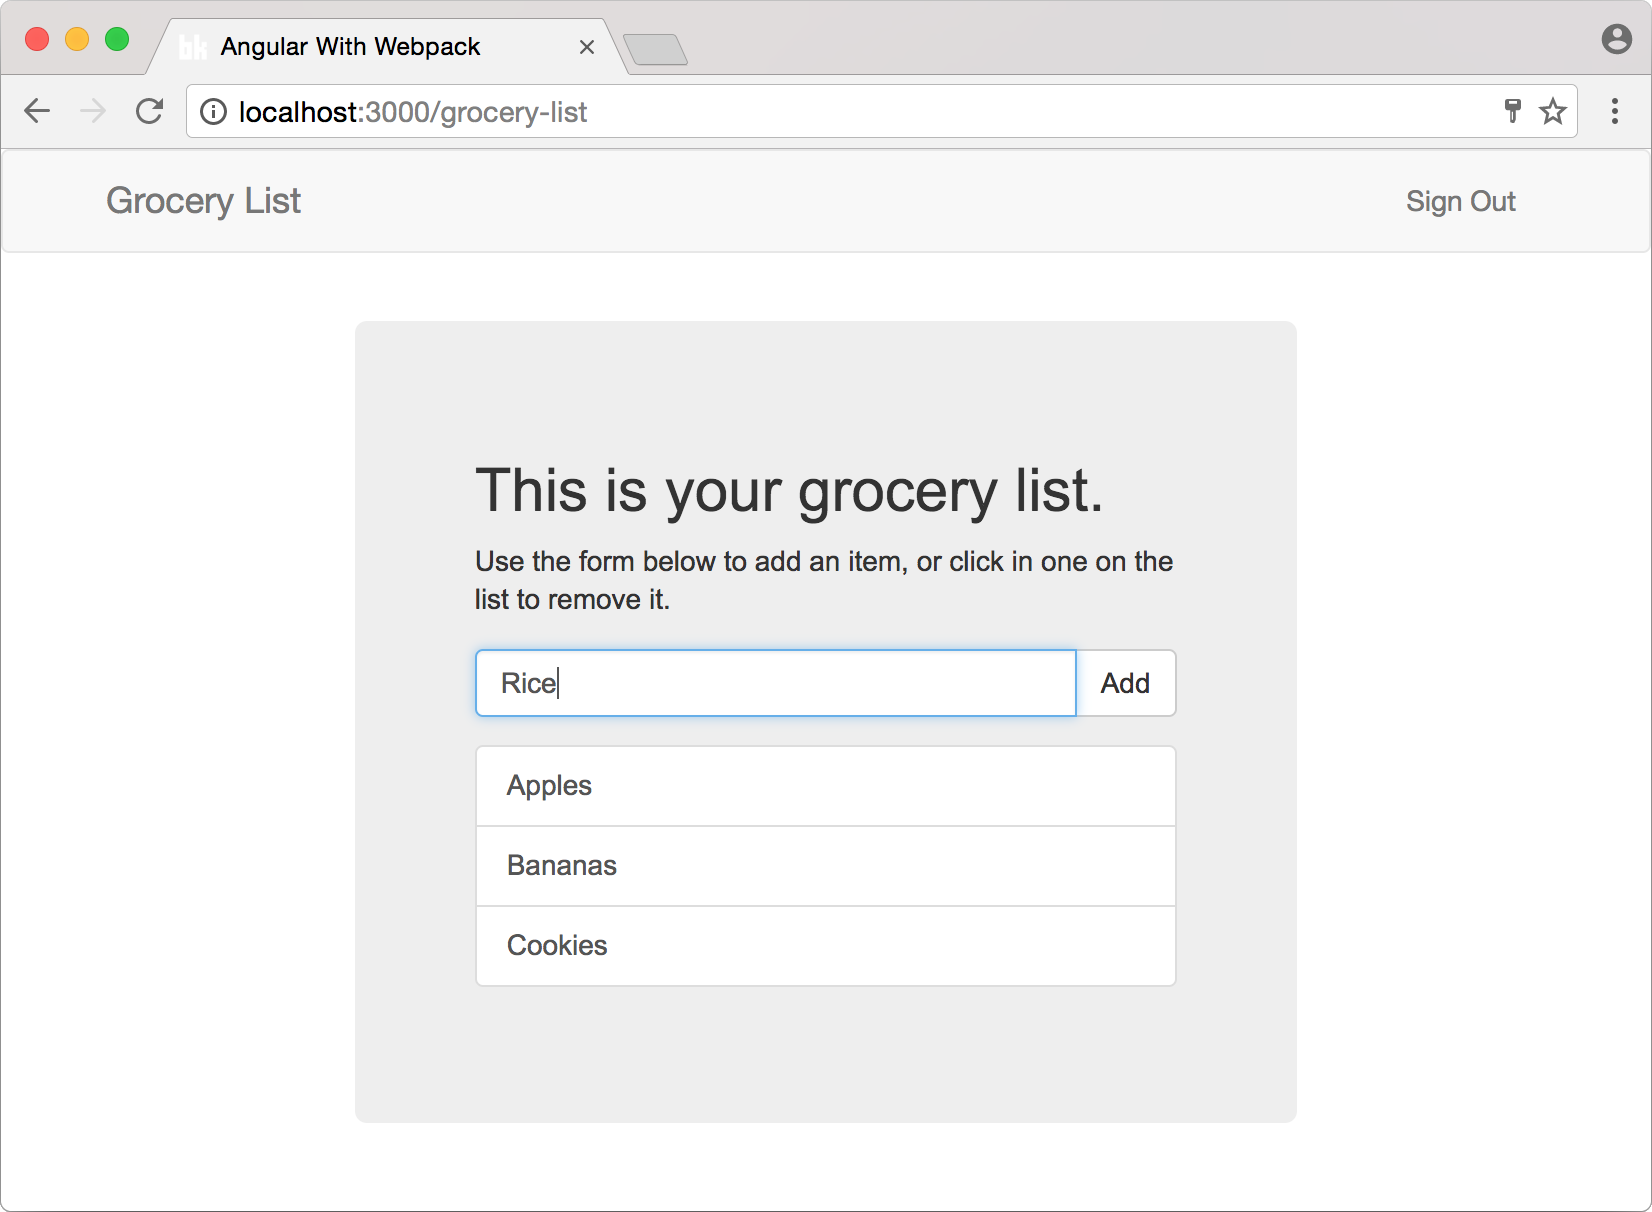
The grocery list application will have a very simple and intuitive functionality. Visitors (unknown users) will be able to register themselves or, if they already have registered before, to sign in and manage their current list of items to buy at the grocery store. A user won't be able to have more than one list. The application will look like this:
The most important files of our source code will be divided in three folders:
1. Client source folder—which will hold our Angular 2 source code.
2. Common source folder—which will hold files that are used by both backend and front-end.
3. Server source folder—which will contain all the code that is responsible for persisting users' data and authenticating them.
## Cloning the Repo
To reach a minimum viable architecture, where we can start developing the real code for our grocery list, we'll need to do some configuration. Angular 2 alone is already considered cumbersome to configure. So, to avoid wasting valuable time, we will use a repo that provides a very good starting point, containing many of the dependencies installed and configured. Leaving us to deal with what matters: Koa's middlewares, Angular's components and JWT tokens' configuration.
This repo was built specifically to be followed alongside with this post, and can be [found on GitHub](https://github.com/auth0-blog/grocery-list). So let's clone it:
```bash
git clone git@github.com:auth0-blog/grocery-list.git
```
### Node.js and NPM
Now that we have the repository cloned, we need to start configuring our development environment. The most important piece of software that will enable us to use Koa and Angular 2 is [Node.js](https://nodejs.org/en/) and its package manager, [NPM](https://www.npmjs.com/). So, in order to continue, we shall first be sure that we have both of them installed with the right version:
```bash
node --version
```
The above command must output, at least, `v7.6.0`, since it is the first version that supports `async` functions. If an error occurs, while issuing this command, or a version prior to that gets printed, please refer to the [download area of Node.js and install the latest version](https://nodejs.org/en/download/).
Having Node.js and NPM correctly installed, we must issue `npm install` on our project's root folder. This command will install, locally, all the runtime and development dependencies that our application has. This command may take a while to run since there are many dependencies.
When the installation finishes, we must issue a `npm run dev` to verify that indeed our project was correctly cloned and that the dependencies were installed. This command will bundle everything and start the Koa server locally on port 3000, so let's head to [http://localhost:3000/](http://localhost:3000/) and check that our backend is serving the `index.html` file. If it is, you will see a very simple page with the title 'Grocery List' in the navigation bar at the top. This bar will also contain two labels called 'Sign In' and 'Sign Up', but they won't do anything for the time being.
## Grocery List Application's Backend
Everything is now in order and we can begin talking about our backend. This will be a thin layer as it will have only three responsibilities. First it will have to be able to register and retrieve users, second it will have to authorize (or deny) user request and third it will have to be able to manage updates to users grocery lists.
To makes things easier we will map just two classes to represent our entities: a User class, to hold users' data; and a Exception class, to represent errors like unauthorized requests. We won't create a class to represent the grocery list itself because this can be easily managed as a property, an array of strings, in our users.
To provide persistence and guarantee that our users' data is available, all our data will be held by an [in-memory database called LokiJS](http://lokijs.org/). This database has the advantage of being really simple to setup and integrate with Node.js. But first, let's start by configuring Koa and its middlewares.
### Koa
Koa's middlewares, just like Express middlewares, are functions that have access to three things: the request object, that represents the request sent by the user; the response object, that represents what will be sent to the user; and the next middleware in the stack. Middlewares can execute any code to change the request and/or the response object and can decide if the next middleware will get executed or not.
Our application will have three middlewares that will help us providing the functionality that we need.
The first middleware is [koa-bodyparser](https://github.com/koajs/bodyparser). This middleware is responsible for parsing the request sent by the user and it supports three types of content: JSON objects, forms (inputs, select boxes and so on) and text. Whenever we have this middleware configured, we can access the data sent by the user. This is a must-have middleware, and as such our boilerplate repository already comes with it installed and configured.
The second middleware is called [koa-static](https://github.com/koajs/static). As the name indicates, this middleware enables us to serve static files, like an image, or an html file, to our users. Considering that we want our users to be fed with the `index.html` whenever they visit our website, we need this middleware. This is another must-have middleware, so the base project already have this one as well.
The third middleware will be responsible for sending errors formated as JSON objects to our users. Although we could use an existing middleware, like [koa-error](https://github.com/koajs/error), we will build this one from scratch to show how easy it is.
#### The Exception Handler Middleware
Let's begin by creating an `Exception` class to represent expected errors during runtime. Since this class will be useful on our front-end as well, we shall create it, naming as `exception.ts`, in a new folder called `common`. The result must be a file on `./src/common/exception.ts` with the following content:
```typescript
export class Exception extends Error {
private _statusCode: number;
constructor(statusCode: number, message: string) {
super(message);
this._statusCode = statusCode;
}
get statusCode(): number {
return this._statusCode;
}
toObject(): Object {
return {
statusCode: this._statusCode,
message: this.message
}
}
}
```
As we can see, what we've just created is responsible for carrying two properties related to errors. A status code, that represents an HTTP status, and a message with the error description.
In order to be able to warn our users properly—i.e. in a JSON object format—about these errors, we have now to create an `exception-handler.middleware.ts` file that will contain our's middleware source code. Create it as a sibling to `app.ts`, under `./src/server/`. The contents of this middleware are very simple:
```typescript
import {Exception} from "../common/exception";
export default async (ctx, next) => {
try {
return next();
} catch (err) {
if (err instanceof Exception) {
// it transform the exception to an object literal
ctx.body = err.toObject();
ctx.status = err.statusCode;
} else {
// unknow error
ctx.body = { message: 'Unexpected error.' };
ctx.status = 500;
}
}
};
```
Reading this file from top to bottom, we can see that it first declares a dependency on the previously created `./src/common/exception.ts` file and, after that, exports an `async` function. This function passes the control to the next middlewares in the stack, to let them process the requests, while keeping sure that if any errors occurs on them it gets catch and then informed to the user as an object literal.
Defining the `Exception` class and the `exception-handler` middleware is not enough. We also have to change `./src/app.ts` to make our Koa server use these new resources.
```typescript
// ... other imports
// import the newly defined exception handler middleware
import exceptionHandler from "./exception-handler.middleware";
// ... previou configs and middlewares
// make Koa server use the middleware
SERVER.use(exceptionHandler);
SERVER.use(ROUTER.routes());
SERVER.listen(3000);
```
It is important to note that the `exception-handler` middleware must be configured *before* the `ROUTER.routes()` middleware. Defining it like that enables our handler to call the routers that we will define later, and handle any exceptions and errors that might occur on them.
### User's Class and LokiJS Database
We have now a backend application that is capable of serving static files, parsing user requests and handling exceptions. So let's start creating the representation of our users and then create a class that will help us persist these users.
Our `User` class implementation is straightforward. Create a file called `user.ts` in the same folder of `exception.ts`, which is `./src/common/`, and then add the following code:
```typescript
export class User {
public email: string;
public password: string;
public name: string;
public token: string;
public items: Array;
public static OnSerialized(instance : User, json : any) : void {
delete json.password;
delete json.meta;
}
}
```
Besides the five properties defined in this class, there is one fancy element, the static `OnSerialized` method, that worths a mention. To avoid sending over the wire the users password and a property called meta, that only LokiJS cares about, we will use a `Serialize` function that is part of a package entitled [cerialize](https://github.com/weichx/cerialize). Whenever we use this `Serialize` function, this `OnSerialized` gets called and removes the mentioned properties, sending only the data that we want to send.
Now, the user database helper, which we will create as a new file called `user.dao.ts` on `./src/server/user/`, will contain three methods that will allow us to persist and retrieve users and a method to bootstrap the database collection.
```typescript
import { User } from '../../common/user';
class UserDAO {
private USER_DB: LokiCollection<{}>;
configure(DB: Loki) {
let instance = this;
DB.loadDatabase({}, function () {
instance.USER_DB = DB.getCollection('user');
if (!instance.USER_DB) {
instance.USER_DB = DB.addCollection('user');
}
});
}
insertUser(user: User) {
this.USER_DB.insert(user);
}
findByEmail(email: string): any {
return this.USER_DB.findOne({ email });
}
update(user: User): void {
let persistedUser = this.findByEmail(user.email);
persistedUser.items = user.items;
this.USER_DB.update(persistedUser);
}
}
export const SINGLETON: UserDAO = new UserDAO();
```
The first method defined, `configure`, will be later called with an instance of a LokiJS database. This instance will then be used to get the `user` collection or, if it was not created yet, create this collection. The other three methods are pretty self-explanatory. We call `insertUser` to insert new users, `findByEmail` to find an user by the e-mail address and `update` to make the user's new data persistent.
Last thing that we have to do, to have a user collection to hold some data, is to setup LokiJS within our backend and then configure the `UserDAO` class to use it. So, on `./src/server/app.ts`, let's make the following changes:
```typescript
// ... previous imports
// import LokiJS and UserDAO
import * as Lokijs from "lokijs";
import {SINGLETON as UserDAO} from "./user/user.dao";
const DB = new Lokijs('grocery-list.json', {
autosave: true
});
UserDAO.configure(DB);
// ... everything else
```
This change is small and simple. There are only three steps that we need to follow:
1. Import LokiJS and `UserDAO`.
2. Configure a new instance of LokiJS, defining a system file that will hold our data while our server is not up.
3. And then call `configure` method on our singleton `UserDAO`, passing to it the LokiJS database instance.
So far we have only called the method that configures `UserDAO`. The other ones, that enables us to retrieve and update users, are yet to be used.
Next we will create a route to allow a user to be updated.
### Handling User Update
To be able to update our users grocery list, we now have to create our first Koa's route. The project that we've cloned already contains one route, defined on `./src/app.routes.ts`, that serves the `index.html` file whenever an unknown URL is called. We do this to allow the Angular 2 front-end application, that we are going to build, handle routes by itself.
Creating a Koa route to handle updates on users is a straightforward process. Let's create a file called `user.routes.ts` on `./src/server/user/` with the following code:
```typescript
import {SINGLETON as UserDAO} from "./user.dao";
export default {
path: '/api/update-list',
middleware: async (ctx, next) => {
let user = UserDAO.findByEmail(ctx.state.user.email);
user.items = ctx.request.body.items;
UserDAO.update(user);
ctx.body = {};
}
}
```
All that we do in this file is export a object literal with two properties. The first property, called `path`, represents the URL that will be requested by external resources, like our front-end, to update the a user's grocery list. The second property, called `middleware`, contains the `async` function that will handle such requests.
This function acts as a last resource in a request, since it does not call `next();` like the previous one that we've built. It simply retrieves a user object, base on the user's e-mail, and then update this user with the new items sent within the `ctx.request.body`.
Notice that we use two different objects to get data from the request. The second object, `ctx.request.body`, contains the new information sent by the user and it is under `koa-bodyparser`'s responsibility to parse it properly. The first object, `ctx.state.user` does not exist yet. We still have to find a way to identify whose request we are handling, but first we have to wire our new route to our application:
```typescript
// ... koa router and fs imports
import UPDATE_LIST_ROUTE from "./user/user.routes";
// ... other routes
ROUTER.post(UPDATE_LIST_ROUTE.path, UPDATE_LIST_ROUTE.middleware);
export default ROUTER;
```
The code snippet above has to be inserted on `./src/server/app.routes.ts`. First we import our route and, after other routes already defined on this file, we register it on the main `ROUTER` object, configuring it to handle post requests for the defined `path`.
### Authentication and Authorization
We now have the endpoint that will handle updates on users list integrated on the backend and ready to work. But we are still missing a way to authorize a user to issue such an update and, more than that, we still don't have an endpoint to authenticate existing users and register new ones. These are the last features that we have to implement on our backend, so let's dig into them.
First thing that we will do is to create a file called `authentication.routes.ts` under `./src/server/` folder with the following content:
```typescript
// routes
import {SINGLETON as UserDAO} from "./user/user.dao";
import {Exception} from '../common/exception';
import { sign, verify } from "jsonwebtoken";
import {Serialize} from "cerialize";
const SUPER_SECRET = 'change-this';
export const SIGN_UP = {
path: '/api/sign-up',
middleware: async (ctx, next) => {
let user = UserDAO.findByEmail(ctx.request.body.email);
if (user) {
throw new Exception(401, 'E-mail already registered.');
}
UserDAO.insertUser(ctx.request.body);
user = UserDAO.findByEmail(ctx.request.body.email);
ctx.body = {
token: sign(user, SUPER_SECRET),
user: Serialize(user)
};
}
};
export const SIGN_IN = {
path: '/api/sign-in',
middleware: async (ctx, next) => {
let user = UserDAO.findByEmail(ctx.request.body.email);
if (user && ctx.request.body.password == user.password) {
ctx.body = {
token: sign(user, SUPER_SECRET),
user: Serialize(user)
};
} else {
throw new Exception(401, 'Uknown user');
}
}
};
export const SECURED_ROUTES = {
path: /^\/api\/(.*)(?:\/|$)/,
middleware: async (ctx, next) => {
try {
let token = ctx.request.headers['authorization'];
ctx.state.user = verify(token.replace('Bearer ', ''), SUPER_SECRET);
return next();
} catch (err) {
throw new Exception(401, 'Uknown user');
}
}
};
```
This new file exports three `async` functions that will act like routes, let's dive into the first two of them:
1. The first one will respond to `/api/sign-up` post requests and it will enable new users to register to our application.
2. The second one is going to be tied up to `/api/sign-in` in order to allow (or deny) an user to use the application. This is done based on an e-mail and a password informed by the user.
Both middlewares described above respond to the user in the same way. If they are fed with proper data they send back a JSON response containing a token—issued by a function called `sign` of the [jsonwebtoken package](https://github.com/auth0/node-jsonwebtoken)—and the user data, which contains its e-mail address, its name and its list of items to buy at the grocery store. In case the user sends improper data, like a wrong combination of e-mail and password, or tries to register with an e-mail that is already registered, both middlewares answer with an exception describing the problem.
The third middleware acts as a key component on our backend. As we can see, the path that it will answer to is a regular expression. This regular expression makes this middleware activate on any request sent to paths that begins with `/api/`, and what it does is to check if a valid token is informed on the `authorization` header request. This verification occurs with the help of `verify` function of the [jsonwebtoken package](https://github.com/auth0/node-jsonwebtoken).
`Sign` and `verify` functions work together to secure our users' data. Whenever a request is sent to any of the protected endpoints, `verify` takes control and ties a user object literal, that is retrieved from the token, to the `ctx.state.user` reference. This token *must* be present and signed with the same secret ingredient, which is done by the `verify` function when the user authenticated or registered.
So, that is how we guarantee that our user is who he claims to be. A Token data can be read by anyone anywhere, but its content cannot be changed because if it is, the `verify` function will complain that it cannot assert this content.
Now it's time to register these new routes on our backend application. To do so, open the `./src/server/app.routes.ts` file and add the following code:
```typescript
// ... previous imports
import { SIGN_IN, SIGN_UP, SECURED_ROUTES } from "./authentication.routes";
// ... LOAD_HTML function declaration and middleware that uses it
ROUTER.post(SIGN_IN.path, SIGN_IN.middleware);
ROUTER.post(SIGN_UP.path, SIGN_UP.middleware);
ROUTER.post(SECURED_ROUTES.path, SECURED_ROUTES.middleware);
ROUTER.post(UPDATE_LIST_ROUTE.path, UPDATE_LIST_ROUTE.middleware);
export default ROUTER;
```
It is important to notice that order matters when defining middlewares and routes on Koa. Each middleware/route can decide wether the next one on the stack must execute or not. So we must define `SIGN_IN` and `SIGN_OUT` *before* the `SECURED_ROUTES` middleware and the three of them must also be defined *before* `UPDATE_LIST_ROUTE`.
Like so, we finish writing our backend, which has now every feature that we desire secured, and can focus on the front-end development with Angular 2.
## Angular 2 Front-End - the Final Boundary
The repository that we've cloned already comes with a basic Angular 2 application that is bootable. But it doesn't really do anything useful and, as so, we must create the components that will allow our users to register, authenticate and manage their lists.
There are three components that we will have to create - `SignInComponent`, `SignUpComponent` and `GroceryListComponent` - alongside with a `RouterModule` to handle front-end's states, an `AuthenticatedGuard` that will prevent unknown users to access protected areas, an `AuthenticationService` that will be used by the first two components and a `GlobalErrorHandler` that will catch any error and warn the user.
As we can see, even in a simple application as our grocery list, there is a very good number of moving parts. So let's get to them.
### Handling Errors Globally
The first moving part that we are going to attack is the `GlobalErrorHandler`. This handler will enable us to warn the user when an expected error occur, like badly informed credentials. Creating this handler is quite simple, first we create a file called `global-error-handler.ts` under `./src/client/app/` with the following content:
```typescript
import { ErrorHandler } from "@angular/core";
import { Exception } from '../../common/exception';
export class GlobalErrorHandler implements ErrorHandler {
handleError(error : any) {
if (error.rejection && typeof error.rejection.json == 'function') {
let myErrorObj: Exception = error.rejection.json();
alert(myErrorObj.statusCode + ': ' + myErrorObj.message);
} else {
console.log(error);
}
}
}
```
Notice that our `GlobalErrorHandler` uses the common `Exception` class that we've created before. This is used to tightly type the error coming over the wire and then to be able to refer to the status code and error message.
Now we have to register it on the main application module, that is hold by the `./src/client/app/app.module.ts` file:
```typescript
// ... previous imports
import {GlobalErrorHandler} from "./global-error-handler";
@NgModule({
// ... other statements
providers: [
{ provide: ErrorHandler, useClass: GlobalErrorHandler }
]
})
export class AppModule { }
```
Registering it to become our `ErrorHandler` is easy. As we can see in the snippet above, it is just a matter of telling Angular that whenever it needs `ErrorHandler`, it must actually use `GlobalErrorHandler` class.
### Authentication Service on the Front-End
After configuring a way to handle errors on our front-end application, it is time to create our first and only Angular 2 service. This service will be responsible for both authentication and sign up, and it is going to be called `AuthenticationService`. Let's create a file called `authentication.service.ts`, in `./src/client/app/` folder, to handle these features for us.
```typescript
import {Injectable} from "@angular/core";
import {Http} from "@angular/http";
import "rxjs/add/operator/toPromise";
import {User} from "../../common/user";
import {Router} from "@angular/router";
@Injectable()
export class AuthenticationService {
private _user: User;
constructor(private http: Http, private router: Router) { }
private onAuthenticated(response: any): void {
this._user = response.json().user;
localStorage.setItem('token', response.json().token);
this.router.navigate(['/grocery-list']);
}
authenticate(email: string, password: string): Promise {
return this.http.post('/api/sign-in', { email, password })
.toPromise()
.then(response => this.onAuthenticated.call(this, response));
}
signUp(user: User): Promise {
return this.http.post('/api/sign-up', user)
.toPromise()
.then(response => this.onAuthenticated.call(this, response));
}
user(): User {
return this._user;
}
}
```
This service only has three public methods: one to `authenticate` an user based on an e-mail and a password that are passed as parameters; another one to allow a new user to `signUp` to our application; and third method that returns the `user` authenticated, or null.
Both `authenticate` and `signUp` methods have a very similar behavior. The first one makes a call, through the Angular 2 `Http` component, to `/api/sign-in` endpoint passing an object literal containing the user's e-mail and password. If the backend sends back a successful response, then `authenticate` method handles this response to the private method called `onAuthenticated`. This private method then takes three steps:
1. It takes the user's data sent back and keeps it on the service memory, under the `_user` property.
2. It gets the JWT token sent by the server and registers it on the `localStorage` under the `token` key.
3. Sends the user to the `/grocery-list` Angular 2 route (yet to be defined).
The `signUp` method proceeds almost in the exactly same way. The difference is that it sends the users name, in parallel with their e-mail and password, and the endpoint also changes to `/api/sign-up`. But, if the request gets a successful response, this methods proceeds exactly the same way as the `authenticate` method, passing the response to `onAuthenticated` private method.
Also, it is important to notice that if any error is sent back from the server, then `GlobalErrorHandler` previously defined handles the error by showing it to the user through an `alert(message)` call.
Lastly, let's not forget to register this service within our `AppModule`, that is located at `./src/client/app/app.module.ts`. Simple task, just add it as a provider below our `GlobalErrorHandler`:
```typescript
// ... other imports
import {AuthenticationService} from "./authentication.service";
@NgModule({
// ... previous definitions
providers: [
{ provide: ErrorHandler, useClass: GlobalErrorHandler },
AuthenticationService
]
})
export class AppModule { }
```
The difference between both declarations occur due to the fact that `GlobalErrorHandler` works as a substitute to the default `ErrorHandler`, while `AuthenticationService` does not substitute anything, it will get injected on the components that we will create.
### Sign Up Component Definition
Now we will start working on the three components that compose our application, the first that we will investigate is the `SignUpComponent`. Its definition is very easy, as the heavy work is done by the `AuthenticationService`. Create a new file called `sign-up.component.ts` in a new folder called `sign-up` under `./src/client/app/` and paste the following code:
```typescript
import {Component} from "@angular/core";
import {AuthenticationService} from "../authentication.service";
import {User} from "../../../common/user";
@Component({
selector: 'sign-up',
templateUrl: './sign-up.component.html'
})
export class SignUpComponent {
user: User = new User();
constructor(private authenticationService: AuthenticationService) { }
signUp(): void {
this.authenticationService
.signUp(this.user);
}
}
```
We will also need to create the `sign-up.component.html` that is referenced by this component. Create it right next to the component definition and paste the following HTML code:
``` html
Fill your data.
```
This component, and its template, works in a simple way. It just define a dependency to `AuthenticationService`, a property of the type `User` and a method `signUp`. Whenever our users reach this component, they will be facing a form with three input texts: one to fulfill with the user's name; another one to fulfill with the user's e-mail address; and the last one with to fill with the desired password. After filling these fields, the user will have to submit the form by clicking the `Sign Up!` button, which will trigger the `signUp` method that we have just defined. This `signUp` method only has one responsibility, to pass the user's data to `AuthenticationService.signUp` method.
### Sign In Component Definition
The next component that we are going to define is `SignInComponent` and it is extremely similar to the `SignUpComponent`. This component will also have its own folder, so let's create a `sign-in` under `./src/client/app/` and add a file called `sign-in.component.ts` to it with the code below:
```typescript
import {Component} from "@angular/core";
import {AuthenticationService} from "../authentication.service";
@Component({
selector: 'sign-in',
templateUrl: './sign-in.component.html'
})
export class SignInComponent {
email: string;
password: string;
constructor(private authenticationService: AuthenticationService) { }
signIn(): void {
this.authenticationService
.authenticate(this.email, this.password);
}
}
```
Similarly to `SignUpComponent`, we also have to define a template to be used by this component. So we must add a file called `sign-in.component.html` besides the previous file and add the following HTML template:
``` html
Enter your credentials.
```
As we can see the only difference between both components is that the last one does not asks for the user's name and calls `AuthenticationService.signIn` method instead of `AuthenticationService.signUp`. These components could easily be merged into a single `SignInSignUpComponent`, but let's follow the [single-responsiblity principle](https://en.wikipedia.org/wiki/Single_responsibility_principle) and keep things separate.
### AuthHttp Configuration
Before moving ahead to the `GroceryListComponent` we must first configure a great component called `AuthHttp`. This component belongs to the [angular2-jwt package](https://github.com/auth0/angular2-jwt) and it makes communicating with secured backend very easy.
Since we have already followed the convention stated on its documentation - i.e. we have saved ours users' JWT token under the `id_token` on the `localStorage` - it is just a matter of configuring our `AppModule` to use it as a `provider` and then defining this class as a dependency to whatever component needs it (like we are going to do with `GroceryListComponent`).
So, let's open the `./src/client/app/app.module.ts` file and add this class as a provider:
```typescript
// ... previous imports
import {AUTH_PROVIDERS} from "angular2-jwt";
@NgModule({
// ... previous configuration
providers: [
// ... previous providers
AUTH_PROVIDERS
]
})
export class AppModule { }
```
### Grocery List Component Definition
Now we finally get to the real deal component. The `GroceryListComponent` is what the users are really interested in. This component will be responsible for three things: letting the users see theirs current grocery list; letting the users add new items, through a form, to their lists; and letting the user remove an item by tap/clicking it. Again, two files will be needed. The first one is the component definition with its methods, and the second one is the component HTML template.
Let's begin by creating a new folder called `grocery-list` under `./src/client/app/`. Then we must create a file called `grocery-list.component.ts`, on this new folder, with the following content:
```typescript
import {Component} from "@angular/core";
import {AuthenticationService} from "../authentication.service";
import {User} from "../../../common/user";
import {AuthHttp} from "angular2-jwt";
@Component({
selector: 'panel-component',
templateUrl: './grocery-list.component.html',
styles: [`
.jumbotron p { font-size: 1em; }
.jumbotron form { margin-bottom: 1em; }
`]
})
export class GroceryListComponent {
private updateList = '/api/update-list';
newItem: string;
constructor (private authenticationService: AuthenticationService, private authHttp: AuthHttp) { }
private updateUsersList() {
this.authHttp.post(this.updateList, this.getUser())
.subscribe(
data => this.newItem = null,
err => console.log(err)
);
}
getItems() : Array {
return this.getUser().items;
}
addItem() : void {
if (this.newItem && this.newItem.trim() != '') {
if (!this.getUser().items) {
this.getUser().items = [];
}
this.getUser().items.push(this.newItem);
this.updateUsersList();
}
}
removeItem(index: number) : void {
this.getUser().items.splice(index, 1);
this.updateUsersList();
}
private getUser(): User {
return this.authenticationService.user();
}
}
```
This component definition is far bigger than the previous ones, but it is also easy to grasp its content. What it does is to provide three public methods that will be called by the template:
1. The first method, called `getItem` simply returns a list of `items`, that belongs to the current logged-in `user`. This list is then showed, by the template, to the user so he can see what does he have to buy.
2. The second method, called `addItem`, is responsible for checking if the user has informed a new item, through the `ctx.newItem` property, and then to call the `updateUsersList` private method. This method is also called by the next public method and what it does is to issue a post request, through the `AuthHttp` object, to update the user's list.
3. The third and final method is responsible for enabling the user to remove an item. This method is linked to every single item of the list on the template, and whenever one is tapped/clicked, this method is called with the index of the selected item. Then it simply calls the `updateUsersList` private method, updating the user's list on the backend.
``` html
This is your grocery list.
Use the form below to add an item, or click in one on the list to remove it.
```
The above HTML code is the template that the `GroceryListComponent` expects to find on `./src/client/app/grocery-list/grocery-list.component.html`, so let's create this file and paste this snippet. As we can see here, the template contains: a form that enables the user to inform a new item; and a list of items - which is populated by the [\*ngFor Angular 2 directive](https://angular.io/docs/ts/latest/api/common/index/NgFor-directive.html). Each item on this list also contains a `(click)` event defined to call the `removeItem` method on the component.
### Defining the Routes and their Guard
We are getting really close to having a fully functional grocery list application, but there are a few more steps that we have to take. First we will need to define a [guard](https://angular.io/guide/router#milestone-5-route-guards), called `AuthenticatedGuard`, that will prevent the users to reach the grocery list component if they did not authenticate. For that, let's create a file called `authenticated.guard.ts` under `./src/client/app/` with the code snippet below:
```typescript
import {CanActivate, ActivatedRouteSnapshot, RouterStateSnapshot, Router} from "@angular/router";
import {Observable} from "rxjs";
import {AuthenticationService} from "./authentication.service";
import {Injectable} from "@angular/core";
@Injectable()
export class AuthenticatedGuard implements CanActivate {
constructor(private authenticationService : AuthenticationService, private router: Router) { }
canActivate(route: ActivatedRouteSnapshot, state: RouterStateSnapshot):
Observable | Promise | boolean {
if (this.authenticationService.user() != null) {
return true;
}
this.router.navigate(['/']);
return false;
}
}
```
This guard has as dependency on our `AuthenticationService` and uses it whenever someone tries to activate a route that is wired to it. The `canActivate` method is what blocks or enables a user to move ahead. If the user has not authenticated yet, he or she is redirected to the root route, which will show the sign-in form.
Having defined the guard we are now able to define our routes. This will be done in a new file called `app.routing.ts`. Create this file under `./src/client/app` and add the following code:
```typescript
import {RouterModule} from "@angular/router";
import {SignInComponent} from "./sign-in/sign-in.component";
import {SignUpComponent} from "./sign-up/sign-up.component";
import {GroceryListComponent} from "./grocery-list/grocery-list.component";
import {AuthenticatedGuard} from "./authenticated.guard";
const APP_ROUTES = [
{ path: '', component: SignInComponent },
{ path: 'sign-up', component: SignUpComponent },
{ path: 'grocery-list', component: GroceryListComponent, canActivate: [AuthenticatedGuard] }
];
export const Routing = RouterModule.forRoot(APP_ROUTES);
```
This code creates a constant array called `APP_ROUTES` that contains all the three routes that our application have. They are:
1. The root route - identified by an empty string `''` - is tied up with the `SignInComponent` and, as such, shows the sign-in form whenever reached. This will be available at the root path of our domain (e.g. [http://localhost:3000/](http://localhost:3000/) or [http://www.mydomain.com/](http://www.mydomain.com/)).
2. The `sign-up` route, which will be shown when a user navigate to `/sign-up` path, is wired to `SignUpComponent` and enables users to register to our application.
3. The `grocery-list` route that presents the list of items to be managed by the user. This route, which has as path `/grocery-list` is the only route that is guarded by the `AuthenticatedGuard`. So, whenever a user tries to activate it, the guardian verifies if the user is authenticated and then it decides whether the can navigate to it or not.
Having ours routes defined we must now update the main template, which is located at `./src/client/app/app.component.html`, adding these routes to the hyperlinks on it. Open this file and update it as follows:
```html
```
Also, notice that we must add a `router-outlet` tag to the `section` tag. This is where our components will get rendered.
### Wiring Everything Up in the AppModule
We have now every single piece of the front-end defined, but, before being able to execute our application completely for the first time, we have one last step. Angular 2 forces us to define every single component used in a module in the module definition, in our case in the `AppModule` (which is located at `./src/client/app/app.module.ts`). Fortunately this is a trivial task. Open the module's file and update it as follows:
```typescript
// ... previous imports
import {AuthenticatedGuard} from "./authenticated.guard";
import {Routing} from "./app.routing";
import {GroceryListComponent} from "./grocery-list/grocery-list.component";
import {SignUpComponent} from "./sign-up/sign-up.component";
import {SignInComponent} from "./sign-in/sign-in.component";
@NgModule({
bootstrap: [ AppComponent ],
declarations: [
AppComponent, SignInComponent, SignUpComponent, GroceryListComponent
],
imports: [
BrowserModule, HttpModule, FormsModule, Routing
],
providers: [
{ provide: ErrorHandler, useClass: GlobalErrorHandler },
AuthenticationService,
AuthenticatedGuard,
AUTH_PROVIDERS
]
})
export class AppModule { }
```
Note that we have added five imports - being three components, the `Routing` declaration and the `AuthenticatedGuard` - and that the imported elements must be properly set in the correct place. That is, the three components must be added in the `declarations` array, the `Routing` must be add to the `imports` array and the `AuthenticatedGuard` must be added to the `providers` array.
And then finally we have reached the point where we have a fully functional grocery list. To see it working just issue `npm run dev` in the root folder of our project and, when it finishes the building process, head to [http://localhost:3000/](http://localhost:3000/) and play with our app.
## Conclusion
As we could see, writing Koa web servers is very easy and we achieve very clean code through the use of `async` functions. It is almost as if we were reading code that runs entirely synchronous. Also, by using TypeScript on both the backend and the front-end, our code becomes more readable and reliable, due to the type safe approach of this programming language.
Allied to that, we can see that although these technologies are relatively new, we already have support to a lot of things, like securing the communication with JWT tokens.