---
title: "APIs: A Look Into What They Are and How They Work"
description: "A complete introduction to APIs for beginners. Learn what they are, how they work, and write your first API."
authors:
- name: "Biodun Chris"
url: "https://auth0.com/blog/authors/biodun-chris/"
date: "Nov 15, 2017"
category: "Developers,Deep Dive,API"
tags: ["api", "javascript", "identity", "auth0", "authentication"]
url: "https://auth0.com/blog/api-less-scary-approach/"
---
# APIs: A Look Into What They Are and How They Work
# Introduction to APIs
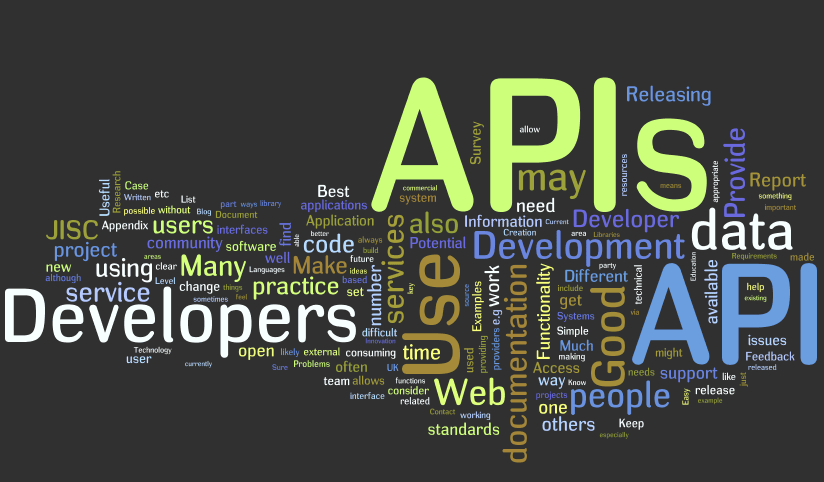
_Image source : [Wikibon](http://wikibon.org/blog/cloud-api-standards/)_
> An API is a set of functions and procedures that allow the creation of applications which access the features or data of an operating system, application, or other service
— Google
> An Application Programming Interface (API) is a set of subroutine definitions, protocols, and tools for building application software…
— Wikipedia
These definitions are combinations of multiple unfamiliar terms which seem like nonsense and scary at first. You can spend a whole day trying to look up every term above and forget what you were searching for in the first place and the chain just never ends.
This happens to everyone. What you should never do is give up. We are here to discuss APIs in a less scary way, let’s get started!
## To Do:
* Explain what an API is.
* Discuss why you would build an API.
* Build a simple app using the Auth0 API.
The magnificent, “Application Programming Interface” or API, highly exalted in the previous definitions above is simply a messenger. Think of an API as a waiter. You go to your favorite classy restaurant to buy food, you have to place your order ( make a request ) right? Someone walks up to you with list of meals available, the waiter ( API ) . The waiter takes your order, goes to the kitchen to process your order and comes back with the meal.

## How requests were made before APIs
Take a look at cheap restaurants, where there are no waiters, no menu, you just walk straight to the kitchen to get your meal. I believe you know how messy and inconvenient that can get, lots of customers barking their orders, each struggling to get attention. You don’t want to be caught up in that mess.
Well, before APIs, clients interacted with the data store directly, which had lots of downsides to it; the biggest of which was the lack of security.
---
In computing, APIs take the request from the user of an app (web client, mobile app, etc.) to get or send a resource. Say you just placed an order for a MacBook from an online store. The online store's API takes the order information and sends it to the server to process the order, then returns a response, notifying you whether it was successful or not. The data has to be represented in a format that both the app and the server will understand, just the way the menu is written in a specific language you and the waiter understand so he can place the right order for you at the kitchen. The generally accepted format is JSON (JavaScript Object Notation). The order information may look like this:
```javascript
{
"customerName" : "John Doe",
"item" : "MacBook Pro",
"price" : 1000
}
```
The API (messenger) sends this data to the Data Store, which saves the order information and API returns with response for the Client. Example response :
```javascript
{
"status": true,
"message": "Your order has been successfully placed, kindly
anticipate delivery in couple days"
}
```
Upon receipt of this response, the client app traverses the data to fetch the needed info. The user gets to see only this message, others are abstracted.
---
## Why do you need an API?
Let’s say you want to display motivational quotes on a section of your website. You might decide to write all these quotes or copy them off the internet and save them in your database. But don’t forget you need a sufficient amount of these, you don’t want to bore your readers with same quotes all the time. So imagine the stress of getting these quotes and saving everything in the database.

_Image source: [The Bitchy Waiter](http://thebitchywaiter.com/2014/02)_
APIs are accessed though endpoints. Endpoints present an interface via which a resource or group of resources can be accessed. So when a request hits the API, it knows just what you want and how to respond to the call.
Take a look at these endpoints from [talaikis.com](https://talaikis.com/random_quotes_api/) :
### Endpoints available:
* [https://talaikis.com/api/quotes/random](https://talaikis.com/api/quotes/random) — returns one random Quote.
* [https://talaikis.com/api/quotes](https://talaikis.com/api/quotes) — returns 100 random quotes at a time.
From the code above, calls made to those endpoints return different resources. The first returns a random quote every time it’s called, while the other returns 100 random quotes. For your app, I believe the first endpoint is just perfect, so we'll use it!
__NOTE__: Before you can make use of any API, you have to read the documentation, know the type of request it takes, queries, parameters and the structure of the expected response.
A sample request using [`jQuery.getJSON()`](https://www.w3schools.com/jquery/jquery_ref_ajax.asp) method to call the first endpoint:
```javascript
jQuery.getJSON('https://talaikis.com/api/quotes/random/', function(quote){
//code to display your quote on the website goes here.
})
```
Response:
```javascript
{
"quote": "I'd like to talk about free markets. Information in
the computer age is the last genuine free market left
on earth except those free markets where indigenous
people are still surviving. And that's basically
becoming limited.",
"author": "Russell Means",
"cat": "age"
}
```
Does that look familiar? Yea, that’s JSON again. We've used a simple external API to get the data we needed with ease.
There’s a lot more we can do with the API, but that’s all we will cover for now. Next, let's build a full application that utilizes various APIs to get a feel of how to work with them.
---
# Quotes Web App
## To Do:
* Build a Quotes Application.
* Introduce Auth0.
* Use Auth0 for User Authentication in our application.
## Building a Quotes Application with ExpressJS
This session assumes you know basic Node.js & Express framework, if not take time out to read up [here](https://goo.gl/vCjXwJ)
Create an ExpressJS (a framework built on top of Node) project using [express-generator](https://www.npmjs.com/package/express-generator). Run the commands below to setup express and create a new project.
```bash
$ npm install -g express-generator
$ express quotesGenerator
$ cd quotesGenerator
```
The second command creates a folder and basic files to start up your project. Open the folder with your favorite IDE or text editor.
Run the command below to install the dependencies described in `package.json`.
```bash
$ npm install
```
## Install additional dependencies:
```bash
$ npm install connect-flash express-session passport hbs --save
```
* [connect-flash](https://github.com/jaredhanson/connect-flash) stores flash messages in the session.
* [express-session](https://github.com/expressjs/session) is a nodejs middleware for handling sessions.
* [passport](https://github.com/jaredhanson/passport) is an authentication middleware for nodejs
* [hbs](https://handlebarsjs.com/) is a templating engine for nodejs.
Open up `app.js` and make the following changes:
_app.js_
```javascript
//require the modules
const passport = require('passport');
const session = require('express-session');
const flash = require('connect-flash');
// set up hbs for templating
app.set('view engine', 'hbs');
//Replace the line below app.use(cookieParser()) with the code below;
//required for passport to maintain user state/data.
app.use(
session({
secret: 'APP_SECRET',
resave: true,
saveUninitialized: true
})
);
app.use(passport.initialize()) //initialize passport
app.use(passport.session()); // persistent login sessions
app.use(flash()); // use connect-flash for flash messages stored in session
//set static files / assets directory
app.use(express.static(path.join(__dirname, 'public')));
// Handle authentication failure error messages
app.use(function(req, res, next) {
if (req && req.query && req.query.error) {
req.flash("error", req.query.error);
}
if (req && req.query && req.query.error_description) {
req.flash("error_description", req.query.error_description);
}
next();
});
// Check logged in
app.use(function(req, res, next) {
res.locals.loggedIn = false;
if (req.session.passport && typeof req.session.passport.user != 'undefined') {
res.locals.loggedIn = true;
}
next();
});
```
Next thing is to create the views:
* Index.hbs
* Profile.hbs
* error.hbs
* layout.hbs
Create those files inside your view directory and rename any `.jade` file to `.hbs`.
_views/error.hbs_
``` html
{{message}}
{{error.message}}
{{error.stack}}
```
The file above display errors while developing with stack traces. The double curly braces allows us to get variables passed from the server-side, you will be seeing more of it.
_views/layout.hbs_
``` html
{{title}}
{{{ body }}}
```
This is a parent view every other view file will have to inherit from. I have included the required assets we need; bootstrap.min.css, jquery.min.js, bootstrap.min.js.
_views/index.hbs_
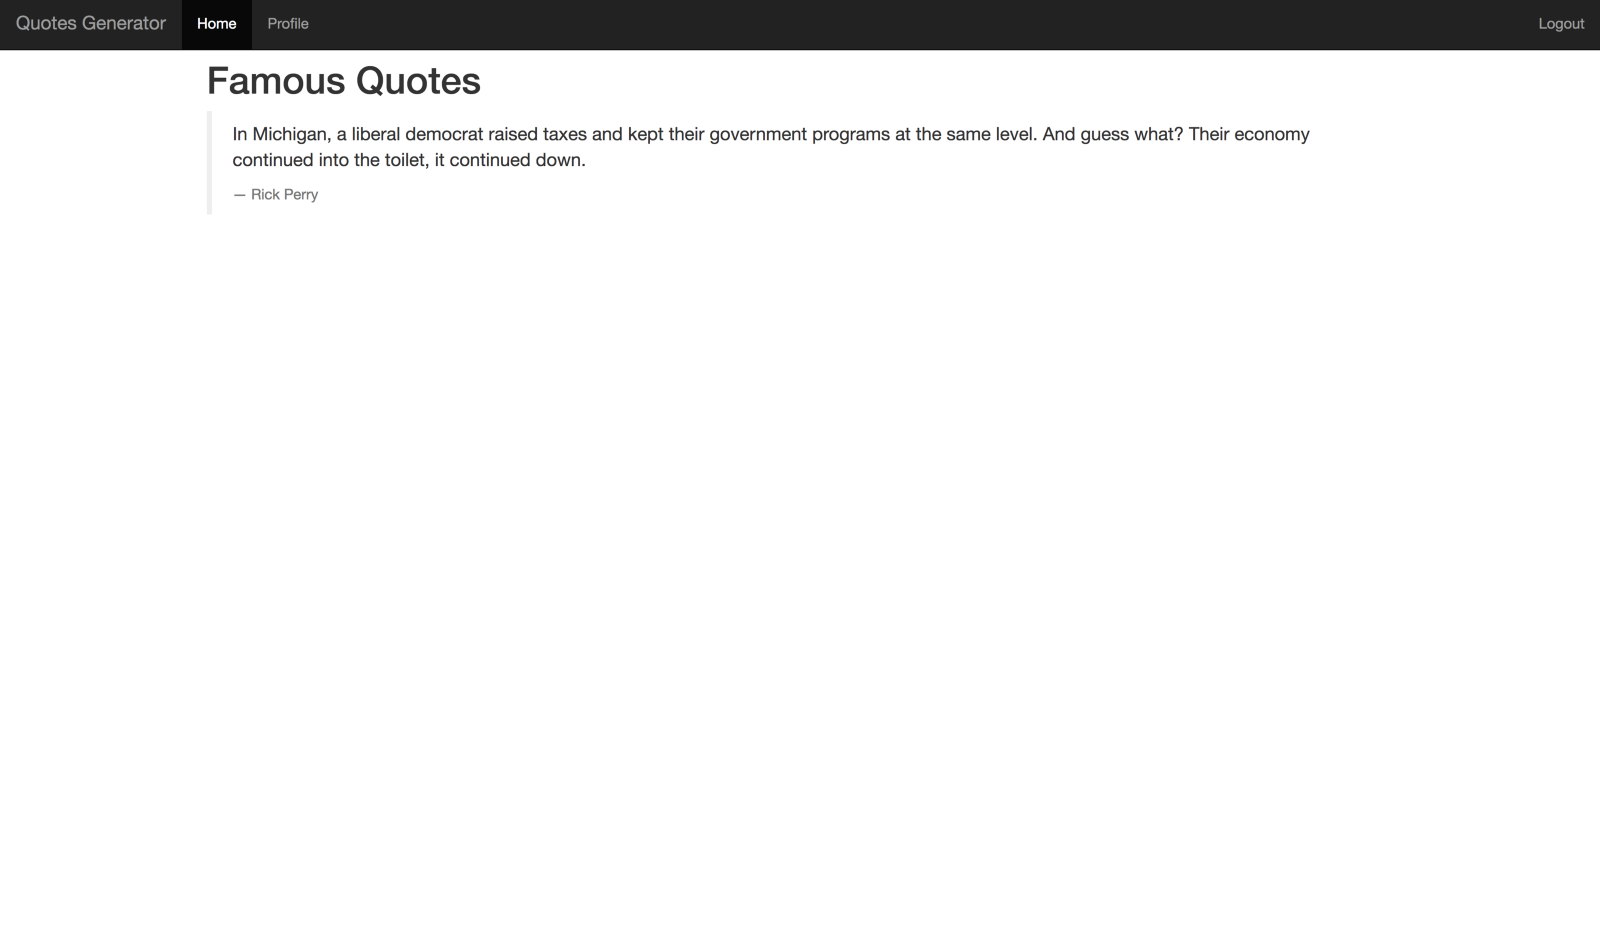
``` html
Famous Quotes
Fetching...
```
This is the landing page. It displays random post everytime it’s loaded. The tiny script embedded in it calls the [talaikis.com](https://talaikis.com) quotes api to obtain random quote.
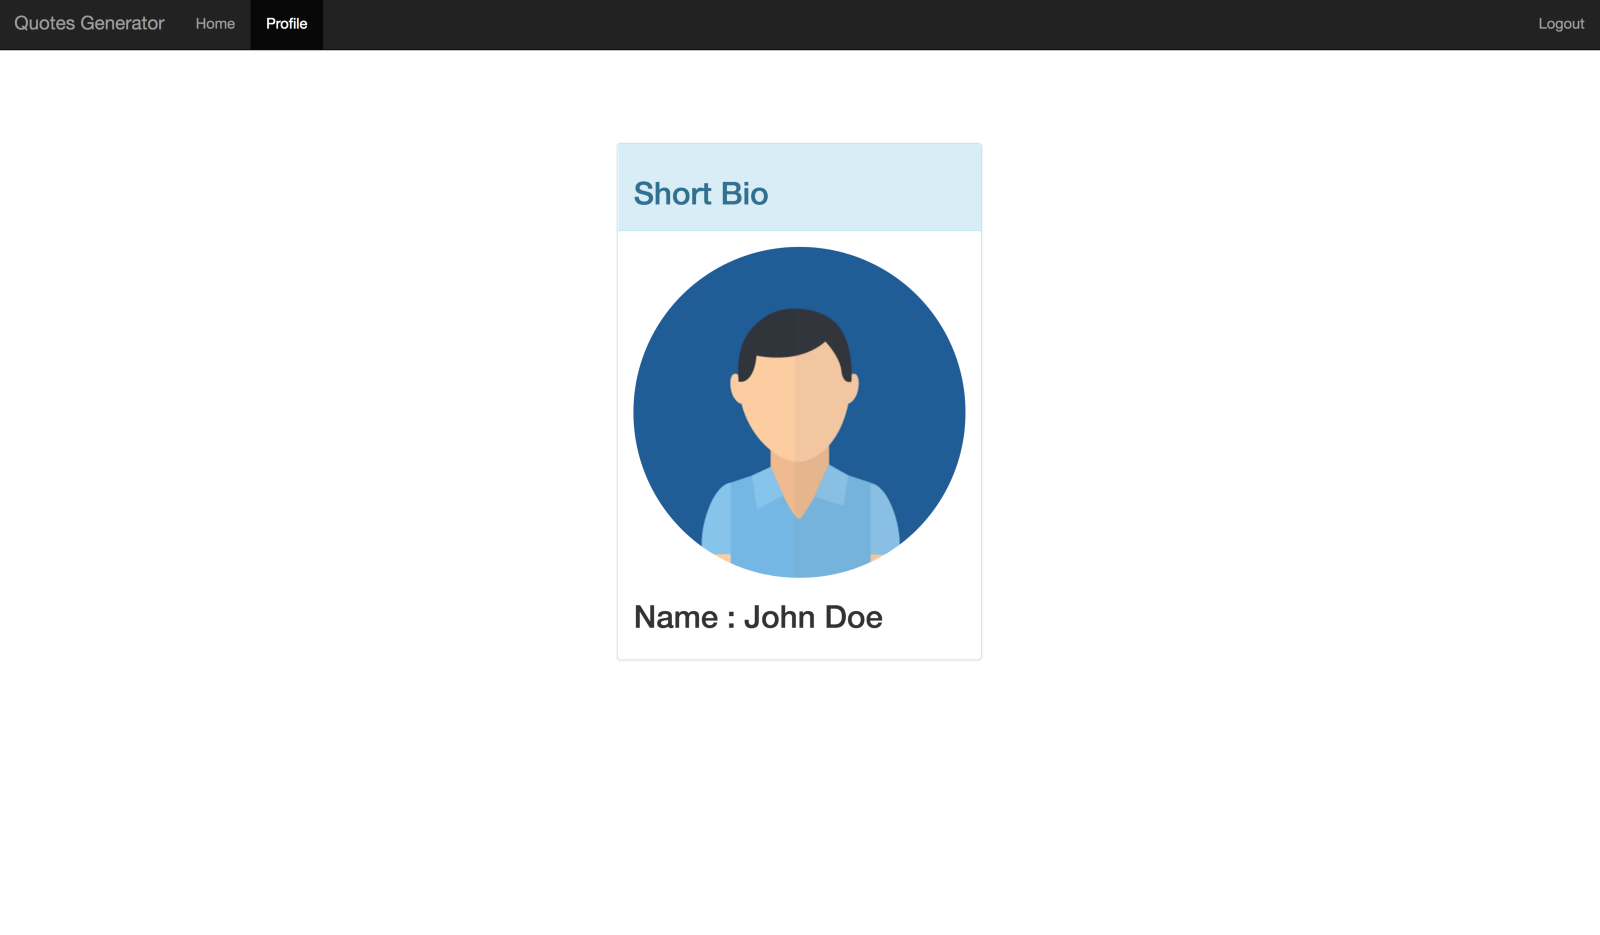
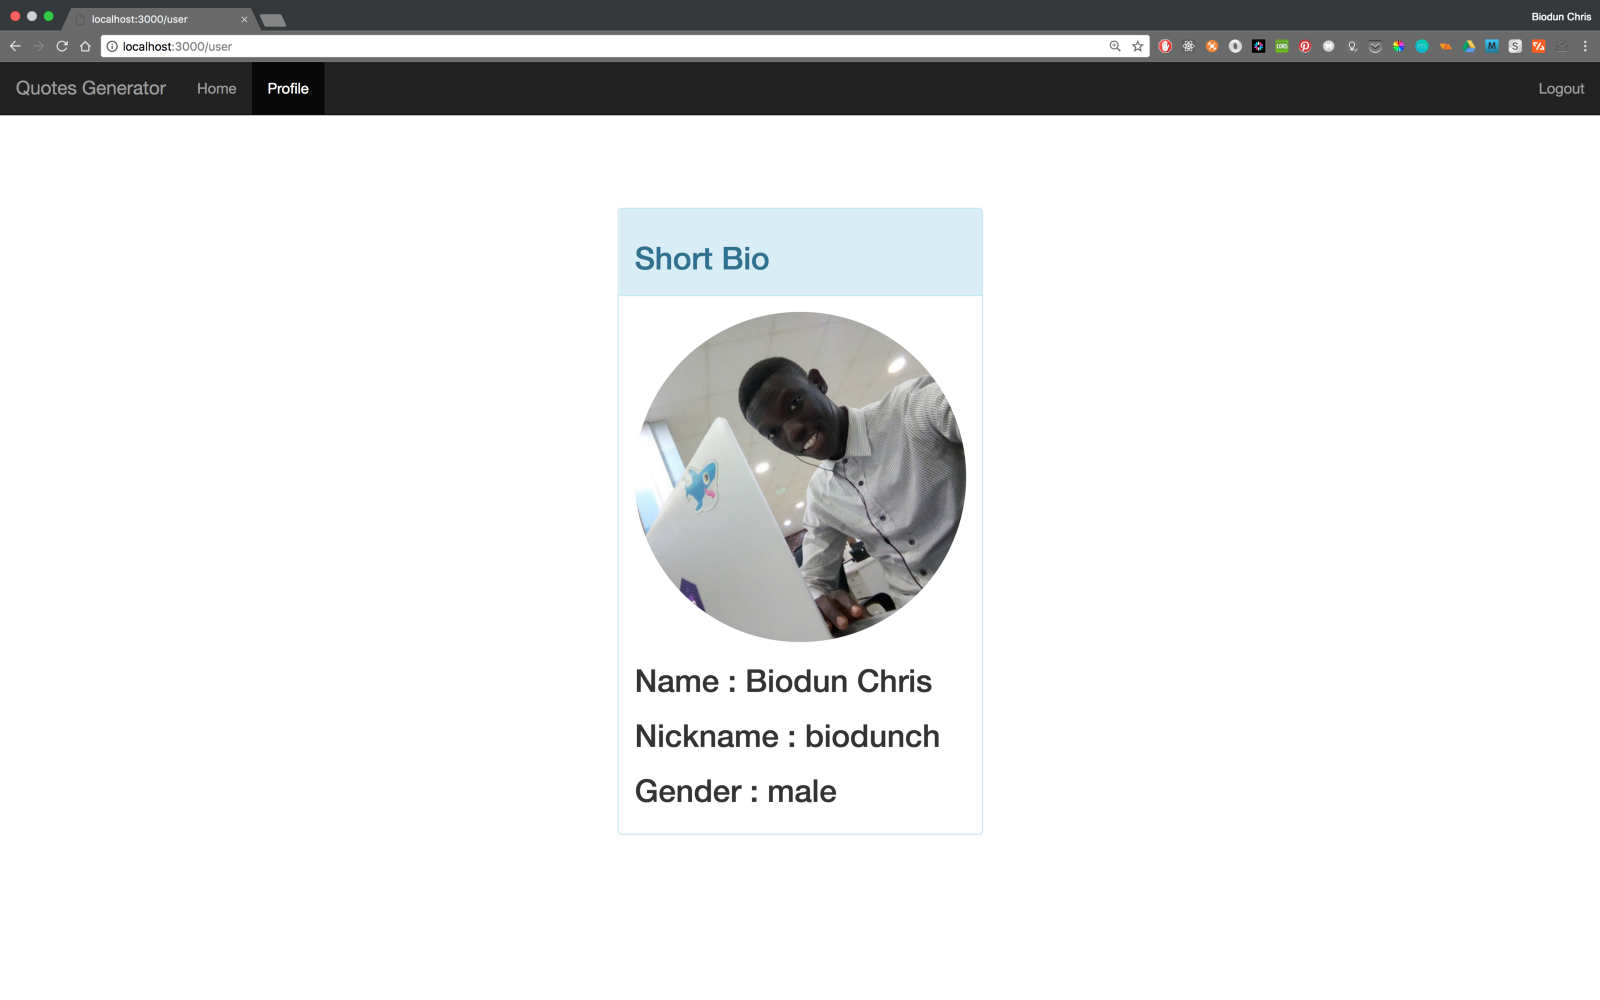
_views/profile.hbs_
``` html
Short Bio
Name : {{ user.displayName }}
Nickname : {{ user.nickname }}
Gender : {{ user.gender }}
```
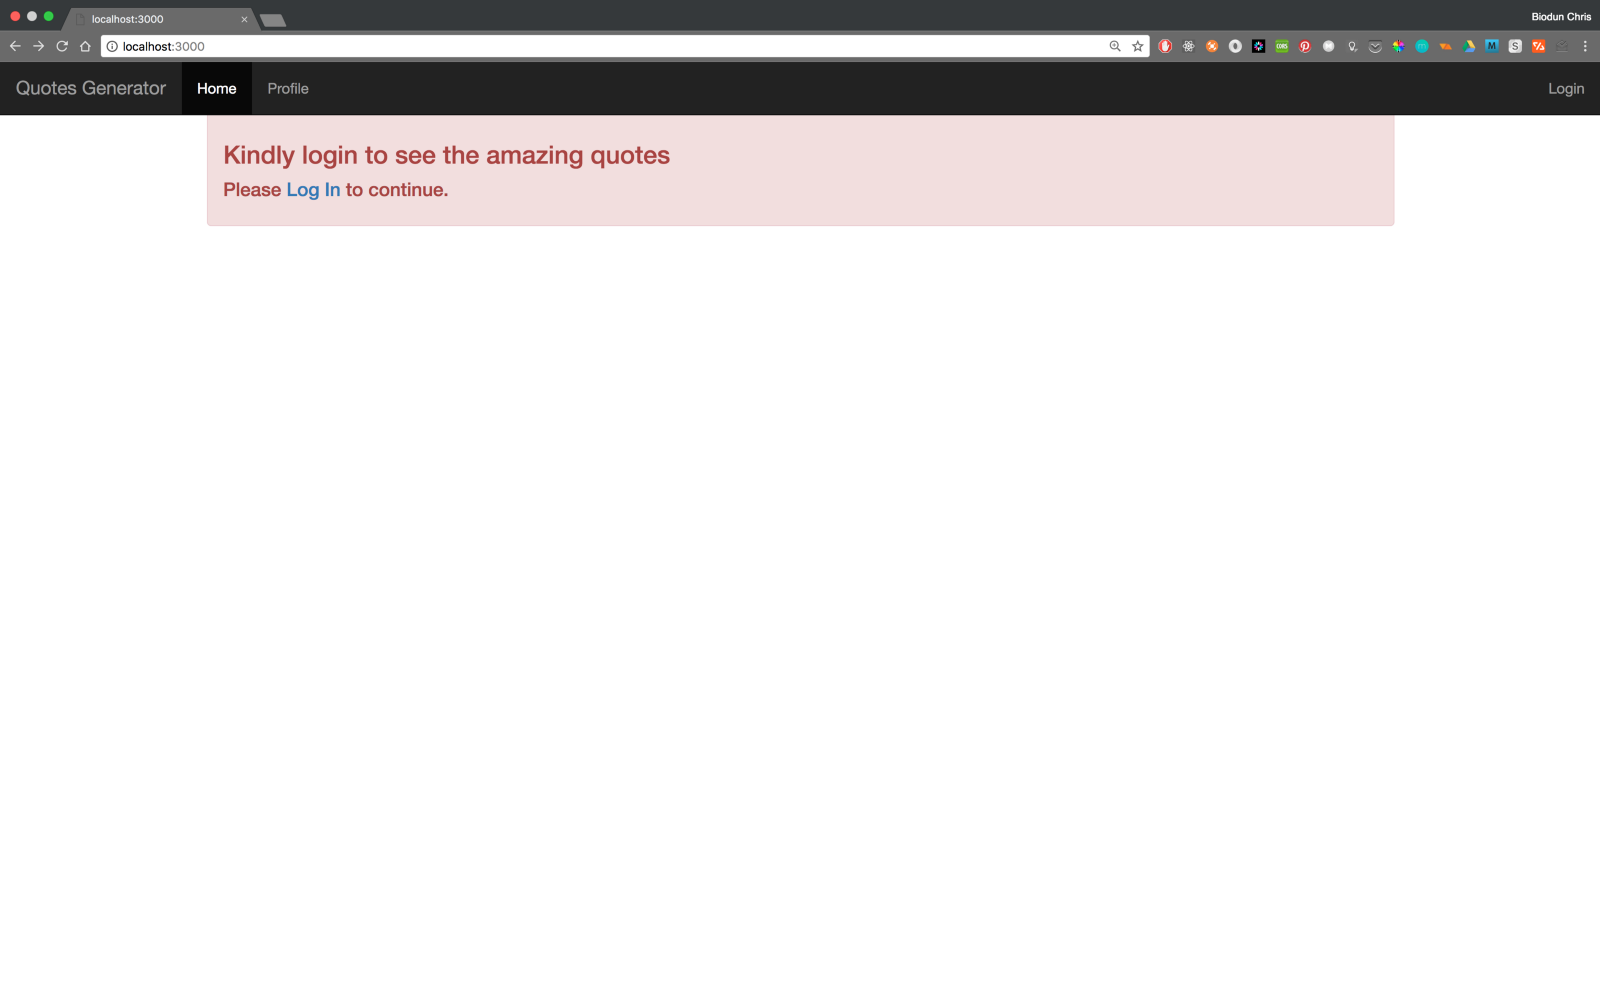
## Run the App
Start up your server if it’s not running.
```bash
$ npm start
```
_landing page_
_profile page_
That's all we have for now but let's be a little stingy with access to the quotes. Users should have to log in to see them. This is where Auth0 comes in.
## What is Auth0?
**Auth0** issues [JSON Web Tokens](https://jwt.io/) on every login for your users. This means that you can have a solid [identity infrastructure](https://auth0.com/docs/identityproviders), including [single sign-on](https://auth0.com/docs/sso/single-sign-on), user management, support for social identity providers (Facebook, Github, Twitter, etc.), enterprise identity providers (Active Directory, LDAP, SAML, etc.) and your own database of users with just a few lines of code. If you don't already have an Auth0 account, [sign up](https://auth0.com/signup) for one now."
On your [dashboard](https://manage.auth0.com/), create a new client, a client is simply the app we want to manage.
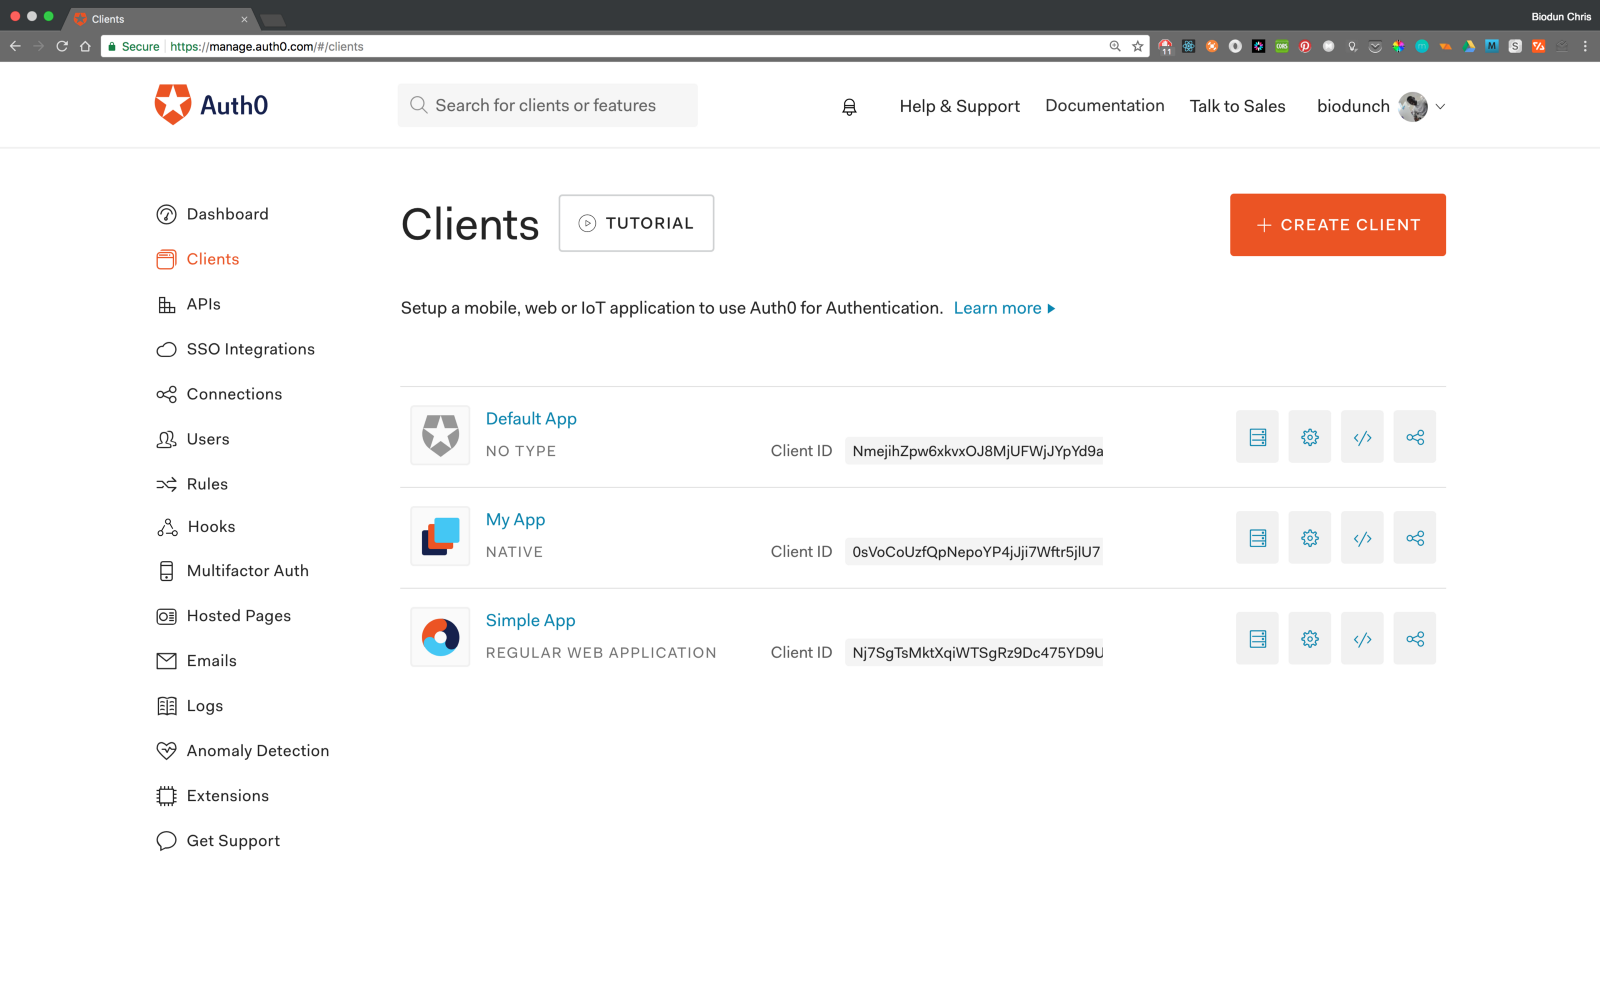
Give it a name and select **“Regular Web Application (with refresh)”**.
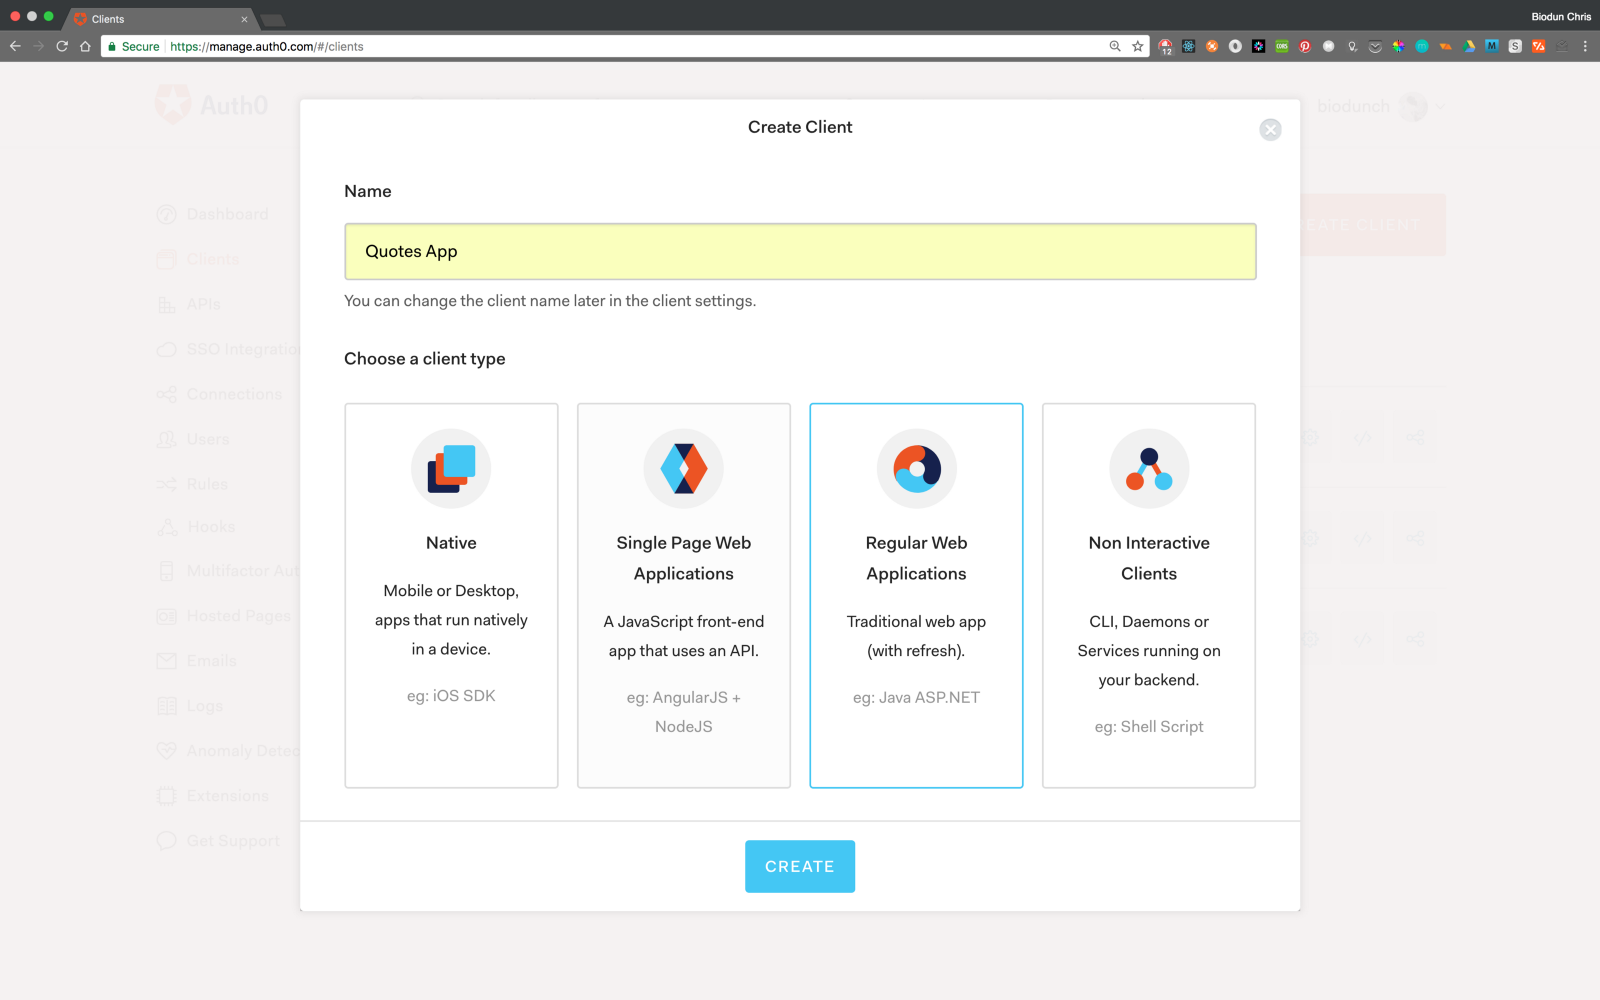
Next, choose the technology for the project, which in our case is Node.js.
Navigate to the settings tab, take note of your __domain__, __client id__ and __client secret__.

## Step 1: Install the Middleware Dependencies
Make sure you are in the root directory of the project, then run the command:
```bash
$ npm install passport-auth0 connect-ensure-login --save
```
* [passport-auth0](https://github.com/auth0/passport-auth0) is a nodejs Auth0 package using passport.
* [connect-ensure-login](https://github.com/jaredhanson/connect-ensure-login) middleware ensures that a user is logged in.
## Step 2: Configure the Middlewares
Create a new instance of the __Auth0Strategy__ strategy. Enter your Auth0 client details as configuration values. Tell passport to use the strategy.
Update the app.js file to include this configuration.
_app.js_
```javascript
//requiring dependencies
//Auth0 aunentication configuration
const Auth0Strategy = require('passport-auth0');
// Configure Passport to use Auth0
const strategy = new Auth0Strategy(
{
domain: 'YOUR_DOMAIN',
clientID: 'YOUR_CLIENT_ID',
clientSecret: 'YOUR_CLIENT_SECRET',
callbackURL: 'http://localhost:3000/callback'
},
(accessToken, refreshToken, extraParams, profile, done) => {
return done(null, profile);
}
);
passport.use(strategy);
// This can be used to keep a smaller payload
passport.serializeUser(function(user, done) {
done(null, user);
});
passport.deserializeUser(function(user, done) {
done(null, user);
});
```
Place this snippet just above the part where we set the view engine.
Replace the placeholder values with the credentials on your [dashboard](https://manage.auth0.com/login#/clients). I recommend that you load them from environment variables to prevent your credentials from been leaked. Make sure your `app.js` file looks like this.
## Step 3: Configure the Callback URL
Head over to your Auth0 dashboard and register a callback url in __Allowed Callback URLs__ like this:
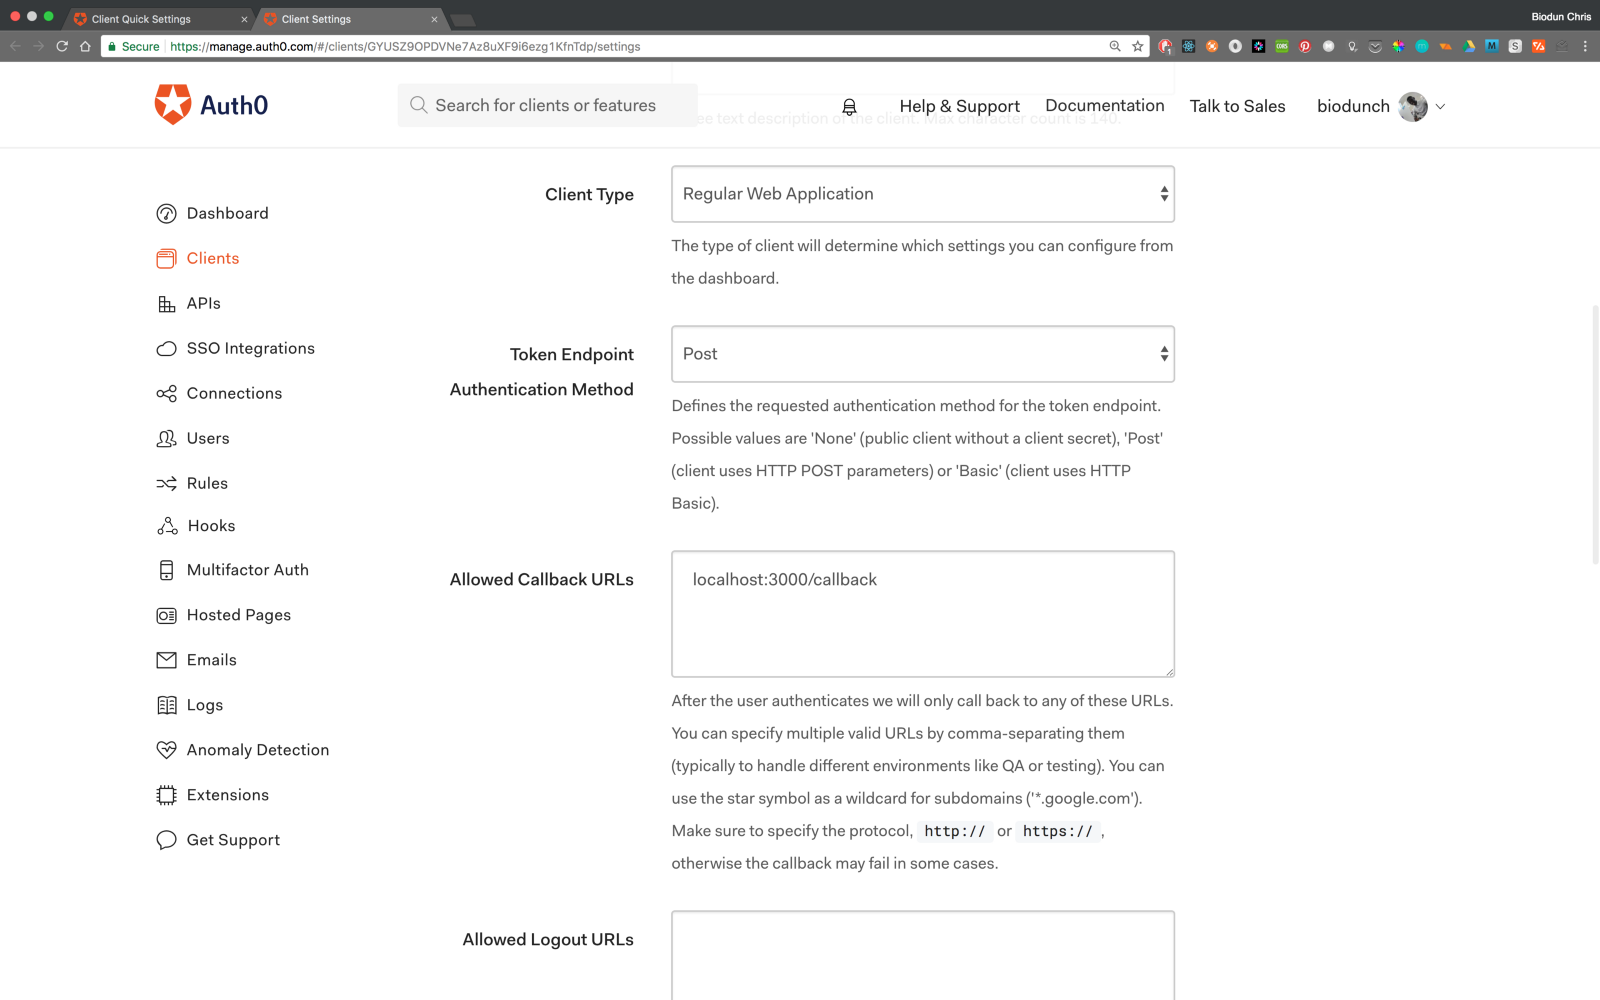
```text
localhost:3000/callback
```
Replace the content of `index.js` file in routes folder with this:
_routes/index.js_
```javascript
const express = require('express');
const passport = require('passport');
const router = express.Router();
/* GET home page. */
router.get('/', function(req, res, next) {
res.render('index');
});
// Perform the login
router.get(
'/login',
passport.authenticate('auth0', {
clientID: 'YOUR_CLIENT_ID',
domain: 'YOUR_DOMAIN',
redirectUri: 'http://localhost:3000/callback',
audience: 'https://' + 'YOUR_DOMAIN' + '/userinfo',
responseType: 'code',
scope: 'openid profile'
}),
function(req, res) {
res.redirect('/');
}
);
// Perform session logout and redirect to homepage
router.get('/logout', (req, res) => {
req.logout();
res.redirect('/');
});
// Perform the final stage of authentication and redirect to '/users'
router.get(
'/callback',
passport.authenticate('auth0', {
failureRedirect: '/'
}),
function(req, res) {
res.redirect('/');
}
);
```
Open `users.js`, let’s modify that to send the data of a logged in user to the view.
_users.js_
```javascript
const express = require('express');
const passport = require('passport');
const ensureLoggedIn = require('connect-ensure-login').ensureLoggedIn();
const router = express.Router();
/* GET user profile. */
router.get('/', ensureLoggedIn, function(req, res, next) {
//req.user holds the details of authenticated user
//render profile.hbs with the user data
res.render('profile',{ user: req.user });
});
module.exports = router;
```
Modify `profile.hbs` to use data provided by the route above.
_views/profile.hbs_
``` html
Short Bio
Name : {{ user.displayName }}
Nickname : {{ user.nickname }}
Gender : {{ user.gender }}
```
You will notice that I have replaced the hardcoded names with the user details rendered with the view.
Add a check to `index.hbs` to ensure user is logged in before they can see the quotes using the `connect-ensure-login`.
_views/index.hbs_
``` html
{{#if loggedIn }}
{{/if}}
```
Let’s update _layout.hbs_ to toggle the login/logout based on the user’s logged in state.
_layout.hbs_
``` html
{{title}}
{{{ body }}}
```
## Run the App
_localhost:3000_
_localhost:3000/login_
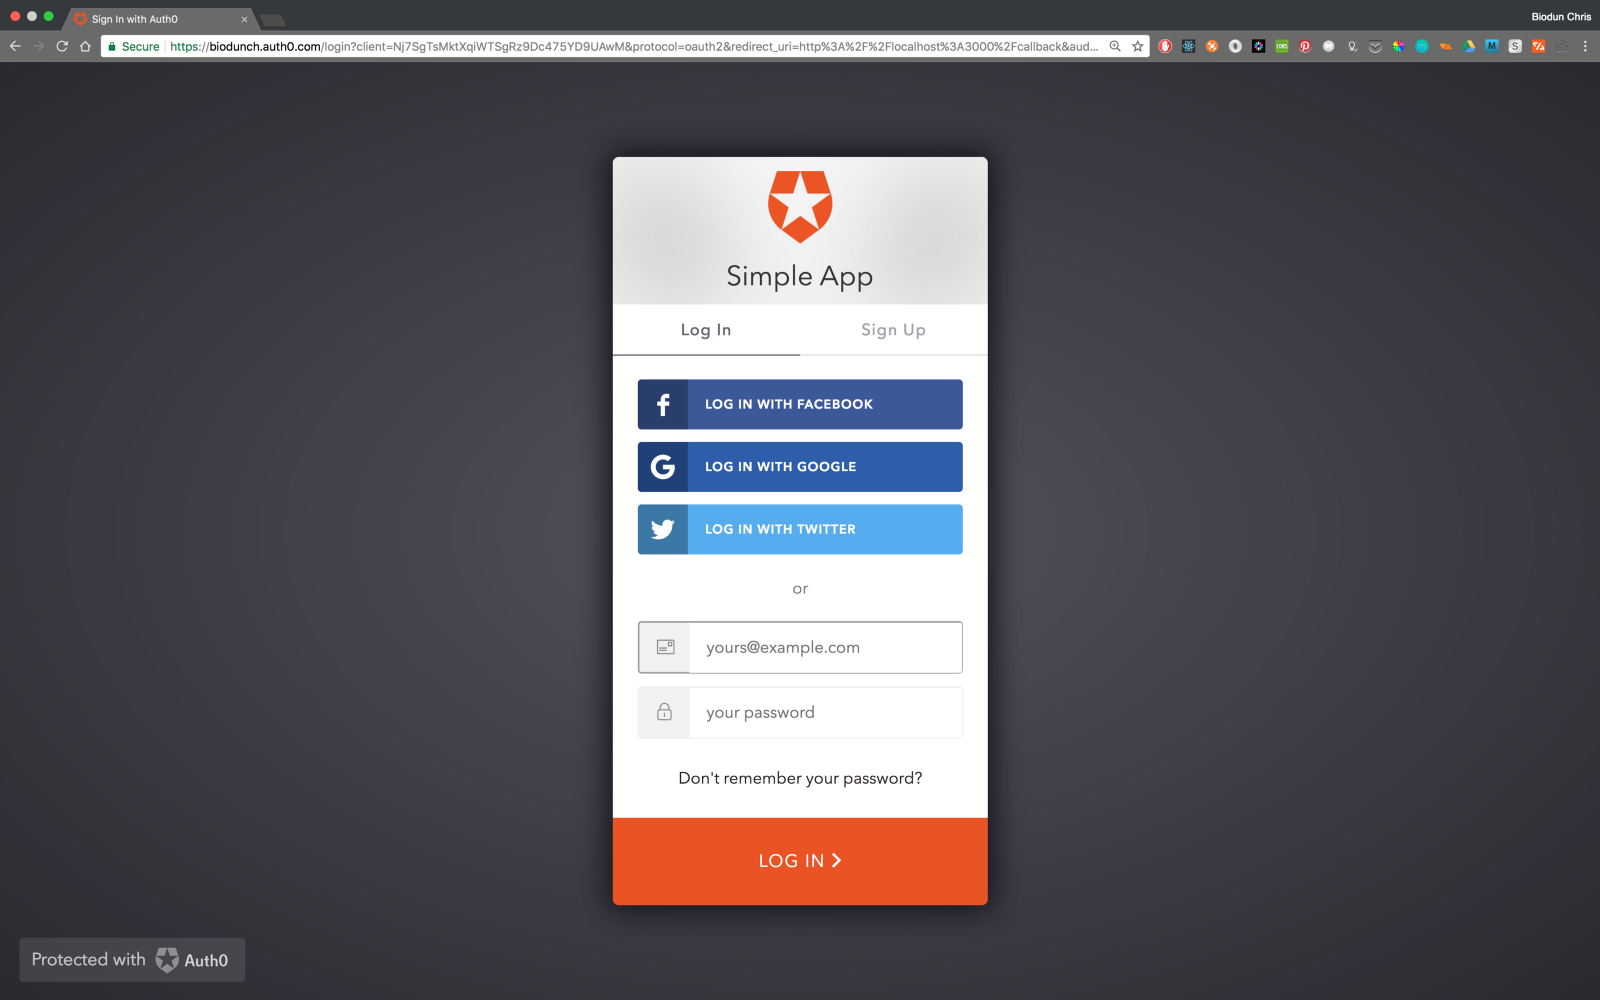
_localhost:3000/user_
## Conclusion
Well Done! You have just built a simple web app using ExpressJS framework as a backend and Auth0 to authenticate and manage users. This tutorial was designed to help you understand APIs and how they work. Now you can use the knowledge gained here to build even better apps with scalable user management and authentication using Auth0.
Check out the repo for the app on [GitHub](https://github.com/biodunch/quotesGenApp). Also I’ve deployed a demo on [heroku](https://quotesgen.herokuapp.com).
Kindly let me know if you have any questions or recommendations in the comment section.
For more information, check out [this list](https://www.computersciencezone.org/50-most-useful-apis-for-developers) of useful APIs for programmers. Have fun tearing them down.
Read up and Practice More!