---
title: "Using Angular $Http and Angular 2 Http - Angular 2 Series Part 3"
description: "Learn the differences between $http in Angular 1.x and Http in Angular 2. Find out how to use the RxJS Observables that Http returns."
authors:
- name: "Ryan Chenkie"
url: "https://auth0.com/blog/authors/ryan-chenkie/"
date: "Oct 15, 2015"
category: "Developers,Deep Dive,Angular"
tags: ["angular2", "angularjs", "observables", "http", "javascript", "post-series"]
url: "https://auth0.com/blog/angular-2-series-part-3-using-http/"
---
# Using Angular $Http and Angular 2 Http - Angular 2 Series Part 3
---
**TL;DR:** Making **HTTP requests in Angular 2 apps** looks somewhat different than what we're used to from Angular 1.x, a key difference being that Angular 2's **Http** returns **observables**. In this tutorial, we cover how to use Http to make requests and how to handle the responses. We'll also see how we can do basic authentication for an Angular 2 app. Check out [the repo](https://github.com/auth0/angular2-http) for the tutorial to see the code.
This is Part 3 in our Angular 2 series. Be sure to check out [Part 1 on Pipes](https://auth0.com/blog/2015/09/03/angular2-series-working-with-pipes/) and [Part 2 on Models](https://auth0.com/blog/2015/09/17/angular-2-series-part-2-domain-models-and-dependency-injection/).
---
It's fair to say that most of Angular 2 looks and feels completely different than Angular 1.x, and the **Http** API is no exception. The **$http** service that Angular 1.x provides works very nicely for most use cases, and is fairly intuitive to use. Angular 2's Http requires that we learn some new concepts, including how to work with **observables**.
In this tutorial, we'll look at some of the key differences in the way that Angular 1.x and 2 implement **HTTP requests**, and we'll also see how to make requests and handle responses. Incidentally, the sample we use to test out **Http** will also let us see the basics of adding authentication to an Angular 2 app.
It's important to note that the Http implementation for Angular 2 is still a [work in progress](https://github.com/angular/angular/issues/2793), and a lot of things are still in flux or aren't complete yet.
## Differences between Angular 1.x $http and Angular 2 Http
**Angular 2's Http implementation** again provides a fairly straightforward way of handling requests, but there are some key differences. For starters, **HTTP calls in Angular 2** by default return observables through [RxJS](https://github.com/Reactive-Extensions/RxJS), whereas $http in Angular 1.x returns promises. Using observable streams gives us the benefit of greater flexibility when it comes to handling the responses coming from HTTP requests. For example, we have the potential of tapping into useful RxJS operators like `retry` so that a failed HTTP request is automatically re-sent, which is useful for cases where users have poor or intermittent network communication. We'll see later in the article how we can implement RxJS operators in our Http observables.
In Angular 2, Http is accessed as an injectable class from `angular2/http` and, just like other classes, we `import` it when we want to use it in our components. Angular 2 also comes with a set of injectable providers for Http, which are imported via `HTTP_PROVIDERS`. With these we get providers such as `RequestOptions` and `ResponseOptions`, which allow us to modify requests and responses by extending the base class for each. In Angular 1.x, we would do this by providing a `transformRequest` or `transformResponse` function to our `$http` options.
In Angular 1.x we can transform requests globally in the application's `config`.
```js
.config(function($httpProvider) {
$httpProvider.defaults.transformRequest = function(data) {
return JSON.stringify({name: "Ryan"});
}
});
```
Whereas in Angular 2, we would extend the `BaseRequestOptions`.
```js
class MyOptions extends BaseRequestOptions {
body: string = JSON.stringify({name: "Ryan"});
}
bootstrap(App, [HTTP_PROVIDERS, provide(RequestOptions, {useClass:MyOptions})]);
```
## Http in Action
Let's take a look at how we can perform some basic requests with Http. We'll see how to work with `POST` and `GET` requests by using our trusty [NodeJS Chuck Norris quote backend](https://github.com/auth0/nodejs-jwt-authentication-sample), which will require us to retrieve and store a JWT, and thereby implement basic authentication.
## Getting Started
As we have in our other Angular 2 articles, we'll use [Pawel Kozlowski's](https://twitter.com/pkozlowski_os) [ng2-play](https://github.com/pkozlowski-opensource/ng2-play/) repo for this tutorial. To get started, clone the repo and run `npm install`, then `gulp play`.
We also need to get our random quote server running. With the Angular 2 seed project installed, let's clone and install the quote server in the root of our project.
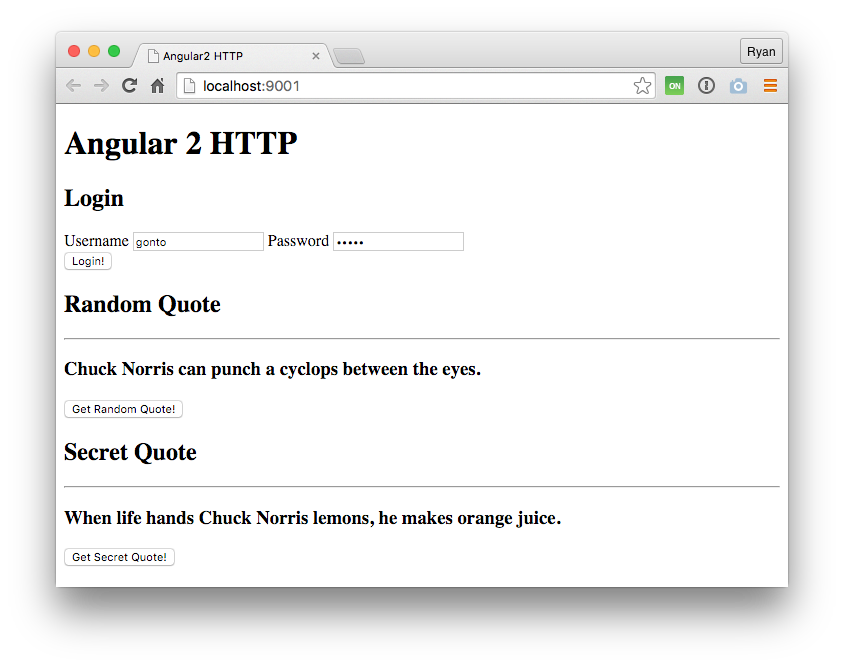
We also need to set up our `app` component by importing what we need and providing a template.
```js
// app.ts
import {Component, View} from 'angular2/angular2';
import {Http, Headers} from 'angular2/http';
import {CORE_DIRECTIVES, FORM_DIRECTIVES} from 'angular2/angular2';
@Component({
selector: 'app'
})
@View({
directives: [ CORE_DIRECTIVES, FORM_DIRECTIVES ],
template: `
Angular 2 HTTP
Login
Random Quote
{{ "{{randomQuote" }}}}
Secret Quote
{{ "{{secretQuote" }}}}
`
})
export class App {
constructor(public http: Http) {
}
}
bootstrap(App, [HTTP_BINDINGS])
```
As you can see, we've imported some familiar pieces like `Component` and `View`, but we are also pulling in `Http` and `Headers`. We'll see it later on, but we can modify the headers we send in our requests with the `Headers` class.
We're making use of a form for the user to eventually provide their credentials. The form calls an `authenticate` method on submit.
In the `App` class, we're passing `Http` to the constructor so that we can use it in our class methods.
## Simple GET Request
Let's start with a simple `GET` request to the `api/random-quote` route which doesn't require authentication.
```js
getRandomQuote() {
this.http.get('http://localhost:3001/api/random-quote')
.map(res => res.text())
.subscribe(
data => this.randomQuote = data,
err => this.logError(err),
() => console.log('Random Quote Complete')
);
}
logError(err) {
console.error('There was an error: ' + err);
}
```
The `getRandomQuote` method starts off looking pretty familiar--we do an `http.get` request by passing in a URL as an argument. Remembering `$http` from Angular 1.x, this is where we would tap into the promise that gets returned by using `.then`, but as you can see here, we're doing something pretty different.
As was mentioned earlier, **HTTP calls in Angular 2** return observables, so we need to use RxJS methods to operate on them. The first thing we do is map the values that are returned as text, since our call to the `api/random-quote` endpoint returns text. If we were expecting a JSON response, we would call `res.json()` instead. After this, we need to **subscribe** to it so that we can **observe** values that are returned.
An observable subscription takes three functions to handle what happens as the stream is observed. The first function is the **next** case, or what happens when the HTTP call is successful. If the call is successful, we're saying that the data returned should be put on a property `randomQuote` so it can be displayed in the view. The second function is the **error** case, and in our example we are logging any error messages to the console by calling our `logError` method. Finally, the third function defines what happens once the call is **complete**, and here we are simply logging out the things are finished.
Let's test that out to make sure it works.

## POST Request with Modified Content Type
Our `authenticate` method will need to make a `POST` request to the back end and specify the content type so that we can send our credentials. For this, we'll use `Headers`.
```js
// app.ts
...
class CredentialsModel {
username: string;
password: string;
}
...
authenticate(data) {
var username = data.credentials.username;
var password = data.credentials.password;
var creds = "username=" + username + "&password=" + password;
var headers = new Headers();
headers.append('Content-Type', 'application/x-www-form-urlencoded');
this.http.post('http://localhost:3001/sessions/create', creds, {
headers: headers
})
.map(res => res.json())
.subscribe(
data => this.saveJwt(data.id_token),
err => this.logError(err),
() => console.log('Authentication Complete')
);
}
saveJwt(jwt) {
if(jwt) {
localStorage.setItem('id_token', jwt)
}
}
...
```
The `authenticate` method accepts `data` that is passed down from the view when the form is submitted. We're grabbing the username and password from it and making a `creds` string in the form that the server expects.
We need to say that the content type should be `application/x-www-form-urlencoded` and this can be done by appending a header onto our `headers` instance. Then we simply pass this as a header in the options object when we make the `POST` request. From here, the returned observable is handled in the same way that we saw in the `GET` request, but this time the response is JSON, so we use `res.json()`. We also call the `saveJwt` method and pass it the token that is received to save it in local storage.
## GET Request with Authorization Header
Now that we know how to modify headers, sending the JWT as an `Authorization` header is simple.
```js
// app.ts
...
getSecretQuote() {
var jwt = localStorage.getItem('id_token');
var authHeader = new Headers();
if(jwt) {
authHeader.append('Authorization', 'Bearer ' + jwt);
}
this.http.get('http://localhost:3001/api/protected/random-quote', {
headers: authHeader
})
.map(res => res.text())
.subscribe(
data => this.secretQuote = data,
err => this.logError(err),
() => console.log('Secret Quote Complete')
);
}
...
```
We can check this in the browser to make sure our call to the protected endpoint works.
## What Can We Do with Observables?
You might be wondering why Http doesn't just return promises like it used to, so we can stick to our familiar methods for resolving HTTP calls. The fact of the matter is that we can do much more with observables than promises. With observables, we have a [whole bunch of operators](https://github.com/Reactive-Extensions/RxJS/blob/master/doc/gettingstarted/categories.md) to pull from, which let us customize our streams in nearly any way we want.
If you haven't worked with observables before, you can get an idea of how they work in our recent post on [Authenticable Observables](https://auth0.com/blog/2015/09/10/jwt-authentication-with-observables/).
It should be noted that the [Angular team is still deciding](https://github.com/angular/angular/issues/4390) on the best way of implementing the RxJS operators with Http, which means these operators aren't all available for use just yet.
We can get a taste for how they work by plugging in some simple operators. For example, in our `GET` call to `api/random-quote`, we can attach a filter.
```js
// app.ts
...
getRandomQuote() {
var count = 0;
this.http.get('http://localhost:3001/api/random-quote')
.map(res => res.text())
.filter(x => x.length > 100)
.subscribe(
data => this.randomQuote = data,
err => this.logError(err),
() => console.log('Random Quote Complete')
);
}
...
```
Now only quotes with a length greater than 100 characters will come through. If we click the "Get Random Quote" button a few times, we see it at work.
We can also delay our subscription if we want. Here we wait two seconds before printing the quote to the screen.
```js
// app.ts
...
.map(res => res.text())
.delay(2000)
.subscribe(
data => this.randomQuote = data,
err => this.logError(err),
() => console.log('Random Quote Complete')
);
...
```
While that might not be the most useful, what we will really benefit from once Http is solidified are operators like `retry`. If we were expecting network connectivity issues, we could define a number of times to retry the request.
```js
// app.ts
...
.retry(3)
.map(res => res.text())
.subscribe(
data => this.randomQuote = data,
err => this.logError(err),
() => console.log('Random Quote Complete')
);
...
```
Another benefit of observables is that they can be cancelled. This can be useful for situations where HTTP requests are going on for a long time, perhaps to an unresponsive server somewhere. This is something that isn't easily done with promises, and something that the [Fetch API has yet to implement](https://github.com/whatwg/fetch/issues/27).
## Aside: Using Angular with Auth0
Auth0 issues [JSON Web Tokens](http://jwt.io) on every login for your users. This means that you can have a solid [identity infrastructure](https://auth0.com/docs/identityproviders), including [single sign-on](https://auth0.com/docs/sso/single-sign-on), user management, support for social identity providers (Facebook, Github, Twitter, etc.), enterprise identity providers (Active Directory, LDAP, SAML, etc.) and your own database of users with just a few lines of code. We implemented a tight integration with Angular 1. Angular 2 integration is coming as soon as it's on Beta! You can read the [documentation here](https://auth0.com/docs/client-platforms/angularjs) or you can checkout the [SDK on Github](https://github.com/auth0/auth0-angular).
## Wrapping Up
**HTTP requests in Angular 2** definitely look different than they did in Angular 1.x, but with the change comes a big boost in capability. Having requests return observables is great because we will be able to use RxJS's operators to get the returned streams behave the way we like. We'll be able to use operators like `retry` to automatically start a request again if there are network issues.
In this tutorial we saw how Http can be used to make `GET` and `POST` requests, but we can also use other HTTP verbs like `PUT`, `DELETE`, and `PATCH`. We also saw how we can customize the headers we send with the `Headers` class.
As with Angular 2 in general, Http is always going through changes. The Angular team keeps a very good [backlog of Http issues and feature implementations](https://github.com/angular/angular/issues/2793), which is a good place to keep updated on how Http progresses.
 ## Wrapping Up
**HTTP requests in Angular 2** definitely look different than they did in Angular 1.x, but with the change comes a big boost in capability. Having requests return observables is great because we will be able to use RxJS's operators to get the returned streams behave the way we like. We'll be able to use operators like `retry` to automatically start a request again if there are network issues.
In this tutorial we saw how Http can be used to make `GET` and `POST` requests, but we can also use other HTTP verbs like `PUT`, `DELETE`, and `PATCH`. We also saw how we can customize the headers we send with the `Headers` class.
As with Angular 2 in general, Http is always going through changes. The Angular team keeps a very good [backlog of Http issues and feature implementations](https://github.com/angular/angular/issues/2793), which is a good place to keep updated on how Http progresses.
## Wrapping Up
**HTTP requests in Angular 2** definitely look different than they did in Angular 1.x, but with the change comes a big boost in capability. Having requests return observables is great because we will be able to use RxJS's operators to get the returned streams behave the way we like. We'll be able to use operators like `retry` to automatically start a request again if there are network issues.
In this tutorial we saw how Http can be used to make `GET` and `POST` requests, but we can also use other HTTP verbs like `PUT`, `DELETE`, and `PATCH`. We also saw how we can customize the headers we send with the `Headers` class.
As with Angular 2 in general, Http is always going through changes. The Angular team keeps a very good [backlog of Http issues and feature implementations](https://github.com/angular/angular/issues/2793), which is a good place to keep updated on how Http progresses.